
Àpèjúwe
This plugin allows you to deploy your WordPress site source code from git repository using webhooks.
Automatically pull from a repository to a web server. You can configure which branch is triggering the pull action.
After each deployment plugin saves the status to logs which are available through wp-admin and also are sent by email.
Supported git repository hosting services:
* Github
* Bitbucket
* Stash
Àwọn àwòrán ìbòjú
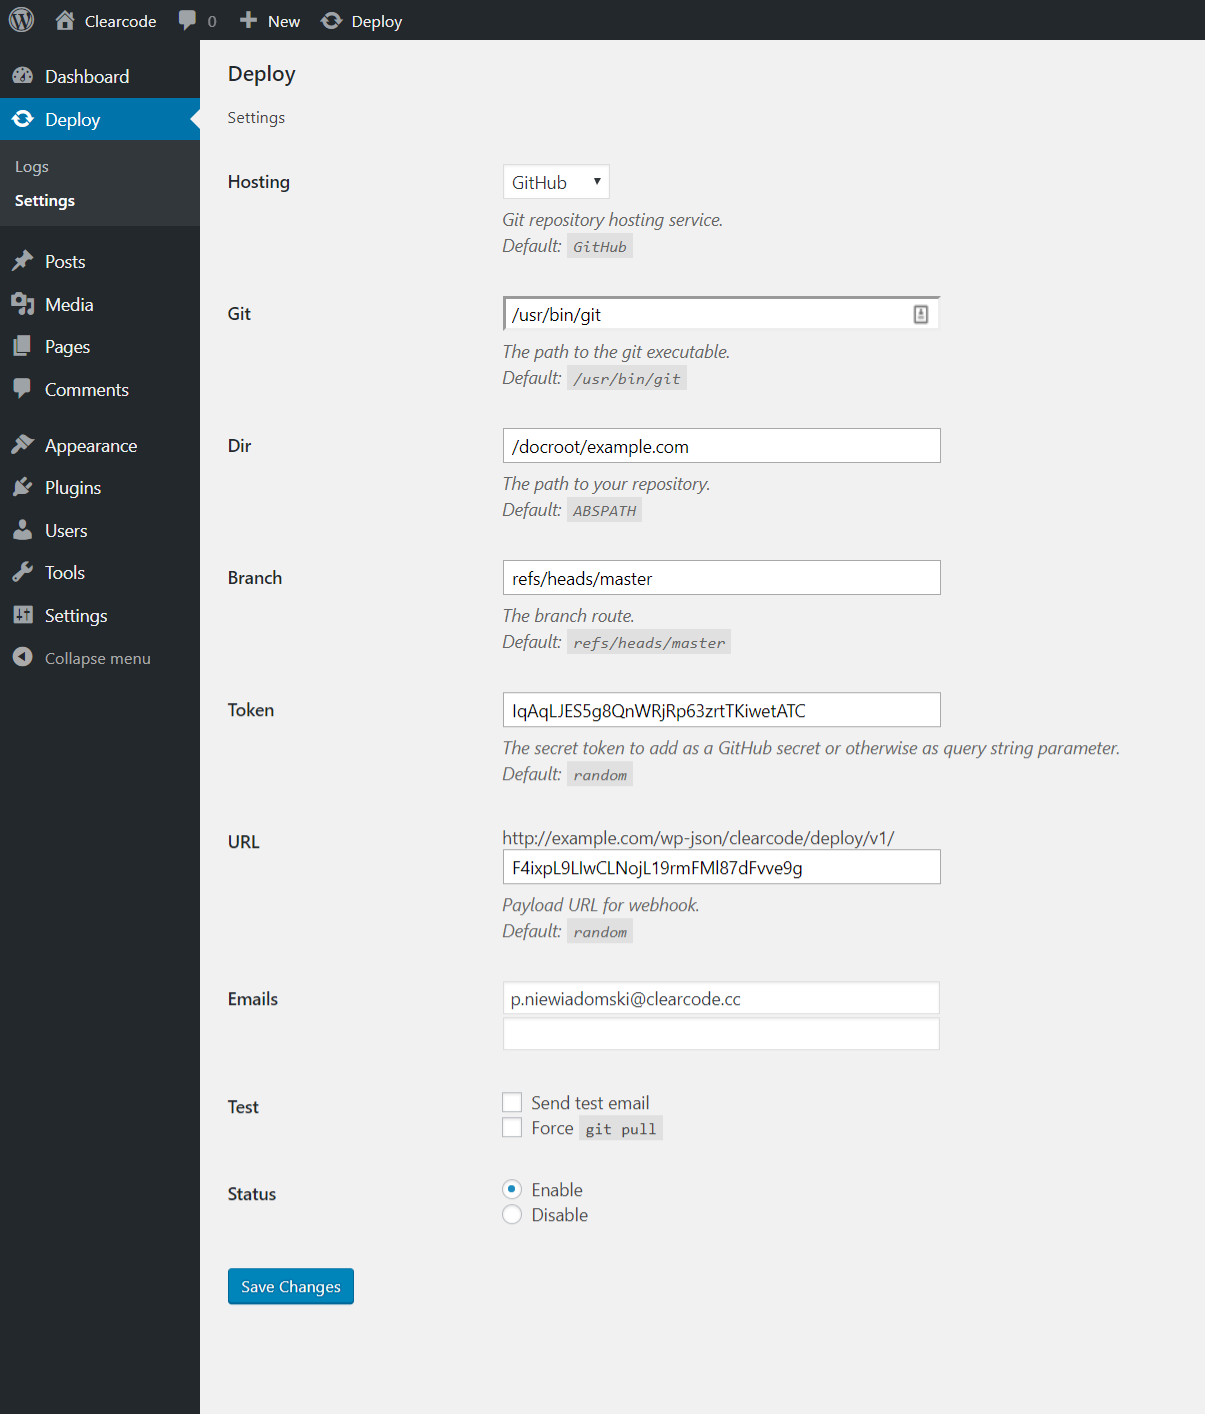
CC-Deploy Settings – Visit the ‘Deploy > Settings’ page, select your preferred options and save them. 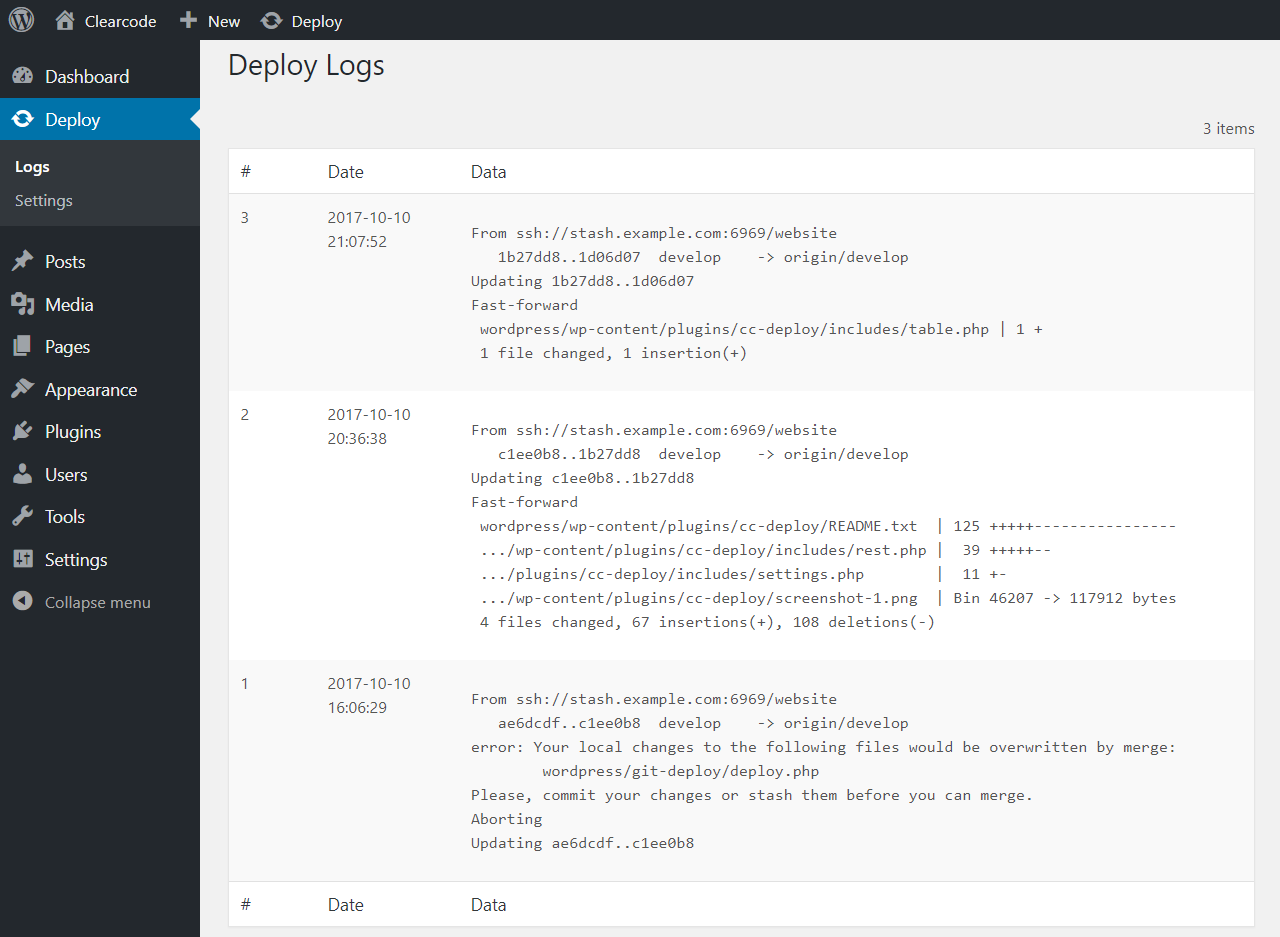
CC-Deploy Logs – Visit the ‘Deploy > Logs’ page to review latest deployment logs.
Ìgbéwọlẹ̀
From your WordPress Dashboard
- Go to ‘Plugins > Add New’
- Search for ‘CC-Deploy’
- Activate the plugin from the Plugin section on your WordPress Dashboard.
From WordPress.org
- Download ‘CC-Deploy’.
- Upload the ‘cc-deploy’ directory to your ‘/wp-content/plugins/’ directory using your favorite method (ftp, sftp, scp, etc…)
- Activate the plugin from the Plugin section in your WordPress Dashboard.
Once Activated
- Visit the ‘Deploy> Settings’ page, select your preferred options and save them.
Multisite
The plugin can be activated and used for just about any use case.
- Activate at the site level to load the plugin on that site only.
- Activate at the network level for full integration with all sites in your network (this is the most common type of multisite installation).
FAQ
- Installation Instructions
-
From your WordPress Dashboard
- Go to ‘Plugins > Add New’
- Search for ‘CC-Deploy’
- Activate the plugin from the Plugin section on your WordPress Dashboard.
From WordPress.org
- Download ‘CC-Deploy’.
- Upload the ‘cc-deploy’ directory to your ‘/wp-content/plugins/’ directory using your favorite method (ftp, sftp, scp, etc…)
- Activate the plugin from the Plugin section in your WordPress Dashboard.
Once Activated
- Visit the ‘Deploy> Settings’ page, select your preferred options and save them.
Multisite
The plugin can be activated and used for just about any use case.
- Activate at the site level to load the plugin on that site only.
- Activate at the network level for full integration with all sites in your network (this is the most common type of multisite installation).
Àwọn àgbéyẹ̀wò
Kò sí àwọn àgbéyẹ̀wò fún plugin yìí.
Àwọn Olùkópa & Olùgbéejáde
“CC-Deploy” jẹ́ ètò ìṣàmúlò orísun ṣíṣí sílẹ̀. Àwọn ènìyàn wọ̀nyí ti ṣe ìkópa sí plugin yìí.
Àwọn OlùkópaṢe o nífẹ̀ẹ́ sí ìdàgbàsókè?
Ṣàwárí koodu, ṣàyẹ̀wò ibi ìpamọ́ SVN, tàbí ṣe àgbékalẹ̀ sí àkọsílẹ̀ ìdàgbàsókè nípasẹ̀ RSS.
Àkọsílẹ̀ àwọn àyípadà
1.0.1
Release date: 13.03.2018
- Fixed: Compatibility with WooCommerce.
1.0.0
Release date: 10.10.2017
- First stable version of the plugin.