Tag: Scenario

  • Having finished all the painting of all of my WWII collection to date I was inspired to get them out on the table for some rip roaring action. It was time for Lord Lovat’s No.4 commando to go on operations…

    “Ah.. good evening Shimmy, take a seat, now we’ve  got a job for you old boy. Through ‘most secret sources’ the top-brass have discovered that the bosche are stockpiling fuel and supplies on the Channel Islands. They believe that these are part of the plans for an invasion of Britain. Your mission is to conduct a raid on St Peters port to destroy supplies and infrastructure there. Secondary to this aim is to gather intelligence pertaining to the enemy’s plan for invasion.”

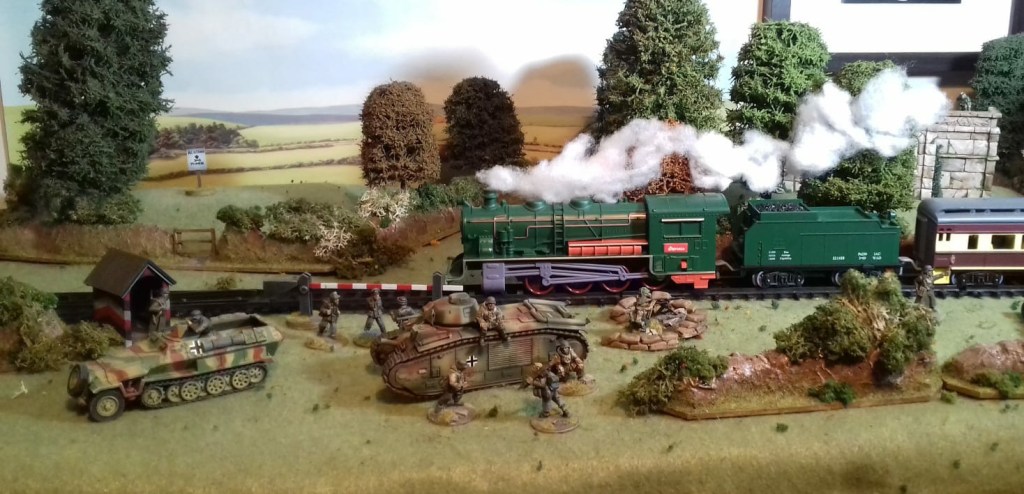
    “Here is an aerial photography of the port…”

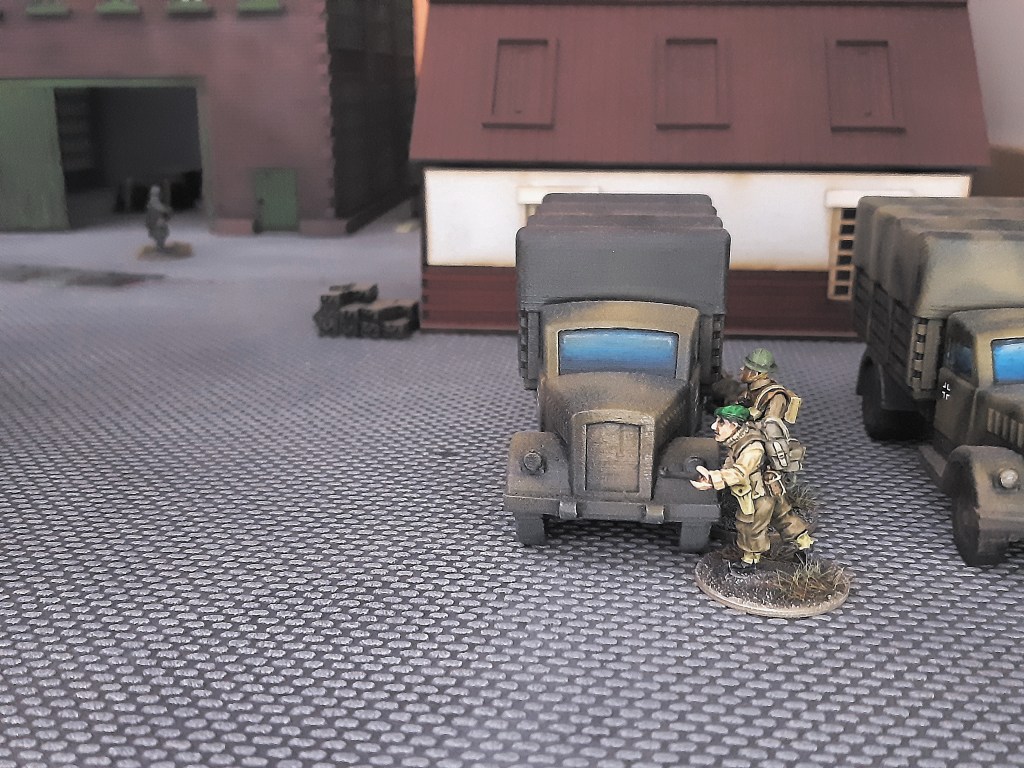
    “Supplies are being kept in warehouses and being transported to stashes across the island. We have also received, through the Pigeon Policy Committee, some pictures taken by an anonymous Channel Islander..”

    “The building in the distance of the middle photo is being used as a barracks by the garrison troops and the administration building to the north has been seconded by the Germans as an HQ building. That would be the best place to gain intelligence, though failing that, capturing some sentries would suffice.

    The Mission

    The force of commandos set off for the Channel Islands at 10pm but due to navigational mishaps the LCA didn’t reach Guernsey till 2am. They infiltrated the port and split into two demolition parties, one made their way to the barrack building to lay demolitions and flank the German HQ. The other team, led by Lord Lovat himself, made their way to the warehouse.

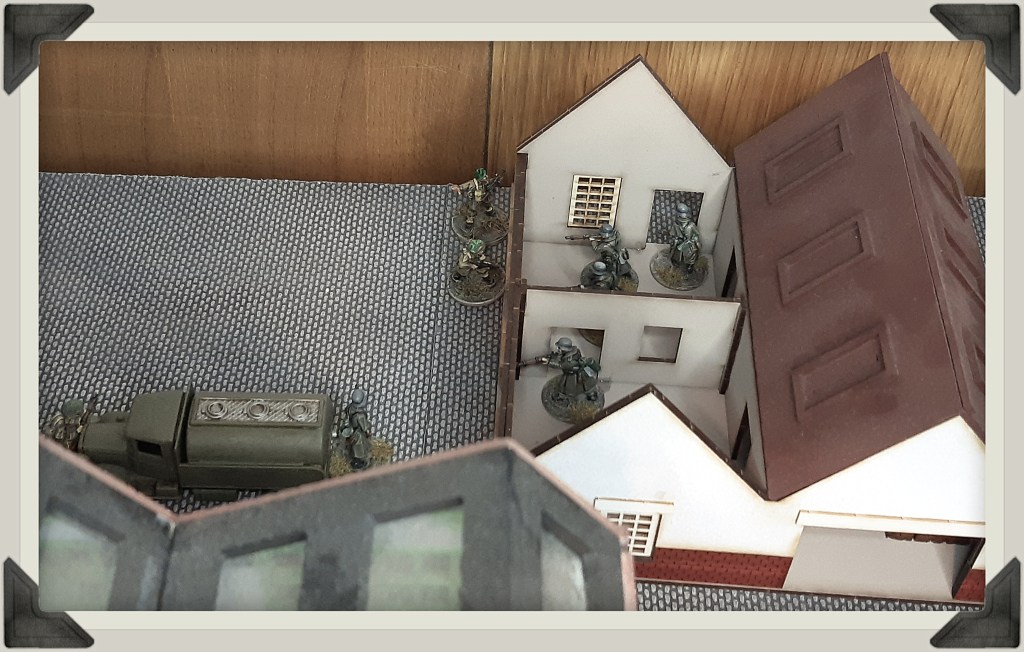
    The flanking force successfully laid charges outside the barracks but as they made their way to the vehicle park, a keen eyed sentry on the door at the HQ spotted private Jenkins as he set up his bren gun for enfilading fire.

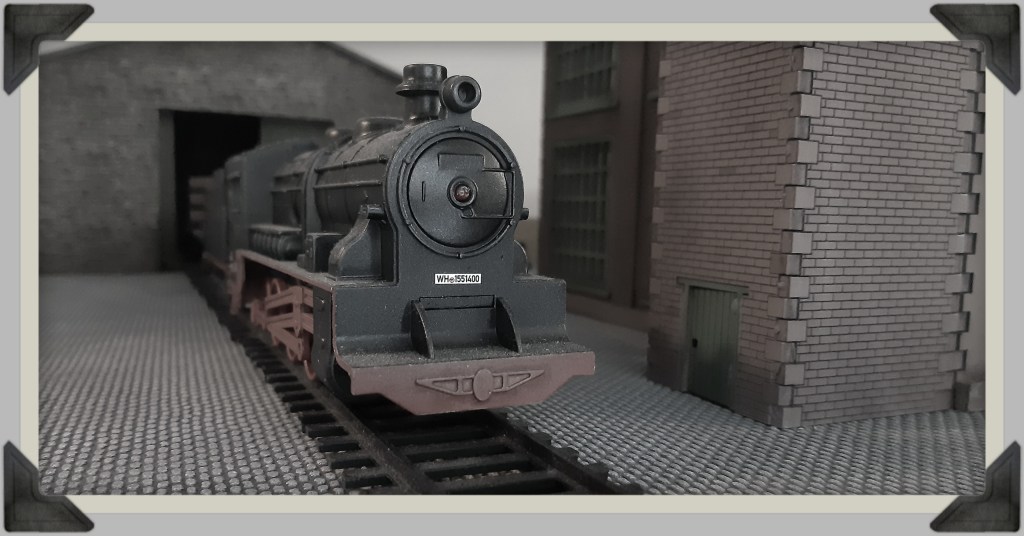
    As the alarm was raised at the HQ and rifle and LMG fire began to erupt from there, Lovat’s section had just finished planting charges on the locomotive and warehouse when the sound of running boots on the cobbles alerted them to the approach of a patrolling German sentry. Private ‘Lofty’ Short appeared around the corner of the warehouse and smashed the butt of his Lee Enfield into the sentry’s face, pole-axing him. Lovat ordered corporal Wilson to lay down fire on the spandau in the roof of the HQ. Wilson was injured during the ensuing exchange of fire.

    Meanwhile, the flanking section conducted vicious close quarters fighting around the barrack block with grenades and small arms fire being exchanged. Ultimately the commandos were able to keep the garrison troops pinned In the building.

    As the early hours of the morning wore on and with the sky beginning to lighten, the commandos started to disengage. ‘Lofty’ Short picked up the downed sentry to take back as a prisoner for interrogation.

    As the commandos reached their LCA and readied themselves for departure the night was ripped apart as the demolition charges exploded with blinding flashes on the horizon. All told a successful night’s work!

  • Schwerpunkt!

    For a number of years now I have had a WWII skirmish project simmering away on the back-burner. In a previous post I showed off my US airborne infantry but I have documented very little on my blog since then.

    Somewhere in North West Europe German forces offload to repel the allied invasion.

    My collection is somewhat unusual, including as it does, a captured Char B tank, a sentry box with military policemen, planes, trains and automobiles. This is because rather than collecting and playing the more conventional WWII wargame I have decided to focus more on commando raids and special operations.

    I stumbled across the fantastic skirmish rules Five men at Kursk by Nordic Weasel Games some time ago and have played several games with my US airborne forces in Normandy as they ambushed panzer grenadier convoys, blew up train tracks and generally made a nuisance of themselves…

    “Where are we Sarge?”

    I have, over the last couple of years, also amassed a collection of buildings for more industrial settings…

    German HQ at St Peter Port, Guernsey, complete with troop barracks, Opel Blitz trucks and staff car.

    I have been itching to have a go at another Nordic Weasel ruleset called Where Stenguns Dare: WWII Cinematic Commando Action. As the title suggests these rules allow you to conduct commando missions in the truest 60s war movie style…

    Little do the patrolling German sentries know that commandos of the Special Boat Section, commanded by Lord Lovatt himself are lurking in the shadows.

    I have completed the last few models recently which has given me the WWII bug again (and started me looking to buy some more models now I have completed everything I currently own) So I’m hoping to dare the stenguns and cause a nuisance!

    “Actung Panzer, how did zey get hold of a panzer!!?”
  • Hello fellow carbon based lifeforms and welcome to another Deadzone post! I have been playing some more solo missions in the Deadzone this week and trying out a new randomized activation for the ‘opposition’, using counters drawn from a cup. It has worked rather well at creating suspense, not knowing which enemy model will activate next creates lots of problem-solving for both sides.

    I also have a shiny new copy of Command Protocols: Escalation and the new Incoming Intel deck winging its way to me. I am looking forward to seeing what the new deck, which has both bonus victory conditions and event cards, will add to the game.

    Deadzone is a fantastic skirmish game full of dynamic action and what better way to showcase that fact than a comic strip based on an event from my current battle?

  • I had some time during the week to setup and play the second scenario of my solo campaign, and if I thought the first battle was nail-biting then I was certainly in for a shock second time around!

    Mission #2 – Beacon of hope

    ‘You now know what you’re up against, and the scale of the threat is greater than you could have imagined. You have sent dispatches to command, but your meagre resources can’t guarantee the quality or strength of the signal. Remembering a nearby radio tower, you hatch a daring plan. If you can find a functioning data-terminal you can guarantee that your message reaches your allies. If only the area wasn’t already overrun with zombies’

    I selected my 150pt strike force and faced the hordes!..

    The strike team assemble…

    There are 4 possible locations where the data-terminal could be marked out with red stars…

    Gaunt and his ghosts scout ahead…

    Major Corbec makes a heroic last stand as ‘poxwalkers’ crawl in through the window, he is eventually overcome under hordes of undead flesh…

    Brother Gunther and brother Kessler (heavy weapon specialist) attempt to stem the tide with their withering fire…

    Gaunt finds the data-terminal  first time, thank the Emperor, and  just needs to spend a turn encrypting a message to high command…

    Trooper Tona Criid provides invaluable fire support throughout the mission. Here she makes two pinpoint headshots, saving apothecary brother Leo from overwhelming odds…

    Criid provides yet more assistance for her space marine allies..

    As the strike team makes its egress a ‘poxwalker’ shambles out of nowhere and makes to attack. Brother Bartholemu crushes its head with his powerfist.

    The Aftermath

    Battered and bloodied but victorious, the strike team make  their way to the agreed  extraction. As the picture shows, Major Corbec and brother Gunther didn’t make it and several members of the strike team were injured.

    We did find some useful items including a smoke grenade, medi-pack and extra ammunition. The black cubes were used to keep track of who made kills during the mission, as this gains them experience points.

    During the post-mission phase, surviving strike team members gain experience points and may go up in rank which grants them a boon. I decided to give everyone an increase in Fight stat with the exception of Criid, who I gave an increase in her Shoot stat and Gaunt who received Tactician(+1), which will give me an extra command dice to roll each turn.

  • Regular readers will know about my fondness for the Commands & Colors series of games by Richard Borg. This fantastic range of games is often referred to as  ‘light’ wargame due to the simple, easy to learn rules and lack of tables or charts, but I think that does it a disservice.

    One of the strengths of this game is that it simulates the problems inherent in commanding armies in an elegant way. The command card deck limits the maneuverability of your forces and covers the plethora of problems that can cause orders to be lost or misinterpreted, etc, without complex rules.

    It also allows me to spend my time concentrating on my tactics rather than looking up rules, thus allowing me to stay engaged with both the game and my opponent.

    Several years ago I made a hex board on which to play Battlecry with my 10mm miniatures and the other day I setup the for board for a solo battle.

    Rather than playing one of the many historical scenarios from the rulebook, I setup a ‘meeting engagement’ with random forces. Each army was lined-up in march columns at the side of the table and units could be brought on to the battlefield by playing a Section card and ordering units to march on from off table.

    The board setup with march columns top right and at the bottom right the solo playing aid.

    Early on, Confederate artillery routes a Union cavalry brigade whilst infantry in the wood engage yet more Union cavalry…

    The Confederate’s early success is finally stymied as Union reserves make it onto the field…

    The Union counter attack gains momentum as one Confederate cavalry brigade is destroyed and the other repulsed…

    The Union cavalry presses the attack and destroys the Confederate artillery whilst deadly musketry from the infantry puts paid to the Confederate cavalry…

    The march columns show that the bulk of the Confederate army is still marching to the sound of the guns…

    Confederate infantry build hasty fieldworks…

    Union artillery is rushed forward…

    And opens up a bombardment on the Confederate positions…

    The Confederate counter attack begins with a cavalry charge from the right flank…

    The Confederates have committed more brigades to the fight…

    With a solid defensive position secured and fresh units coming forward, the Confederates are victorious.

    All in all this was a very entertaining game which swung back and forth. It was an interesting challenge to balance taking the offensive with the units you have on the battlefield and bringing on reserve units, which take time to get into the action.

  • Ardera IV – Campaign #3

    The struggle for Ardera IV raged on through what was known as the cold year, which is caused by the rather strange, elliptical path by which the planet orbits the main sun-star Artemis.

    An entire single orbit of the Artemis sun-star takes 2 terran-standard years, one of which takes Ardera IV three million miles away, dropping the planet’s atmosphere to freezing temperatures.

    However, the sub-zero temperature did nothing to quell the bellicose nature of the orks and fighting continued at a relentless pace.

    Campaign move

    I decided to create another level of attack to allow me to use more titans and superheavy vehicles. By using 625 tons of supplies an army can conduct an All-out assault, using 2500 points to build their army. In the first battle I allowed 2000 points for the defenders, but I may have to think about that.

    The Orks conduct an all-out assault from their bridgehead at the Malcador river.

    Scenario – Battle at Highway 45521 South-East

    The Imperial defenders and their defence-works were deployed first. Dug-in, along the fortified highway, they covered a dense network of minefields and razor wire, creating deadly kill boxes.

    The ork horde deploys to assault the Imperial positions..

    On The ork left flank Warboss Eisengore orders forward his heavy armour..

    On the right flank greenskin infantry, along with Wierd-Boy towers, face-off against the warhound titan, Pack-Hunter ‘Leo’…

    In the centre the ork gargant, ‘Owd Yella’, takes heavy fire from Pack-Hunter ‘Kessler’ and Shadowsword ‘Damocles’.

    An ungodly armour battle ensues over the open steppe and ‘Owd Yella’ is laid defenceless with power shields down and all weapon systems destroyed, burning but still unbowed.

    Campaign Move

    With the Ork’s all-out assault failing with much slaughter, including the near destruction of the scrap titan Owd Yella, the Imperium hit back with a major attack at a vital crossroads.

    Battle at the crossroads

    The Iron Eagles space marines assaulted the ork positions from the south-east. Ork defences were light, with the dug-in infantry stretched over a wide front. The adeptus astartes conducted a precision strike on the right flank of the ork forces.

    Iron Eagles muster ready to attack…

    Tactical, assault and devastator marines press forward with heavy support from terminators of 1st Company…

    Devastator squad captures the bunker and holds it against greenskin infantry and heavy armour…

    On the space marine’s right flank, the assault smashes through the thin green line as heavy artillery attempts to destroy a satellite array…

    As hell rages on all around, a command squad of Iron Eagles battle with the ork warboss…

    The ork defences were no match for the ferocity of the space marine onslaught and the line was rolled up with contemptuous ease. When the ork warboss was slain by the Iron Eagle commanders, the greenskin’s will to fight was sundered and the marines ran down the scattered survivors.

    With an astounding victory at the crossroads, the forces of the Imperium managed to push the orks back to the natural choke-point between two major rivers. A brilliant strategic victory.

  • Following on from my last post, here is a quick update on my memoir 40k narrative campaign. As an ork force tied up the space marines reserves at the Ormffidian river forks, they struck out to secure the bridges over the Malcador river.

    20171230_221907
    Ork and space marines face off across the Malcador river.

    In this scenario, I decided to play using the more traditional victory conditions from the C&C games, in this case the winner would be the first side to reach 6 victory points.

    Permanent victory points are gained by destroying enemy units and temporary victory points are gained by having a unit in a bridge hex.

    A near run thing

    I took command of the ork army this time round and used a solo playing aid (as mentioned in the last post) to generate the space marine orders.

    It was a very close battle, with the bridges becoming focal points for the fiercest fighting and changing hands several times. Finally the might of the Adeptus Astartes won through, securing two bridges and destroying five ork units (including the warboss)

    20171231_194223
    On the right flank tactical marines secure the bridge as terminators and heavy support, provided by Vindicators and Land Raiders, take up position to cover them.

    20171231_194534
    In the centre of the line, Predator tanks sweep the bridge clear and repel all counter attacks. The third bridge is well within the green skin’s grasp.

  • Over the Christmas holiday I have been playing plenty of games of Memoir 40k, attempting to tighten-up the rules and stat-lines.

    I now have a very workable set of 60 command cards which is composed mainly of Memoir ’44 cards, along with leader cards from C&C Ancients and “hit & run” cards from Battlecry. This creates the right combination of modern combat elements with a sprinkling of heroic sci-fi.

    Battle for the Ormiffiad River Forks

    20171230_222055
    Closing stages of the Battle of the Ormiffiad River Forks

    Following the success of the space marines during the Battle for Macharius Bridge, the orks attempted a probing attack at the Ormiffiad River Forks. A small Iron Eagles task force rushed to plug the gap with orders to hold till the last man and last bullet.

    The battle ended in a stalemate, the space marine force took heavy casualties but managed to hold the line. Meanwhile the orks were merely conducting a diversionary attack whilst, in the north, their main body struck out for the bridges over the Malcador river….

    20171230_221907
    Ork and space marines face off across the Malcador river.

    Bridging the Gap

    As well as all this excitement, I have been packing away the Christmas decorations and I took the time while I was in the attic to sort through the general detritus that had been left by the previous owners. While I was up there I found this…

    20171230_222236

    I have no interest in playing this game but it will solve one particular problem I have been experiencing with my campaign until now, that of a distinct lack of bridges.

    20171230_221720
    Problem solved…

  • I don’t have a dedicated ‘games room’ and so instead must adapt with the space I do have to use here at Chez Tinpot. I can set up a 4′ x 4′  table in my front room but it has to be taken apart and stored after use. This will most likely be the mainstay for most gamers and is generally considered the norm.

    However, I sometimes want to lay out a battlefield and conduct a solo war game, which may take several days to conclude and I really need space for this. The most suitable spot is in the corner of my bedroom and so from there comes this scene of ‘little Italy’ 1943…

    Armoured Recon
    Vanguard elements of the 14th Canadian Armoured Regiment
    observe the scene ahead from a low ridge.

    Vista
    They’ve found a section the river which is fordable to their
    tanks and support vehicles

    IMG_0581
    However ‘Jerry’ artillery rains down, forcing them to withdraw
    until the infantry catches up to support their attack.

    Going Solo

    Solo war gaming is a rather niche element within an already niche hobby and it seems a rather odd idea on the face of it. Most war games are conducted between at least two opponents who will plan their strategies and conduct faints and decoys to throw each other off their real intent. How can this be replicated by oneself?

    I have seen some rules which create an opponent which conducts actions by the rolling of a dice and consulting the relevant tables. I’m sure there are many more ideas besides, but I have a system of my own devising.

    The biggest problem with solo gaming is the idea that both Generals are the same person who would, naturally, know how to counter the enemies next move and thus ensues a stalemate situation. What if, however, we as the war gamer consider the general plan as somewhat out of our control?

    Instead of playing the role of General I play the chain of command that will have to receive orders in the field, the Junior Officers and NCOs who truly conduct the battle on the ground.

    For this ‘Orders from Above’ game I will generally use cards or counters with generic orders, sometimes rolling for the number of orders allowed, thus creating a certain amount of randomness whilst also allowing me to use my initiative to best serve the battle plan which is quite simply the objectives and parameters of the scenarios themselves. Having a bad hand of orders can force you to work outside your own plans and beliefs as to what would be the best plan going forward, which is, I am sure, the story many officers and NCOs had to face in real life.

    I find it interesting to watch the battle with less of a vested interest in whether one side or the other wins and simply enjoy the process with time to think on the progression of the engagement as a whole, researching historical accounts as I go and it provides a great problem-solving game!

    Not So Solo No More

    This newly set up board is for a game with a difference. This game will be in part a ‘solo’ war game as I will conduct the battle myself as time allows, but there will also be a ‘Blind’ player who will play the role of the battalion commander planning his attack on a defended position by way of maps and best intelligence available to him at the time.

    I will play the supporting command structure to set his plan into motion and collate the information of events as they unfold. I have already set up the defensive positions and will conduct reactions from the Germans during the battle, using a handful of solo ‘house-rules’ and a copy of Crossfire WWII.

    I have done this once before with a friend. It was interesting to see him create plans and orders with much more hesitance than if he had been at the game board himself enjoying the luxury of perfect information of the battle (he normally believes almost wholly in the ethos of Tora! Tora! Tora!). This time round The Old Guardsman has agreed to have a go and will be taking on the role of the Canadian Commander so I’d better get off and collate the Intel for the boss!

Design a site like this with WordPress.com
Get started