The Editioning: Week Three, OD&D

OD&D, The Woes of Sorrowfield, Session Two

Let me start by saying, if you’re one of my players, turn back now! Do not read! Danger! Danger!

The PCs gathered some hirelings. The town of East Barrens was not replete with adventuring types or even warriors, so I ruled that the only idiots available for hire were what OD&D refers to as “normal men.” This is a term from CHAINMAIL, I think, and means they are not fighters of any kind. Basically, they’re what later editions might call 0-level NPCs. Four of them showed up for duty. They did not all survive the session…

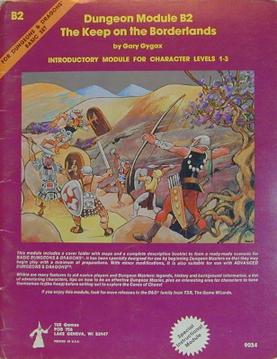
Hirelings are an interesting part of old D&D. You don’t really hear of a lot of 5e adventuring parties taking on a bunch of mercenaries as backup. But I remember playing AD&D particularly back in the olden days, the party would always want an extra NPC or two. They were often necessary to ensure survival. Playing OSR games like the Black Hack and Black Sword Hack, we have always employed hirelings for a variety of reasons in recent years too. Even in UVG, you probably won’t get very far without a crew of NPCs to keep your caravan running smoothly. UVG’s pretty old school in that respect. In the old games, they were pretty much just damage soaks, meat shields and extra carrying capacity. Even today, as a GM, I find I only role-play them when the players remember they exist as characters, which is not very often. In our Basic D&D game, the adventure we’re playing, Keep on the Borderlands, is designed for 6 to 9 players or something nuts like that, so we went all out of hirelings. Especially after my character got murdered by bandits in the first combat of the game. In oD&D and Basic, I think it’s easier to handle a larger number of characters, especially in combat. You don’t have to remember all those actions and complicated initiative order that you have in 5e and other more modern systems. Mostly, each character gets one actions/attack and they can move and that’s it. You roll initiative per side each round so you don’t have to keep the order in mind for a whole combat. This keeps it smooth. At least, that was our experience last week in both games.

The adventurers set off into the Barrenwood. They had to pass through it to find the source of the magical attacks the forest and the town had been coming under for weeks. It had not stopped raining and the road was a mucky morass. They trudged along the overgrown path into the dark, rotting woods and, before long encountered some trouble. A swarm of crystal infected arachnids had built a supernaturally strong web across the path in the dark, at just the height to trap unwary travellers. That’s what it did to our Fighting Man, Siward, who was leading the way. Abiss, the Halfling Thief set about cutting him free with her magical bronze sword while the others tried to scare off the spiders. Tadhg, the Cleric, made clever use of his lamp oil and torch, by blowing the oil out of his mouth at the flame to create a DIY breath weapon, incinerating a large part of the swarm and the webs as well, freeing Siward! They found some treasure on the ground below the webs, gold and some more magic items, a magic mace and a Staff of Striking.

I am running the Wilderness expedition as a hex-crawl. Here’s a picture of the hex map I drew in my “Pocket Dimension” from the Melsonian Arts Council. I bought a pack of ten of these a couple of years ago and I’m finally getting some use out of them.

A hex map in a hex-flower shape. It has letters from A to G along the top and numbers from 01 to 13 along the left hand side. There is a town in G-04 with a river flowing south and through it. a road goes from the town southeast and off the map. Another branches off into the forest that takes up the rest of the hex map. In the forest there is a lake B-05 and river winding south through the trees.
Barrenwood hexmap

Anyway, you can see the town in the north-east of the map and most of the rest of it is forest by design. I want the entire Wilderness portion of the adventure to take place in the Barrenwood. The area is not very large. I haven’t defined the exact size, but I’m thinking about an hour of travel per hex, with time added for encounters and rough terrain. Essentially, I ask the players to roll 2d6 on this encounter table each time they enter a new hex.

2Undead animals – crystalline growths – They won’t attack unless attacked. They make terrible noises while attempting to go on as if they were alive. Stats as Skeletons.
3Trapped merchant – stuck in a tree with strange crystalline chimeric creatures below. Stats as Zombies. Succesful attacks provoke a save vs Stone. Offers them 1000 GP to save him.
4Swarm of glowing crystalline spiders – trap! Treasure dropped amongst the webs – Staff of Striking, Mace +1, 560 GP, 300 SP, 500 CP. The spiders can do no damage but PCs will need to make saves vs Stone.
5Undead trees – crystalline branches. brittle and weak to fire – try to grab PCs. Treasure inside them – Total of 400 GP.
6Crystalline undead – one has a journal explaining how to find the entrance to the dungeon
7Pixies – frightened and angry – try to trick the pcs into swimming in the lake, diving for treasure
8Hermit’s shack – Breandan only drinks rain-water he collects himself in casks. Wagers the adventurers that they can’t kill the carnivorous crystal elk that he says has been stalking him. He will offer them an old silver amulet with a ruby in it (3000 GP.) Can also tell them the best way to reach the coast so they don’t have to roll on the encounter table anymore. Says he encountered another adventuring party returning from the tower ruins a while ago. Apparently they were frightened off by a horde of undead on the first subterranean level.
9Nothing but more sodden trees and undergrowth trying to trip them. Roll 1d6. On a 1, become lost. Roll 1d6 to determine the direction they go in.
10Crystalline briar patch. It takes up the whole hex. Will require ingenuity to traverse, or they can go around. If they brave the crystal thorns they will need to make one Save vs Stone per turn for six turns. They will find treasure, however. Roll on Type A table each turn.
11Roll on Wilderness Encounters tables in the Underworld and Wilderness Adventures page 18
12The rain stops and the sun comes out. Crystalline shards glisten upon every bough and underfoot. A lost Acolyte finds them. Grainne Bell, CL 1, AC5, HP3, THAC0 19, Turn Undead, Crystalline ear
Barrenwood Encounter Table.
I can’t figure out how to format this so it doesn’t look like crap on the blog. Sorry!

So far, this method has worked well and has been telling a story, which is what I wanted. I have struggled to stick exactly to the letter of the old OD&D books, mostly because so much is left to the referee in play. But there is also another point. The Underworld and Wilderness Adventures random encounter mechanic just didn’t work for me and the game I’m creating with the players at the table. There is a lot in the that book about castles in the wilderness, and a set number of hexes you can travel in a day and how far away you can be from a monster and still be surprised. There are no castles in the Barrenwood. It wouldn’t make sense in the context. Surprise will occur if no-one Hears Noise from the trees because it’s a forest and not open territory. And surely hexes can be any size one chooses? For all these reasons, I decided to go with my own hex-map + encounter table combo. It’s simple and effective.

The PCs escaped the spider webs with their loot and no casualties, although one of the NPCs got bit by a spider and failed her Save vs Stone so her index finger turned into crystal. She managed to keep it together enough to continue, though. They moved on into the next hex towards the river and they encountered a pair of mischievous pixies who flew around them laughing and invisible. The Magic user, Ilaina, used her own Ring of Invisibility and I ruled that she was able to to see the diminutive fairies in that state, because I thought it was a cool idea. She was able to identify what they were up against and get a good look at them (they had thought, perhaps, that these were talking crows that they’d heard tell of in the town.) This seemed to anger the pixies but they nonetheless agreed to show them the source of the magical bursts which had polluted the waters and damaged the town.

The mischievous pixies left the PCs on one side of the raging river that passed through the forest while they flew on and laughed at them from the opposite bank. Siward and one of the hirelings, Edmund, used their axes to chop down one of the more gargantuan stress on their side and I asked for an attack roll from Siward to hit the other side with it. I did this, mainly because there is not really a mechanic to test abilities and there are no skills at all, unless you mean thief skills. I briefly considered adopting the roll-under mechanic used in Basic D&D, but felt that I would rather use the mechanics as presented for this, as much as possible. I really am just picking and choosing which rules to employ here. So, with their makeshift bridge in place, the party clambered across to a an area relatively devoid of trees. Since they had entered a new hex, I asked for another encounter table roll. Sticking close to the riverside, Abbis was able to hear a rustling and cracking coming their way through the trees, giving the adventurers a heads-up to the emergence a moment later of a half-dozen undead trees! My idea for these monsters was basically, zombie treants, brittle and rotting and falling apart. I gave them the stats of a regular zombie from the Men & Monsters book, but made them extra susceptible to fire damage, not that that came up in the fight. It was a tough combat! Our thief was lucky that she had levelled up the previous session or she would have died when she got brained by a rotting tree limb and two of the NPCs, Edmund, who I had named for my dead Basic D&D PC, and Brianna of the crystal finger, went down. The party were victorious but it had been a costly battle. Luckily, the bole of one of the undead trees was filled with treasure!

That’s where we wrapped up the session. Everyone levelled up at the end of it, what with all the treasure I’d been throwing at them.

Conclusion

This week, more than the previous one, I have become aware exactly how difficult it is to stick to the idea of playing this game as it would have been in 1976. It’s really impossible. My gaming brain has been influenced for good or for ill by so many story-games, the OSR and even later editions of D&D that its essentially impossible not to feel their effects on what we’re doing.
But, then again, I’m sure there were as many ways of playing this game at the time, as there were groups playing it. You would have had you hard-core war-gamers that used it as fantasy set-dressing, your power gamers and min-maxers who wanted to do nothing but gain XP and influence, castles and followers and power and there were probably still others who played it as a fantasy romp with real role-playing elements and deep character backstories. So, I’m quitting my hand-wringing over it. As far as this Editioning challenge goes, it has to be secondary to the enjoyment of the players, including me. Otherwise, what’s the point?

The Editioning: Weeks One and Two, Basic D&D

The Keep on the Borderlands

Friend of the blog, Isaac has generously offered his time and effort to take on the Editioning with me. He’s DMing Basic D&D for us right now. He decided on the Keep on the Borderlands as the adventure for this edition, and I couldn’t be happier. It’s the iconic first scenario for many, many adventurers in the 80s. I actually think I might have played at least part of it as a novice, although I have no real memory of it.

For those who don’t know it, here’s the set up. The PCs arrive at the Keep on the Borderlands, a remote and embattled outpost, that has been recently assaulted by a group of creatures that have come from the nearby Caves of Chaos. They use the keep as a base of operations to set out and explore the caves and other locations in the area.

It’s got a few interesting NPCs with their own specific motivations and desires and a couple of different factions to keep things interesting, including the Ospreys, a rebellious bandit clan, the current ruler in the keep, the Castellan, and the Thyrenian Guild.

A lot of these older modules are designed for unusually large numbers of PCs. I think this one is designed for 6 to 9 players. As we started off with just two players (now expanded to three) it was essential to hire a whole bunch of hirelings. We started off with four but quickly decided we should max out that number and hired three more. By the time we set out to the Caves of Chaos, in our third session, we had a small army, including a slightly suspicious priest by the name of Jabeck and his acolytes. This should make combat interesting.

The cover of B2, The Keep on the Borderlands. A purple cover with the name of the module and a colour illustraiton in the middle: a piched battle on the road between adventurers and monsters.
By Scanned by DM2ortiz, Fair use, https://en.wikipedia.org/w/index.php?curid=505624

How its going

I say we set out for the caves in session 3, but actually, that was just our most recent and successful foray. Here’s the story of the first one.

So, in the first session, Tom and I made characters. As per the rules, we rolled up our ability scores first and determined the character class best suited to those scores afterwards. Tom rolled pretty well and decided on an Elf character, Eandril Summerstream, which made a lot of sense as elves had the benefit of spells and proficiency with melee and ranged weapons too. Given our smaller party size, that flexibility could be useful. I rolled execrably:

Str: 6
Int: 6
Wis: 12
Dex: 5
Con: 9
Cha: 10

There was only one option with those scores, so I created Edmund of the Sun, a Cleric of the Sun. He’s a lovely fellow, but thick as pig shit. I played into the idea that he was barely literate and couldn’t remember an NPC name if his life depended on it. I outfitted him in plate armour because his dexterity was so bad and he only had 2 hit points. Between the two of us, we represented the only two survivors of our mercenary band called the Company of the Summer Sun (a clever play on the names of the two characters) who arrived at the keep with the hope of rebuilding.

I genuinely had a great time roleplaying Edmund in the keep and getting pissed in the tavern with the party’s new hirelings. We awoke in the street the next day, suffering from alcohol poisoning and set off with Jabeck and his mates to explore the Caves of Chaos. Now, we had been warned about Jabeck by the keep’s chaplain, Father Burgoyne, who asked us to watch him and find out what we could about him. He suspected that he was a spy for the Great Serpent Cult, which operated out of the caves. But Father Burgoyne was incredibly racist against elves and Jabeck seemed reasonable when we went to talk to him. He also plied us with ale, which endeared him to us. So, I guess we took his side. That’s how he ended up accompanying us to the caves. I really hope he doesn’t betray us…

Anyway, on the way, Isaac had us roll for a random encounter, which resulted in an ambush by the aforementioned Ospreys. Now, we had been given a token by one of the guards in the keep to take to the Ospreys to maybe do some work for them. However, there was also a bounty on them, which was worth 10GP per right ear returned to the keep. Being rather lawful types, we decided to go anti-Osprey in our outlook. Edmund tried to throw them off by deliberately mistaking the voice of the unseen Osprey in the roadside bushes for a lad he knew in seminary. He trusted in his armour to protect him from any potential attacks. Turned out this was a mistake. They got tired of Edmund’s sass and rolled initiative. We lost, they won, one of them fired an arrow. It lodged in Edmund’s eye-socket, killing him immediately and outright, with 2 points of damage. The first combat roll of the game killed my boy. It was a bit of a shock, even though I had predicted Edmund’s early and brutal demise from the outset, given his atrocious stats.

From there, Eandril led the charge and killed the three bandits. I picked up one of the hirelings to control for that battle but wanted to make my own character again. So as the rest of the party turned around and returned to the keep to regroup, I started rolling. Oddly, by the time Eandril and the hirelings got back from chasing down the Ospreys, to the road where Edmund’s corpse lay, it was gone, taken, they assumed, by Jabeck to dispose of as per the rites of their shared religion.

A thief in a black and white illustration from the Basic Rule Book
Yoink

Despite the loss of Edmund, the encounter proved quite profitable, between the 30gp for the Osprey ears and the horses they left behind, Eandril did well. By the time they returned to Father Burgoyne to tell of Edmund’s demise, I had my next PC ready. Thaddeus Nightbane is a thief, obviously. I rolled significantly better for this character so hopefully he will last a little longer. This would be unlike every family member, friend and acquaintance he had ever had, however, as they have all perished tragically somewhere in his backstory. Despite this slight worry, Eandril decided to take him on as a full party member.

To the Caves

Finally, with session 3 on Wednesday, we actually made it to the Caves of Chaos. We were joined by another player, who rolled up a Halfling. We also created some backup characters for everyone, given the obvious lethality of the system and the adventure. There is no doubt that the lack of hit points, the lack of healing, or spells of any kind for the cleric, the swinginess of the combat and the potential for unbalanced encounters is pretty rough on these little adventurers, so its best to go in prepared. Unfortunately, my backup character is just as bad as Edmund, and is, possibly, one of his peers, as I had to go Cleric again. With all this character creation, we didn’t get too much time to play. But we did make it down the road without a random encounter this time.

When we got to the caves we discovered a group of goblins moving something around down there in sacks (the sneakier PCs went in to hide in shadows and spy on the inhabitants.) Our plan is to draw them out of the caves as much as possible and ambush them in a pincer. We have executed the first part, gaining their attention with some elven lullabies, so out of place in the darkened caverns. And last we left off, we were getting ready to roll initiative! Exciting! Hopefully Thaddeus lasts a little longer than Edmund.

The Basics

Dungeons and Dragons Game Rule Book cover. A red dragon menaces a warrior wielding an axe.
Big Red

There are too many possible versions of Basic D&D to definitively say that we’re playing the version. I mean, we’re not even really using one version at the table. We have the Rules Cyclopedia, which contains all the rules from the entire BECMI line, the Dungeons and Dragons Rule Book also printed in 1991, which only contains he Basic rules for levels 1 to 3. Isaac also has been referring to the Moldvay rules, a kind of 2nd edition of the Basic set, and we have even been using resources and specific rules from OSE, which is essentially the same ruleset.

In general, this hasn’t been an issue. We have come across some conflicting rules. Encumbrance was the first one. Isaac simply made a ruling to go with the encumbrance from OSE rather than the Cyclopedia. We have discovered a could have differences in spell descriptions, but they were functionally unimportant so we could safely ignore them or Isaac would make a ruling as to which version to use.

I have to say, stuff like the class sheets from OSE, printed out and handed to the players, have actually been very useful and don’t have any deleterious impact on the “playing Basic D&D experience.”

As for interaction with the rules, Some have found THAC0 and descending AC to be a bit of a leap to understand, but, luckily, the character sheets Isaac has selected have the full range of “to hit” numbers laid out so all we have to do is roll the dice and refer to the table.

Things like the rolls for thief skills are weird and anomalous but not difficult to understand. Once again, as long as you have them laid out for you, its easy to know what you’re rolling and what you need to get below to succeed, whether its on a D6 or a d100.

Conclusion

It’s too early for a conclusion, but, despite the death of my first PC on the first combat roll of the game, I am enjoying the game and the adventure. The old school style has been particularly refreshing. It’s interesting that we need to rely on a cadre of mercenaries to even attempt the adventure and I like the randomness that’s inherent in it.

I’ll be back with more reports once we have a couple more sessions, dear reader, so stick around!

The Editioning: Week One: OD&D

Highs and Lows

Oh boy, what a D&D week we had. The Editioning has well and truly begun! OK, technically, it began last week with OD&D character creation as I mentioned in the last post. As a note, you can find all the Editioning related posts here. Depending on when you read this post, there might be three others or, like, a dozen. I have no idea how long this experiment is going to go on for, tbh.

Anyway, We’ve had three sessions already! Isaac guided Tom and I through character creation and the first steps on our adventure in B/X D&D on Tuesday and Wednesday. And then I kicked off our OD&D adventure online with four members of Tables & Tales, which included the aforementioned Tom and Isaac.

Across the two games and the three sessions we have had victories and losses, death, and new life, fun and horror.

First up is my OD&D game, so let’s get into what it was like.

OD&D: The Woes of Sorrowfield

The first session of play for this game happened on Friday the 13th. In general, it was anything but unlucky for the PCs, who consist of Ilaina, the Elven Magic User, Abbis, the Halfling Thief, and the two humans, Tadhg, the Cleric of Brigantia and Siward, the lawful Fighting Man.

As I mentioned in a previous post, I’m not running a published adventure for OD&D. I had expected to run a classic adventure of the era for each edition, but the options were few and underwhelming. So, I decided to take the advice of the game and draw some maps. I started with a basic map of the dungeon and went from there. Although, I haven’t finished the dungeon yet. I realised I needed to be old school about the design: Town, Wilderness, Dungeon, in that order. You need a town for the PCs to resupply, hire hirelings, gather quests and hear rumours. The Wilderness is there to build them up before the dungeon and to add a little to the world, flavour, backstory, connections. And then the culmination should be the dungeon.

So, I went back and drew a map of the town, which the players had decided would be called East Barrens. You can see the map below.

The Town of East Barrens sits atop a defensible hill and is circular from above. Roads spread out in a star pattern from a grand oak in the centre. The Temple to Brigantia towers above the town in the north

We started the session with them arriving at the lower gate, in the south there, the only way through the town’s palisade. It was pissing rain and the guards were asking them for proof of a special invitation from the Bishop.

I told them, luckily, they had just such an invite from Bishop Cerys Williams of the town’s Temple to Brigantia. She had send messengers far and wide across the land of Sorrowfield to garner aid from adventuring types. And they had answered the call.

I instituted a flashback here. I asked the players how they thought their characters knew each other, making it a little easier on them by giving them the nearby city of Bailey as the venue for their meeting. Tadhg, a member of the same sect as Bishop Williams, suggested that the message was sent to him personally, since he had spent time in the town as a young priest, years before. But, knowing he would need more help, he went to the nearest tavern where adventurers gathered, and announced his intention to lend his aid to the town and that he was recruiting. Thus, did the other members of the party gather to him. Of course, they met in a tavern…

Flash forward again to East Barrens. In the town they made immediately for the Temple and the Bishop’s palace. Bishop Williams greeted them and asked them to investigate a series of terrifying bursts of magic that have come from the west, beyond the Barrenwood. Three of these bursts have been launched as though from some enormous catapult over the last three weeks. Two landed in the forest, but the third struck the town’s sturdy stone wall, reducing a section of it to melted, crystaline debris. At the promise of gold, the party agreed to help and then went to explore the town, including the damage to the wall.

Cleverly, Ilaina, the Magic User, decided to use her one spell, Detect Magic, on the wall and its rubble.

This is the text for the spell from the book, Men & Magic:

Detect Magic: A spell to determine if there has been some enchantment laid on a person, place or thing. It has a limited range and short duration. It is useful, for example, to discover if some item is magical, a door has been “held” or “wizard locked,” etc.

I found this, in D&D terms, almost refreshingly vague. This allowed me to describe what she discovered in broad but useful terms, i.e., it was powerful, transformative magic that she hadn’t seen before. And it was dangerous. I was gratified that the PCs were invested in investigation of the phenomena involved from the off! So much so, that, when the opportunity to cast Detect Magic arose again later that same session, and in the same day, I allowed her to do it, with the understanding that, if it were in a dungeon or wilderness setting, I wouldn’t allow it. It’s rough being a 1st level Magic User in these older D&Ds. What is obvious, also, is that far more of the available 1st level spells in OD&D are utility spells, rather than offensive of defensive, compared to later editions. This makes the Magic User much less useful in combat encounters in the early days. This, we discovered later in the session.

Ilaina warned the stone masons working to repair the wall that the debris could be dangerous to handle and they began to take precautions, with thanks.

As they made their rounds in the town, they discovered a couple of things. Another team of adventurers had set out a week ago to find the source of the magical blasts, but had not yet returned. This was of particular concern as that group was made up of locals, and the townsfolk were eager to get them home.

Before they could settle into the inn for the night the Bishop approached them again on the rain-soaked streets, with a request to investigate the cemetery by the temple. Reports had come to her of strange noises emanating from there and she was worried about grave-robbers. They readily agreed to check it out. When they got there, they opened the large gate and utilised an iron spike to wedge it open, leaving their vector of egress open, just in case. I admired the use of the iron spike by the players. It was old school as all get out. Then they entered to investigate. They heard the scraping and clacking of the skeletons before they saw them. But it was too late to do anything except roll initiative once they did…

Initiative in OD&D was nicked from Chainmail Miniature Wargaming rules. In fact, the whole combat system was, but thankfully Gary and Dave were kind enough to present an “alternative combat system” for those who didn’t have the patience for all that, in the Men & Magic book. I present it below:

The Alternative Combat System from Men & Magic:
Armor
Class Description
20-Sided Die Score to Hit by Level*
Level 1–3 4–6 7–9 10–12 13–15 16&+
2 Plate Armor & Shield 17 15 12 10 8 5
3 Plate Armor 16 14 11 9 7 4
4 Chain Mail & Shield 15 13 10 8 6 3
5 Chain Mail 14 12 9 7 5 2
6 Leather & Shield 13 11 8 6 4 1
7 Leather Armor 12 10 7 5 3 1
8 Shield Only 11 9 6 4 2 1
9 No Armor or Shield 10 8 5 3 1 1
*Fighting-Men: Magic-Users advance in steps based
on five levels/group (1–5, 6–10, etc.), and Clerics in steps
based on four levels/group (1–4, 5–8, etc.). Normal men
equal 1st-level fighters.
All attacks which score hits do 1–6 points damage unless otherwise noted.
Ronan McNamee (Order #51119631)
20
ATTACK MATRIX II.: MONSTERS ATTACKING
TARGET:
Armor
Class Description
20-Sided Die Score to Hit by Monster’s Dice #
Dice Up
to 1 1 + 1 2–3 3–4 4–6 6–8 9–10 11&+
2 All as in Table 17 16 15 13 12 11 9 7
3 1. above... 16 15 14 12 11 10 8 6
4 15 14 13 11 10 9 7 5
5 14 13 12 10 9 8 6 4
6 13 12 11 9 8 7 5 3
7 12 11 10 8 7 6 4 2
8 11 10 9 7 6 5 3 1
9 10 9 8 6 5 4 2 0
All base scores to hit will be modified by magic armor and weaponry. Missile
hits will be scored by using the above tables at long range and decreasing Armor
Class by 1 at medium and 2 at short range.
The Alternative Combat System from Men & Magic

That’s it. If you have any questions about it, ask your referee (they weren’t using the term Dungeon Master at this stage of the hobby.) If they don’t know, shrug. Make something up.

So, back to initiative. Each side rolls a D6 and compares results. If the rolls are equal, everything happens at once. Otherwise, the side with the higher roll gets to go first. If that’s the players, they can make some decisions about who acts before whom and what actions they’re going to take.

Technically, this is how a combat round should progress:

Chainmail Turn Sequence 1: TURN SEQUENCE THE MOVE/COUNTER MOVE SYSTEM 1. Both opponent's roll a die; the side with the higher score has the choice of electing to move first (Move) or last (Counter-move). 2. The side that has first move moves its figures and makes any split-moves and missile fire, taking any pass-through fire possible at the same time. 3. The side that has last move now moves its figures and makes any split-moves and missile fire, taking any pass-through fire possible at the same time. 4. Artillery fire is taken. 5. Missile fire is taken. 6. Melees are resolved. 7. Steps 1 through 6 are repeated throughout the remainder of the game. Note:Missile fire from split-moving troops is considered to take effect immediately during the movement portion of the turn, and the same is true of passthrough fire. All other fire, both artillery and missile, is considered to simultaneously take effect just prior to melee resolution.
The Move/Counter Move System from Chainmail

Or, alternatively, like this:

Chainmail Turn Sequence 2: THE SIMULTANEOUS MOVEMENT SYSTEM 1 . Both sides write orders for each of their units (groups of figures of like type), including direction of movement and facing. 2. Both sides move their units according to their written orders, making onehalf of the move, checking for unordered melee contact due to opponent movement, and conducting split-moves and missile fire and taking any pass-through fire; then the balance of movement is completed as ordered. 3. Artillery fire is taken. 4. Missile fire is taken. 5. Melees are resolved. Note: Exact orders for each unit (group of figures of like type) must be given. Cavalry may be given the order to "Charge if Charged" (CIC), either in their own behalf or in support of any nearby friendly unit. Such CIC movement begins at the one-half move and is only half of a normal charge, i.e., a unit of medium horse CIC to support a unit of archers would move up to 12" during the second half of the turn.
The Simultaneous Movement System from Chainmail

As you might have guessed, dear reader, these are screenshots from the Chainmail rules I mentioned earlier. That’s what OD&D rules were based on, after all.

In practice, there was really no need for all that. The combat was short. These were half hit-die skeletons (I’m using the optional rules for monster hit dice from the Greyhawk supplement for OD&D, which allows you to use d8s for hit dice. Previously, they were d6s with various bonuses.) Besides, there was a cleric who could turn them on the roll of a 7 on 2d6, which he did. Here’s the rules for turning undead:

The Turn Undead Table from Men & Magic: Clerics versus Undead Monsters: Monster Type Acolyte Adept Village Priest Vicar Curate Bishop Lama Patriarch Skeleton 7 T T D D D D D Zombie 9 7 T T D D D D Ghoul 11 9 7 T T D D D Wight N 11 9 7 T T D D Wraith N N 11 9 7 T T D Mummy N N N 11 9 7 T T Spectre N N N N 11 9 7 T Vampire N N N N N 11 9 7 Numbers are the score to match or exceed in order to turn away, rolled with two six-sided dice. T = Monster turned away, up to two dice in number. D = Dispelled/dissolved, up to two dice in number. N = No Effect.
The Turn Undead Table for Clerics. this is all the rules for that ability.

Yep, it’s just a table again. You’ll notice there is nothing about distance or duration of the turning so we kept that vague. Basically they were turned for as long as it took the PCs to do another action each and make for the gates.

Before that, though, the thief succeeded in a Hide in Shadows roll to go for a backstab. In OD&D, low level thieves’ chances to do anything with their skills are practically non-existent, so the success felt immense, as did the 8(!) damage from the backstab, utterly destroying one skelly! In OD&D, backstabbing gives the thief a +1 to hit and doubles the damage. Huge for a first level character. I would imagine it is much less satisfying at higher levels, as I don’t believe there is any way to increase those bonuses as they level up.

From Greyhawk. The tables for thief abilites and how they improve across levels. Also included is that table showing how demihumans benefit: Thief Open Locks*/ Remove Traps* Pickpocket* or Move Silently*/ Hide in Shadows* Hear Noise Apprentice 15%/10% 20%/10% 1–2 Footpad 20%/15% 25%/15% 1–2 Robber** 25%/20% 30%/20% 1–3 Burglar 35%/30% 35%/25% 1–3 Cutpurse 40%/35% 45%/35% 1–3 Sharper 45%/40% 55%/45% 1–3 Pilferer 55%/50% 60%/50% 1–4 Master Pilferer 65%/60% 65%/55% 1–4 Thief*** 75%/70% 75%/65% 1–4 Master Thief 85%/80% 85%/75% 1–4 Master Thief, 11th Level 95%/90% 95%/85% 1–5 Master Thief, 12th Level 100%/95% 100%/90% 1–5 Master Thief, 13th Level 100%/100% 100%/95% 1–6 Master Thief, 14th Level 100%/100% 100%/100% 1–6 Bonuses to Dwarves, Elves, and Halflings as Thieves: Type Open Locks Remove Traps Pick- Pocket Move Silently Hide in Shadows Hear Noise Dwarf 5% 15% - 5% 5% - Elf - - 5% 10% 15% - Halfling 10% 5% 5% 10% 10% + 1
The thief abilities.

Our Magic User helped by providing light, in the form of a lantern they borrowed from the front gates. I gave the PCs a +1 to hit for this.

Meanwhile the Fighting Man guarded the Magic User. But once the skeletons had been turned, the fight was effectively over. This is when I gave them the opportunity to use Detect Magic again. This time it was on the fountain, which was overflowing into the disturbed graves. The water was filled with the same magical crystal shards as they had seen at the damaged wall, leading them to believe the magic was what raised these skeletons. So they asked me if they could destroy the fountain, make it stop working. The thief failed a Detect Traps roll, which I allowed as a way to understand the workings of the fountain. The Fighting Man, however, was able to destroy it. Now, if this was a later edition, that would have been a Bend Bars/Lift Gates roll for the fighter, but since no such ability existed in OD&D, I was forced to go with the next best thing… Open Doors. As this is a feat of strength described under the Strength stat in the Greyhawk supplement, it seemed like the best thing to use, honestly. It’s a D6 roll, and Siward needed a 1 or a 2 to succeed. He rolled a 2! He used a rope to bring down he fountain and bent the pipe inside until it stopped flowing.

The Strength table from Greyhawk: Strength Hit Probability Damage Weight Allowed* Open Doors 3–4 –2 –1 –100 1 5–6 –1 NORMAL –50 1 7–9 NORMAL NORMAL NORMAL 1–2 10–12 NORMAL NORMAL +50 1–2 13–15 +1 NORMAL +100 1–2 16 +1 +1 +150 1–3 17 +2 +2 +300 1–4 18** +2 +3 +500 1–5 *this is an addition or subtraction to/from the normal carried without encumbrance **fighters with a strength score of 18 are entitled to make an additional roll with percentile dice in order to determine if their exceptional strength is highly extraordinary, consulting the table below: Dice Score Hit Probability Damage Weight Allowed Open Door*** 01–50 +2 +3 +500 1–5 51–75 +3 +3 +600 1–5 76–90 +3 +4 +700 1–6 (1) 91–99 +3 +5 +900 1–6 (1–2) 00 +4 +6 +1,200 1–6 (1–3) ***the numbers in parentheses represent the chance of a fighter with that particular score of opening wizard locked or magically held portals.
The Strength Table from Greyhawk. You’ll notice this table includes the percentile addition for fighters with 18 strength. They abandoned this for B/X D&D and then brought it back for AD&D.

Then they looted the opened graves and went back to the cemetery gate. They used some more iron spikes to keep it shut and called on the Bishop to go and destroy the undead with her far more powerful turn undead abilities. She rewarded them and then they went for a few well deserved pints in the inn where they informed a grateful populace that the water from the fountain and probably the wells in the town, which all came from the same underground river, was probably polluted. They immediately started gathering the plentiful rainwater and filled our heroes with drinks and rumours.

Now, I provided the PCs with plentiful loot from those opened graves. Thousands of silver and gold pieces, gems and magical items. It might seem like a lot, considering it was their first encounter, but gold = XP in this game. At one XP per gold piece, two of their number were able to level up at the end of the session. The thief and the cleric have to attain much lower numbers of XP to level up than the fighting man and the magic user. Since I knew I wanted this game to only last about six sessions and it would be a single adventure, I wanted to make sure they got the chance to level up. So I suspended the usual rule that they can’t gain levels until the end of an adventure, instead allowing it at the end of sessions. I may even allow it whenever they rest to account for the disparity in levelling rates.

Conclusion

I’ll have to come back for another post on the B/X D&D game, dear reader. I didn’t expect this one to go so long! But, please come back for it. We’re playing the absolute classic, The Keep on the Borderlands!

The cover of B2, The Keep on the Borderlands. A purple cover with the name of the module and a colour illustraiton in the middle: a piched battle on the road between adventurers and monsters.
By Scanned by DM2ortiz, Fair use, https://en.wikipedia.org/w/index.php?curid=505624

As for the first session of OD&D; we had a brilliant time. As a note, we were playing online using Zoom and Roll20. Unsurprisingly, Roll20 does not have an OD&D character sheet option, so the player’s just used their own hard copies. We really just used the VTT for the maps. And, although I had a map of the cemetery drawn, we didn’t even place tokens on it. It ended up all theatre of the mind, which was just fine by me. There is no doubt that the game presents some challenges and relies on the referee to make a lot of rulings or to use the rules in unexpected ways, but that was actually part of its charm, I found.

Looking forward to the next session in two weeks.

Time-loop

Spell Jammin’

The Editioning has started. We made some characters for OD&D the other night. We have one Fighting Man, one Magic User, one Cleric and one Thief, just as Gygax (or maybe Arneson) intended. But today, I want to write about a mini 5E campaign we just ended.

I have been running a Spelljammer campaign on and off for the last three years or so. The main campaign is, I guess, nearing a conclusion. I had always envisioned a particular timeline for it, factored in major plot beats, character moments, significant locations and events, but underestimated exactly how long a lot of that would take and, of course, where the PCs would take the game in some cases. So, last year, I decided to take a break from it. But, some months before the break, one of our number was launched into the IRL adventure of welcoming his second child into the world. When he and the rest of us came back to Spelljammer, I wanted to play something that would explain where his character had been in the interim.

The Wild-spacer Giff, Azimuth, is our resident Charisma Fighter. Or, he was. Now, he’s a Fighter/Paladin. He used his charm to get the group out of a couple of tight spots and himself into a couple of hot dates. He had a troubled back-story. The rest of the crew picked him up after he had been left stranded in Wildspace when some disaster befell his own ship, captained by his father, Parallax, also known as “the Admiral.” He didn’t know what had happened and he was driven to find out. When their adventures took them to the Rock of Bral, he did some investigation and discovered that something was happening to ships in a region of space known as the Amos Expanse. This struck a chord with Azimuth. So he put a crew of his own together while his erstwhile companions pursued their own goals, and he set off into the Expanse to find his dad. We called it, “The Search for the Admiral,” or “Dad-quest” for short.

Side Quest

This is how I handled it. We took another extended break from the main campaign and I got the other players to create new characters to act as the crew for Azimuth’s own ship. They all had a connection of some sort to the Admiral so it made sense that they would want to help find him. The players really got into this! They loved the opportunity to play new PCs in the same world, and even, in a way, the same campaign as their older characters had been in for a couple of years. They came up with some incredibly different characters compared to their original ones. My wife was playing a gnomish artificer in the main campaign and decided to create an Astral Elf Circle of Stars Druid who talked like Jennifer Coolidge (like many of the people I play with, my wife is a fully paid up member of the funny voice club.) I wrote, last summer, about the idea of allowing the players to use their two characters interchangeably from now on.

Giff! He's a hippo in a victorian military uniform holding a blunderbuss
Giff! He’s a hippo in a victorian military uniform holding a blunderbuss

The bulk of the seven session campaign was spent searching and investigating the Amos Expanse. I handled this as described in this post. TL;DR they rolled on a few encounter tables and they marked progress points when they rolled a 6. In the end, they rolled on those encounter tables quite a few times. What I enjoyed most about this part was that they found a through-line of a plot in the random encounters that I had never intended. There were a number of different hazards, problems and encounters that involved Kindori, the whale analogues in Spelljammer. There was an encounter with some space-vikings who were hunting them. Another involved the corpse of a Kindori that was being mined for space-ambergris and another was an encounter with a Kindori ghost. I had come up with these by using the spark-tabes in Between the Skies but never saw them as connected. And they wouldn’t have been if it hadn’t been for the order they were rolled up by the players during their journey. Anyway, on 5 progress points, they found what they were looking for.

Loop

It just so happened that the last encounter they rolled up before the finale was a big one. They encountered a Void-frost Elemental that was holding open an anomalous portal from the Elemental Place of Frost into Wildspace and it was spreading out from there. The PCs’ ship got caught in the ice (along with another Kindori who ended up helping them) They were forced to trudge across the space-ice-floe and defeat the elemental to close the portal and release their ship. It was a tough fight and they took a lot of damage to achieve their goals, but they won out in the end. When they did, of course, the enormous portal popped out of existence. This event drew the Crimson Cloud they had been hearing about to that spot, to fill the “void” it had left. It also trapped the PCs inside the cloud!

It turns out this was a fortuitous happenstance since this is also where Azimuth’s Da had been all this time. He, along with all his crew and a whole other ship had been trapped in a time loop inside the cloud ever since the disaster that had left Azimuth stranded at the start of the campaign!

Here’s what happened. Azimuth’s Dad, Captain Parallax, had been commanding his ship through the expanse when it encountered the Crimson Cloud. The Cloud was a temporal anomaly that allowed beings and objects to travel in time. Inside the anomaly, they got hit by another ship that had also been caught in it. This other ship also bore Azimuth’s Dad, just a much younger version of him. And it was a mercenary ship from decades earlier. The mercs rammed into the Admiral’s innocent merchant ship, assuming they were their target. And that’s when they got stuck in the time-loop. A device aboard the Admiral’s ship, a sort of Portable Dungeon, meant to trap whole armies in a prison demi-plane, interacted with the temporal anomaly and trapped them in the time-loop.

The way I planned it, the loop would last only about 15 minutes. As such, the two crews and the two versions of Azimuth’s Dad had done this over and over again, hundreds or thousands of times. But none of them were aware until the PCs also got sucked in, half way through a loop.

This is what I did to handle the loop. I established the events that would happen without the intervention of any outside influence such as the PCs. Here is the basic set of events:

  1. The ships enter the cloud/loop after colliding – The Mastodon’s Breath (Parallax Senior’s ship) is damaged but not completely wrecked. It has a great hole near the prow. The Jackpot (Parallax Junior’s ship) has only taken minor damage, but, unknown to them, it is enough to cause a massive blowback effect when they fire the cannon into the Mastodon’s Breath. It will be enough to destroy both ships in a cataclysmic explosion.
  2. Xenotermination giff marines get together to make an assault on the Mastodon’s Breath. Lieutenant Parallax is cheering them on from the spelljamming helm. The assault is met with surprising opposition from the elves in Lord Faewynd’s retinue (these guys were being transported by Parallax along with their cargo) and the crew of the Mastodon’s Breath, not to mention the distraught Captain Parallax himself. The fighting is bloody and results in the marines retreating, badly hurt.
  3. Fearing the worst, Lord Faewynd and a bodyguard escape the MB on a small tender with the spelljammer helm from the ship and the Astral Dungeon on board. Meanwhile, both crews take the time to rest and heal.
  4. Just as the Jackpot’s captain, Captain Lagrange orders the firing of the main cannon, Lieutenant Parallax and Captain Parallax finally see each other from opposite decks. That’s when both ships explode in a fiery blaze.
  5. Not long afterwards, the Astral Dungeon will reset, taking everything back to the starting point, just after the two ships collided.

Live. Die. Repeat.

I got the idea to do this, partly because my wife is a big fan of time-loop movies like Groundhog Day and Edge of Tomorrow and I wanted to give her that experience. But also, I had read a clever adventure in the Dragonbane boxed set that showed me it was possible to create an adventure like this. In fact, it made it seem relatively easy. It hinged on the series of events, of course, but “The Village of the Day Before” was far more complicated, in many ways than what I had planned. It had a lot of NPCs you had to locate and keep track of, for one thing. I didn’t need to do that so much since everyone was restricted to one of two ships. In fact, it was surprisingly easy to run, is what I found, as long as I kept the timeline in mind.

The PCs experienced three iterations of the time-loop. On the first two times, they got blown to smithereens along with everything else trapped in the anomaly when the merc ship fired their enormous cannon and blew up the Astral Dungeon. They reappeared on the edge of the map each time. On the second go, they noticed the interaction between the explosion from the cannon and the Astral Dungeon in the middle of a pitched battle with the giff marines. By the third one, they had figured out they had to prevent the cannon from blowing that thing up and they had to get to it and find out some way to shut it off to free themselves. And that’s what they did. They had to kill the mercenary captain and fight the marines to a standstill while they figured it out, but they managed it.

Conclusion

In the end, there was no “big bad” to fight to end the adventure. There was just a puzzle to solve and some chances to take. The players did that and they escaped the time trap. It was exactly what I wanted and the players seemed to enjoy it too.

If you’re thinking about running a time-loop adventure, DMs out there, do it! But let me warn you, it’s hard to keep it to yourself when you’re planning it!

The Editioning: How to OD&D

The Editioning Begins

The first session for our Tables & Tales OD&D game is set for next Friday. I think it’s just going to be a session 0 to introduce the game to the players and have them create characters. Part of the reason for this is the way I’m approaching it. It’s going to take a little longer to complete my preparations than I thought it might. Today, I’m taking you on the start of that prep journey with me. Click this link to check out all the posts on the Editioning, our challenge to play all the major editions of D&D in the next twelve months or so.

Step 1: the Map

I have made an important decision, dear reader. I’m not going to run a published adventure for OD&D in the Editioning. For one thing, there are precious few of them. For another, they are not very attractive. I considered running the adventure contained in the Blackmoor supplement, the Temple of the Frog. But then I listened to this review of it on the Between two Cairns podcast and I decided against it (yes, I know they were reviewing the 1986 version made for the D&D Expert Set, but I’m assuming a sufficient similarity that will allow me to make assumptions about the older version.)

Instead, I thought to myself, I thought, “you should just do what the OD&D core books assume you’re going to do, create your own dungeon, your own wilderness, your own NPCs and monsters and treasures. That’s the real OD&D experience, you idiot!” I then apologised to myself for calling me an idiot and got out some graph paper and a pencil, because Gary and Dave told me to start with a map.

Dungeons & Dragons, Book III, The Underworld & Wilderness Adventures by Gary Gaygax and Dave Arneson starts with a section entitled, “The Underworld.” Here’s the first page of that:

Sample side elevation of a dungeon from the Underworld section of OD&D volume III

OK, I don’t have a lot of time, and am only willing to expend a moderate amount of effort but I have a decent imagination. So, hopefully that’ll see me through. One advantage I have here is that I know I only want this game to last about six sessions, so I doubt I need to make anything very large.

Since I’m starting with this map, I’m hoping it will inspire me to come up with a theme for the adventure/dungeon. Let’s see.

If you are one of my players, TURN BACK NOW! SPOILERS AHEAD!

Levelling

My dungeon - six levels including the ruined tower on the surface and the sea cave at the bottom with the flyig saucer crashed in it.
My dungeon – six levels including the ruined tower on the surface and the sea cave at the bottom with the flyig saucer crashed in it.

I’ve started by planning out six and a half levels of dungeon. My pen did provide some inspiration immediately by drawing the whole side elevation with a cliffside on the left. I hadn’t meant to do this, but a slight mistake led to it and then, it just felt right. I placed the ruined lower floor of a tower on the surface, near the cliff’s edge and drew a shaft dropping from the floor down to a subterranean level. That level also has an entrance on a ledge poking out from the cliffside.

At the book’s urging, I decided to mix up the methods by which an adventurer might move between each of the levels. The bare shaft between levels one and two gives way to a simple stairway between two and three. From three to four and from three to five there are lifts and you can only safely traverse the gap between levels four and five if you can fly. From level five, you can get to level six by the use of a rocky slide or a teleportation pad. You might also get to level six by descending from the ledge at level 2 above, although you would need a lot of rope and a swimming proficiency badge. I like this! It seems fun and means the players won’t always know what to be on the look out for when they decide it’s time to descend.

For the craic, level six is a submarine cavern, inside which is a crashed flying saucer. Well, looks like a theme is definitely coming together, although, it hasn’t fully crystallised yet.

Level One

The ruins of the tower currently play host to a group of Dwarven mercenaries in need of shelter. There are four rooms, including the Dwarves’ camp. One room contains nothing of interest but a handle to the trapdoor that leads down to Level Two. Another has a riddling raven who keeps its hoard of shinies here. If they answer a riddle, they’ll get a prize but if they attack the bird, they’re getting cursed. The last room has the trapdoor to the next level and a Gray Ooze resting on top of it.

I’m having immense fun with this so far. I’m doing it all by hand; drawing the maps in a notebook and writing out descriptions on the opposite pages. I normally do session prep on my computer and I haven’t built a dungeon from scratch in maybe eight or nine years. It’s a real breath of fresh air!

Level Two

My thinking behind this level is that it is there to dissuade potential dungeon delvers. It will present wave after wave of undead, who will regularly appear, as if from nowhere, in the room adjacent to the one the adventurers emerge into from the level above, trying to force them back. The undead are not real. Rather, they are like characters generated by the holodeck in Star Trek. If the PCs explore other ares of the level, they will probably find the hidden control room which will allow them to turn off the hardlight illusion generator. Then they’ll be able to get through to the stairway leading to the next level down.

I am quite excited about this idea, especially as there is an alternative to fighting the undead or figuring out the illusion generator. They can escape to the ledge on the cliffside from this level, although the only option is to descend into the sea from there…

Levelled Out

A crude line drawing of a dragon with a bird flying at its face
Dragon

That’s as far as I have gotten so far. I need to knuckle down and expand on what I’ve done so far. So I’m going to leave this post here for now. I’ll keep you posted on my progress in a few days.

The Editioning: From OD&D to 5E 2024

Bloggies Inspiration

I have read a lot of TTRPG blogs in the last few weeks, dear reader. I imagine the chances are good that you have too, if you’ve been following the Bloggies awards over on Explorer’s Design. There have been so many wonderful reads, I really did find it hard to choose between many of them. What a I liked most of all were the posts that expressed their enthusiasm for the hobby in one way or another. You can feel it shine from a d66 table of carefully curated results as much as you can from the effusive prose of some bloggers. And there were blogs about every aspect of this weird pastime from story-telling to initiative methods and everything in between. So often, what I found is that writers went back to the source material for inspiration, those historical tomes that defined the RPG scene and continue to play an outsized part in it, whether we like it or not. Most of these we were OSR bloggers with a keen interest in the original D&D from 1974. But you would occasionally see other editions get a shout out. On top of this, I get a newsletter from the Shop on the Borderlands that tempts me weekly with a lot of old dragon game shit I don’t need… Unless, what if I did need it?

The Editioning

Now, I have some to lots of experience with most of the editions of the game, and I already have a bookshelf full of D&D, mostly AD&D 2nd Ed and 5E, but also several 4E books, a smattering of 3rd Ed and a couple of 1st Edition tomes. So, I figured, if I undertook a challenge to play a full adventure in every edition of D&D during the next twelve months, I wouldn’t need to supplement my collection too much to make it possible.

So, that’s where we are now. The Editioning is coming to pass. The plan is to play every edition of the D&D game, in order (although there may be some overlap) in our gaming community, Tables and Tales, between now and February next year. Isaac has agreed to take up DM duties for several editions. I will run OD&D, AD&D 2nd Ed, 3rd Edition and 3.5 and Isaac has said he would like to run B/X D&D, Ad&D 1st Edition and 4E. Someone else in the community might run 5E 2014 and 2024, but if not, I’ll probably do those too.

Pre-loved

The covers of the AD&D 1st Edition Dungoen Master's Guide and the D&D 3.5 E DMG.
Just arrived!

I’m trying to source second-hand copies of the main rule books of each edition where possible. It seems more like a real history project when you have relics, primary sources, legendary tomes. It’s part of the adventure. I like to think about others using the books to play their own campaigns twenty, thirty, forty years ago. It puts me in touch with my own teenaged self and allows me to tap into the enthusiasm I had for the game back in the day. Also, its just cool to have them.

I’ve been surprised to find that you can get most of them for prices that I don’t consider extortionate, either on Shop on the Borderland or Ebay. I started shopping for them last week and a couple of DMGs showed up on Friday, AD&D 1st Edition and D&D 3.5E. They’re in good condition considering how much I paid for them. But before we get to those editions, we need to take a look at OD&D and D&D Basic/Expert.

The Educationing

This undertaking has taken me to school. I had to figure out which editions were really distinct enough to deserve to be a part of it. I started by looking up the full list of editions here. I found this useful table:

A table nicked from the Wikipedia entry for Editions of Dungeons and Dragons. it shows all the versions from OD&D to 5E 2024.
From Wikipedia

You can see that it clearly shows the parallel evolution of Dungeons & Dragons and Advanced Dungeons & Dragons. I remember, as a young DM being quite dismissive of the non-Advanced version of the game. I had cut my teeth on the Basic Set but felt as though I had graduated past it to AD&D after a year or two. Never-the-less, I did play it in the nineties. A friend DMed it for us using the Rules Cyclopedia and the Hollow World campaign setting. Looking back at it now, I wish I had had more of an interest in it. Above any other version of the game, except, perhaps OD&D, it seems to have had the greatest influence on the modern OSR. Hindsight is 20/20 I suppose.

I have seen the terms B/X and BECMI and Blueholme and The Red Box and whatnot, for a long time. But this was the first time I bothered my arse to figure out the differences between them. This despite having actually played the using the Basic Set myself. I did not know that the confusing “abbreviation,” B/X referred to the first two boxed sets of the D&D rules, Basic and Expert, which allowed play from level 1 to level 14. I also had not known that the initialism, BECMI, referred to the full set of five rule-books, Basic, Expert (why is Expert shortened to ‘X’ in B/X but ‘E’ in BECMI? Make it make sense!) Companion, Master and Immortal. BECMI supported advancement all the way from 1st level to 36th!

Anyway, I made the executive decision to collapse all these versions into one, and just refer to it as B/X, since the main difference seems to be the extension of level caps with each successive book and we will not be playing long enough for that to be an issue. Nonetheless I have ordered both the Basic Set rule book and the Rules Cyclopedia, just to make sure we have all our bases covered.

Whither Adventure?

The cover of the Making of the Original Dungeons and Dragons. It has a red cover with a big gold ampersand on it.
The cover of the Making of the Original Dungeons and Dragons.

There are still a few decisions to make. And there is a lot of work to do to prepare.

I have a relatively easy task to begin with, and that’s the reading of the OD&D books. I picked up the PDFs of these from Drivethru for a song. I do have them in a a slightly unwieldy printed form in “The Making of the Original Dungeons & Dragons” book that a friend kindly gifted me at Christmas, so I am happy not to need to empty my bank account to purchase a vintage copy of those books. I’ve quickly realised that I would also need the Greyhawk supplement since, otherwise, I would need to use the Chainmail medieval miniature war-game to run combat, and that was a bridge too far for me. The Greyhawk supplement included the first iteration of the D&D combat system that we might recognise today.

On top of that, we have to decide on what adventure modules to run for each edition. I would like to use vintage adventures that were made for the particular edition that we’ll be playing. For B/X, AD&D etc. there are tonnes of options, which means we’ll have to narrow them down somehow. But for OD&D, we have a very different problem. Adventure design appears to have been mainly the domain of the DM. The main books give you rules and tables, monsters, treasures etc, but mainly they encourage the DM to create their own stuff. Which is great! But it leaves me with the question, is that what I should do? Since that’s the intention? Or, should I use the one adventure I could find in any of the OD&D supplements, Blackmoor? The adventure is “The Temple of the Frog,” and I haven’t finished reading it yet. But it does strike me as the sort of scenario that could be quite lethal unless the PCs turn up with an army of hirelings. If that’s what’s intended, maybe that’s just what we should go for.

Conclusion

I don’t yet know which way I’ll go with that decision, dear reader. I would welcome feedback from anyone with more experience of OD&D or the Temple of the Frog than me.

In general, this challenge has got me quite excited about playing D&D for the first time in quite a while. I wrote a few posts about maybe getting back into playing AD&D back in 2024, specifically I wanted to play Dark Sun. The experience of even making a character put me off it. But I now think that, with other players involved, it could be not only of historical interest, but it could be really fun! I know some of our players in Tables & Tales really like a bit of crunch, while others love the OSR principles of rulings above rules that OD&D might bring.

One thing you can be assured of, dear reader, is that I’ll be taking you with me along the way. I hope to have some interesting things to write about reading, prepping and playing these games, so stick around!

The Bloggies 2026

It’s Bloggies time again! This year, I’m not nominated, mainly because I didn’t nominate myself, which is what I did last year. But there are lots of great blog posts involved. I recommend you go and treat yourself to some of them.

This year, it’s being run by Clayton Notestine, last years’ winner over on the Explorer’s Design blog. It’s a lot of work! The honour of winning is tempered by the commitment of time and effort it requires to run it the next year. But he’s doing a brilliant job so far.

Today, I’m going to highlight one of my favourite posts from each category. The categories are:

  • Advice
  • Critique
  • Gameable
  • Meta
  • Theory
  • Debut Blog
  • Blog Series

For voting purposes, the posts are all paired, so they’ll be pitted against each other in a brutal gladiatorial blog-off. There can be only one!

You can read them all using the links provided on this page. Or you can join me in listening to them via the We Read the Bloggies podcast, to which many members of the TTRPG/blogging community have so generously donated their time.

Advice

This is my pick from the Advice category:

Just Tell Them What They Need! by Nate Whittington of the Grinning Rat blog. It was published on December 9th 2025.

If you have ever read a TTRPG adventure and screamed at it to provide you with the relevant information on a dungeon room, an NPC or a situation, this one’s for you.

Critique

This review of Mausritter, and, more specifically, the campaign set, The Estate, for that game, is really interesting. Recently, Quinns was on the Dice Exploder podcast talking about his love of the tactile, chit-based inventory system Mausritter uses. But, in this review, although the author, Malmuria, likes the way the system works, they point out that it’s a lot of work just to keep track of all those little pieces.

Gameable

On the d4 Caltrops blog, we have a very short but incredibly useful post on the stocking of wilderness hexes in OSR games. The main resource here is a d66 table which identifies discoveries as:

  • Landmarks
  • Lairs
  • Resources
  • Special
  • Hazard

Or some combination of these. Mostly, it provides sparks of inspiration to allow a GM to come up with discoveries that make sense in their campaigns/worlds. Here’s an example:

Hazard/Resource: Consider a Hazard that renders the Resource invaluable or inaccessible in some way.

Doesn’t that get your little GM brain whirring?

Theory

I love this post about Making Hacking an OSR Style Problem from the goblin.zone blog. I don’t play a lot of cyberpunk games or even games set in the modern day so this is not a subject that comes up very often in my gaming life. I am, however, in my day job, responsible for system security and data protection so I particularly clicked with Part 2: Useful Real World Concepts

Meta

I write RPG reviews here on the dice pool dot com. Some are better than others, but I do always try to make them useful to the reader, the potential player/GM or the prospective buyer. I don’t often think about how I go about doing this. But, if I did, it would probably be encapsulated in this post from The Dodecahedron blog. It references another post from one of my go-to reviewers, Idle Cartulary, on the Playful Void blog, which also did a lot to lay out what reviews should do. I appreciate any writing that makes me consider what it is that I’m doing and both of these posts did that.

Best Debut Blog

My pick in this category is the Valeria Loves blog. Here’s the post that got me hooked. Valeria has a compelling and entertaining voice:

I am a priestess of Blorb. Just as the map is not the territory, the rules are not the fiction. You do not need a codified movement speed to permit player characters to move.

And there is a satisfying assortment of blog posts so you’re sure to find something to your liking.

Best Blog Series

It’s the Playful Void again. Over the Christmas/New Years period Idle Cartulary reviewed a truly staggering number of games/modules for Critique Navidad. It was one a day for thirty days. I wrote a blog a day during my first month on the dice pool dot com. I can tell you, that’s a lot of work! And I was only prattling away about the shit the occurred to me, not reading, critiquing and writing about the work of others in a thoughtful and fair manner. That’s what this series is. Go check it out.

The Sutra of Pale Leaves, The Fixer

Goodbye Carcosa

Dear reader, last week, we took a look at the final part of the Sutra of Pale Leaves campaign. Today, we’re looking at the Fixer, the final scenario in Carcosa Manifest, the second book in the series. Its part of the Sutra of Pale Leaves, but its not necessarily part of a campaign. You could play it as a stand-alone module, but you could also play it as a coda to your SoPL game. It makes as much sense as the very loose way the campaign is presented, if not the way you might actually find yourself playing it.

The Repairer of Reputations

The Fixer is based on the short story by Robert W Chambers, the Repairer of Reputations. I’ve just listened to it on Youtube. It’s a story of insanity, ambition and murder, which is told from the point of view of a man who has come under the influence of the King in Yellow and a deformed, yellow Repairer of Reputations named Mr Wilde. Go listen to it or read it here. It’s not very long and I think it’s worth reading. The story and the scenario share a few major scenes and themes, but the Fixer is resembles the Repairer of Reputations only loosely. For one thing, the original was set in a then future New York City, while the scenario is based in 1990s Tokyo. The main thing, of course, is that it’s an RPG scenario for a number of players, and that necessitates a few things. The PCs need to have something to do, there has to be room for all of them to be the “main character” and it has to have enough meat on its bones to keep them going for a few sessions of play. I think the Fixer is quite successful at doing these things.

Beginnings

There is an interesting conceit here, that the investigators are down on their luck. They are members of Tokyo’s growing homeless community and are lacking money and respect. It’s possible that they are the same investigators that played through the full Sutra of Pale Leaves campaign. In fact it’s suggested that that’s the reason for their current predicament. Perhaps the things they were forced to do to fight the Pale Prince got them arrested or sent to a psych ward. Maybe they became social outcasts due to their talk about mind viruses and Carcosa and faceless people. Whatever the reason, they have ended up on the streets.

But then they’re given an opportunity by Mr Nomura to make some good money and repair their reputations, restoring their lot in life. Nomura is a strange man with terrible disfigurements and an ever-increasing number of cats. He acts as a wakaresaseya, a breaker-upper, if you will. This is a real business in Japan, and it fits in the scenario perfectly. In fact, in the short story, we never discover what it is that Mr Wilde actually does to Repair Reputations and I’m not sure that such a job ever truly existed in history. So, I like this logical adaptation in the scenario. He calls on the PCs to target several “wrong-doers who have made it into his ledgers.” These include a politician, a dirty cop, a buddhist abbott, a yakuza gangster and a fashion CEO. These are known as the Strawmen. He doesn’t want them killed or physically harmed. Rather, he would like the investigators to humiliate and humble them in particular ways.

Episodic

The visual flow chart of the scenario features the five portraits of the strwmen from the scenario at each of the points of a pentagram with a portait of the Fixer, Nomura above them all.
The Fixer Flow Chart

This scenario bucks the trend when it comes to format. Rather than simply following leads from location to location as the other SoPL scenarios, the investigators need to deal with each of the Strawmen one by one. Now, these people are all assholes in one way or another, even the buddhist abbott is a drug-addict who tricked his way into inheriting his title from his father by convincing the old man that his brother was actually the junkie. So, the investigators are unlikely to feel too bad about bringing them down. In fact, each of the strawman sections details the exact kind of shitheel each one is, their background, their weaknesses and where they’re most likely to be found. For instance, the politician can usually be intercepted at the National Diet (Japanese parliament) or on the golf course. Most useful is the “possible approaches” part in each strawman section. Obviously, this is Keeper-facing information, but it can be used to confirm that the investigators are on the right track. Generally, they are going to have to overcome things like getting onto a golf course or into parliament buildings while being homeless person. But once they get there, they get to do fun things like blackmail, or just straight-up releasing blackmail material to destroy them.

I can see each of the strawmen maybe taking a single session, with an episodic, strawman of the week type game. This would be interspersed with the results of the investigators’ efforts. You see, the truth is that targeting these individuals is essential to the completion of a ritual that will succeed in bringing Carcosa into our world. Nomura wants to overwrite Akihabara with the home of the Prince of Pale Leaves. They will start to see changes such as the police station being turned into changed into a castle looming over the town market square of Carcosa, or the National Diet transforming into the Royal Ballroom. As the city changes, so too does Nomura himself. His simple silicone prosthetic fingers become a cybernetic arm, and eventually he wears a porcelain mask and he is completely subsumed in some sort of cloak of scales with odd protuberances. I really like the gradual change in this villain and in the world. The investigators must assume their actions have something to do with these changes. The become more extreme with each strawman they bring low. And yet, the scenario assumes they continue to do what they have been employed to do.

Endings

Nomura, the Fixer pictured with his cybernetic arms on the table in front of him. He is otherwise a normal enough looking Japanese man wearing a light coloured shirt. There are cats in both the foreground and the background.
Nomura, the Fixer

Once Carcosa has been fully unlocked by the actions of the PCs, Nomura will attempt to fulfil their bargain by offering them positions of authority in his new city. The scenario provides us with a number of lore sheets, which the Keeper can give to any investigators that agree to this. These include, the Rightful Crown Prince, the Royal Matchmaker and the Judge of the Star Chamber. These are to be assigned to particular investigators, not randomly. For instance, the Rightful Crown Prince is supposed to be given to a PC with a good reason to despise the politician strawman so that they can rightfully exceed his level of political power. Even if the PCs don’t want to take on these roles in Nomura’s new world, they might anyway, if they enter into a period of underlying insanity, or if their Exposure Points get high enough, which is fun.

As a truly standalone scenario, we are told that the Fixer is not proscriptive on how it might end. It provides a couple of potential climaxes but it could really go any way. It does, however, still have the numbered Endings common to all these scenarios. I don’t know how we square that circle, to be honest. Anyway, here are the Endings:

  1. Party Wipe (Failure)
  2. Carcosa Manifests (Bad Ending)
  3. Reality prevails (Good Ending)
  4. Split Decision (Umwelt Ending)

Conclusion

I like this scenario. It’s weird and contains some potentially amazing scenes and revelations for the players. The NPCs are well drawn and the events are memorable. I think it would be a perfect way to wrap up your time with the Sutra of Pale Leaves and would act as a fun epilogue to the campaign.

All in all, I’m happy I took this deep dive into these books. I haven’t all that much experience running Call of Cthulhu but I think I would run this full campaign because it resonates with me personally. I think the Prince of Pale Leaves is an insidious and threatening unbeatable villain. The setting is one that I think will fascinate many people and the themes revolving around elements of Japanese culture and society work really well. The variety in the scenarios would, I think, keep it compelling and interesting for both Keeper and players. But I don’t think I would take their advice on running the scenarios in any order other than the one they are presented in and I can’t imagine myself playing it more than once, as they suggest is possible in the intro.

The Sutra of Pale Leaves, The Bridge Maiden Part 2

The Sutra Ends?

Not quite. We’re almost there, dear reader. This post is about the scenario that’s designed to be the culmination of the Sutra of Pale Leaves campaign for Call of Cthulhu. But it’s not the last scenario. There is one more to go. It’s called the Fixer and I’ll deal with that one next time. If you’re interested in the rest of the posts on this subject, check them out here.

The Bridge Maiden, Part 2 is, guess what, the continuation of the Bridge Maiden, Part 1. You come here to the dice pool for all the hottest insights, dear reader. The intro section tells you that you should run this as the last scenario in your campaign also. As I mentioned in these posts before, you’re informed early on that you can run the scenarios of this campaign in any order, but obviously, if you try running the Bridge Maiden Part 2 before Part 1, it’s not going to make a whole lot of sense. I would contend that the only two scenarios you really have to play to make an, admittedly very short, campaign are these two. None of the events of the other scenarios are central to the main plot of the Sutra of Pale Leaves. Honestly, even the events of the first part are basically surplus to requirements. More on that later.

Make way for SPOILERS below!

Who and What is the Bridge Maiden?

“Who” is a relatively easy question to answer, thankfully. In a very real sense, the Hashihime or Bridge Maiden, is embodied by Umezono Kaho, the NPC from Part 1 who probably employed the investigators to find her brother. Unfortunately, her brother had been transformed by the power of the Sutra, into a pale, subterranean, tentacular creature, but he was basically an asshole so whatever. However, after the events of that scenario, Kaho disappeared. No matter what the PCs did, there was no way to find her. During that time, she had become more and more assimilated into the Association of Pale Leaves (APL.) Not only that, but she has become the vessel for the entity known as Hashihime, as had her ancient ancestor, the great warrior-woman, Gozen Tomoe.

“What” is a bit more difficult. As the Hashihime, Kaho will be the one to guide the Prince of Pale Leaves from his home in Carcosa, across a magical bridge to Earth. This is achieved through the performance of a ritual. It’s not fully clear to me how this all works, though. We know that Gozen was an adherent of the Prince but I don’t know why only she, or her ancestors, have the ability to act as escort. We are told that it’s part of the ritual, but not why. We don’t have many other details about the ritual either, to be honest. But that’s because the PCs will not be able to stop it from beginning. So, let’s move on.

Beginnings

It’s at least a year since the events of Part 1. The investigators might have forgotten that Kaho ghosted them after they found/killed/escaped the clutches of her brother. But something comes up that leads them back to her. As usual, you can use the investigators’ confidants to get them involved, but there are no explicit hooks provided in this scenario as there are in the others we’ve looked at so far. Instead, we have a few bullet points describing ways to bring in the PCs without the intervention of the confidants. Honestly, I’m not sure why that is. After a year, I think it would be great to have a solid narrative hook to utilise to re-introduce them to this case. Especially as it’s not really even the same case! Part 1 revolved around the disappearance of Kaho’s brother, Minoru. Her relation to the Bridge Maiden and the APL is entirely tangential to it.

Except for one important detail. The Mandala of the Divine Eye was the artwork/sign/magic that allowed the APL to identify Kaho, through the thoughts and memories of her brother. Minoru had taken it to his lair beneath Tokyo in Part 1. It’s quite possible the investigators found it when they tracked him there. If they didn’t manage to do that, never fear! It has plot armour, so they will have been given it by one of their ever useful confidants who got their hands on it after it washed out of a storm drain. Either way, the PCs will, hopefully, want to examine it. Otherwise the beginning section of the scenario, “Interval: Examine the Mandala,” will be rendered useless and their progress through the rest of Part 2 will be drastically stymied. Yes, that’s correct, we’re starting with an interval. A bold move indeed. In this interval they will, with any luck, learn a great deal about the plans of the APL through regular old studying. But, if they’re really lucky, they’ll also experience a vision of the future, the coming of the Prince of Pale Leaves himself to our world as its new sovereign. They will also learn about the robbery in which the Sutra was stolen and a lot more about the Sutra itself. This is potentially weeks of Library Use rolls and social skills to investigate. Don’t get me wrong, I think this sort of thing is important to a Call of Cthulhu scenario. In fact, I think a lot of other scenarios in this campaign do not allow for enough Library Use. But it’s not exactly an in media res beginning, is it?

Actual Beginnings

So, 9 pages into the scenario, we get to the actual start, with a section call “Start: Pedestrian Paradise.” In this section the PCs finally hit the streets and get out of the dusty libraries and backrooms. This is where we get back to one of the themes of the previous part, the fashion industry in 1980s Tokyo. In fact, this part is far more linked to fashion than the first part. Kaho has been using her designs to influence the youth of the city and the country by integrating elements of the Sutra into her designs. It uses flower motifs and the brand is called Blume. Its set in the evocative neighbourhood of Harajuku, which was coming into its own in the ‘80s as a hub for youth and fashion, the likes of which, its fair to say, Japan had never seen before.

As the investigators try to question the groups of young people in the streets, they realise that there is something wrong here. The various groups, all wearing Kaho’s designs, tend to move as one, even going so far as to surround some poor girl menacingly, and acting like some sort of crazed flash-mob. All she had done was dropped her ice-cream on one of them! The mob are almost dancing at first, as though choreographed, but if the PCs intervene in anyway, the whole crowd will turn on them and attack.

This is more like it! This is the way I like to start a scenario. But, unfortunately, it comes only after weeks of in-game time while the PCs hit the books.

Leads

The visual flow chart for this scenario starting from the conclusion of part 1 and ending with the epilogue
Bridge Maiden Part 2 – Flow Chart

Following the flash-mob frenzy, the investigators are expected to follow some bread-crumbs. These lead to locations such as the design studio, Blume, where they might encounter one of Kaho’s employees with some answers for them, and a hypnotic motivational poster that’s forcing the staff to work absurdly long hours to fulfil the company’s goals. If only tearing a poster off the wall were enough to cure that particular illness in Japanese society. One of the disappointments in this scenario is that it doesn’t lean further into this particular theme. I think Part 1 does so quite well, though with other themes, as does Wonderland and Fanfic. But this scenario has a more urgent feeling to it (except during the ponderous starting interval.) It’s trying to wrap things up. So let’s move on.

The Association of Pale Leaves

The page of the scenario that includes an image of the invitation to the event/ritual that will launch the new fashion brand and summon the Pale Prince.

They’ll eventually receive an invitation to the launch party of Kaho’s new brand. Her co-mastermind, according to the invitation, is a man named, simply, Prince. Nope, not the Purple One, the Pale one. And they’re having a big party in a warehouse on a wharf in the city. This is to be the location of the ritual during which they will summon a Bridge of Light linking our world to Carcosa, allowing the Prince to cross over. That, of course, is where the big finale will be.

But before then, they might just want to investigate the offices of their nemeses, the APL. Truly this could be an “into the belly of the beast” moment in this scenario. They might actually have been invited there by the leader of the APL, Ōhiro Kimitaka, who could have given them one of his business cards in an earlier and entirely optional encounter. In the text, this encounter is described as “dangerous.” In reality, it is nothing of the sort. The most dangerous thing that might come out of it is to push the plot forward. Which begs the question, “why make the encounter optional in the first place?” Of course, there’s always the possibility that the PCs might attack him. You never know what they might do, after all. But it’s unlikely and he is heavily guarded.

Speaking of Ōhiro, I am not convinced by this guy’s villainy at all. Only within the Keeper-facing backstory has he proven himself to be ruthless and single-minded in the pursuit of his goals, which include bringing the Pale Prince to Earth. He Is, if anything, a slightly tragic figure. He can never realise his other goal, which is to become one with the Prince like everyone else exposed to the Sutra. Due to some neurological damage he suffered in World War II, he is “unsuitable.” Obviously, what he wants is unfavourable to the rest of humanity, but we never get to see him do anything particularly heinous in the course of the campaign at all. However, in one potential ending for this scenario, he begs the Prince to take him with him back to Carcosa. In answer, the Prince picks him up, defying all logic and physics, folds him like origami and pops him in his pocket, while Ōhiro screams in either despair or ecstasy. And that’s good.

OK, back to the APL HQ. During their time in this location there is a chance they will not only encounter Kaho, finally, but also uncover a great many answers as to what the heck is going on. They might even be able to recover the original copy of the Sutra. All of this is great, but is also fraught with danger. Obviously there are many opportunities for the investigators to gain more Exposure Points, thus drawing them closer to being taken over by the Prince themselves. They could be discovered and detained until the ritual. They might even risk death if they go up against some of the Courtiers of the Pale Prince. Hopefully not though. If you had a TPK before getting to the finale, that would be a real shame.

Finale

The PAle Prince is a blonde guy with sunglasses on and a low cut top.

“Spectacle” is the word I would use to describe the ending of this scenario and, I suppose, the whole campaign. This feels appropriate. Most of the scenarios have ended that way, Fanfic on top of Tokyo Tower, Dream Eater in a fight to the death in the dreamscape, The Pallid Masks of Tokyo in the otherworldly Château Carcosa/psychaitric hospital. Also, this one involves, for the first time, the incursion of the Prince of Pale Leaves himself into our world. It should be huge. He doesn’t strike me as an understated kind of bloke.

So this is what we have. After the investigators have milled around in the warehouse party for a short while, it’ll be time for the event/ritual. Everyone goes out to the wharf where construction has begun on the real-life Port of Tokyo Connector Bridge, aka the Rainbow Bridge. I like this intersection of the mundane and the mythical in the real-world, crossed with the events in this campaign. This is a really good example of it. Anyway, As everyone arrives, a great, winding bridge of solid light appears at the end of the unfinished, physical bridge as fireworks burst and fall above. Beyond, Tokyo disappears and Carcosa appears.

What a vision, what a reveal. This feels like a proper culmination to this long series of scenarios. The way is open and the Prince appears in a parade led by Kaho, now in her role as Hashihime, the Bridge Maiden. Carcosa threatens to overlay itself on Tokyo, and, eventually, the whole of the Earth. Only the investigators stand between their world and utter erasure. Big stakes! Surely they’ll throw everything they have at this threat!

There are several options to do this. They can take out Kaho in one way or another. Without her, the ritual will fail and the Prince will be forced back into Carcosa, closing the portal behind him. They could try ramming the Prince’s car off the bridge (there are lots of large construction vehicles handy), they could even do a suicide run on the bridge with a helicopter.

Endings

We have three potential endings this time. The worst is really the worst.

  1. Symphony in Yellow (Failure) – If they don’t defeat the Prince, the Bridge Maiden or disrupt the ritual, the entire world will fall to the Prince and will merge with Carcosa.
  2. Pre-emptive Strike (Best Defense Ending) – Its possible the PCs did some questionable, “the ends justify the means” type shit to disrupt the ritual. So, they might just end up in prison, safe in the knowledge that it was in a worthy cause.
  3. The Once and Future King (Triumphant Ending) – The investigators come out completely on top, having disrupted the ritual and destroyed the Bridge of Light. The APL might rise again, but, for now, it has been defeated.

Conclusion

There are things I like about this scenario. I like the actual start with the Pedestrian Paradise. I like the thematic elements like the mandala making the workers work harder and longer. I love the finale. It’s over the top and you might even argue that it is less than fitting for a Cthulhu game, but it works for me, especially as the culmination of the entire campaign.

On the other hand, I am not a fan of the interval to begin the scenario. I also don’t like the lack of additional thematic elements or the lack of action from one of the main villains of the piece.

But, as with all of my reviews of these Sutra of Pale Leaves scenarios, I haven’t played them. I don’t know how they might work at the table. I make a lot of suppositions and assumptions. They are educated guesses really. So, please do bear that in mind when you read them.

As I mentioned at the start, there is actually one last scenario in Carcosa Manifest. It is somewhat different in flavour, format and content, but it is related, nonetheless. If you have been following along, dear reader, you probably have a good idea of my overall impression of these books, the scenarios and the campaign. But I will go into it in more depth at the end of the next post.

Jailbreak – A Spire One-shot

Break Time

Our Blades in the Dark campaign is going well. We’ve only had three sessions but the players are moving the plot forward all on their own and are developing their characters in unusual and gratifying ways. But, for reasons, we’ve had to move our recent sessions to the weekend. So that has left us with a Wednesday gap. I grew bored of wasting my Wednesday evenings on housework, dog-walking and reading so I cooked up a plan to go back to Spire. But, since the change to our Blades schedule is only temporary, I wanted to make this a short one. To be certain we could wrap up our game, I decided to make it a one-shot. A city-break, if you will.

Shadow Operations

Cover of Shadow Operations - the city in red and black
Shadow Operations

A few years ago, Rowan Rook and Decard published a book called Shadow Operations. It’s a collection of eleven scenarios meant to be played in a single sitting, and it’s great.

It does a couple of things cleverly and well. The first thing is that it presents a template for a Spire one-shot and then has every scenario in the book stick to it. Not only does this make the reading and digestion of the scenarios easy for the GM, it also provides them with the basis for creating their own one-shots. You can see this Scenario Breakdown in the image below.

Scenario Breakdown
Scenario Breakdown

The other thing I really like about this book is the Iconic NPCs it provides. These are a list of statted out archetypes. They have titles such as “the Enforcer,” “the Queen,” and “the Vizier.” Then, throughout the book, each of the major NPCs presented in the scenarios fit into one of these archetypes. You don’t need stats for each NPC that way, you just use those iconic cookie cutters and refer to the handy reference page in the front if you need some stats for them. For a game like Spire, where there really isn’t anything like a bestiary or monster manual, and the enemies are just different types of people, this is a game changer. You can see the Iconic NPC stats in the image below.

Iconic NPCs
Iconic NPCs

Other than these introductory sections, there is a page of advice on Running One-shots in the back. This is pretty bare-bones, to be honest. It does tell you its best to “be up-front with your players.” Which is a great advice. You won’t have time for hidden agendas, secrets and mysteries that require deep investigations to reveal. Just lay it all out for them or you will leave them frustrated and the scenario unfinished. I couldn’t agree with this more. But the main piece of advice is to use index cards to write down the various locations, NPCs, PCs and props on. Once you have done that, you can group them appropriately, kind of like a game of Cluedo (or Clue for my dear readers from across the Pond.) There is nothing wrong with this advice. As much as I could, I went with it, insofar as I could playing on Roll20. But, as it turned out, we never really used my virtual index cards. The players had no real problem remembering where their characters or any other NPCs were at any given time or where any particular location was in relation to any other. So, I can’t help but feel that this advice only scrapes the surface of what the prospective one-shot GM needs to know. So much better is the advice in Heart. In Heart we are told to pay particular attention to pacing, to start fast and keep the pace up as much as possible. A one-shot is a sprint, not a marathon. Provide necessary information in flashback or in summary and get the PCs started right in the middle of the action. Give them an achievable goal. I wrote a whole blogpost on this a while ago. You can check it out here. One thing I’ll say, however, is that much of the need for this advice is obviated by the structure of the scenarios in the book and the directions within each one on how, where and when to start, and what the PCs’ aim is.

Running One-shots - advice page from the back of Shadow Operations
Running One-shots – advice page from the back of Shadow Operations

Speaking of the individual scenarios, I found it quite tough to choose the one I wanted to run, especially as I only left myself about three days to decide on it and prepare it.

Here are a few that I considered:

  • Life and Soul – Go kill Mr Winters, one of Spire’s most prominent gangsters, at his own birthday party
  • The Last Train – Get aboard the Last Train travelling the Vermissian and steal it or the tech that powers it
  • These Feral Saints – Find and recruit a newly reincarnated Hallow (drow saint) in Pilgrim’s Walk before some other cult does

But the one I went with was Jailbreak, a mission to infiltrate the Hive, Spire’s most notorious and terrifying prison, and, once there, ensure the aelfir can’t execute their prize prisoner, the Gnoll Warlord, Brakesh Gold-Tongue.

Jailbreak

There will be SPOILERS ahead, so, if you care about that sort of thing, look away now.

If you’re still here, welcome to the Hive. I’m going to discuss, briefly, my experience with Jailbreak as a scenario, playing Spire as a one-shot and whether or not I would recommend it.

I had four players for this one-shot and exactly three hours to complete it in. I like having time-constraints like this in some ways, as it gives me a very clear idea of how long I can spend in the various sections of the session. I was able to wrap it up within the time, although it was tight. We played online for convenience and because there was a gale-force wind and torrential rain that evening. We used Roll20, as I alluded to above. We found the Spire character sheets on that platform to be quite user-friendly and easy to navigate once you got used to them. It helps that Spire is a relatively rules-light game, certainly. There is a button you use to make rolls when necessary, which is handy as it combines your dice pool automatically. However, I will say that in instances where you have to apply a Difficulty to a roll you are forced to roll each d10 individually, because you can only see the highest die roll if you use the button. If an opponent has a Difficulty of 2, it means you have to take away your top two die rolls from the dice pool and go with the third highest. It’s a small thing but it did come a up a couple of times during play.

Suggested Classes

Character Sheet for the pregenerated Bound character, Sansel from the Spire Quickstart Guide.

Another piece of advice that I feel should be central to running a one-shot of Spire, much like my advice for a Heart one-shot, is to make sure you have pregenerated PCs. When time is of the essence, you can’t be spending an hour creating a set of custom characters. One of the most useful parts of the scenario structure provided is the Suggested Classes. For Jailbreak, these were Bound, Carrion Priest, Lajhan, Midwife and Shadow Agent. So I stole and tweaked a number of pregens from other Spire products such as the Quickstart and the campaign frame, Eidolon Sky. The only one I had to create from scratch was the Shadow Agent as I couldn’t find one already made in any of the Spire books I own. The most time-consuming element of this was just copying and pasting a bunch of stuff into the Roll20 character sheets. But there is no doubt about how much time it saved on the night. I could have done a better job with some of the characters to be honest, but when they are only in the spotlight for such a short period of time, a long and complicated backstory can be a hindrance, actually.

Finally we get down to the scenario itself. As I mentioned above, the central goal is to infiltrate the Hive and get Brackesh Gold-Tongue out. But, the Intro actually asks you to start the PCs already inside the prison. You then just ask them how they managed it! I loved this as it got them started right in the action and removed all the time-consuming planning that such an undertaking would usually require. My players went straight in the front door in disguise, in a meat cart or as a sort of chaplain for the drow guards and prisoners.

Intro

The Cover of Sin showing two drow looking out over a dark city in flames.
The Cover of Sin

You are then asked to describe the Hive. Now, there is minimal description of the prison in the main Spire book. It introduces it as a jail built into the living walls of Spire itself. It has rows of hexagonal cells which can be dropped individually from the wall in the event of an escape attempt. The unfortunate inmate would fall inside their cell all the way through the central abyss of the city, possibly all the way down to the Heart beneath. This is a terrifying prospect but, as I said, the description of the building, its inmates and staff etc, is brief. I was happy I had a copy of Sin. That book contains a much more evocative section on the Hive that was written, as it so happens, by Basheer Ghouse, the author of Jailbreak. It provides juicy tidbits like the way there are lots of walkways spanning the chasm below the prison, but they don’t have any handholds. Gulp. It also provides some great examples of the types of poor mutated experiments of creatures that are resident in the Menagerie. The Menagerie a part of the Hive where the aelfir send their old pets, experiments and art projects when they’re done with them. One of the main NPCs in Jailbreak is Dawn-Upon-Ice, a hobbling former aelfir who now acts as an information broker of sorts and can produce all sorts of nasty poisons in her guts for a price.

NPCs

Speaking of NPCs, Jailbreak has five, which is an easily manageable number. I will say, we didn’t interact with all of them, we skipped Qadiv Love-Fool, a sort of gnoll collaborator, purely due to the fact that the PCs did not pursue the information they gained about him. Brakesh Gold-Tongue, himself and Dew-In-Shattered-Mountains, the aelfir poet-interrogator, were my favourite to play. Neither lasted long against the PCs.

Suggested Scenes

After the NPCs section, there’s the suggested scenes. With the sort of structure you’ve got in these scenarios, this is really useful. Essentially, all you’re given to work with is a starting situation. The PCs are expected to push everything on from there. The suggested scenes allow the GM to pepper their descriptions of the infiltrators’ journey through the prison with interesting moments and opportunities to introduce the major NPCs. Here’s an example of one that I found particularly useful:

Smiling Kas spots the characters as she escorts Dew about the Deep Cells. She asks precisely no questions and accepts any excuse or alibi, no matter how ridiculous. If the characters have not threatened her and seem new to the Hive, she warns them not to stay in the Deep Cells too long.

I made liberal use of these suggested scenes.

Locations and Props

The next section describes the major Locations. I gave each one of these a little box drawn on the map on Roll20, thinking I would move the players’ tokens around from one to the next as their PCs moved. But, in practice, I didn’t really use them at all. Each of the Locations, which included the Menagerie, the Offices, the Guard Quarters, Watch Posts and The Deep Cells contain a brief description of the place, where it is in relation to at least one other place and the sorts of people and props that might be there. They are all short and to the point. Very easy to use on the fly. This section is supported by the prop section, which comes next. Props include unnamed NPCs like patrolling guards and menagerie experiments, by the way.

Twist

Each scenario has a Twist. Jailbreak’s twist is that Brakesh is a real asshole and has been going around the Hive murdering people, guards and prisoners alike. He was betrayed by his own side and left for dead before he was captured because he was kind of a psycho. He won’t leave with the PCs unless they either help him to kill each of the other named NPCs or offer him a shot at Snow-On-Stone, the aelfir commander who captured him. My players only encountered him about ten minutes before the end of the session. This worked out fine because their attempts to convince him to come with them failed so miserably that he attacked them and they were forced to kill him before escaping through an exploded front door to the prison. This worked out fine for them, as it happened. The Ministry wanted things to get messy to gain the attention of the papers and they were happy as long as the aelfir no longer had Brakesh as a source of information and didn’t get the opportunity to execute him publicly.

Conclusion

I love the way Shadow Operations is presented and it has a great variety of one-shot scenarios with an eclectic variety of settings and characters. Each of the scenarios is presented in only four pages, including one full page illustration. They are tight and easy to use because of the format. I do think it could do with some better advice on running a one-shot but, as I said above, if you follow the scenario structure, you’ll be alright.

Jailbreak was fun. It had a great setting. I loved describing a scene where the guards dropped one of the cells out of the wall and the PCs watched it plummet and the moment when they discovered one of Brakesh’s murder victims stuffed under the stairs was good too. But I found we had not enough time for the characters to shine as much as I would like. Maybe this is just one-shots in general, or maybe it’s how I handled it, but I would have liked a bit more room for the PCs’ characters to breathe.

I will definitely be going back to mine that rich seam of Shadow Operations in the future. It was so easy to pick up Jailbreak and run it with minimal prep. I would recommend it!