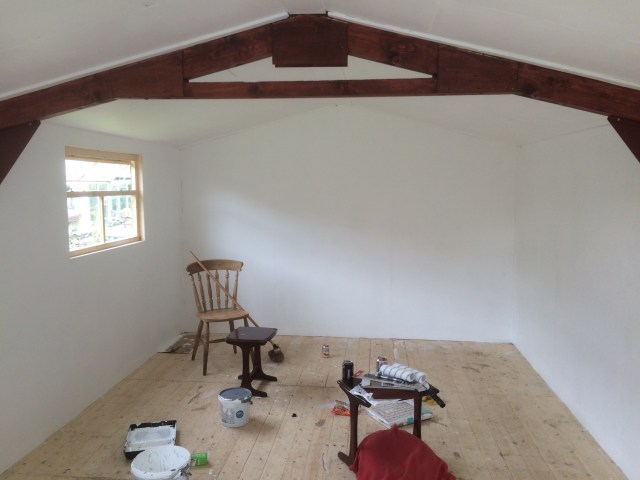
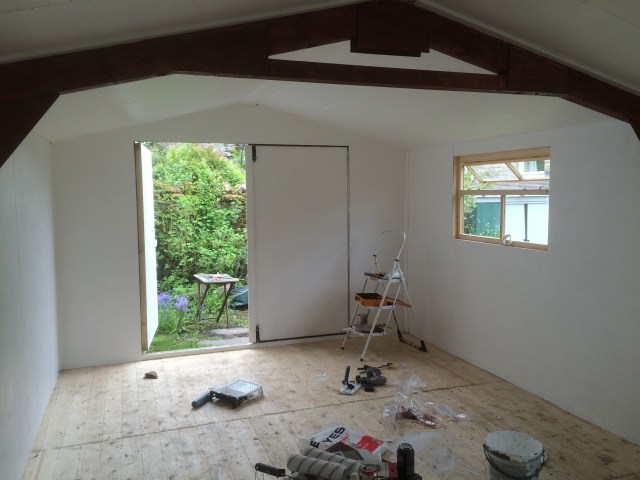
On the final leg of the ‘Shed Journey’. Layout hopefully going in on Saturday.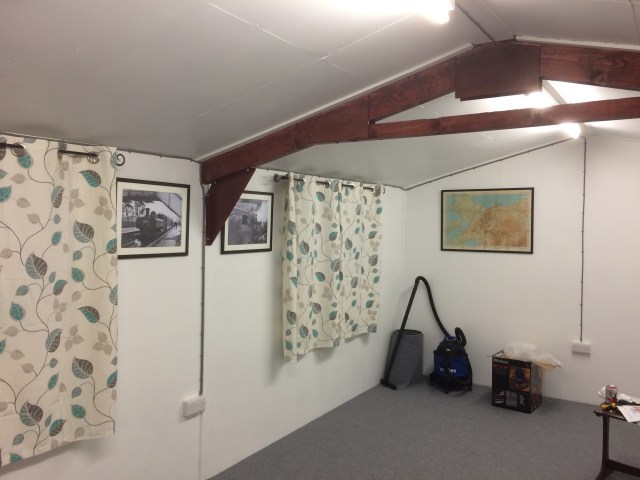

Researching, Learning and Working in Finescale 4mm OO Gauge
On the final leg of the ‘Shed Journey’. Layout hopefully going in on Saturday.
It’s here, it’s up and after several coats of paint it’s ready for the electrics!
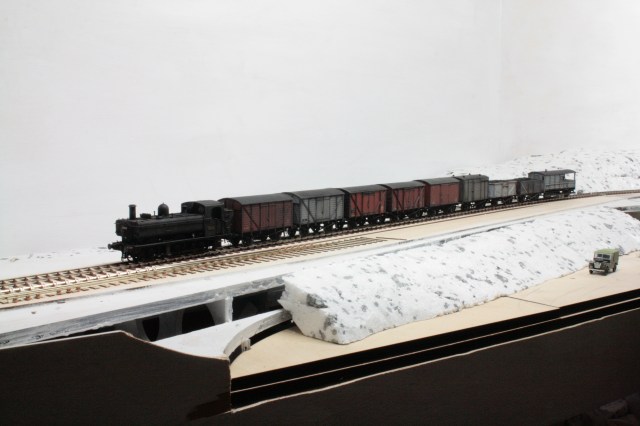
Next week the carpet goes down ready for Cwm Prysor to take it’s rightful place.
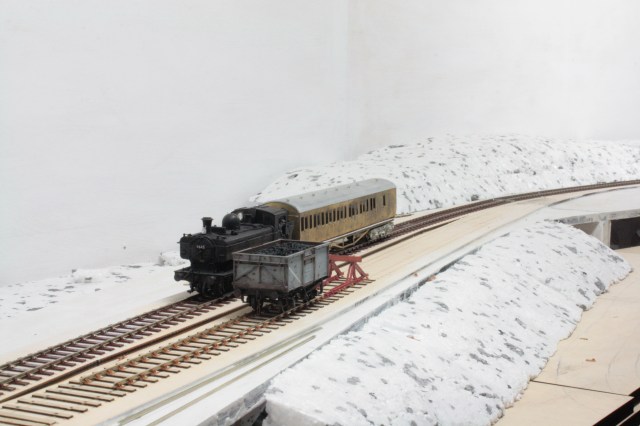
Ok, the bleak whiteness does make it look like it’s still been snowing up their since Christmas!
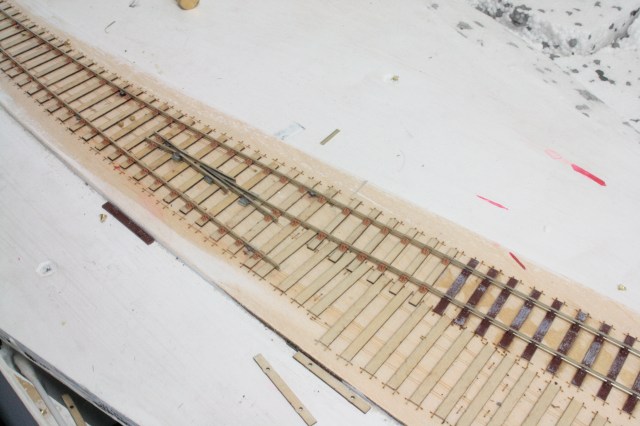
The bufferstop has now been made, and the siding partially laid.
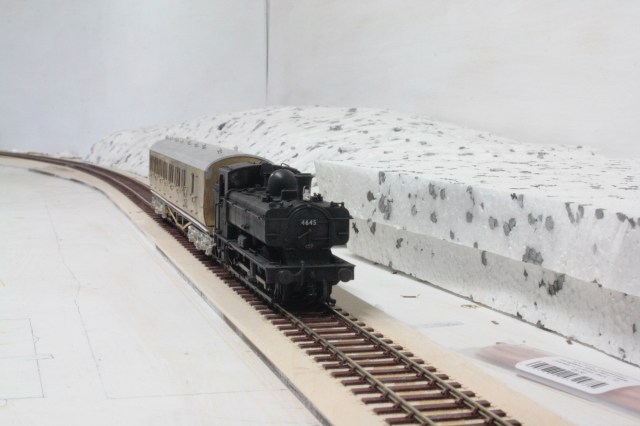
At 7.17am, 4645 passes the former loop, now siding….with the 6.45am off Bala, due at Blaenau Ffestiniog, 8.36am.
Today I finished the laying of the track on the Main Line. It generally went well, although a touch of fettling was required on the track that crosses the baseboard join.
As some of you may know, the loop at Cwm Prysor was taken out in 1951, leaving a dead end siding. It had niggled me I was modelling the 1950s and retaining the loop.
From a practical route I’ve decided to model it as a siding. This makes no need for a control panel, a cobalt lever will suffice, and trying to find a time for a friend to come up to finish the points was looking difficult. The point that needs to stay only needs switch blades and check rails to finish, the other had hardly been done so easy enough to remove the timber sleepers. So it’s a big enough job I feel comfortable with taking on.
This is my first proper layout, I’ve never wired before so on this one, I wanted it be as simple as possible. I can still shunt on down trains and still run all the existing stock as planned, and it’s more accurate for 1950s Cwm Prysor.
I’m rather pleased with how the timber sleepers now match up to the SMP track work. In the next day or so I’m going to make the Lanarkshire Models GWR Buffer stop up, and then begin laying the siding, making the trap points and finally finishing the point.
A friend I hadn’t seen for some time came over today to drop back my Noch Grassmaster. I brought him to see the layout and the first thing he said was ‘is it P4 or EM’, it just shows the effect making your own points and fine scale track can have, even in OO.
Last weekend, I spent an enjoyable time in that wonderful country, Wales. The two days were spent admiring railways in 4mm and Standard Gauge. The plan had initially been made for me to also make a visit up to Cwm Prysor but the weather showed snow….so plans were changed!
Saturday, Alan Buttler and I headed over to Geoff Taylor’s for some banter and chin wagging. Geoff kindly programmed two of my panniers, 4645 and 9793. 7428 was also taken along for some posing. Many thanks again to Geoff, for letting me run and pose my stock on the layout. Also thanks to Alan for allowing me to share his photos, the guy really does have an eye for photography.
4645 with a pick up goods passes the Mawddach Estuary.
7428 passes the George Hotel at Penmaenpool
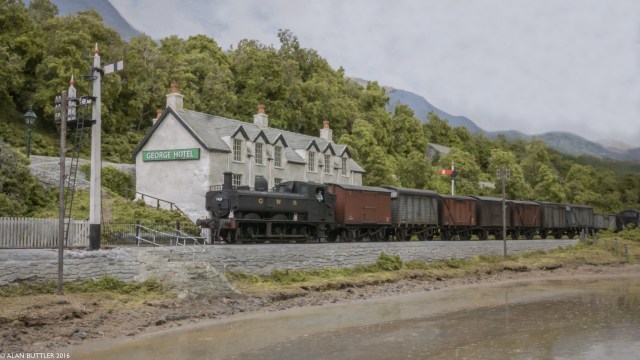
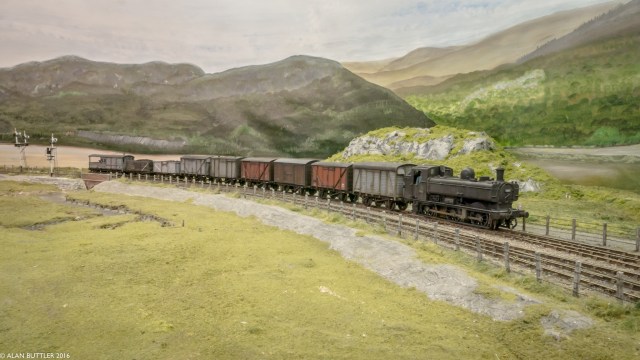
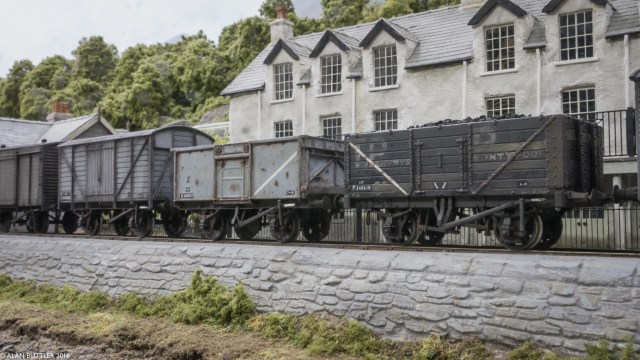
My 16T and the ex Pontypool PO trundle by
Sunday saw Alan and I heading off for a lovely day on the Llangollen Railway and their Spring Gala. The whole thing had a Cambrian theme which was simply perfection! Seeing two Manor’s in BR Black, on their former stomping ground was something that wasn’t too be missed. The highlight for me though, was a return journey in a Toad Brake Van. It’s something I had always fancied, but never had the opportunity to do before. Once again, thanks to Alan for allowing me to share his photos.
7820 at Llangollen Station….to think where the railway has come in 40 years.

Double headed Manor’s….a pure spectacle!

The Cambrian Coast Express arrives at Carrog Station.

A timeless scene at Carrog, time travel is possible!

Special thanks to Matt Davies, and his colleagues for creating a truly wonderfully themed Gala. Was a cracking day and weekend all round.
On that note, better head off ready for tomorrow’s visit to Scale Four North.
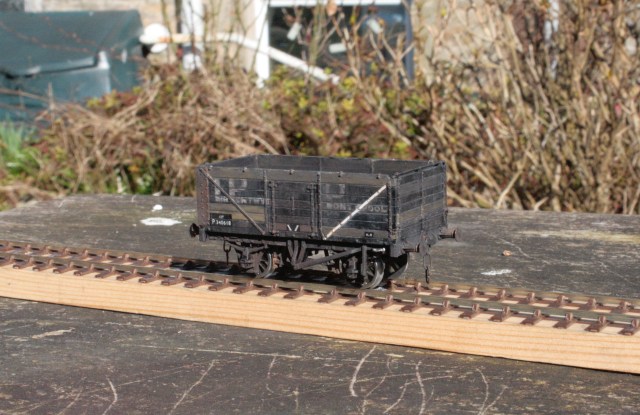
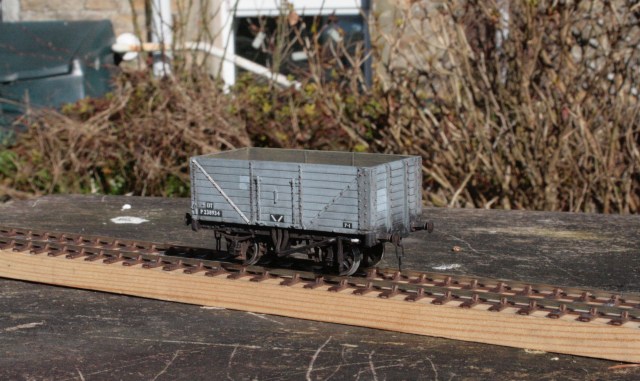
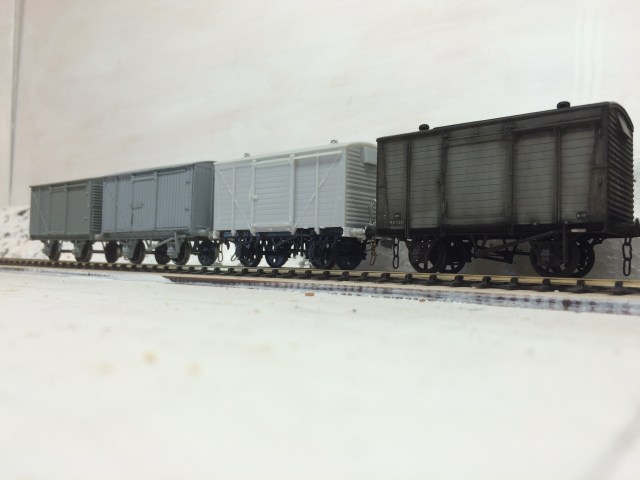
So from the 16T, I have moved onto the planked ex Private Owner. The RCH design is most familiar to ex railwaymen and modellers a like. When we tend to think of POs, it’s easy for our mind to only think of the brightly coloured wagons supplied by model railway manufacturers. I think we have all been to several shows where their bright liveries have been seen festooned on many a BR period layout. The truth of the matter is that, yes at one time the POs were relatively well maintained by their owning companies, however the degradation had set in during the Second World War and come the Nationalisation of the Railways in 1948, they were all inherited by the newly formed BRITISH RAILWAYS. Like they had in the war, BR were relatively happy to continue to patch them up where possible and simply add new P prefix numbers.
I picked up this Tir Pentwys Pontypool PO a few weeks ago for a good price (I’ll go onto cost comparisons later) and it felt somewhat appropriate. The first stage was the use of a fibre glass brush, to just distress the lettering slightly, but to also give the paint something to key too. The next stage was the adding of replacement planks and further washes followed. The interior was also painted and given several dirty washes. Transfers added were from Model Master, and further washes to finish. The chassis as to represent wood, was painted with a mix of Matt Black and Humbrol 98 ‘Chocolate’ (another method picked up from Ian Fleming). Final touches was the addition of a little bit of powder work on areas of the chassis.

Another cliche that you see on layouts is to the other extreme, exPOs all in unfitted grey. From what I have read, when BR decided upon it’s wagon liveries, it wasn’t automatically transferred over to the older POs, rather being concentrated on new wagons being built. It wasn’t until around 1958 that someone high up at BR instigated the painting of the ex POs, and at that stage it was only ever going to be a smaller number that received the livery, as scrapping of older pre war wagons was somewhat imminent.
Photographs too can be deceptive. It’s quite easy for what can appear to be an unfitted painted wagon, to actually be bare timber. However I have seen a couple of photos on the Blaenau Branch of grey exPOs, and I do like the livery. Now some may say I am being hypocritical in my time period of operation (1953-1959), so periods are somewhat mixed regarding stock. However along as I get the balance right, I don’t believe this to be too much of an issue.
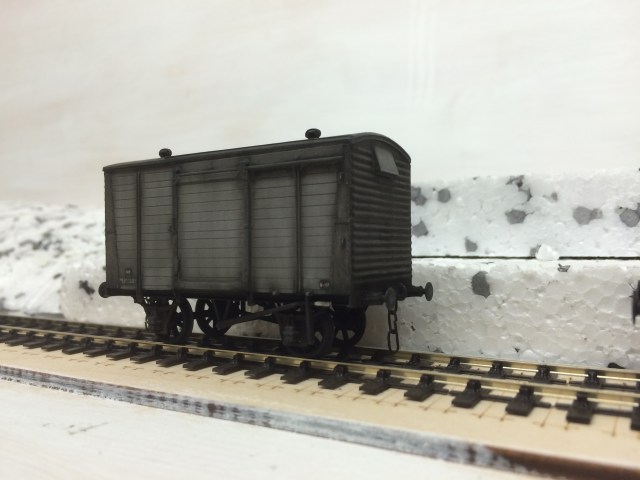
My exPO was a Bachmann Grey model I bought a year or so ago, however my views on this are well known to my blog readers, and it’s been repainted with Revell 76. With this one, I wanted this to be in relatively good condition, with just a small amount of weathering (slight rust on the iron work) to take the edge off it.
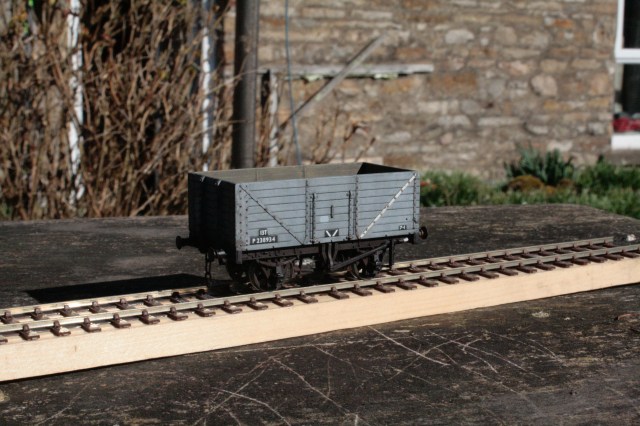
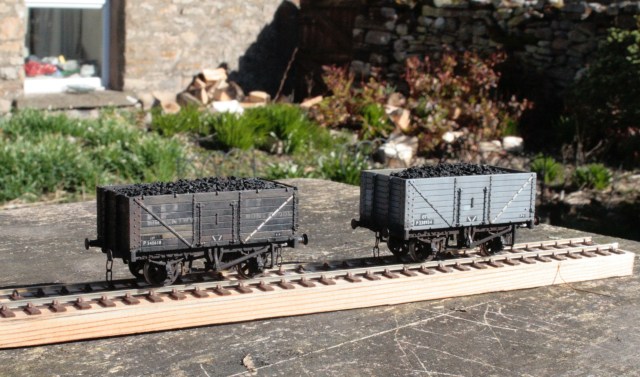
As can be seen in the first photograph, both wagons have been fitted with my removable coal (based on the Geoff Kent method, but with a twist) more information of which can be found on my thread on Modellers United here. Both wagons have been fitted with Ambis hooks and links.
I touched on cost earlier. Now the Tir Pentwys PO, I purchased last week brand new for £7.45. I have picked up a pack of three limited edition Bachmann POs (theres a nice Cambrian branded one in there) and individually they worked out at under a tenner each. I had considered purchasing the new Oxford Rail PO, but once I saw the work required to bring it up to the same standard as the Bachmann model and as I could obtain Bachmann models for the same/lower price, I couldn’t see the point and would prefer to focus my modelling skills elsewhere, but each to their own. 🙂
To bring this to a close, it’s been a rewarding project. The Tir Pentwys although wasn’t timed, must have taken in the range of 3-4 hours, but it’s been very enjoyable. Once again, like I mentioned in my 16T article, the most important aspect as been preparation and research. Instrumental again has been the works of Geoff Kent and John Hayes.
Finally, I’d like to wish my followers a very Happy Easter, and for those going to York Show, see you on Sunday. 🙂
Tom
Excellent musings from modeller and friend Andy Jones.
This post has come about for 2 reasons. The main reason is the brake van pictured above and the other I’ll get to later.
Now the brake van pictured above is a SECR 20t 6 wheeled goods brake van diagram 1558. 40 were built in 1898 that had one open and one enclosed balcony. These were later rebuilt and had different framing on each end compared to the 50 later 1910 design that had two enclosed ends from new. Most passed into BR ownership but were withdrawn between 1949 and 1960. One has survived and is based at the KESR.
The model I have was picked up cheap at the Manchester show in December and I originally thought it was a Falcon Brassworks kit going by the weight of it. It wasn’t until I got it home and was trying to take the EM gauge wheels out to replace…
View original post 640 more words
Over the past week, my hobby time has been spent working on the Bachmann BR 16T I repainted in my last update. This was a project I had initially been dreading, as steel bodied 16Ts have a particular look, and many models I’ve seen just do not look right.
When it came to adding the ‘rust effect’ I did keep going back to Ian (windcutter) Fleming to see what he thought, who offered suggestions and advice which I appreciate. On something like this, I think it’s always good to have another set of eyes on the project.
Several days later, and here are the results.
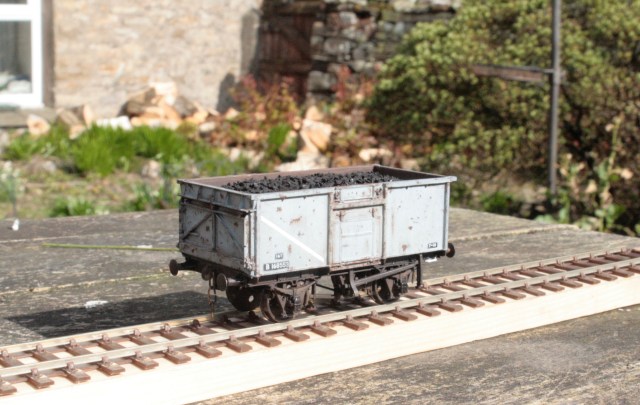
The chassis was treated with a mix of Revell 84 and Matt Black (another tip picked up from Ian’s blog). Further treatment with powders made the finishing touches to the chassis. The interior was painted with the same paint mix as the chassis, before being finished with powders which has given a rather pleasing effect. I didn’t feel the need for the airbrush and I feel it’s always good to broaden ones techniques.
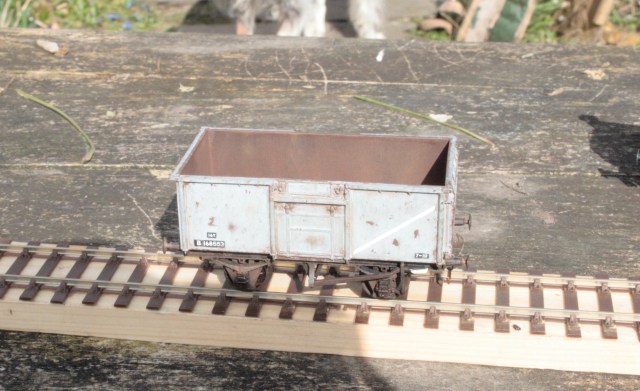
I am aware that the Brake push rods have been fitted the wrong way around, something Bachmann seem to have a habit of doing. It’s not the only Bachmann model I’ve seen in my fleet that has also been fitted the wrong way around. I had looked to swopping them around, but sadly they are only detailed on one side. For the moment they will stay and will be possibly be replaced at a later date.
As a conclusion, I think the most important aspect of this weathering project was preparation. I’d spent some time thinking how I was going to approach this wagon, consulted modelling friends, prototype photographs and Geoff Kent’s excellent volumes on 4mm wagons.
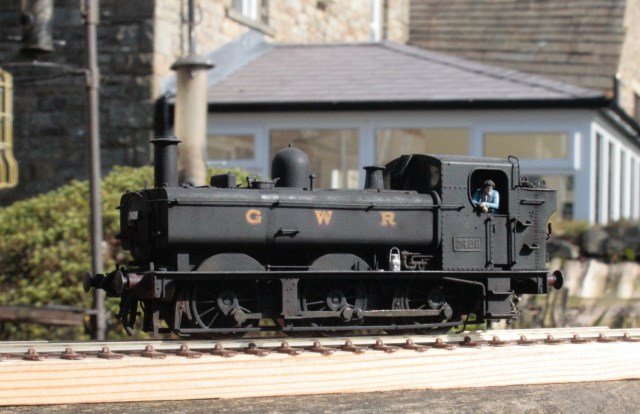
I also took the opportunity of good sun light (yes I know…don’t fall off your chair at that prospect) to photograph 7428 outdoors, still very pleased with the finish on her.
I’m near to finishing work for Easter, so I’m looking forward to starting work on a 1950’s ex PO. York Show next weekend where I will be stewarding and a trip down to the Llangollen for their Spring Gala. Plenty to look forward to!
Cheers for now!
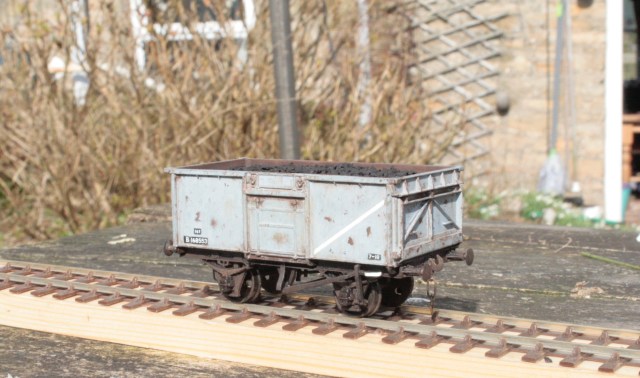
Keeping with the rolling stock theme in mind, I’ve moved my attention to mineral wagons. I don’t need a mass of them, but I certainly need a few (one/two per pick up goods). To be honest, I’ve been putting off working on a 16T, as I knew I would be venturing into new ground….certainly not a case of a few washes down the body work. I’ve seen various methods of 16T Mineral weathering, the current fad seems to be involve maskol painted over. For me, the result doesn’t cut the mustard (from what I’ve seen). I’ve mentioned Ian’s work before, but the results on 16Ts just look right to me and it’s along similar methods I shall be following. (check out some of Ian’s examples here).
First stage, (as I do with all my unfitted stock) is a repaint with Revell 76.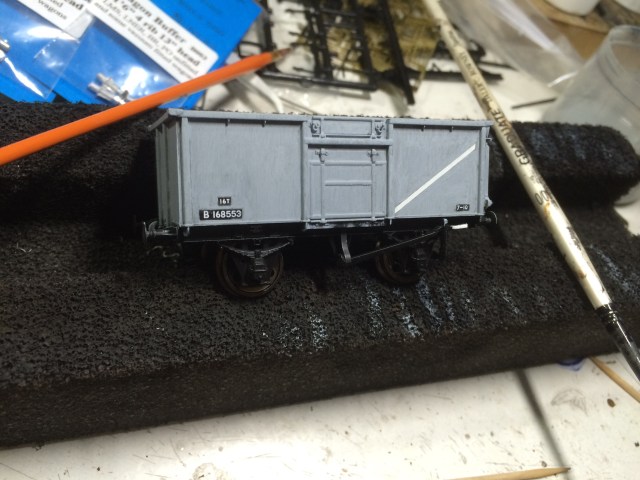
Bachmann’s grey has always seemed too dark too me, and originally I had intended to retain some of my stock in the original colour for variation, but in the end I couldn’t live with it so now all stock is repainted. The nice thing is that due to weathering, and varying plastic colours, although painted in Revell 76, not one item of unfitted rolling stock is the same colour as the next.
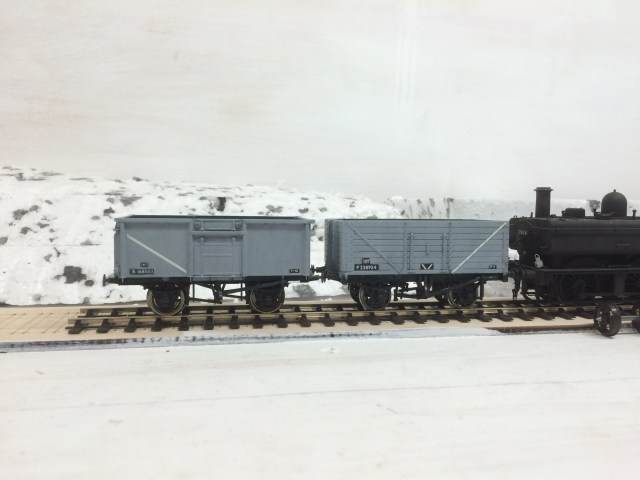
For a point of reference, where you are looking at now is precisely where Cwm Prysor Station will be. Next to the 16T, is a Bachmann wooden bodied mineral (LMS design I think) which I too have repainted into Revel 76. The wooden bodied wagon has had replacement Romford wheels fitted as the Bachmann wheels were incredibly wobbly (anyone else finding this?)
Both wagons are being a left for a week to allow the paint to harden.
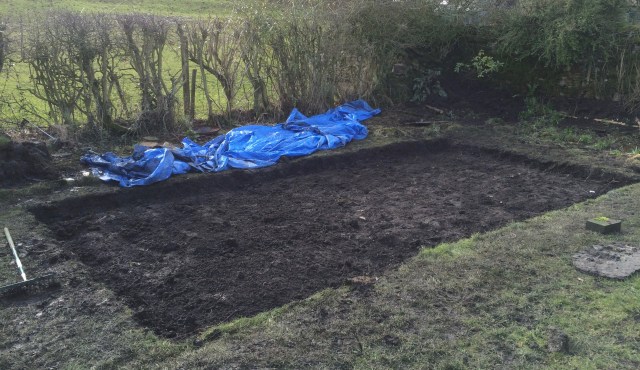
Meanwhile… Cwm Prysor’s home is getting that bit closer….
That’s all for now folks! 😉
Like many things, variety is the spice of life as they say. I find that I go through phases of what I enjoy modelling. Occasionally I fancy working on a Pannier, other times rolling stock and currently, it’s vans that have my attention. I find Vans in particular interesting (I blame that Pennine chap!), in particular those of the former London Midland and Scottish Railway.
I think it’s the distinctive high sides and shallow roof profile that appeals. It’s just over a year since I built my first wagon kit, a Ratio LMS Van. It was a rewarding experience since the current RTR version is wrong (ex Mainline and currently in the Bachmann range).
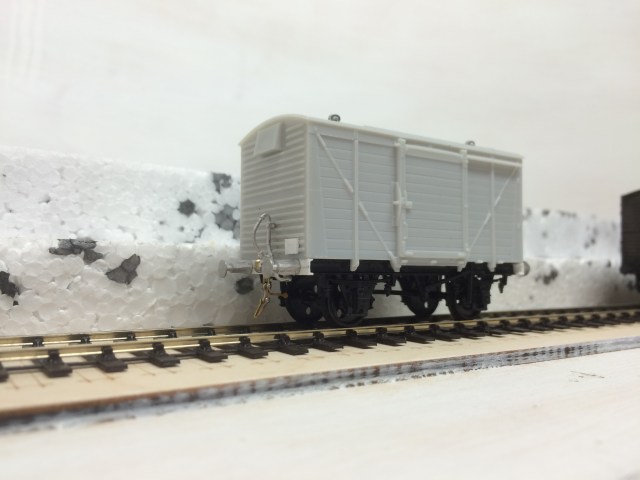
Next up is something a bit different. The body is the old airfix model (now available from Dapol). It depicts a BR Dia 1/204 which although built by BR, is very much an LMS design. The under frame is Parkside Dundas’s PA16 chassis kit, buffer beam fabricated from Plasistruct channel, with Lanarkshire Models Buffers/Vac pipes and masokit screw links to finish. For more information on the subject of this conversion, check out Ian’s blog post on the LMS van varieties.
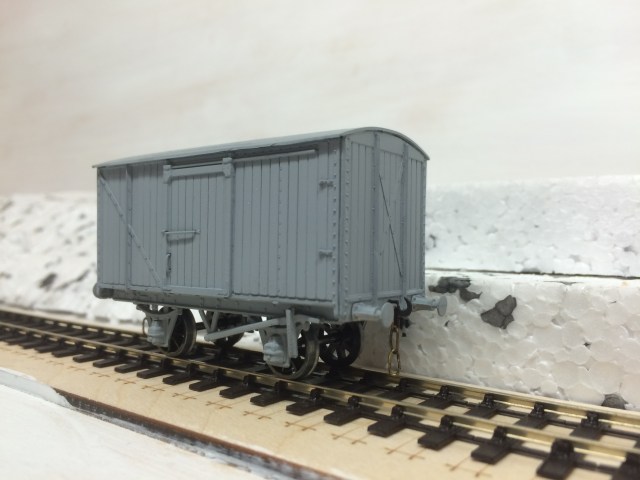
Next up is a Van I built just under a year ago (I think it was my second wagon build) and is a Cambrian Models kit. It represents D1664, a modified Midland design. I only got around to painting this a month ago (during a batch session I painted a V16 Mink and Bachmann Toad). I intend to get this Van numbered up and weathered in the coming weeks. Construction wise it didn’t go together as easily as the Ratio van, although in some ways a challenging kit becomes that little bit more rewarding.
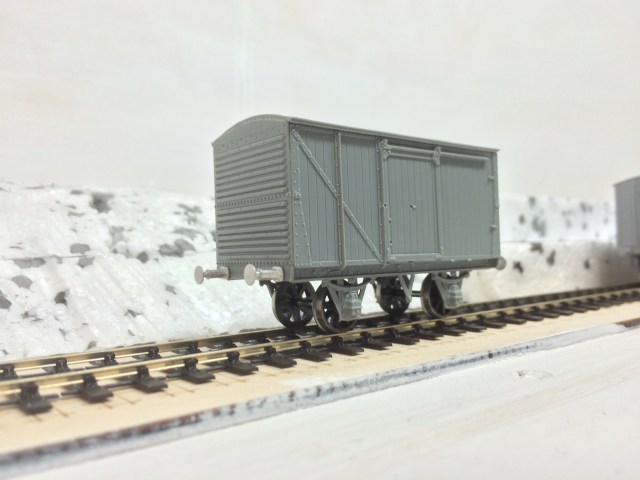
Finally, another Cambrian kit. and in this case it was the first corrugated ended van the LMS built I believe, a D1663. I have literally built this today and have the under frame detail to work on next. I’m going to build this as a fitted example, to be finished in Bauxite. Buffers are from Lanarkshire Models once again.
I’ve put a further order in for some more LMS vans from the Cambrian range, generally of the older diagrams. Meanwhile, I am also working on another Ratio Van with Parkside under frame. It’s a case of now is the time for getting the bulk of the goods stock underway, because once the Spring arrives and Cwm Prysor moves to it’s new home, layout work will be taking priority.

You must be logged in to post a comment.