Add, edit, or remove unnecessary checkout fields, collect customers’ specific information, and optimize checkout fields order. Improve user experience and increase conversion rates with the Checkout Fields Editor module.
It lets you professionally customize checkout fields to improve the checkout process and reduce cart abandonment rates.
Through this “Checkout Field Editor” Module, you can improve user experience and increase conversion rates. It has 4 different tabs: General, Billing Fields, Shipping Fields, and Additional Fields.
1. General
Click on the general tab.
1.1 Enable Checkout Field Editor? Toggle this button to activate the checkout field editor. This action is mandatory.
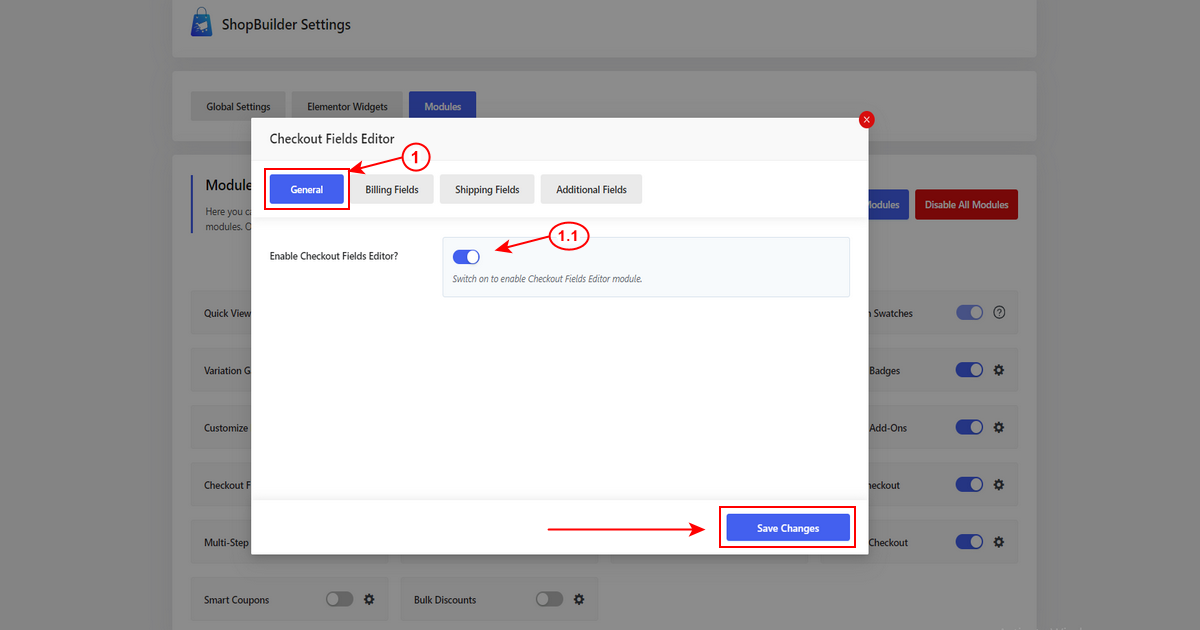
Now, click on the “Save Changes” button to save the updates.
2. Billing Fields #
Now, click on the Billing Fields tab.
2.1 Customize Billing Form? If you want to customize the billing form, enable this option. This is mandatory.
2.2 Custome Billing Title: You need to insert a custom title. This title will appear on the order edit page, in the order email, and on the thank you page.
2.3 Billing Fields: In this section, you can edit the settings of each field according to your choice. You can add, edit, or remove unnecessary fields.
2.4 If you want to add more custom fields, simply click on the “Add Custom Field” button. You can fill out the field as per your requirements.
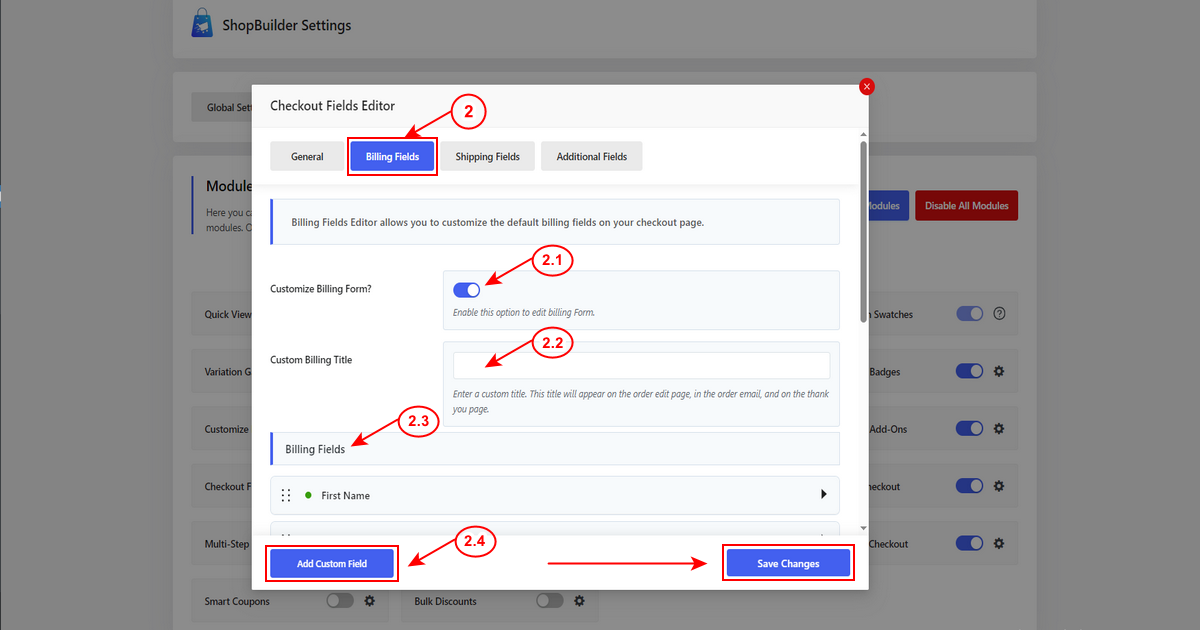
Now, click on the “Save Changes” button to save the updates.
3. Shipping Fields #
Now, click on the Shipping Fields tab.
3.1 Modify Shipping Form? If you want to edit the shipping form, activate this option. This is required.
3.2 Custome Shipping Title: You need to enter a custom title. This title will appear on the order edit page, in the order email, and on the thank you page.
3.3 Shipping Fields: In this section, you can edit the settings of each field according to your choice. You can add, edit, or remove unnecessary fields.
3.4 If you need to create more custom fields, simply click on the “Add Custom Field” button. You can customize the field according to your preference.
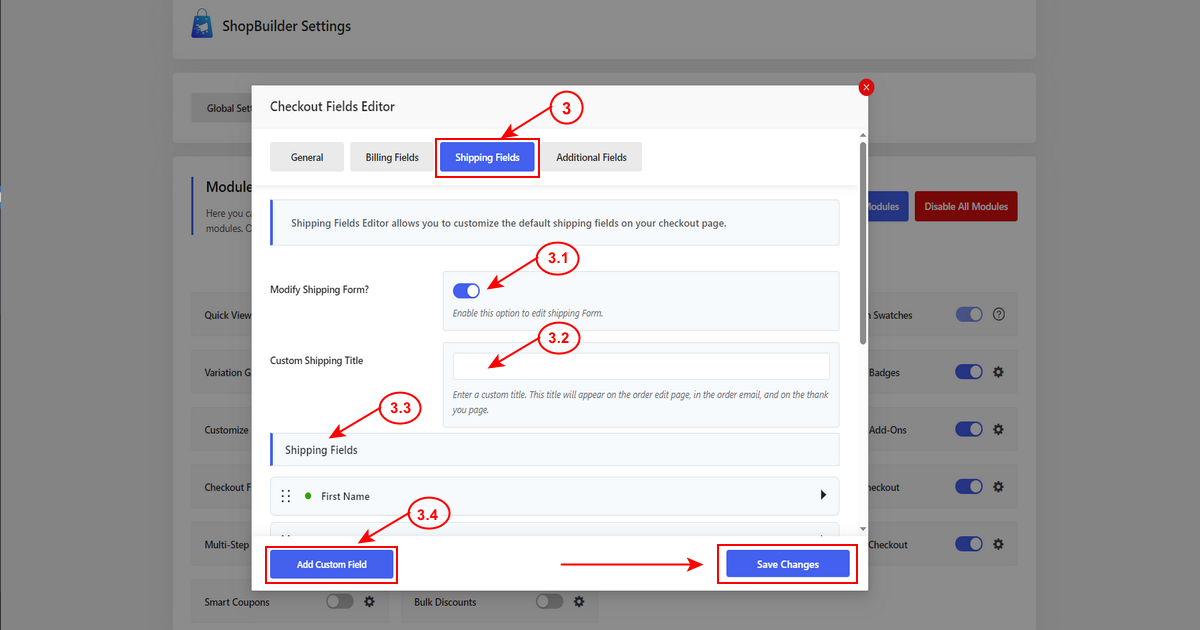
Now, click on the “Save Changes” button to save the updates.
4. Additional Fields #
Now, click on the Additional Fields tab.
4.1 Modify Additional Form Field? If you want to customize the additional form field, switch on this option. This is mandatory.
4.2 Custome Information Title: Add a custom title. This title will appear on the order edit page, in the order email, and on the thank you page.
4.3 Additional Fields: In this section, you can edit the settings of each field according to your choice.
4.4 If you want to add more custom fields, simply click on the “Add Custom Field” button. You can fill out the fields as per your requirements.
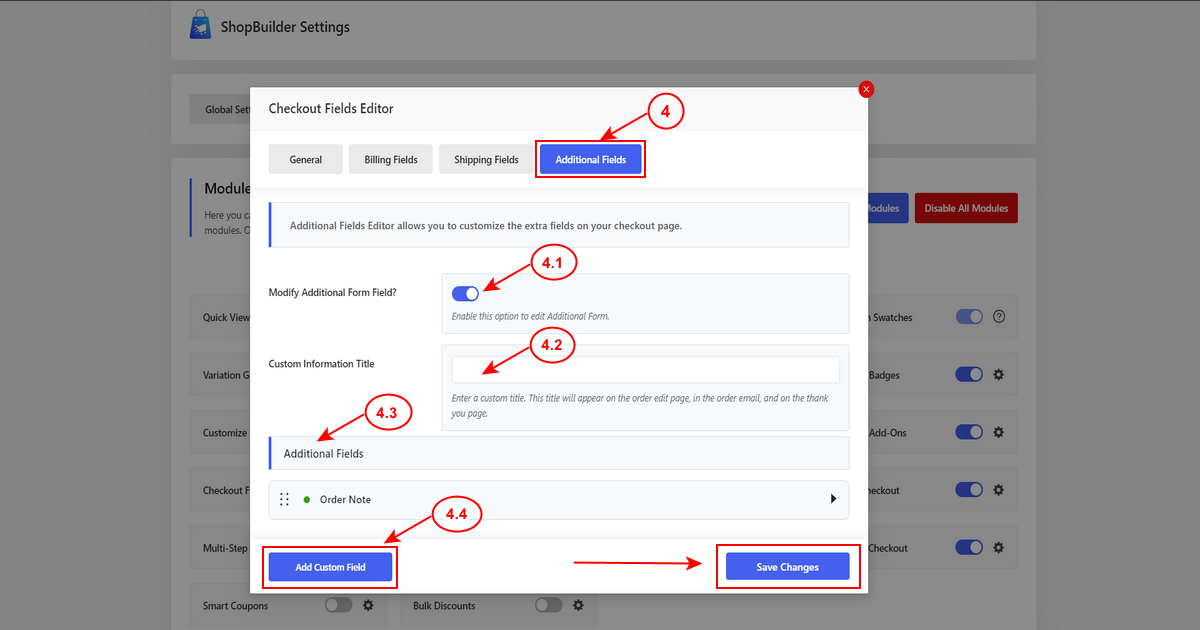
Now, click on the “Save Changes” button to save the updates.
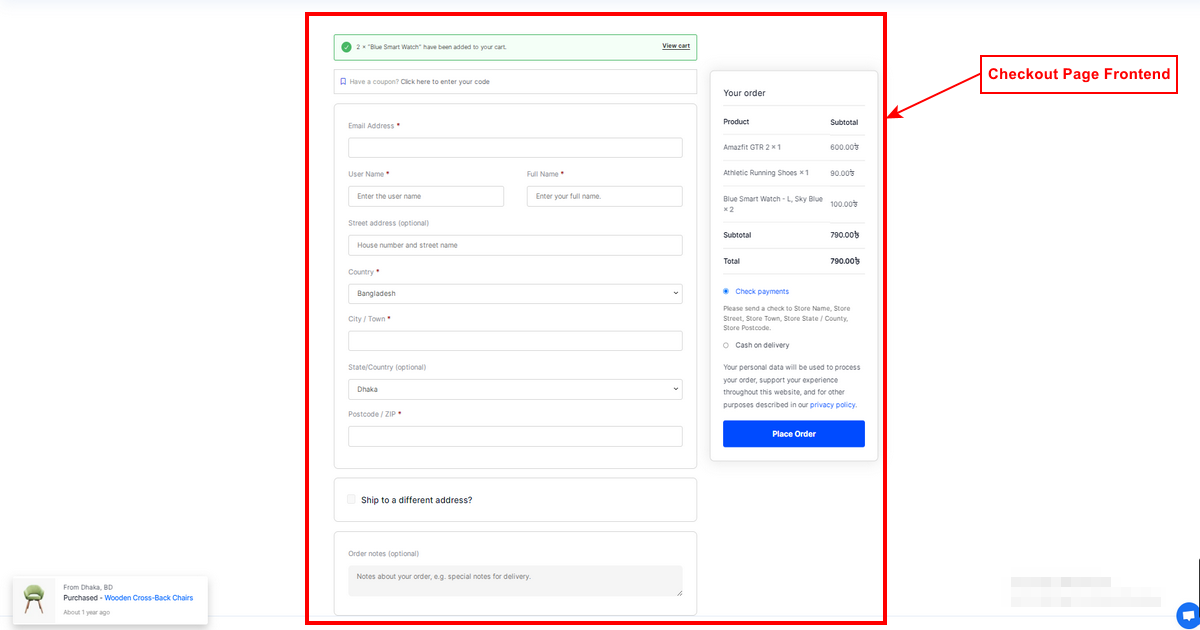
Front End View of Checkout Field Editor Module #
Below, you can see the Checkout Page Frontend.