Adding partial payment options can skyrocket conversion rates. This module provides a great experience and flexibility for your customers. This will allow your customers to pay in part when they cannot give the full amount. This will assist you in losing orders.
It has 4 tabs: General, Partial Pay Rules, Notification, and Style.
1. General #
1.1) Enable Partial Pay: Toggle this button to activate the module.
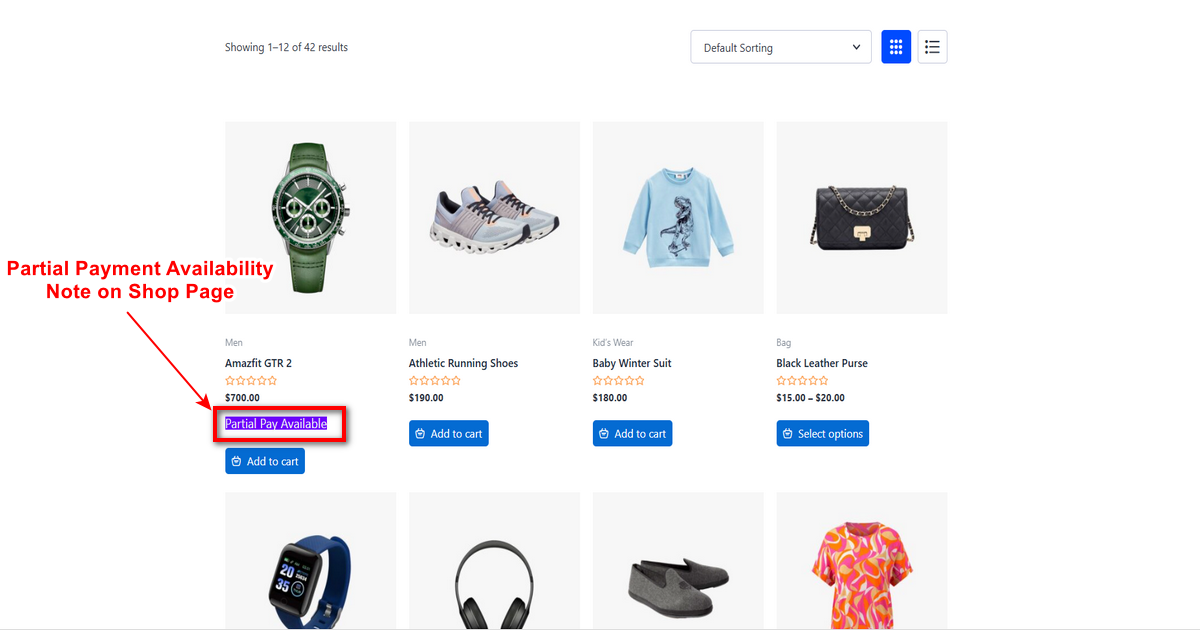
1.2) Show Partial Pay Availability Note: You can activate this option to display a discount availability message in the shop, archive, related, upsell, and cross-sell sections.
1.3) Default Payment Type: Select a payment method that you wish to set by default. Choose partial payment or full payment.
1.4) Restrict Payment Method in Checkout: You can restrict the preferred payment method from the dropdown. You can hide the particular payment method on the first checkout, but for the second installment, all payment methods will appear.

1.5) Due Date After Payment (Days): Set the number of days after the initial payment when the remaining balance is due.

1.6) Send Reminder Before Due (Days): Specify how many days before the due date the customer will receive the reminder email.
1.7) Disable Coupons: Switch on this option to automatically disable coupons if any product in the cart has a partial pay product.
1.8) Partial Payment Input Label: Insert the label for partial payment.
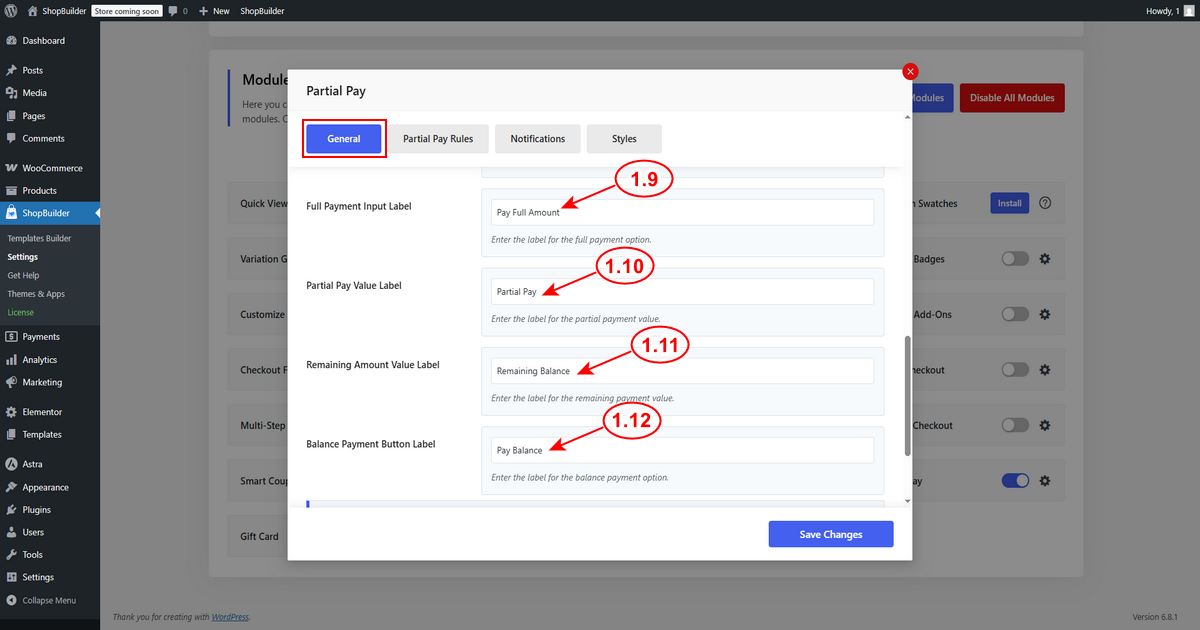
1.9) Full Payment Input Label: Write the text for the full payment option.
1.10) Partial Pay Value Label: Insert the label for partial value.
1.11) Remaining Amount Value Label: Enter the preferred text for the remaining amount value.
1.12) Balance Payment Button Label: Input text for the balance payment option.
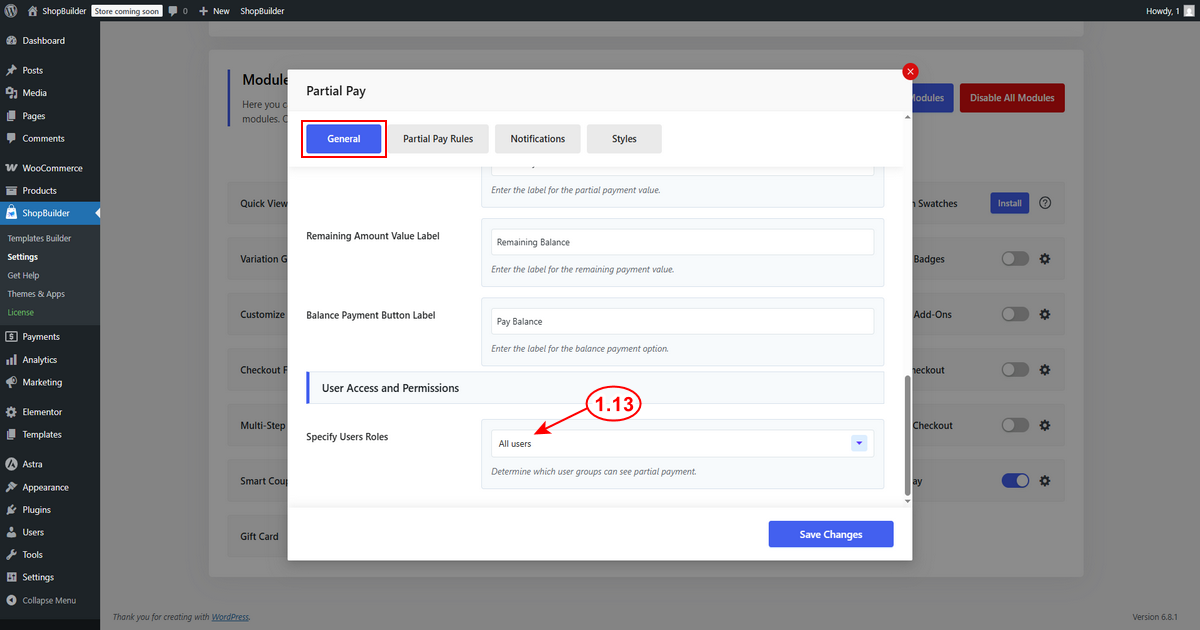
1.13) Specify User’s Role: Determine which user group can see partial payment.
2. Partial Pay Rules #
Now, move to the “Partial Pay Rules” tab.

2.1) Click on the “Add New” button to make a new rule.
2.2) Rule Title: Determine the title of the rule.

2.3) Applicable For: Specify whether the partial pay applies to selected products, categories, or tags from the dropdown.

2.4) Applicable Products: Choose specific products to include. Leave blank to apply the partial pay to all products.
2.5) Amount Type: Determine how you want to receive the payment. Choose fixed or percentage amount type.
2.6) Partial Pay Amount: Enter the partial payment amount based on the amount type you have selected above.
Now, click on the “Save Changes” button to save the updates.
3. Notifications #
3.1) New Partial Payment Received Email (For Admin): Activate this option to enable this option to send an email to the admin when an order contains a partial-pay option.

3.2) Partial Payment Confirmation Email (For Customer): Enable this option to send a confirmation email to customers when they order partial payment products.
3.3) Partial Pay Balance Expiration Reminder Email: Toggle this button to activate the option to deliver an email to customers when a partial payment balance due is about to expire.
3.4) Partial Payment Expiration On-Hold Notification Email: Enable this option to send an email to customers when their partial payment has expired and the order has been placed on hold.
Now, click on the “Save Changes” button to save the updates.
4. Styles #
Now, click on the Styles tab.
4.1) Shop / Archive Text Styles: Customize the text visuals settings.

Font Size: Determine the font size.
Text Color: Choose the text color.
Background Color: Select background color.
Border Radius: Fix the border radius. Ex. 10px | 5px 10px | 0 5px 5px 0.
Padding: Change the padding. Example: 15px.
Margin: Set margin. Example: 0, 15px, 15px, 15px.
4.2) Partial Pay Form Style
Field Primary Color: Select primary color for the field.
Field Background Color: Choose the background color.
Field Label Color: Set the label color of the field.
Field Price Color: Choose field price color.
Field Text Color: Determine field text color.
Field Border Color: Fix the border color of the field.
Border Radius: Apply border radius if required. Ex. 10px | 5px 10px | 0 5px 5px 0.
Margin: Choose a margin. Ex. 10px | 5px 10px | 0 5px 5px 0
- Now, click on the “Save Changes” button to save the updates.

Partial Pay Settings on Edit Product Page #
Move to Products → All Products and edit the particular product you want to customize. .

1) Click on the “Partial Pay” option.
2) If you want to remove the partial payment option from the product, then click on “Disable Global Rule”.
3) Enable the “Override Global Rules” for customization. After activating, you will notice several settings.

Amount Type: Determine how you want to receive the payment. Choose fixed or percentage amount type.
Partial Pay Amount: Enter the partial payment amount based on the amount type you have selected above.
Due Date After Payment (Days): Set the number of days after the initial payment when the remaining balance is due.
Send Reminder Before Due (Days): Specify how many days before the due date the customer will receive the reminder email.
Front End View of Partial Pay #
From the shop page, customers can easily see the partial pay note on the products.
Partial Pay options on the product detail page.

Partial payment details on the cart page.

Partial payment details are on the checkout page.


