Serverles AWS Lambda – Part 2: Retrieve data from AWS DynamoDB

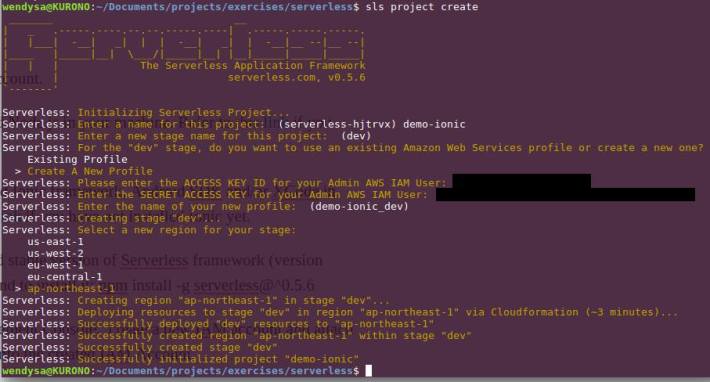
In this past article , we learned how to create our 1st AWS Lambda service through using Serverless framework. Our current Function in the project, currently exposing GET HTTP verb and when it is invoked, it returns a list of harcoded blog objects. In this arcitle, we are going to extends its capability, by refactoring this part, to not returning hardcoded array. Instead, we are going to return an array of objects where are stored in AWS Data Storage service.

DynamoDB vs SimpleDB vs RDS (Relational Database Service)

AWS offers 3 Database Services to customers as follows: DynamoDB (a NoSQL database solution) , RDS ( Relational Database service, hosted & handled by AWS) and SimpleDB ( a similar NoSQL database to DynamoDB, yet AWS seems `hide` it from customers, but it’s accessible ). Among of these 3 options, I rule out RDS, because its pricing is the most expensive compared to the others (https://aws.amazon.com/rds/pricing/).

So we have SimpleDB vs DynamoDB now. DynamoDB is popular and widely used. However, in terms of query speed & price, SimpleDB is more attractive compared to DynamoDB on a certain case. I am tempted to choose SimpleDB over DynamoDB, but since in this sample, we are going to build the backend API for a kind of blog application, DynamoDB is mentioned as suitable choice for this case. However, in future articles, I will cover the SimpleDB version of this sample, because it’s still interesting to me.


Initialise blog table on AWS DynamoDB

  • Open Blog project’s serverless.yml file and then add these resources entries.
15442222_10209531126492450_6453505499330815730_n
Add resources block in serveless.yml

The resources section we added in serverless.yml file in there, is a way of telling serverless for creating a new DynamoDB table on AWS. In the section we define the table’s name, a String typed Attribute that we defined as the Primary key for this table and initial Read & Write Capacity units of the table. As for other attributes, we will add them when we are going to create records later.

  • Once we have saved the changes in serverless.yml file, let’s go back to command terminal and invoke serverless deploy command for deploying the service. You may want to remove prior deployed service by running serverless remove command 1st.
15492048_10209533696276693_8348512342170787345_n
Running serverless deploy command
  • Now we are going to check the created table and add records on it. Let’s login into AWS Web Console using your Account and look for DynamoDB home page.
15542284_10209526893986640_8278991969420752178_n
Accessing DynamoDB’s Home Page
  • Go to DynamoDB Tables’s page. Confirm that you notice the Blogs table appear on screen. Select it and then click Items tab.

15440518_10209527049990540_3733155806861019371_o

  • On the Items tab view, click Create item button and confirm that a modal dialog as in this following screenshot appears.
15439827_10209527249635531_182565783167740202_n
Access DynamoDB Create Item page
15439976_10209527261395825_443327492936059599_n
DynamoDB Create Item Modal
  • Through accessing the popup menu, add 3 more attributes (columns) and fill them with strings as their values.
15578480_10209527865330923_6722338196689040398_n
Add more attributes with values
  • As for the id, we are going to assign it with UUID. To generate the UUID, we can use available tool such as in this site.
15492602_10209528130057541_4408324398395814107_n
Assign UUID on id attribute
  • Repeat prior steps to add as many records as you want. You could go to Actions menu -> click Duplicate button for doing this.
15577903_10209530053905636_5985571610743560938_o
Created Blog records

Setup AWS SDK for Node.JS

AWS provides SDK for developer which contains various APIs for accessing their services, including DynamoDB. We need to use the SDK for Node.JS in our Lambda function for accessing the DynamoDB Table we created in previously.

  • In the lambda project, ensure that it has package.json file. Otherwise, we will need to create it through running npm init command.
15590010_10209534771183565_2910924853169733744_n
package.json file
15590464_10209534788944009_2455790222455992124_n
running npm init command for creating package.json file, in proper way
  • Once we have finished prior step, we’ll install the AWS SDK inside our project through running npm install aws-sdk –save command. The extra –save argument on the command will add an entry in the package.json file, to ensure that when CloudFormation building our lambda, and run npm install command, npm would install the AWS SDK library into this project.
15578542_10209536533947633_7211788418072510870_n
Installing AWS SDK
15492538_10209536541747828_8470975299309866365_n
AWS SDK entry in dependencies section of package.json file
  • Ensure that you have setup your IAM account’s Access & Secret Keys. If you are not sure with this, open ~/.aws/credentials file and ensure that there are lines which define these keys entries. If not, follow guide in this site.
15590609_10209535294556649_42198199827940078_n
content of ~/.aws/credential file

Refactor Blogs resource’s GET verb – Phase 1

As we have done in prior article, we created retrieveBlogs helper method which returns a list of hardcoded blog objects. We are going to create a new method for replacing this retrieveBlog method. Here is the steps of how we are going to do this.

  • Remove the retrieveBlogs method from handler JS file. Move the removed method’s hardcoded lines into a class, we name it as DynamoDbDataService class. Change the handler JS file to instantiate the new class and call its getAll method.
15578204_10209543119832276_3459169278569822042_o
Moving retrieveBlogs method into the new DynamoDbDataService class
  • Then, in the Handler JS file, we change the code by importing our new class, instantiate & initialise the new class and call its getAll method for retrieving the Blogs items from AWS DynamoDB.
15338663_10209543486281437_4971861985644717314_n
Changed Handler JS file to use our new DynamoDbDataService class
  • Before we move to next refactoring phase, we’ll invoke serverless invoke local command 1st to ensure that there are no errors in our new code.
15492125_10209535931132563_9057149045344926516_n
Test our refactored lambda function in our local machine

Implement calls to AWS DynamoDB using AWS-SDK

  • Let’s go back to DynamoDbDataService class. On the early lines (below ‘use strict’ line), we’ll put a statement to import AWS-SDK library.
15621720_10209543639045256_8136405371073962034_n
Import AWS SDK
  • Moving to the constructor part, we write lines to initialise the AWS’s configuration property. We want to tell AWS SDK which AWS Region that our Lambda Service is deployed to. We could hardcode it to a specific region such as us-east-1, ap-southeast-1 , etc. But, we won’t do this way. Because we don’t want to change this line in the future if we want to deploy the Service to different region.
    AWS has provided an environment variable AWS_DEFAULT_REGION which filled with correct AWS Region of where our Lambda service deployed to, in the cloud environment. Therefore, we are going to get the AWS Region from AWS_DEFAULT_REGION environment variable, instead of hardcoded it.
15492400_10209543745727923_6070001576467098088_n
Initialise AWS SDK & Region inside constructor
  • Removed all hardcoded lines inside getAll’s returned Promise object. Then, we’ll start with instantiating AWS.DynamoDB.DocumentClient type. This type expose methods which one of them can be used for pulling data from a DynamoDB table – the scan method. scan method takes TableName as a required parameter. We build the scan’s parameters which consist of TableName & Limit(define maximum number of returned records). We assign the tableName & numberOfItems property’s values into these parameters. Next, we call the documentClient instance’s scan method and pass the params as its argument. When the call is finished, the callback in the method’s 2nd argument is triggered. Inside the callback method, we check whether the calling process is ended as giving error or result. Should it is ended as error (err is not null), we call the promise’s reject method and takes the err object as its argument. Otherwise, we call resolve method and takes the result (data) as its argument.
15622538_10209543768088482_3759355797743570048_n
Re-implement the getAll method

Testing the changes in local development machine

  • At this point, we should be ready to test our changes. Before we deploy our code to AWS, it’s good thing to do if we test it first in our local machine. As usual, to do this, we will invoke this command to invoke the service, AWS_DEFAULT_REGION=<AWS Region of where your lambda sits on> serverless invoke local -f <lambda function’s name> . In our case, we will invoke the command as AWS_DEFAULT_REGION=us-east-1 serverless invoke local -f blogsFetch
  • Invoke the command and confirm that we got the result with status code is 200 and the body contains stringified retrieved data, came from our AWS DynamoDB’s table.
15589635_10209549143102854_3206144194476542933_n
Invoke changed Lambda function in local against AWS DynamoDB

Deploy to AWS and testing it on API Gateway test page

  • All should be still fine. It’s time for uploading our changed Lambda function to AWS. This time, instead of running serverless deploy -s dev -r <aws-region> command, we call this command for deploying only the Lambda code only (node.js code): serverless deploy -f <function’s name> -s <stage> -r <region>.We use this command because we don’t want to rebuild other resources such as the DynamoDB when deploying our updated Lambda code.
15578735_10209549236505189_1908013641050570633_n
Deploy the updated lambda using -f argument (deploy per function)
  • Although it was working fine when we tested our lambda in local environment, we still need to test the deployed Lambda function. This time, instead of using Postman for testing our API, we will do it in different way. We are going to test it through using API Gateway’s Test Page. Go back to our AWS Console page then go to AWS API Gateway service page. On the page, click Resources link in left menu. Then on Resources pane, click the GET verb. On right pane, click a Blinking Dot with label TEST link. This will bring the API Test page when we clicked it.
15585075_10209549347147955_5725502401346282511_o
Accessing API Test Page
  • Confirm that the right pane is refreshed and display the test page. On the page, there is blue coloured with thunder icon button, the test button. Click this button. This will invoke our blogs/fetch API.

15171049_10209549411429562_7284752223752980644_n

  • When the call is finished, we received “Internal server error”. We will cover how we are going to fixing these issues.
15665887_10209549448350485_8850368016774724947_n
“Internal server error” when testing ther API GET verb
  • On the displayed Logs, we could not find any useful information which explains why the error happened. To look for what was going on and the cause of this error, we could see it on CloudWatch Logs window. Open the Cloud Watch page then click Logs item on left menu. Confirm that the right pane refresh and display a list of Log Group item. Click the item whose name is matched to our blogs/lambda service.
15590038_10209549566393436_7830682212492007648_n
CloudWatch page with displayed Log Groups list
  • When we clicked one of displayed Log Groups item, the right pane is refreshed again and displays a list of Log Streams. Click the one with latest Last Event Time.
15622007_10209550862505838_7253757097566019991_n
CloudWatch page with displayed Log Streams list
  • In the next page, expand the item that looks like explain this error. Notice the errorMessage & errorType, it seems that we have not authorise the Lambda Function to do Scan operation against the designated DynanmoDB table.

15589616_10209550976148679_2309715960096197322_n

Fixing the unauthorised access error

  • To fix the previous error, we need to give authorisation access to our Lambda function for performing scan operation against the DynamoDB Table. The way to do this is by adding DynamoDBIamPolicy entry in the serverless.yml file, under Resources entry as follow:
15665701_10209551212474587_6687703448620478353_n
Updated serverless.yml with DynamoDBIamPolicy entry
  • Save the changed serverless.yml file and then re-run the serverless deploy -f <function’s name> -s <stage> -r <region> command again.

Retesting the Lambda on API Gateway test page

  • Once we have redployed our lambda function, go back to AWS Web Console’s API Gateway Test page of our deployed Lambda function. Then, press the Test button. Noticed that we do not receive error anymore. Instead, we should see records from DynamoDB Blogs table are retrieved and displayed as follow.
15589549_10209551406519438_828441359589004905_n
Returned response from testing the GET API

Conclusion

At the end of this article, we have learned a number of key things to get our Lambda function able to pull data from AWS DynamoDB. First, we define the DynamoDB table we want to create through adding Resources section in serverless.yml file.  Once we redeployed our Lambda to AWS, AWS CloudFormation will create the DynamoDB Table, beside our Lambda function & its API Gateway endpoint. Then, we filled the created table with several items through AWS DynamoDB Web Console.

On the Lambda function’s handler code, we structured our code by moving retrieveBlogs method into an ES6 class (the DynamoDbDataService class) and wrap the method’s body with ES6 Promise (because we want the records retrieval to be an asynchronous process). Then, we replaced the hardcoded lines with logic for Initialising AWS SDK’s Document Client class and calling its scan method for retrieving records from Blogs table.

Aside from these, we learned how to get the detailed error log in case a request to our deployed Lambda’s endpoints return “Internal Server Error”,through looking at AWS CloudWatch web page. We also learned that the API Gateway page has a section that allow us to Test our Lambda’s HTTP Endpoint.The source code of this article can be found in this link.

In the next article, we will add more verbs on the Lambda function so that it would provide complete CRUD endpoints.

Serverless AWS Lambda – Part 1: A Quickstart for Beginners

This article covers steps for creating your first AWS Lambda service & functions through using Serveless framework. Before following these steps, ensure that you have already had AWS Account.

Pre-requisites:

  • Ensure that you have installed latest LTS version of Node.JS. Visit this link to finding out how to install it in your machine: https://nodejs.org/en/
  • Ensure that you have installed Serverless framework. If not, run this command for installing it:
    sudo npm install serverless -g

    Then, run this command to check whether serverless has been installed successfully or not:

    serverless -v
  • Create a new or reuse existing IAM User account. Ensure that you have given AdministratorAccess to the user account. If you are not sure how to do this, follow the guidance of how to do it in this document
  • Upon created a new IAM User account, take note the displayed API Key & Secret Key of the new IAM Account.
  • Follow the guidance in this document to configure the aws credentials (API Key & Secret Key) that you have noted in prior step. Serverless framework need this information so that it could deploy.

Create your first service:

  • Once we have completed all of required pre-requisites, create a new folder, go into the new folder then run this command to begin creating your 1st service:
    serverless create --template  --path

    . Example:

    serverless create --template aws-nodejs --path blog

    serverless_create_first_service
    Creating 1st Service
  • When creating a new service is finished, we will see file structure in the project folder, as shown in this following screenshot:
    • serverless.yml – a YAML file where we will define configurations for our service, such as AWS Resources (S3, DynamoDB, etc), Region, Nodejs Runtime, we want to use and also our service’s functions configurations.
    • handler.js – Initial Javascript file , created by serverless, that is supposed to be the place where we will write our function’s logic. Rename the file’s name with name of entity that our function interacts with (e.g. blog, product, task, etc).
serverless_initial_project_structure
Initial Project’s Structure
  • Open the serverless.yml file and edit these Configuration sections: lambda function’s name, handler method’s name, associated HTTP path & verb.

serverless_configure_function_1

serverless_configure_function_2
serverless.yml – Configure service’s function
  • Open the handler javascript file. Let’s write code inside the exported function whose the logic is simple – just returning an array of JSON objects
serverless_handler_get_function_1
handler node.js – It retrieves the data, wrap the result in response’s body and return
serverless_handler_get_function
handler node.js code – helper method that is supposed for retrieving the data from storage
  • Before we deploy the lambda function, let’s invoke it in our local machine through executing this command:
    serverless invoke local --function
     e.g. serverless invoke local --function blogs 
    

    Ensure that no error happens and we notice correct result is printed on terminal.

Deploy the service to AWS Lambda

We have implemented simple logic inside Lambda service’s handler and then invoke it locally using serverless invoke command. Now, we need to deploy our lambda through running this command in terminal :

serverless deploy --stage  --region .

Example:

serverless deploy --stage dev --region ap-shouteast-1
15585216_10209556096116675_171074867079464586_o
Deploying Lambda to AWS through calling serverless deploy command
When deployment is successful, we should get the URL Endpoint of our deployed service and there should be no error message appear. If we don’t see the URL Endpoint, there should be a typo inside serverless.yaml (check the events section , if you type it as event, this issue occurs).

This is result that you should get when we browse the endpoint or invoke it using Postman

serverless_invoke_lambda_in_postman
Invoke the Lambda in Postman

How the Serverless deploys our Lambda function to AWS

When we invoked serverless deploy command, serverless zipped our function file(s) and also created a file for configuring AWS CloudFormation stack setting (cloud formation template). Serverless also created a new AWS S3 bucket using our AWS API Key & Secret Key, then upload the zip file & cloudformation setting file into the created AWS S3 Bucket.

serverless_files_in_s3
Lambda files uploaded by Serverless in AWS S3 Bucket
Once the file uploading process is done, Serverless manage the creation of our Lambda function & its API Gateway Endpoint through AWS CloudFormation service. This is done based on the uploaded cloud formation template file. Upon finished the deployment, you could see the created AWS Resources which build up your deployed service through browsing the Lambda , CloudFormation, API Gateway section pages, on your AWS web console.

Removing Deployed Service

In case you need to destroy your deployed lambda service, the common way to do this is through destroying the resources that built your service, through AWS Web console page and then do these procedures: Open S3 page and destroy the Bucket which build the service, Destroy CloudFormation stack, Destroy the Lambda & then the related API Gateway. Serverless provides a quickest way for destroying our service along with its AWS resources. We can do this through invoking serverless remove command, inside the serverless project folder.

serverless_remove_lambda
Removing Lambda function and its claimed AWS Resource

Conclusion

Serverless has simplified the efforts of writing AWS Lambda Function, deploying & hosting the function as an API Gateway resource endpoint. By hosting our node.js-based API on AWS Lambda, we do not need to setup an EC2 instance or other kind of virtual private server just for hosting our code. Through using Serverless & AWS Lambda, we shift this responsibility to AWS and thus, free us from responsibility of setup our own server. In the future article, we will cover steps of how to integrate our Lambda service with AWS Data storage services such as SimpleDB or DynamoDB.

Host an Ionic app into AWS S3 Bucket using Serverless framework

When I was working on a Mobile App’s front end development project, we were asked by our customer to deploy the ionic app into a public server ( as a Web SPA ), so that they could access & playing around with it immediately, in their browsers. Ionic framework comes with a built in web server which allow you to run the app as a Web application ( through invoking `ionic serve` command). Then, this part was not a problem to us. However, we should figure out where & how we were going to deploy the ionic app to. That time, we suggested our customer, to deploy the ionic app into our AWS EC2 Instance/Elasticbeanstalk or into their own on premise server.
Fast forward back to today, we have more options which allow us to deploy an Ionic app (also other web SPA like angular JS or React) into AWS S3 bucket and host the app in there. This is possible since AWS S3 bucket has capability to host static web page. Then, we have several tools to help us doing this: through AWS S3 Web Console, AWS SDK CLI tool or Serverless framework with S3 Client plugin.
In the time I wrote this article, I am working with Backend team which use Serverless framework in our project. Based on this situation, I am curious with this tool’s ability to deploy front end web Single Page Application (SPA) like Ionic, into an S3 bucket. In the next sections, we will cover steps of how to do this in Serverless framework’s way.


Pre-requisites

  • Ensure that you have AWS account.
  • Ensure that you have installed Node.js in your machine. Refer to this link if you have not installed it yet.
  • Ensure that you have installed Ionic framework, Android SDK and/or XCode in your machine. Refers to this link if you have not installed Ionic yet.
  • Ensure that you have installed stable version of Serverless framework (version 0.5.6). If not, run this command to install it: npm install -g serverless@^0.5.6
  • Login into your AWS Management Console, create a new IAM account and attach AdministratorAccess policy into the created IAM Account.

ionic_s3_1

  • Ensure that you have written the created IAM account’s ACCESS KEY ID & Secret access key. We are going to use these in later steps.


Prepare a Serverless project

  • In a terminal box, run sls project create command. Notice that running this command creates a new Cloud Formation’s template in your AWS account for specified region (in this sample, we choose ap-northeast-1 AWS region) and also created a new folder in your current directory.

ionic_s3_2

ionic_s3_3

  • Change directory to the folder created by running command in prior step, then running this command: npm install serverless-client-s3 --save to install serverless-client-s3 plugin
  • Create folder client/dist. In mac/linux command shell, we can do this by running this command mkdir -p client/dist.
  • Copy all files inside your Ionic project’s /www folder into client/dist folder , created in prior step.

  • In the serverless project’s root directory, edit & update the s-project.json file by adding these following changes:


Deploy the Ionic App into AWS S3 Bucket

  • In the serverless project’s root directory, run sls client deploy -s stageName -r regionName command to deploy the Ionic app into AWS S3 bucket for specific stage & region. Example: sls client deploy -s dev -r ap-northeast-1 to deploy the app into Tokyo data center and labeled as dev stage. This might take a while to finish.

  • Once it’s done, notice your AWS S3 console. There is a new bucket created in the list where its name is matched with the bucketname setting we define in our s-project.json file. View its content by clicking the folder’s link. Notice that the bucket contains all of files of our Ionic app, we copied in client/dist folder in prior step.

  • Click Properties button on the page, and click ‘Enable Web Hosting’ accordion button to display url link of the deployed web application.
  • Click the url link to display our Ionic app. Ensure that no error happens and our Ionic app’s landing page is displayed successfully.


The Flaw

The latest version of serverless-s3-client plugin (version 2.0) deploys the web app to s3 bucket with no restriction access policy, which mean it is accessible to anyone / public. While this is not a problem to us (the developers), to our customers, this is mostly undesired. Because they might not want people outside the developer team and themselves, to look at our current works on the deployed Ionic app.

At the moment, restricting accesses to the S3 bucket, require us to add access Policy on it manually through S3 web console. There are couple of guys whom created Pull Request on serverless-s3-client plugin’s github page which allow us to define S3 policy bucket inside s-project.json file. Once the serverless maintainers reviewed & merge these Pull Request, I will update this article with steps to add the s3 bucket’s access restriction policy.