
Creating an Android mobile application could be a tedious one when you need to build rich UI elements on your application. This could be a real problem if your UI designers have adequate or good HTML & CSS skillsets but have little to none knowledge of working with Android XML pages. Another problem arise when there is a requirement to ship your mobile app to support other mobile platforms such as iPhone, Win RT, Blackberry, etc beside on the Android platform. You would need to spend more time, resources & efforts for Designing, Developing, Testing & Shipping your app across multiple mobile platforms which could hurt your budget.
There is a workaround to solve these. Thanks to people whom were involved in Apache Cordova project, a library named “Phonegap” was born to the rescue. Phonegap is a java library that enable Android runtime to load & display HTML pages ( along with their CSS styles ) and also enable the runtime executing Javascript files as well in an Android application. Due to this feature, UI Designer is freed from working with tedious Android XML pages and able to use their current HTML+CSS+JS skillsets for developing the app’s UI elements similar to pages in web application. Since the app is mainly built on top of HTML 5+CSS +JS, a mobile application which is built on top of Phonegap is also runable on other mobile platforms, such as iPhone, with minimum to none modifications to the original code.
So how would it be look like in a simple Hello World application ? I would show you the steps in this article on how to do it in my favourite Java IDE, the Intellij IDEA 12.
Pre-requisites:
- You have setup latest updates of JDK 6 or 7 in your machine. If you are a Linux Ubuntu’s user and have not done it yet in your environment, this article might be useful.
- Ensure that you have setup Android SDK properly in your machine.
- If you use Intellij IDEA like me, ensure that you have setup JDK & Android SDK settings in your IDEA.
- Ensure that you have downloaded latest Phonegap’s library (By the time I write this post, the latest version is 2.7.0).
Enter the Steps:
- Create a new Empty Project in the Intellij IDEA 12.

- Add a new Android Application Module.


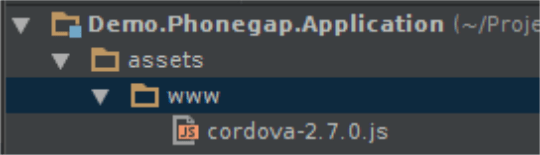
- In the Android Module structure, create a new folder under ‘assets’ folder & name the new folder as ‘www’.
- Copy Phonegap’s ‘cordova-x.x.x.js’ file into the ‘www’ folder.
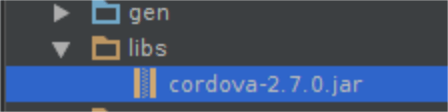
- Copy ‘cordova-x.x.x.jar’ into ‘libs’ folder.
- Right click the ‘cordova-x.x.x.jar’ node & click ‘Add as library …’ option.
- On the Create Library dialog, ensure that Name= cordova-x.x.x, Level = Project LIbrary, Add to Module = the Android Application Module then click [Ok].

- Copy the Phonegap’s ‘xml’ folder where is located in <your phonegap root folder>\lib\android into the ‘res’ folder.

- Add a new HTML5 file into ‘www’ folder. This is the HTML file which is designated for the application’s main page.

- Add a script line in the Head tag for referring to Phonegap’s javascript file.
<!DOCTYPE html>
<html>
<head>
 <title>Demo Phonegap</title>
 <script type="text/javascript" charset="utf-8" src="cordova-2.7.0.js">
 </script>
</head>
<body>
 <h2>Hello Android</h2>
</body>
</html>
- Initially, our HomeActivity class is extended from Android’s Activity class. We need to modify it so that our HomeActivity class would be able to load & display our index.html page as the app’s main page. First, we’ll modify the class so that it is inherited from Phonegap’s DroidGap class. Secondly, we get rid the second line inside OnCreate method and replace it with a code that calls DroidGap’s loadUrl method. This is the code that is exactly doing the magic.
package Demo.Phonegap.Application; import android.os.Bundle; import org.apache.cordova.DroidGap; public class HomeActivity extends DroidGap { /** * Called when the activity is first created. */ @Override public void onCreate(Bundle savedInstanceState) { super.onCreate(savedInstanceState); super.loadUrl("file:///android_asset/www/index.html"); } } - Finally, we’ll modify the ‘AndroidManifest.xml’ file as in the following code snippet. Be advised, you might need to adjust the android:minSdkVersion option so that it match with the android version that has been used by your AVD or Physical Android Devices.
<?xml version="1.0" encoding="utf-8"?>
<manifest xmlns:android="http://schemas.android.com/apk/res/android"
 package="Demo.Phonegap.Application"
 android:versionCode="1"
 android:versionName="1.0">
 <uses-sdk android:minSdkVersion="16"/>
 <supports-screens
 android:largeScreens="true"
 android:normalScreens="true"
 android:smallScreens="true"
 android:resizeable="true"
 android:anyDensity="true" />
 <uses-permission android:name="android.permission.VIBRATE" />
 <uses-permission android:name="android.permission.ACCESS_COARSE_LOCATION" />
 <uses-permission android:name="android.permission.ACCESS_FINE_LOCATION" />
 <uses-permission android:name="android.permission.ACCESS_LOCATION_EXTRA_COMMANDS" />
 <uses-permission android:name="android.permission.READ_PHONE_STATE" />
 <uses-permission android:name="android.permission.INTERNET" />
 <uses-permission android:name="android.permission.RECEIVE_SMS" />
 <uses-permission android:name="android.permission.RECORD_AUDIO" />
 <uses-permission android:name="android.permission.MODIFY_AUDIO_SETTINGS" />
 <uses-permission android:name="android.permission.READ_CONTACTS" />
 <uses-permission android:name="android.permission.WRITE_CONTACTS" />
 <uses-permission android:name="android.permission.WRITE_EXTERNAL_STORAGE" />
 <uses-permission android:name="android.permission.ACCESS_NETWORK_STATE" />
 <uses-permission android:name="android.permission.GET_ACCOUNTS" />
 <uses-permission android:name="android.permission.BROADCAST_STICKY" />
 <application android:label="@string/app_name" android:icon="@drawable/ic_launcher">
 <activity android:name="HomeActivity"
 android:label="@string/app_name"
 android:screenOrientation="sensor"
 android:configChanges="orientation|keyboardHidden|screenSize">
 <intent-filter>
 <action android:name="android.intent.action.MAIN"/>
 <category android:name="android.intent.category.LAUNCHER"/>
 </intent-filter>
 </activity>
 </application>
</manifest>
- Fire up your Android Virtual Device or connect your Android device into your development machine then build & run the project. You will see this if everything is alright.


Where do we go next from here ?
Of course, you could tell your Web Designers to get back working on the Rich UI elements you wish to put in your super-awesome mobile app, immediately 😀 However, there is a drawback for you as a Java developer if you are going on this way. You would need to use lot of JS when you are coding the UI Logics. Your Java skill would be shifted from being used for developing the UI logics ( Activities , events) to your app’s backend development ( This is true if you goes to n-tier with your mobile app and you still want to use Java for developing your app’s backend services ).
Another situation that you should consider is when you have no UI Designers in your team due to limited budget, for example. This should not stop you from using Phonegap. 3rd party vendors like Telerik or Community have created wonderful UI framework that would sit tight & nice with Phonegap, such as Telerik’s Kendo UI or Jquery Mobile. In the upcoming articles, i would present you about how to integrate these UI Frameworks with android & Phonegap through using a little bit advanced problem sample than a simple ‘Hello World’ app. Or extending them further by integrating cool JS framework like Durandaljs 😀 So, stay tuned, My Friends 🙂


