Setup Domain Name for Raspberry Pis, wired to Local Network

In my previous article, I have shared my experience about sharing internet connection received by my Desktop PC, to the RPis. While this setup is okay to me, there is a small matter that bugged me. Whenever I need to reach other RPi from another RPi or from my connected desktop PC (e.g. doing SSH), It requires me to remember & type in the target machine’s IP Address. I want to improve this experience further by just typing the hostname of the target machine such as ssh pi@rylai instead of ssh [email protected]

I understand that in order to achieve this, I would need to setup & run Domain Name System (DNS) servers in my RPis LAN. But, it’s another “I know ( what I should do), but I don’t know (the technical detail of how to do it)” problem to me. After I spent a couple of days searching references which fit to my case, I then bumped with this article. Someone has done it, but I’d like to prove it and see if it fits & works on my RPis LAN.

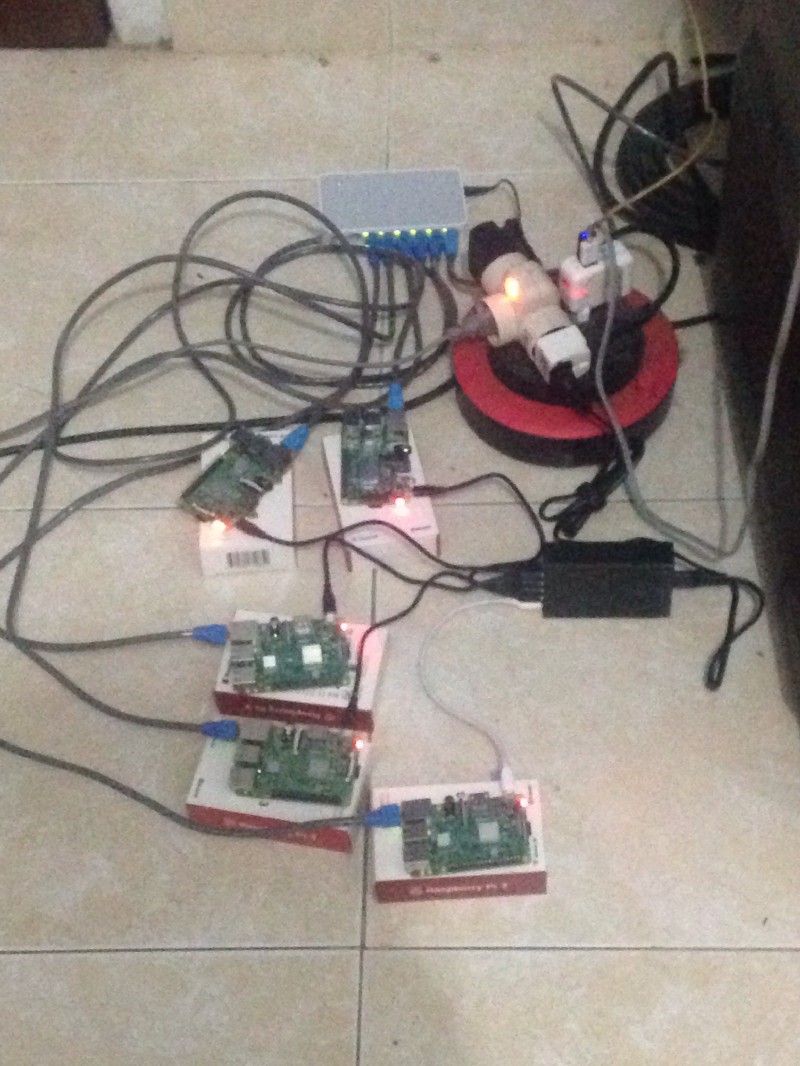
In this article, I am going to share my experience of how I setup the primary & secondary servers on my Desktop PC and my old Raspbery Pi 2 Model B, I connected to the RPis Private Local Network.

Updated the IP Addresses

I did not change any physical parts that are involved in the private network. However, in order to get this done by following the article, I changed each RPis and my desktop PC’s IP Addresses as in the following list:

List of each machine’s new IP Addresses 

Since I updated the network’s address to xxx.xxx.0.0 (netmask 255.255.0.0), these updates will allow me to connect more nodes up to 255 x 255 = 65k devices. Thus, I won’t need to feel worry with re-updating my network’s IP Addresses in the future, when I’ll add more devices into the private network.

I applied the new IP Addresses to RPis through reverting the IP Address configuration I made in dhcpcd.conf file, moved them into /etc/network/interfaces file and also changed the host’s IP Address in the /etc/hosts file.

Added a new entry which map the new IP address to the new host name.domain name 
/etc/dhcpcd.conf in each RPis were reverted into default
/etc/network/interfaces in each RPIs.

I also did similar change on my Dekstop PC’s /etc/network/interfaces and /etc/hosts files.

Changed /etc/network/interfaces file with the new IP on my PC’s LAN port (enp6s0)

I then restarted all RPis and my PC after making these changes on each of these machines, to ensure the changes took effect.

The new IP Address reported by ifconfig command, after rebooted the RPi

Setup Primary DNS Server on My Ubuntu PC

The software which runs DNS server in Linux OS is bind9. I installed bind9 and an additional software(dnsutils ) software on my Ubuntu Dekstop PC, through running this command:

sudo apt-get update && sudo apt-get install bind9 bind9utils bind9-doc dnsutils

Then, I modified bind9’s default config to ensure that it will run on IPV4 mode.

Modified /etc/default/bind9 to force bind9 runs in IPV4 mode

Next, I modified /etc/bind/named.conf.options , /etc/bind/named.conf.local files to put my Private network’s address and the new IP Addresses of each connected hosts, into bind9 ‘s configurations.

Adjusted /etc/bind/named.conf.options file
Adjusted /etc/bind/named.conf.local file

Then, I created /etc/bind/zones/db.<my private network's domain name> as the zone’s config file and /etc/bind/zones/db.<my private network's unmasked ip address's parts>  as the reversed zone’s config file. I changed these files, as shown in the following screenshots.

The Zone File
Enter a caption

After I modified & created these files, I then run named-checkconf & named-checkzone commands to ensure that the changes are valid.

Validate changes in bind9’s config files.

I also wanted to ensure my desktop PC still could access the connected RPis by specified hostname, instead of IP address later. To achieve this, I replaced /etc/resolv.conf file with a symbolic link to /run/resolvconf/resolv.conf .

Replaced /etc/resolv.conf with a link

Then I modified /etc/resolvconf/resolv.conf.d/head file, by entering nameserver entries with IP Addresses of Google’s DNS servers and my Desktop PC.

edited /etc/resolvconf/resolv.conf.d/head file

Lastly, I rebooted my Ubuntu Dekstop PC to see if all changes that I made would take effect and the Primary DNS server ran properly.

Setup Secondary DNS Server on the Raspberry Pi 2 Model B

Setup a secondary DNS is an optional path. I decided to do it anyway, just to make sure when my PC is not turned off and my clusterd RPis are still running, the RPis still could reach each other by specifying their host names. I decided to run the secondary DNS server on my Raspberry Pi 2 Model B, so that I could maximise the number of RPis 3 in the private network to be focusing on actual works that will happen in future.

Setup bind9 on my RPi 2 is quiet similar to setting it up on my Desktop PC earlier. 1st, I did SSH to the Rpi 2, ran update repository command followed by apt-get command for installing bind9, bin9utils, bind9-doc & dnsutils .

Install bin9 and utils on RPi 2

Then, I did same changes on my PC’s bind9 default config file, to enforce bind9 will run on IPV4 mode later.

Enforce bind9 runs in IPV4 mode

Next, I edited both/etc/bind/named.conf.options & /etc/bind/named.conf.local files as shown in these following screenshots:

/etc/bind/named.conf.options file of Secondary DNS server
/etc/bind/named.conf.local file of Secondary DNS server

Notice the different settings in the named.conf.local file compared to the Primary DNS’s file: the type of each zones are set as slave and within each of zones, there is masters entry which points to the Primary DNS’s IP address.

I did not create zone files for secondary DNS server. Thus, I just rebooted my Raspberry Pi 2 to see the changes that I made earlier.

Testings

Once I rebooted my desktop PC and my Raspberry Pi2, I then began conducting a number of Tests, to confirm that the Primary & Secondary DNS are working properly. For 1st Test, I did ping, dig& ssh from my Dekstop PC to one of Raspberry Pi3.

Ping & SSH other nodes by their hostnames from Primary DNS Server

As we could see, the Primary DNS server (My PC) was able to reach the RPis by their hostnames. Next, I ran dig against one of the RPis by host name, from my PC.

Run dig against one of RPi3 by hostname & domain name

We noticed more interesting info appeared from dig , such as the IP Addresses of Primary & Secondary DNS servers, beside the RPi’s full domain name and its IP Address.

2nd Test was doing same thing as in 1st Test, but this was done from within an RPi3.

Ping & SSH test from within an RPi3 to other machines
Running dig against other nodes from the RPi 3

Lastly, for the final test, I turned off bind9 service on my Desktop PC, to simulate if the Primary DNS server is downed, the Secondary DNS server will serve as the Naming server.

Disabling the bind9 on the Primary DNS server

Then I performed ping & ssh commands from within an RPi 3 to other RPi3 or 2.

ping & ssh from a RPi3 to other machines when Primary DNS is turned off

As shown in the screenshots, the secondary DNS server was successful took over the Primary DNS server’s role when it is turned off.

Next plans 

At this point, my clustered RPis can “talk” each other by specifying their host names, instead by their IP Addresses. Also, we could ensure that this feature won’t be gone when I turned off my PC (the Primary DNS server), as long as my RPi 2 B (the Secondary DNS server) is still connected & functional.

In the future, I am going to utilise these clustered ARM Small Computers for serving as my personal R&D infrastructure, supporting my backend application’s development, such as: running Jenkins build in master/slaves mode, running clustered Redis database instances, simulating HA & Load Balancing test scenarios against my Application’s Backend API, security tests, running Docker swarm master/worker containers and many more.

Reference(s)

Sharing internet connection to Raspberry PIs, wired to Local Network

Sometime before I write this article, I bought 5 units of Raspberry Pi 3 Model B, along with : 6 pieces of UTP Cat 6 RJ-45 cables, 5 Sandisk 16GB Micro SD cards, an 8 ports TP-Link TL-SF1008D LAN Switch, and an Anker 6 ports USB Power Adapter with 6 USB OTG cables as well. I ordered those parts, to be used for building an ARM based Computers Cluster, wired altogether forming a Local Area Network.

Once I have setup Raspbian Jessie OS on each of these RPis, I then booted them, (by using my Desktop PC’s Keyboard , Mouse & HDMI monitor) and began on assigning host name & static IP on each of the RPis (through editing their /etc/hostname & /etc/hosts files). I did this because I want to remote the RPis from my own desktop PC using SSH or Remote Desktop, by specifying their static IP Address.

I wired the Rpis using the UTP Cat6 cables to the LAN Switch, and also connected my Ubuntu Desktop PC into the Switch as well. I planned the topology of the wired Network as shown in this following picture:

I did ping test from an RPi to other connected RPis, from my Desktop PC to RPis, run ssh command from my desktop PC to the RPis, and the outcome were all went well.

A problem arise when I connected my Desktop PC to internet. Either through tethering my iPhone to my PC or connecting the PC to my Wireless MiFi modem, I could get access to internet from my Desktop PC, BUT not from the RPis in the wired LAN. It seemed that my Desktop PC did not share the Internet connection it receives to my RPis.

It took me few hours to understand, how sharing internet connection from my Ubuntu PC to my RPis can be done. Through google-ing efforts and trial-error attempts, I bumped into this article & followed partial steps in the article to get this done.

In this article, I am going to share my experience about how to share the internet connection received by my Ubuntu Desktop PC to the wired Raspberry Pis via Local Area Network.

Configure DHCP Client service on each of RPis

Defining a static IP address on an RPi through writing it on /etc/hosts file , helped me remoting the RPi from my Desktop PC. However, it’s not enough to help the RPis for recognising my Desktop PC as the Gateway to Internet. Also, we need to define the address of DNS servers that the RPi should lookup to, so that when they browse to a specific URL Site, they could find it by the site’s Domain name (e.g. http://www.intel.com), instead of by its IP Address (e.g. 103.56.234.57).

Through experimentation, I also found that each of RPis runs DHCPCD server. It is a daemon software which helps the RPi receiving dynamic IP assigned by DHCP server. On one of my RPi, it gave me trouble: it overridden the defined Static IP, replaced it with Dynamic IP (e.g. 169.71.55.12).

In order to prevent this and also `telling` RPis that they should lookup for valid DNS server and recognise my PC as Gateway to the internet, I modified the /etc/dhcpd.conf file in the RPi as in the following screenshot:

Additional changes in the red-squared lines are interpreted as follow:

  1. interface eth0 — Next configuration lines are applied to the LAN interface of the RPi, the eth0 .
  2. static ip_address — This line defines the static IP of current RPi and the subnet mask (/24)
  3. static routers — Defines the Gateway’s IP. In this case, it points to the IP Address of my Ubuntu PC.
  4. static domain_name_servers — Define IP addresses of valid DNS servers. In this case, I defined IP Addresses of Google’s DNS servers.

I saved the changes and then reboot the RPi. By the time my RPi was rebooted successfully, I ran ifconfig to confirm the IP address of eth0 interface has been assigned with the Static IP defined in /etc/dhcpd.conf earlier.

Then, I ping my ubuntu Desktop and I can confirm that the RPi still can reach out my PC.

I repeated these modification steps against the rest of RPis, except I gave different IP Address but still under same subnet address (e.g. RPi #2 = 192.168.8.202, RPi #3 = 192.168.8.203, etc).

Configure IP Tables on the Ubuntu Desktop PC

At this point, It was still half way to share the internet connection to the RPis. Then, I added Network Address Translation ( NAT ) configuration on my PC, through running thisiptables command in terminal window:

sudo iptables -t nat -A POSTROUTING -o wlx6466b309ab63 -j MASQUERADE

Then followed by running this command, to ensure that the IP packets routed from any wired RPis, will be forwarded to wlx6466b309ab63 wireless interface:

sudo iptables -A FORWARD -i enp6s0 -o wlx6466b309ab63 -j ACCEPT

Lastly, we run this iptables command to forward incoming packets from wlx6466b309ab63 interface to corresponding RPis, when the packets have an established initial request.

sudo iptables -A FORWARD -i wlx6466b309ab63 -o enp6s0 -m state --state RELATED,ESTABLISHED -j ACCEPT

To confirm that the changes were applied, I browsed a web page from any of the connected RPi and I confirmed that the web page is loaded on my RPi’s Chromium.

Confirming that the Internet is shared to Rpi

Persist the Changes on IP Tables, permanently

In this moment, I have configured NAT & packets forwarding rules in my Ubuntu Desktop PC for sharing the internet to my RPis. To ensure that these configuration won’t be gone at next time I restart my PC, I installed iptables-persistent tool (run sudo apt-get install iptables-persistent for installing it) and then I ran sudo netfilter-persistent save command in terminal window. This will ensure that the IP Tables Configuration that I has made will be persisted and reloaded at next time I restarted the PC.

Where to go from here

I felt excited, seeing my RPis are fully connected in Local Area Network and also able to access Internet. Next, I would like to setup DNS server(s) in the LAN, so that each of nodes in the LAN would have their own internal domain name, such as mydesktop.nextresearch.local Once I could setup this, I would like to setup DHCP server in the LAN, so that each of the connected parties will have Dynamic IPs.

Reference(s)


Building Redis Docker Image for Raspberry Pi

During the weekend, the time I wrote this article, I have a plan to spend my off-time by creating a simple docker swarm project, which comprising my Desktop PC as the Swarm manager and my Raspberry Pi 2 Model B unit (attached to wireless LAN to my PC) as the worker node. The Rpi worker node is designated to run Redis server, as shown in this following picture:

Docker Swarm Sample - 1 manager (Desktop x64) with 1 Worker (ARM)

Right after initialised the Swarm and joined the Rpi as a worker node to the swarm, I then started pulling the newest version of Redis image container in my Rpi: redis:4.0.1-32bit. However, when I run a container using this image in my Rpi, it did not work. I remembered that the image is intended for x86 machine, while Rpi is an ARM based computer. I should pick the ARM version of the Redis image & I don’t see any of it on redis official docker hub page.

Then, I found some guys in Hypriot created dockerfile & script for building Redis-Rpi, although it is quiet old. I want to run the latest version of Redis on the Rpi (version 4.0.1) and it would require me to making some changes on Hypriot’s Dockerfile, before building the image: replacing Raspbian:wheezy with Raspbian:jessie and change the Redis version from 3.0.4 to 4.0.1. To make these changes, I forked Hypriot repo and will make necessary changes, under a new branch on the forked repo.

In the next lines, we will cover more detailed steps for making the latest version of Redis runs on my Rpi 2 Model B.

Making required changes on Hypriot’s Dockerfile

After I forked Hypriot’s repo, I cloned the forked repo into my PC and make this following necessary changes on the Dockerfile:

  • Replace the OS image from raspbian:wheezy to raspbian/jessie – I want the image to run the latest version of Raspbian.

edit_hypriot_dockerfile_1

  • Update the Redis’s version, download URL & Hash Code. These are taken from this site.

edit_hypriot_dockerfile_2

  • Change the last line to ensure when the container is running later, it will allow other connected machines, accessing the redis database.

edit_hypriot_dockerfile_3

  • I pushed the changed Dockerfile to the forked repository, under “redis-4.0.1” branch.

push_changed_hypriot_dockerfile

Build the Docker image on the Rpi

  • Open a new Terminal window and ssh into the Rpi.

build_docker_image_1

  • Clone the forked repo.

build_docker_image_2

  • Checkout the “redis-4.0.1” branch.

build_docker_image_3

  • Run `docker build -t <dockerhub user id>/<repository name>:<tag> .` command to start building the image, as shown in this following example:

build_docker_image_4

  • Confirm that building image is success. Run `docker images` command to ensure that the image is created.

build_docker_image_5

Run & Test the Image

  • Now, we will run a container from the created image through running `docker run` command.

run_test_image_1

  • Then followed by running `docker ps` command to confirm that the container is up and still running.

run_test_image_2

  • Now, we test the Redis container through doing CRUD against it, from the connected Desktop PC. We are going to use `redis-cli` for doing these query operations. If you don’t have the cli tool in your machine, run `sudo apt-get install redis-tools -y` command to install it.
  • To connect on the Raspi which runs the redis container, run `redis-cli -h <rpi’s hostname or ip address` command. Confirm that no error message shown and the terminal enters Redis-Cli prompt
  • On the redis-cli prompt, run a query to store STRING data (e.g. set app.version 1.0). Confirm that the query returns ‘OK’. Next, run a query to get the STRING data back. Confirm that the query return correct result.

run_test_image_3

Push the image to Docker Hub

In this point, we have created Rpi-Redis docker image that is ready to be used by our Raspberry Pis. However, we would like to have our future Raspberry Pis able to pull it from one common place. In this case, we are going to push our Rpi-Redis image into Docker Hub repository.

  • Before we could push our image into Docker Hub, ensure that we have created Docker Hub account and then login into Docker Hub in the terminal, through invoking this command `docker login –username <your docker hub account’s username> –password <your docker hub’s password>`.

push_image_1.jpeg

  • Finally, we run the `docker push <dockerhub user id>/<repository name>:<tag>` to push the image into Docker hub.

push_image_2

  • We also should see our Rpi-Redis docker image, appears on Docker Hub’s Repository page now.

push_image_3.jpg

push_image_4

Where do we go next from here

Creating Rpi-Redis image is just one step from several steps required for seeing the Docker Swarm sample showing some actions. My next research will be understanding the concept of Service Discovery in a Docker Swarm and its benefits, through using Consul. Then, I have a plan to create my own Consul Docker Image targeted for both x86 & ARM (Rpi) platforms and then put this piece into the Swarm to get it working altogether.

Reference