Tag Archives: ruby

JamfReports Ruby Gem

Ruby Gem for Jamf Pro API

JamfReports is a ruby gem that uses the Jamf Pro API for hosted instances. Currently, it only reports on Applications. Pulling from the /api/v1/computers-inventory?section=APPLICATIONS endpoint.

For gem install instructions see here

*Future reports may be added.


Usage

In order to run JamfReports, you are required to add these two lines to the top of your file, under the require JamfReports line

#!/usr/bin/ruby
require "JamfReports"

## UPDATE THESE VARIABLES -------------------------------
$jamfpro_url = "https://company.jamfcloud.com" 
$api_pw = "Your API KEY HERE"

If you don’t have your api key for the $api_pw variable, run this command to create it and paste it into the variable.

printf "jamfUserName:JamfPassword" | iconv -t ISO-8859-1 | base64 -i -

And these 3 lines to generate the api token and pull the data from Jamf so you can run the report commands.

JamfReports.getToken
JamfReports.checkTokenExpiration
JamfReports.getAllApplicationInventory

A full working file might look like this.

#!/usr/bin/ruby
require "JamfReports"

## UPDATE THESE VARIABLES ----------------------------------------
$jamfpro_url = "https://company.jamfcloud.com" 
$api_pw = "Your API KEY HERE"

## COMMANDS ------------------------------------------------------
JamfReports.getToken
JamfReports.checkTokenExpiration
JamfReports.getAllApplicationInventory

## REPORTS -------------------------------------------------------
JamfReports.listAllInstalledApps
# JamfReports.webBrowserReport
# JamfReports.totalNumberOfOneInstalledApps
# JamfReports.listofOneInstallApps

## After reporting, revoke current token
JamfReports.invalidateToken

Examples

listAllInstalledApps

Returns a sorted list of all apps installed across your fleet of computers in Jamf. Sorted from most installed app, to least.

webBrowserReport

  • Google Chrome.app
  • Google Chrome Canary.app
  • Firefox.app
  • Firefox Developer Edition.app
  • Safari.app
  • Safari Technology Preview.app
  • Microsoft Edge.app
  • Brave Browser.app
  • Arc.app
  • Opera.app
  • LinCastor Browser.app
  • LockDown Browser.app
  • Tor Browser.app
  • Vivaldi.app
  • DuckDuckGo.app

totalNumberOfOneInstalledApps
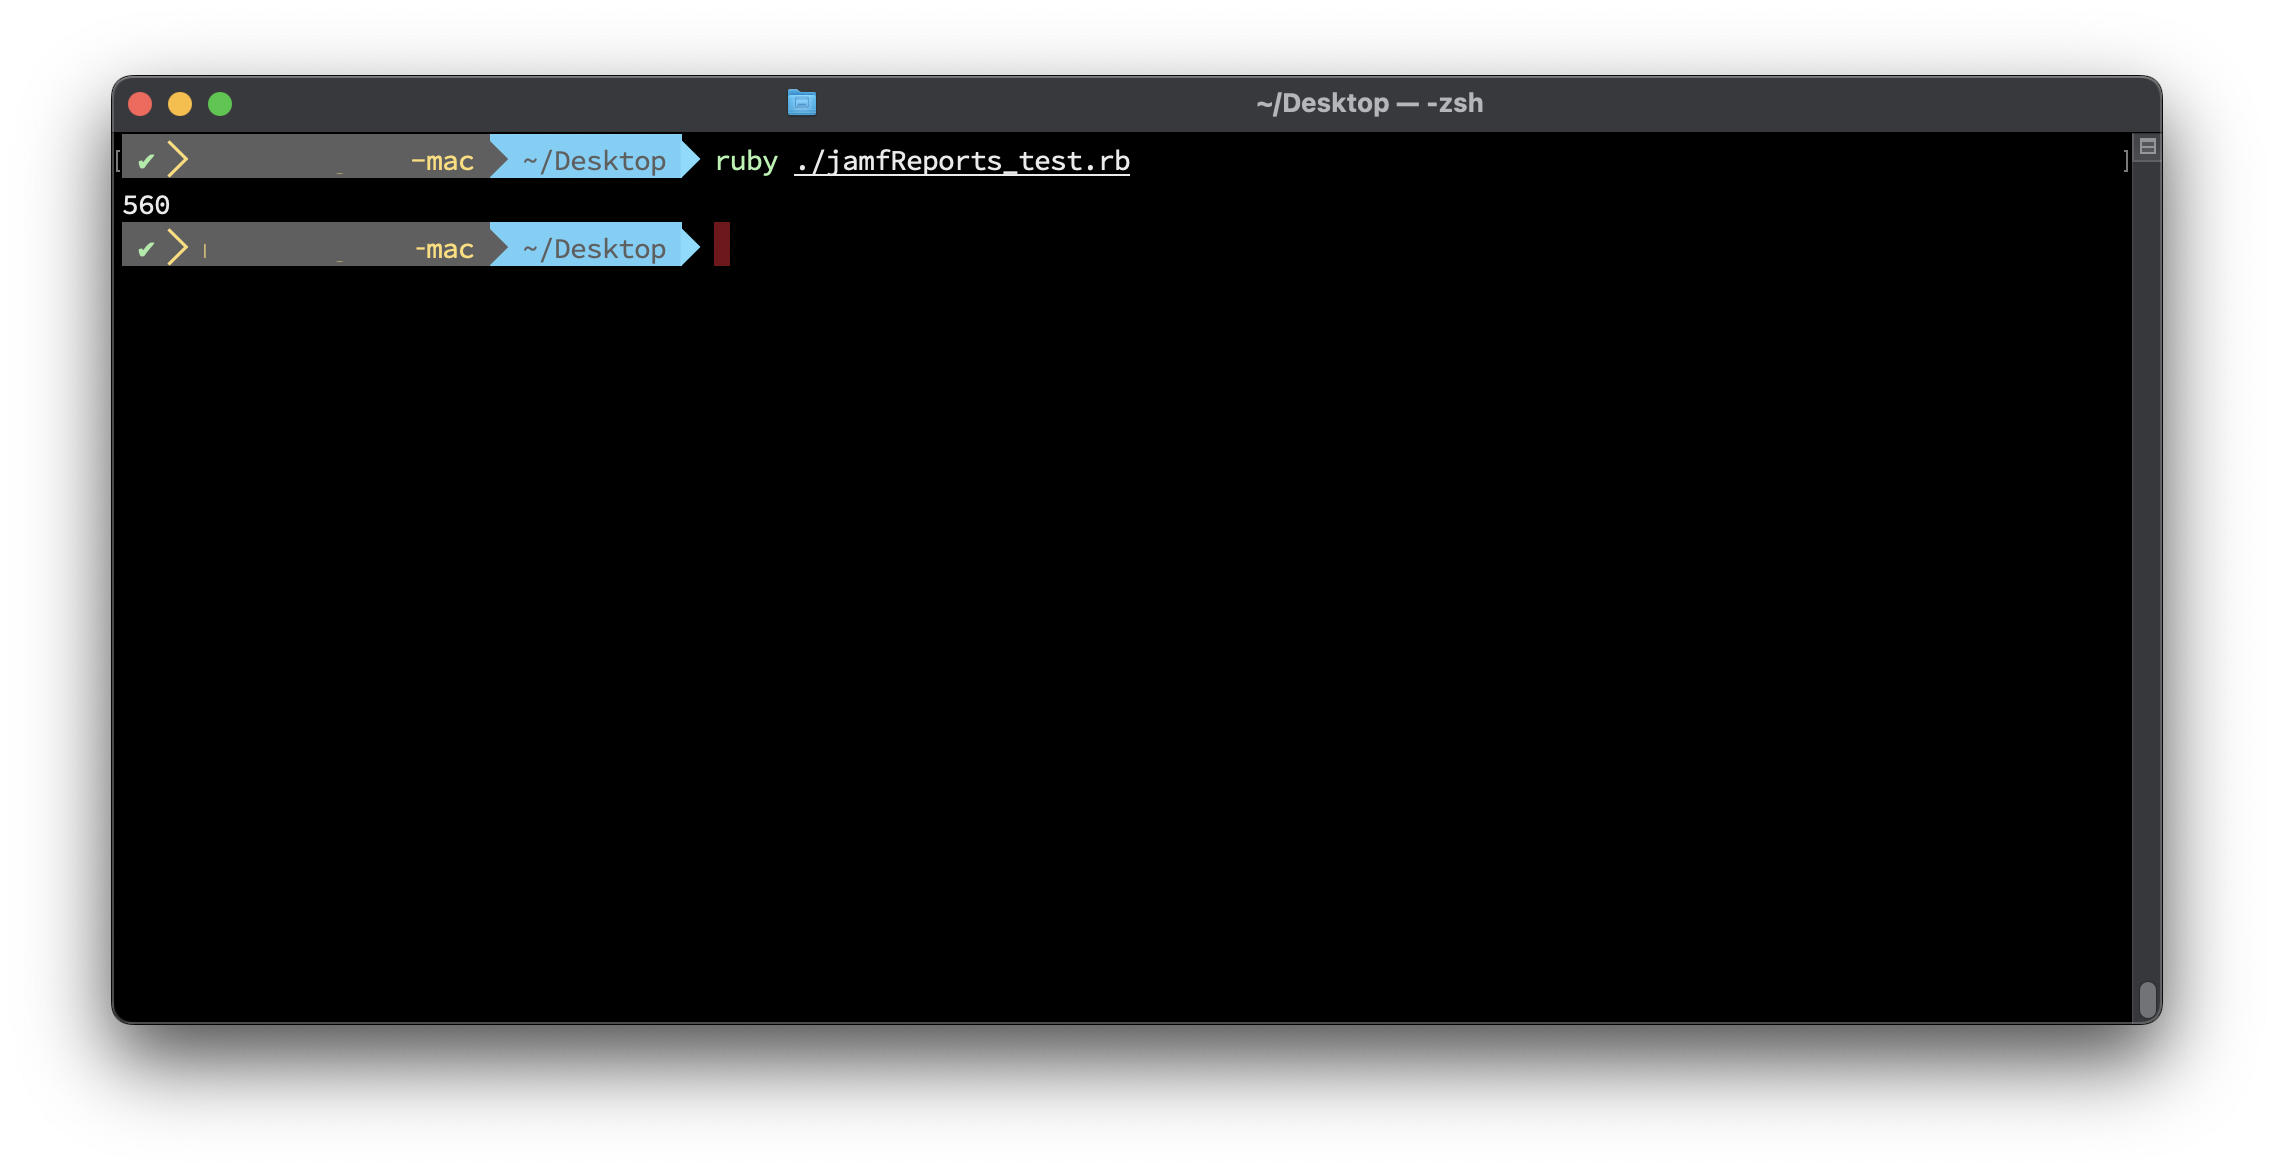
Returns a single metric to show the number of “One-off” or single installed apps across your fleet.

listofOneInstallApps
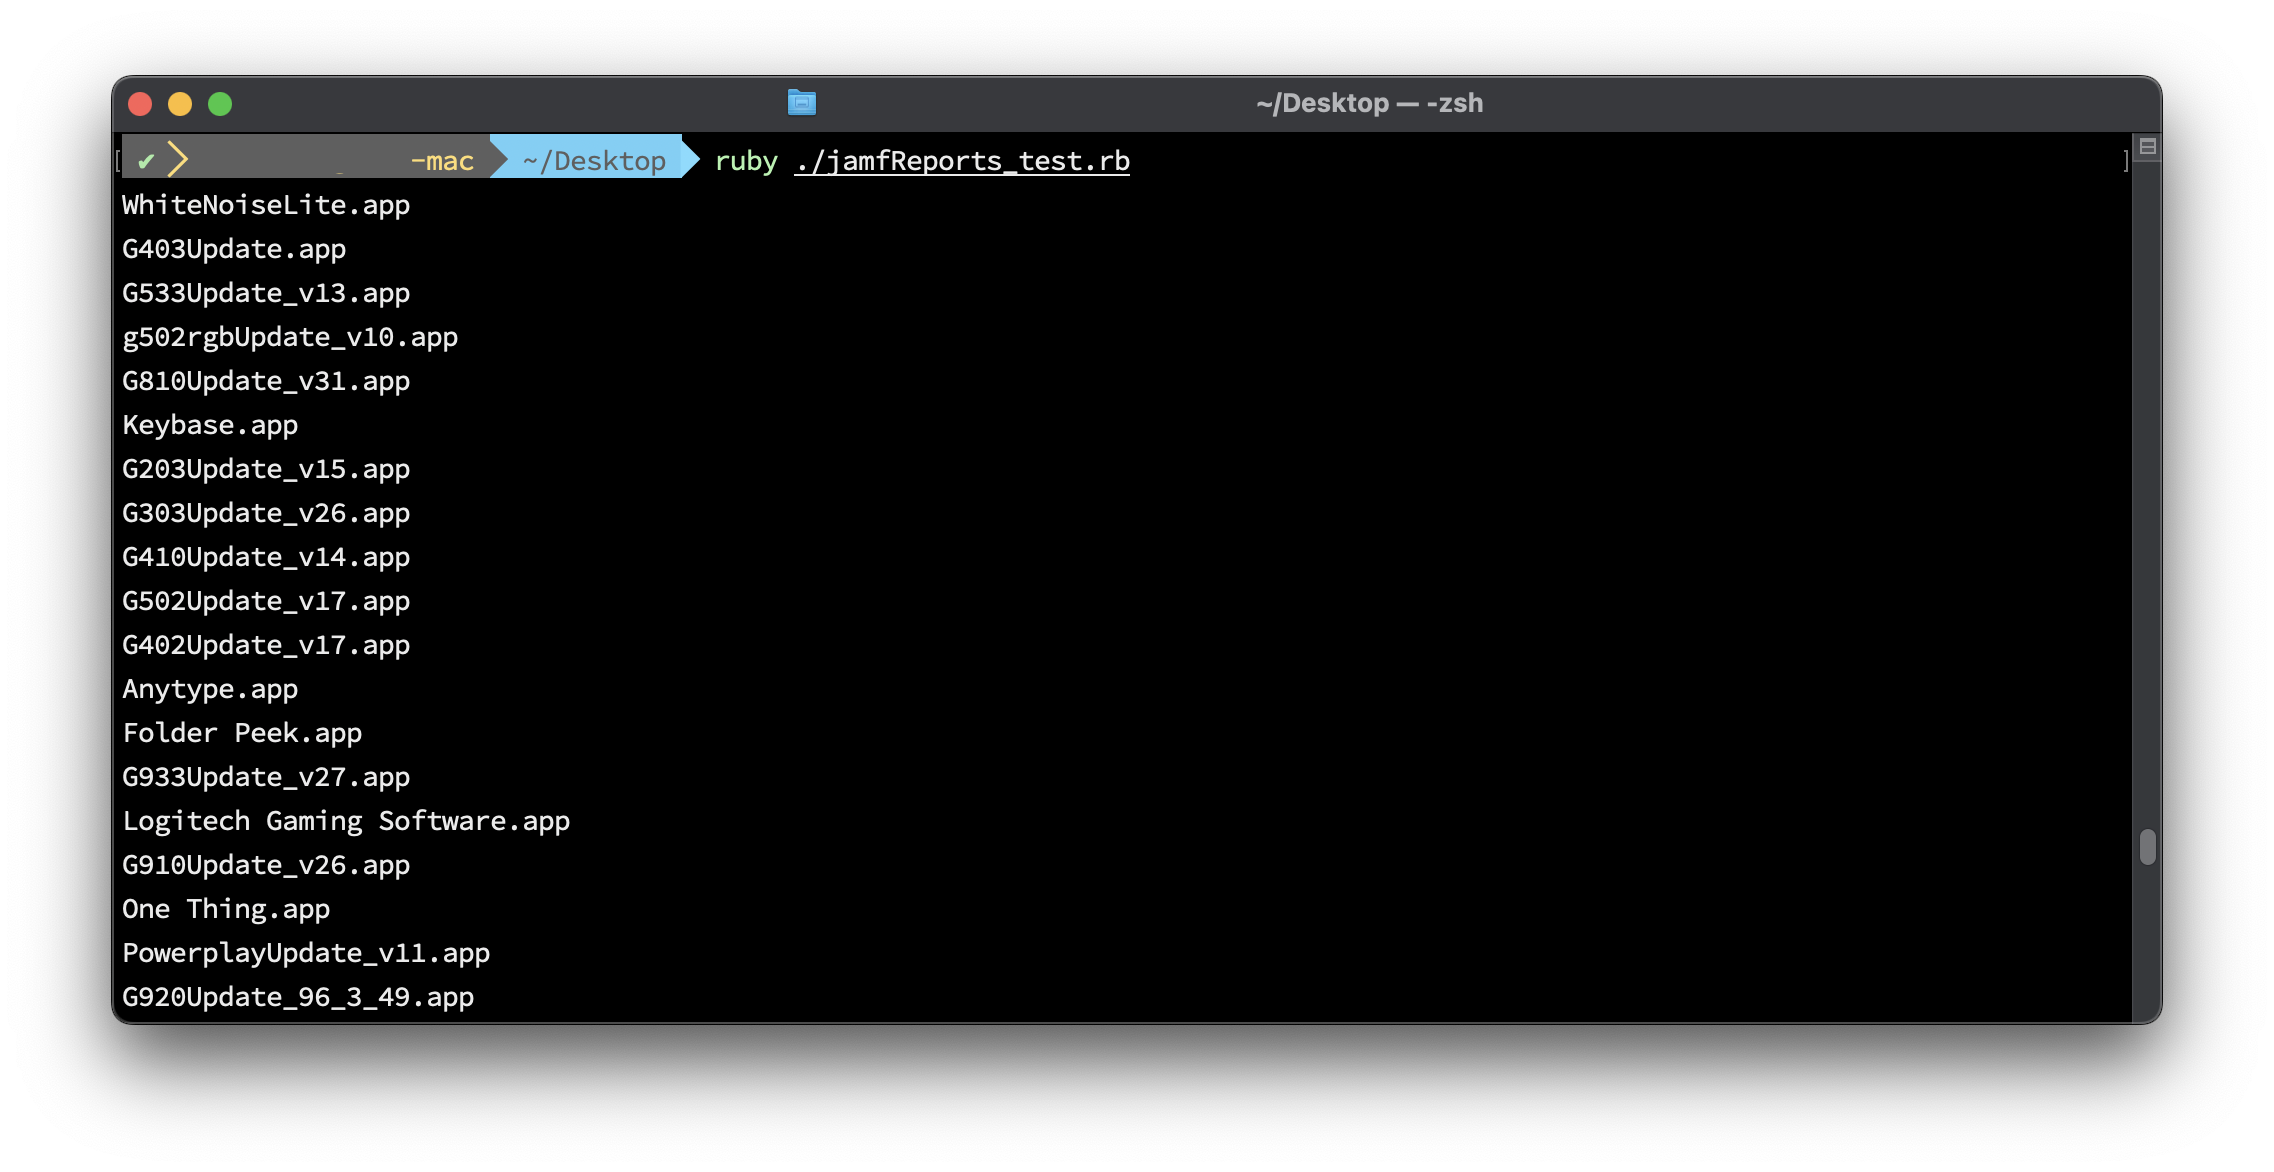
Returns a list of all the “One-off” or single installed apps across your fleet. This can be helpful in scoping in Jamf uninstall policies.

macOS: Enable Chrome Auto Updates For All Users

Meant to be run after installing Chrome for the first time on a machine to enable auto updates for all users. Creates the /Library/Google/GoogleSoftwareUpdate folder, including “TicketStore“. Then registers the system for autoupdates.

Before running, /Library/Google/GoogleSoftwareUpdate doesn’t exist


Run the script with Sudo to install to the system wide location at /Library/Google instead of the user location at ~/Library/Google.

 sudo chrome_enable_autoupdates.rb

After running, the folder and ticket store are created


. To check settings after running:

  • Open Chrome
  • Click on Chrome in upper left menu bar
  • Click on “About Google Chrome“
  • Check update settings

The bulk of the work is done by the KSADMIN command to register a keystone ticket and check for updates. Full script can be found here.

  def self.keystone_register
          command = [
             "'#{KSADMIN}'",
             "--register",
             "--productid",          "'#{product_id}'",
             "--version",            "'#{chrome_version}'",
             "--xcpath",             "'#{CHROMEPATH}'",
             "--url",                "'#{update_url}'",
             "--tag-path",           "'#{TAGPATH}'",
             "--tag-key",            "'#{TAGKEY}'",
             "--brand-path",         "'#{BRANDPATH}'",
             "--brand-key",          "'#{BRANDKEY}'",
             "--version-path",       "'#{VERSIONPATH}'",
             "--version-key",        "'#{VERSIONKEY}'",
       "--system-store",
             "2>/dev/null"]
          system("#{command.join(" ")}")
     end

Organizing Commands In Apple Remote Desktop With The Help Of Ruby

My last post was about manually creating and organizing commands in Apple Remote Desktop with the help of Xcode to edit a plist file.

This post is about using Ruby to do the heavy and ugly lifting of editing the nested UnixCommandTask.plist  file. If you’ve ever saved a command the file exist. If it’s not there, click on the “Unix” tab in ARD and save a test command so the file is automatically created. You can find the file at:

 ~/Library/Containers/com.apple.RemoteDesktop/Data/Library/Application Support/Remote Desktop/Presets/UnixCommandTask.plist

There’s a couple of scripts on my github that help to make the process easier and I hope to cover the overview and basic usage here.

ARDplist.rb is the main file that contains the class and methods, and ARDplist_usage.rb contains examples. You can uncomment commands in “ARDplist_usage.rb” and run them, or create another file for your commands and require ARDplist, see the ReadMe file.


Create A New Folder And Command:

Creating a new foler or command is the most tedious part. There’s a syntax that has to be followed.

Example Code:

#sets a folder named "Admin Commands", with a command named "list of users"
newcommand = ARD::Command.new(
  "Admin Commands",#folder name
  "list of users", #command name
  true, #see output in ARD after command runs
  "ls -1 /Users/",#command to run
  "root", # user to run command as
  1) #select user to run command as radio button, must be set to 1 if you want to run as another user

#executes the above information to actually create the folder and command
ARD.create_command(newcommand)

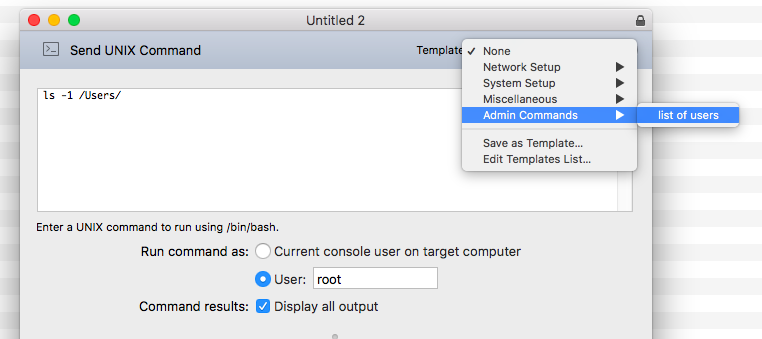
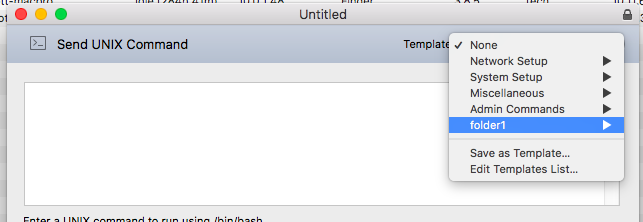
This creates the example below:Screen Shot 2017-05-17 at 3.23.18 PM.png

If you want to add a command to that folder, run the code again but make sure the folder name is the same.

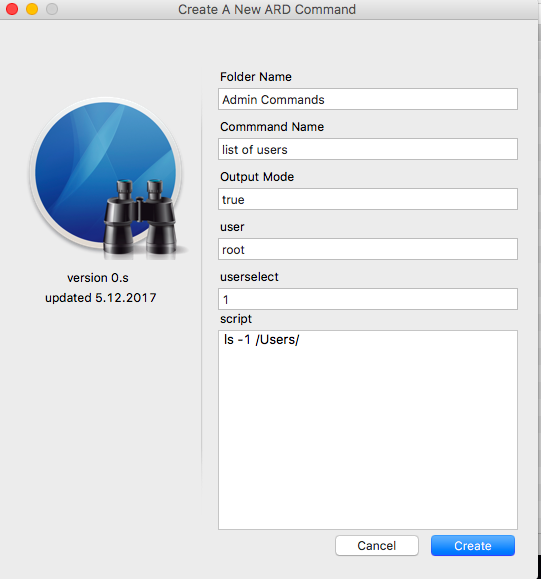
This isn’t too bad if you’re creating a simple command like “ls” but gets a little unsightly if you want to add 6 lines of code. So for the folder and command creation part, I also made a little app with Pashua to give the user a gui. The example code below will make the exact same folder and command as the code example above. The advantage here is you can just paste your code into the “script” field as is, line breaks and all.

ard_13.png


Listing Options:

Once you have folders and commands you can manage and organize them with by using the “ARDplist.rb” file. Just require it in your ruby file and use the command below to see options.

#if ARDplist.rb was in the same directory as your file
#otherwise change the path after require to where ARDplist is
require './ARDplist'
#list of options for use
puts ARD.options

The output will look like this:

- create_command
- create_folder
- create_spacer
- delete_command
- delete_folder
- folder_index
- list_folders
- move_folder
- options
- rename_command
- rename_folder


Moving, Renaming, and Deleting:

I’ll cover some quick and basic examples of the options above.


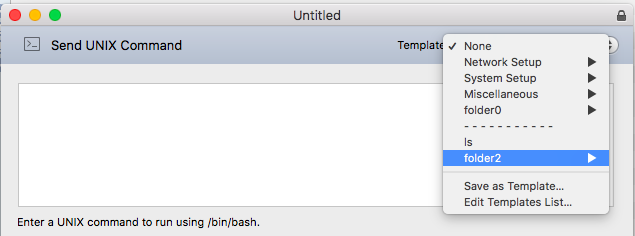
list_folders:

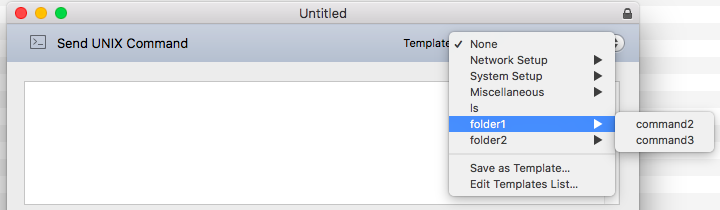
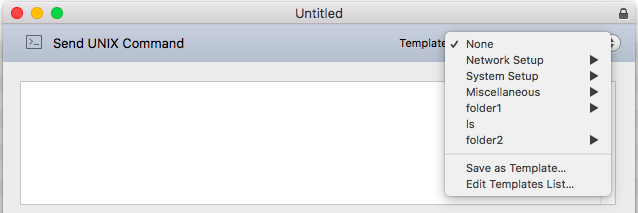
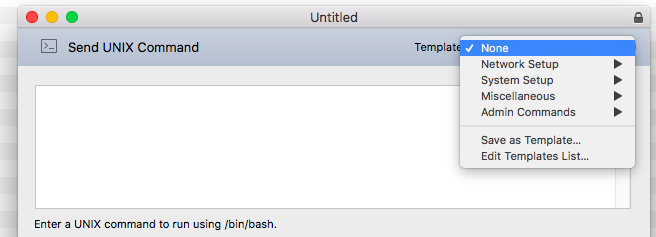
If this is your commands, you can run “ARD.list_folders” to return existing folders and single commands. Beware that the first 4 folders are Apples and do not report back.

ard_1.png
puts ARD.list_folders
#output is a list of folders or single commands that exist
ls
folder1
folder2

folder_index:

Tells you what physical position a folder is in, remember that the first 4 folders don’t count. From the screenshot above, you can see that “folder1” is in the second spot, which in programming language is 1, since counting starts at 0.

puts ARD.folder_index("folder1")

#output below
1


move_folder:

If you want to move “folder1” to position 0

ard_2.png

#move position of existing folder. arguments are (original_position, new_position)
ARD.move_folder(1, 0)


create_spacer:

Create a visual line break to separate commands.

ard_6.png

#creates a visual space by using ---------------
#argument is the physical location you want the spacer
ARD.create_spacer(1)


rename_folder:

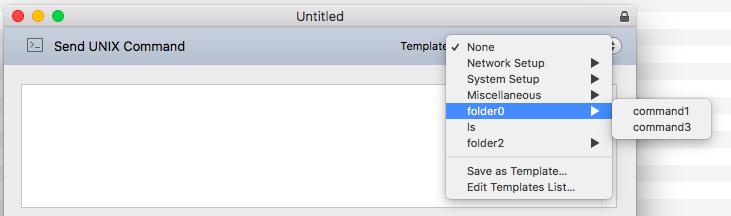
If you want to rename a folder .. example change “folder1” to “folder0”

ard_4.png

#rename an existing folder. arguments are (oldname, newname)
ARD.rename_folder("folder1", "folder0")


rename_command:

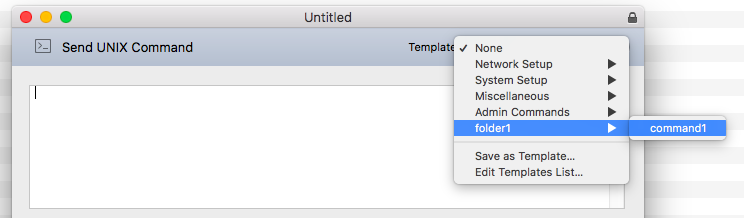
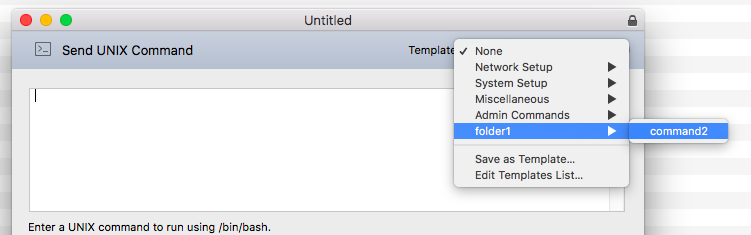
Rename a command inside a folder. Example, change “command1” to “command2”

Screen Shot 2017-05-17 at 4.04.05 PM.png

Before

Screen Shot 2017-05-17 at 4.35.46 PM.png

After

#Rename a command, arguments are ("folder_name", "orignialcommandname", "newcommandname")
ARD.rename_command("folder1", "command1", "command2")


delete_command:

To delete a command inside a folder.

Screen Shot 2017-05-17 at 4.37.51 PM.png

#Delete a command, arguments ("folder_name", "command_name")
ARD.delete_command("folder1", "command2")


delete_folder:

To delete an entire folder. This is the same as using the build in “Edit Templates List” and removing a command in ARD.

Screen Shot 2017-05-17 at 4.44.21 PM.png

#delete an existing folder, arguments are ("foldername")
ARD.delete_folder("folder1")

Convert Active Directory Time Stamps On macOS With Ruby

Being in a domain, I query AD a lot to get back general information. You can do this either by using the Remote Server Administration Tools on a Windows desktop, or by opening the Directory Utility on macOS. Sometimes it’s faster if I script it, or I need a piece of information from a query to do something else in a script.

One issue I was bumping my head against was converting Active Directory time stamps to something human readable. For example if I wanted to see the last password reset for a AD record, I might get back this:

SMBPasswordLastSet: 130888075497943613

Not entirely helpfully. At least not until it’s converted. To do that I have a Ruby method. I then pass the time stamp to the method and get back what I want.


def convert_ad_time(ad_timestamp)
    ad_timestamp_to_epoch=(ad_timestamp/10000000)-11644473600
    epoch_to_date=Time.at(ad_timestamp_to_epoch).strftime("%m.%d.%Y")
    return epoch_to_date
end


puts convert_ad_time(130888075497943613)

The output looks like this: 10.08.2015

A much nicer, human readable date. I can then re-use this method in other scripts that query domain information and get back things like, “Last Logon Time” or  “Bad Password Time”.

Script on Github

Using Ruby To Report On Installed Adobe Creative Cloud Versions

One of the regular task of an admin is to check the version of software installed and decided if the software needs updated. This can be particular important when managing a lab of computers where having consistent application versions across all machines can be critical.

To help me report back on Adobe Creative Cloud Apps installed and their version numbers, I wrote a little script. It scans all the Applications in the /Applications folder and picks out those that start with “Adobe”, then looks for an info.plist file inside the .app bundle and reads the “CFBundleShortVersionString”.

#!/usr/bin/ruby

#==============================================================
# Loop through the applications folder and find apps that
# start with "Adobe". Look inside the folders and find
# .app files, then read the Info.plist file for the
# CFBundleShortVersionString key and report back the version
#==============================================================

#==============================================================
#get a list of Adobe apps and version numbers

def adobe_app_versions
    application_folder = Dir.entries("/Applications")
    for application_name in application_folder
        if application_name.start_with?('Adobe')
            for x in Dir["/Applications/#{application_name}/*.app"]
                puts application_name + " = " + `defaults read "#{x}/Contents/Info.plist" "CFBundleShortVersionString"`
            end
        end
    end
end

adobe_app_versions

This scripts works well for my needs, and gives me the output similar to below. I can run it via Apple Remote Desktop and compile and compare the results of an entire lab to quickly see which machines needed updated.

Adobe Acrobat DC = 15.020.20039
Adobe After Effects CC 2017 = 14.0.1
Adobe Animate CC 2017 = 16.0.1
Adobe Audition CC 2017 = 10.0.1
Adobe Bridge CC 2017 = 7.0.0.93
Adobe Character Animator CC (Beta) = 1.0.5
Adobe Dreamweaver CC 2017 = 17.0.1.9346
Adobe Experience Design CC (Beta) = 0.6.8.6
Adobe ExtendScript Toolkit CC = ESTK CC 4.0.0.1
Adobe Extension Manager CC = 7.3.2.39
Adobe Extension Manager CS6 = 6.0.8.28
Adobe Fireworks CS6 = Adobe Fireworks CS6 version 12.0.1.274
Adobe Flash Builder 4.7 = 4.7
Adobe Fuse CC (Preview) = 2015.1.0
Adobe Gaming SDK 1.4 = 1.0
Adobe Illustrator CC 2017 = 21.0.0
Adobe InCopy CC 2017 = 12.0.0.81
Adobe InDesign CC 2017 = 12.0.0.81
Adobe Lightroom = Adobe Lightroom [1083169]
Adobe Media Encoder CC 2017 = 11.0.0.131
Adobe Muse CC 2017 = 2017.0.1
Adobe Photoshop CC 2017 = 18.0.1
Adobe Prelude CC 2017 = 6.0.1
Adobe Premiere Pro CC 2017 = 11.0.1
Adobe SpeedGrade CC 2015 = 9.1.0

I will note there are a couple of issues. Apparently not every Adobe application uses the “CFBundleShortVersionString”, so you may get back an error for random applications like “After Effects Render Engine.app”, that’s inside the After Effects folder. If you have After Effects installed, you’ll get back.

The domain/default pair of (/Applications/Adobe After Effects CC 2017/Adobe After Effects Render Engine.app/Contents/Info.plist, CFBundleShortVersionString) does not exist

Also, apparently Light room doesn’t follow suit with a standard version number, so you may see something like:

Adobe Lightroom = Adobe Lightroom [1083169]

So, what we’re saying is there’s no consistency even inside Adobe Apps.

Get the script on Github