Tag Archives: mac admin

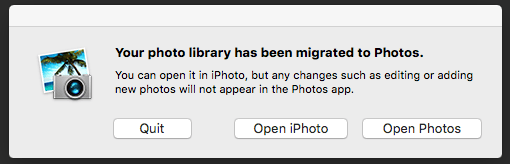
Your photo Library has been migrated to Photos

iphoto_to_photos__6
I ran into a weird issue the other day when switching a user to a new laptop. Part of the process is transferring data, usually via target disk mode. In this case an old iPhoto library from a OS X 10.9 Mavericks machine to Photos on an OS X 10.11 El Captain machine. This has been seamless in the past, as you just move the iPhoto library into the Pictures folder and double-click on it. Photos opens and automatically converts the library to a new “Photos” library.

This time something strange happened, I’m not even sure what. I suspect the user created a new Photos library by importing photos from his phone. Then dragged the iPhoto library in and tried to double-click it. Either way, the user got an error message, “Your Photo Library has been migrated to Photos”. But on opening “Photos”, only the new photos imported from his phone were there.

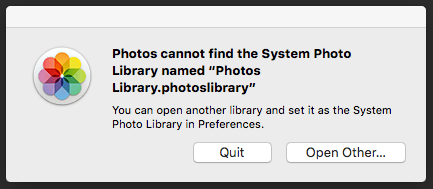
This lead to a cycle of deleting the “Photo” library and trying to double-click the iPhoto library over and over. Now “Photos” complained that the it can’t find the Systems Photo Library. Which means you have to make a new Library that’s empty, which leads back to the iPhoto Library already being migrated.

iphoto_to_photos__7

After deleting every preference file, cache, container, group container, and application support folder I thought might apply … I still had the same issue.

That’s when I decided to look in the Pictures folder for a hidden file, something to do with “migrated”. To my surprise, I noticed the extension of the iPhoto library had been changed to .migratedphotolibrary. I figured if I changed the extension to .photoslibrary, Maybe Photos would migrate library again.

iphoto_to_photos__16

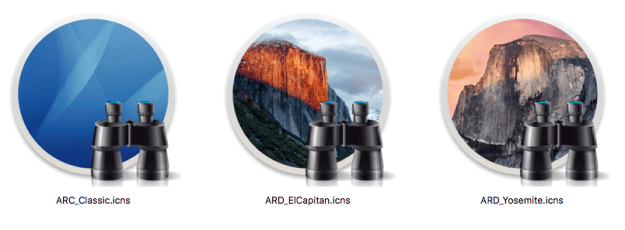
Sure enough on changing the extension, the icon changes from the old iPhoto to the new Photos.

iphoto_to_photos__16  >  iphoto_to_photos__17

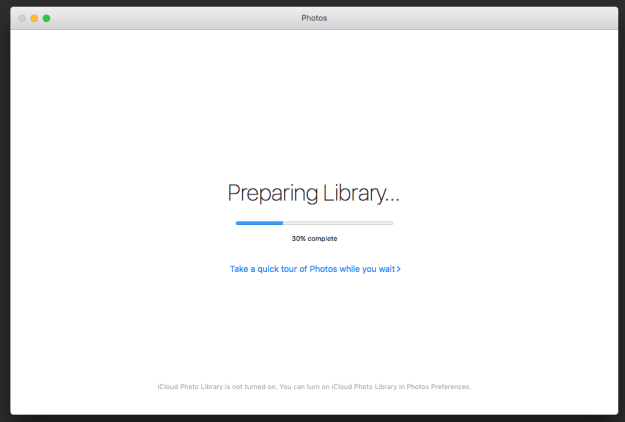
On a double click. “Photos” open and re-migrates the library.

iphoto_to_photos__22

Check OSX Mavericks Powersettings With Shell Script

Instead of using puppet or profiles to check and set the OS X energy settings. I also wrote a simple script that checks the current status of “Computer Sleep”. If it’s set to anything other then “Never” go to sleep, it runs my pmset command and sets the machine to my desired settings.

#!/bin/sh
#version 1.0

#checks the curret status of "Computer Sleep", if it's not set to 0(never sleep), then it runs the pmset command
# sets display sleep to 30 minutes
# sets computer sleep = never
# sets hard drive sleep - never
# sets wake for network access = true
# sets autorestart after power failure = true


if [[ `pmset -g | grep -w sleep |awk '{print $2}'` -gt 0 ]]; then
    
    echo "Changing Power Settings"
    pmset -c displaysleep 30 sleep 0 disksleep 0 womp 1 autorestart 1

    else
        echo "Settings are correct"
    fi

Managing OSX Mavericks Power Settings With Puppet

One of the things I want Puppet to do for my lab of iMac’s is to make sure the computers never go to sleep. That way when I need remote access to them, I know I have it.

Ideally, I don’t want puppet to run the same command every time it runs. It would be much better if it checked for a “sleep” status and then ran on the out coming of the check.

I’ve been testing this back and forth for a day or so and the code I currently have … seems to be doing the trick.

exec { "set_power_settings":
        path   => ["/usr/bin", "/usr/sbin", "/bin", "/sbin"],
        command => "pmset -c displaysleep 30 sleep 0 disksleep 0 womp 1 autorestart 1",
        unless => "pmset -g | grep -w sleep | awk '{print $2}' | grep -w 0 >/dev/null",
        }

The gist of it is… run the “Command“, which set’s my desired power settings. “unless” the current state of “sleep” is already set to “0” (never sleep).

Manage OS X Firewall with Puppet

MAC OS X FIrewall

With the help of glarizza’s module, Property_List_Key, I’m testing managing OS X plist with Puppet. This turns the built-in firewall on and ensures it stays on. Tested on OS X 10.9.5

 property_list_key { 'globalstate':
      ensure => present,
      path   => '/Library/Preferences/com.apple.alf.plist',
      key    => 'globalstate',
      value  => '1',
      value_type    => 'integer',
    }

This get’s me thinking all sorts of creative things that can be managed and enforced in a lab setting, where user’s might have admin rights and make undesirable changes.

Using Puppet to manage Java auto updates on Mac OS X

I’ve been toying with a virtual setup of puppet open source over the last week. My Puppet Master is Ubuntu 12.04, my Puppet Agent is Mac OS X 10.9.

I’ve been looking at puppet for over two years and have tried twice in the past to stand up a virtual machine and make it do something!!!. It usually ends with some crisis being more important and by the time I come back to puppet … I’m lost. I get frustrated and delete the VM’s. Rinse and repeat.

This time I”m up and running and my two big goals, both of which I accomplished, were too manage a local admin account, and install and manage printers for Mac OS X. Two things I can manage in several different ways, but I’d like to see if Puppet’s way is better/different. My thoughts are still out on that. I’m trying to consider how puppet could fit into my current workflows. But it is neat to watch puppet work. Which got me thinking. What kind of creative things can puppet do to manage a Mac OS X desktop?

If one of the things Puppet can manage are file resources, and plist are just formatted xml files. Can puppet manage plist for Mac OS X? So I decided to try something very simple. I want to turn off Java 7’s auto update feature. No matter how many times you turn it off, when you install a new version of Java, it’s re-checked. This is a good test because the plist only contains 1 entry.

Typically to disable auto updates, you can just open terminal and run:

sudo defaults write /Library/Preferences/com.oracle.java.Java-Updater.plist JavaAutoUpdateEnabled -false

But with puppet, I want to make sure of a couple things:

– The file “com.oracle.java.Java-Updater.plist” exist at /Library/Preferences/

– That the mode is set to 644

– The contents of the file contains the entire plist:

<?xml version="1.0" encoding="UTF-8"?>
<!DOCTYPE plist PUBLIC "-//Apple//DTD PLIST 1.0//EN" "http://www.apple.com/DTDs/PropertyList-1.0.dtd">
<plist version="1.0">
<dict>
    <key>JavaAutoUpdateEnabled</key>
    <false/>
</dict>
</plist>

so my puppet code looks like this:

Screen Shot 2014-08-15 at 9.06.00 AM

node pup{
        file {'com.oracle.java.Java-Updater.plist':
                path    => '/Library/Preferences/com.oracle.java.Java-Updater.plist',
                ensure  => present,
                mode    => 644,
                content => '<?xml version="1.0" encoding="UTF-8"?>
<!DOCTYPE plist PUBLIC "-//Apple//DTD PLIST 1.0//EN" "http://www.apple.com/DTDs/PropertyList-1.0.dtd">
<plist version="1.0">
<dict>
        <key>JavaAutoUpdateEnabled</key>
        <false/>
</dict>
</plist>',
        }

And after I run puppet on my node, I did a restart for good measure and then checked the auto update box. Which appears to have worked.

Screen Shot 2014-08-15 at 9.04.54 AM

Pretty neat for a quick test. It has me thinking what else might Puppet be able to do?


Install Printers On A Mac From The Command Line

I found myself setting up a mac from scratch this morning. It’s sort of a one off situation so applying one of my standard images didn’t seem to make sense.

Though when it came time to install the printers I realized I was going to have to add them one by one. I decommissioned our aging Mac print server a few months ago and have moved to IP based printing.

I’ve thought about using munki to manage printers and just haven’t got around to it. So I was stuck with manual setups and that thought kind of got under my skin.

So I finally made a script to add my printers all in one swoop. The basic command is below. You’ll need to wrap it in a shell script, or I just pasted the commands into Apple Remote Desktop and ran them as root on my remote machines.

Command:

/usr/sbin/lpadmin -p "name of printer" -E -v lpd://"printer IP or DNS"/"queue name" -P "path to PPD file" -D "description"

Example:

/usr/sbin/lpadmin -p "DC_3FL_PRINT_B&W" -E -v lpd://"192.168.10.99"/"DC_3FL_PRINT_B&W" -P "/Library/Printers/PPDs/Contents/Resources/HP LaserJet 9050.gz" -D "DC_3FL_PRINT_B&W"

This only works of course if you have the print drivers already installed. If they are not, you need to install them a head of time or copy them before you run this command like in the example below. I choose to copy the ppd file and not run an installer since I know exactly what ppd files I need.

The below command copies the ppd from a network share to the clients printer ppd folder. a simple “copy- source-destination”. Then sets up the desired printer.

cp /Volumes/dcfiles/Transfer\ then\ delete/nscott/PRINTERS/CNR3235X1.PPD.gz /Library/Printers/PPDs/Contents/Resources\
/usr/sbin/lpadmin -p "DC_1FL_ARC_COPY_B&W" -E -v lpd://"192.168.10.133"/"DC_1FL_ARC_COPY_B&W" -P "/Library/Printers/PPDs/Contents/Resources/CNR3235X1.PPD.gz" -D "DC_1FL_ARC_COPY_B&W"

SWITCHES
-p : configures said printer
-E : enables printer to accept jobs
-v : Sets printer URL
-P : Specifies a ppd file to use
-D : creates a text description for the printer

If you wanted to remove a printer instead of add you would just replace the first -p, used to configure a printer, with -x, used to delete a printer.

Set Up Munk Web Admin on Mountian Lion

Munki is a great tool to control software installs and updates and munkiwebadmin is a browser based admin gui to manage and see exactly what’s on your clients machines.

Honestly if you have already setup a munki server, installing munkiwebadmin is a breeze and if you have any issues you should see the instructions here because I’ve noticed a few changes even since installing it myself and the site seems to be updated consistently. It’s pretty straight forward though and most of it can be copy and pasted even if you’re not sure exactly what the commands mean or do. This is a great project for the weekend in a virtual machine.

STEP 1: Install Prerequisites
Xcode

– open App Store and search or xcode, be warned it’s a large download.

– Once it’s download simply drag it to the applicaitons folder, then drag it on to the dock to make a shortcut

Command Line Tools

– open Xcode and go to Preferences > Downloads > command line tools … click install

STEP 2: Setup the Virtual Environment

Open up terminal and copy and paste the commands in red below.

sudo easy_install virtualenv

You’ll see a bunch of lines spit out. That’s normal.

webadmin-1

STEP 3: Create a new virtual environment.

cd /Users/Shared
virtualenv munkiwebadmin_env

webadmin-2

STEP 4: Activate the virtual environment:

cd munkiwebadmin_env
source bin/activate

STEP 5: Install munkiwebadmin and django prerequisites

pip install django==1.4.5
pip install mercurial
pip install -e hg+https://bitbucket.org/cleemesser/django-wsgiserver#egg=django-wsgiserver

STEP 6: Copy and Configure MunkiWebAdmin

git clone https://code.google.com/p/munki.munkiwebadmin/ munkiwebadmin

STEP 7: Edit Settings.py

cd munkiwebadmin
cp settings_template.py settings.py

Time to make some edits to the settings.py file.

Here’s what I do. Open the Settings.py in xcode, that way it’s a little easier to see what’s going on with the syntax highlighting,  and do a copy and paste of the words in red below. This makes it easy to find exactly where you should be making the changes.

Set ADMINS to an administrative name and email
Set TIME_ZONE to the appropriate timezone
Under INSTALLED_APPS uncomment django_wsgiserver
Set MUNKI_REPO_DIR to the local filesystem path to your munki repo. (If you’re using the default repo it would be  /Users/Shared/munki_repo)

Make other edits as you feel comfortable. Save and close the file.

webadmin-3

STEP 8: Initialize the Database

python manage.py syncdb
python manage.py collectstatic

STEP 9: Create a non-admin service account and group

Time to create the “munkiwebadmin” account:

Open System Preferences and go to Users & Groups. Create a Standard user named munkiwebadmin.

To make sure no one can log in with this account interactively, paste the commands below in to terminal to change a few attributes in the user record.

sudo dscl . create /Users/munkiwebadmin home /var/empty
sudo dscl . create /Users/munkiwebadmin passwd *

Now create a munki group and add munkiwebadmin to it.

sudo dseditgroup -o create -n . munki
sudo dseditgroup -o edit -a munkiwebadmin -t user munki

Make sure the munki group can read and write in our munkiwebadmin_env folder.

sudo chgrp -R munki /Users/Shared/munkiwebadmin_env
sudo chmod -R g+rw /Users/Shared/munkiwebadmin_env

Give this group read/write access to the munki repo (MunkiWebAdmin will need permissions to modify manifests). Again if you stuck with the default munki repo just copy and paste the below. Other wise just make sure to substitute the path to your repo in the commands below.

sudo chgrp -R munki /Users/Shared/munki_repo
sudo chmod -R g+rw /Users/Shared/munki_repo

STEP 10: Start the web application and test
Time to see the magic. Switch to the service account we just created:

sudo su
su munkiwebadmin

Start MunkiWebAdmin.

python manage.py runwsgiserver port=8000 host=0.0.0.0

Noe open your browser and go to http://127.0.0.1:8000. If you were successful you should be prompted with a login.

webadmin-5

Use the account you created back in step