Tag Archives: bash

Jenkins Build Scripts For macOS 12 Monterey

I automate part of my macOS builds for new OS releases. I use a simple script (_version_check.sh) that I update with the latest release, ie … 12.2.1. Then I commit it to my repo and fire a webhook to Jenkins. Jenkins takes the version number and checks to see if it’s available via the "softwareupdate" command.

softwareupdate --fetch-full-installer --full-installer-version "$version_to_download"

If it is, it downloads the full installer app, “Install macOS Monterey.app“, to the Applications folder. When that is successful, I have a second Jenkins job that converts the “.app" to a “.dmg" . I archive the “.dmg" and use it in automated workflows with tools like MDS

Scripts are on Github

Showing Bluetooth Battery Percentage On Your Desktop

I use a tool called GeekTool (a fun tool that can be used in a lot of ways) to show the battery percentage of my bluetooth connected devices on my desktop. It makes it easier to keep an eye on them and know when they need charged.

Since switching to an Apple M1 laptop my old script broke, so I took a little time to update it. I used to pull the information from system_profiler but it seems it’s been removed. the ioreg command, now list the current battery percentage of any bluetooth connected devices

ioreg -r -l -k "BatteryPercent"  

This might look like it gives you a lot of output, but we really just need to parse it, to get what we want. The below command will give you current battery percentage for an Apple Magic Keyboard and Magic Mouse. Other products can be listed, but you’d have to run the above ioreg command and get the Product name to switch out in the command.

KeyboardPercent=$(ioreg -r -l -k "BatteryPercent" \
| grep -A 9 "Magic Keyboard with Touch ID" \
| grep "BatteryPercent" \
| awk '{print $3}')

MousePercent=$(ioreg -r -l -k "BatteryPercent" \
| grep -A 9 "Magic Mouse" \
| grep "BatteryPercent" \
| awk '{print $3}')

echo "Keyboard Battery Level: $KeyboardPercent"
echo "Mouse Battery Level: $MousePercent"

Once I have the command working, I update my GeekTool script. There’s a little more formatting here then just show me the percentage and GeekTool is more sensitive to whitespace. The below command is what I use to paste into the script editor to give me the output in the screenshot.

#!/bin/zsh

# Bluetooth Keyboard -----------------------------------------------------------
KeyboardPercent=$(ioreg -r -l -k "BatteryPercent" \
| grep -A 9 "Magic Keyboard with Touch ID" \
| grep "BatteryPercent" \
| awk '{print $3}')

typeset -i b=5
echo "Keyboard:\t\t\c"

if [ ${KeyboardPercent} = 0 ]
then
    echo "Disconnected\c"
else
    if [ $KeyboardPercent -lt 11 ]
    then
        echo "\033[1;31m\c"
    else
        echo "\033[0m\c"
    fi
    while [ $b -le $KeyboardPercent ]
    do
        echo "|\c"
        b=`expr $b + 5`
    done
    while [ $b -le 100 ]
    do
        echo "\033[1;37m|\033[0m\c"
        b=`expr $b + 5`
    done
    echo "\033[0m $KeyboardPercent%\c"
    unset KeyboardPercent
    unset b
fi

echo "\033[0m\nMouse:\t\t\t\c"

# Bluetooth Mouse --------------------------------------------------------------

MousePercent=$(ioreg -r -l -k "BatteryPercent" \
| grep -A 9 "Magic Mouse" \
| grep "BatteryPercent" \
| awk '{print $3}')

if [ ${MousePercent} = 0 ]
then
    echo "Disconnected\c"
else
    if [ $MousePercent -lt 11 ]
    then
        echo "\033[1;31m\c"
    else
        echo "\033[0m\c"
    fi
    typeset -i b=5
    while [ $b -le $MousePercent ]
    do
        echo "|\c"
        b=`expr $b + 5`
    done
    while [ $b -le 100 ]
    do
        echo "\033[1;37m|\033[0m\c"
        b=`expr $b + 5`
    done
    echo "\033[0m $MousePercent%\c"
    unset MousePercent
    unset b
fi

Scripts can be found here

Scripting The Default Terminal Theme In OS X

Anytime I find myself doing a repetitive mundane task .. I think why aren’t I scripting this? I hate the default white terminal theme that comes in OS X. I always find myself changing it to Homebew.

Here’s a sample script. You can simply change “Homebrew” to whatever terminal theme you want.

#!/bin/bash

#set Terminal defaults
sudo -u $USER defaults write /Users/$USER/Library/Preferences/com.apple.Terminal.plist "Default Window Settings" "Homebrew"
sudo -u $USER defaults write /Users/$USER/Library/Preferences/com.apple.Terminal.plist "Startup Window Settings" "Homebrew"

#set window width to 120
sudo /usr/libexec/PlistBuddy -c "Add :Window\ Settings:Homebrew:columnCount integer 120" /Users/$USER/Library/Preferences/com.apple.Terminal.plist
defaults write /Users/$USER/Library/Preferences/com.apple.Terminal.plist "NSWindow Frame TTWindow Homebrew" "97 302 1075 366 0 0 1280 777 "

#restart Terminal
killall Terminal

exit 0

Now that you can script it, you can add it to a post deployment  script or launchagent that runs on the first login. So out of the gates you have a custom terminal. Then you can get real work done.

Check OSX Mavericks Powersettings With Shell Script

Instead of using puppet or profiles to check and set the OS X energy settings. I also wrote a simple script that checks the current status of “Computer Sleep”. If it’s set to anything other then “Never” go to sleep, it runs my pmset command and sets the machine to my desired settings.

#!/bin/sh
#version 1.0

#checks the curret status of "Computer Sleep", if it's not set to 0(never sleep), then it runs the pmset command
# sets display sleep to 30 minutes
# sets computer sleep = never
# sets hard drive sleep - never
# sets wake for network access = true
# sets autorestart after power failure = true


if [[ `pmset -g | grep -w sleep |awk '{print $2}'` -gt 0 ]]; then
    
    echo "Changing Power Settings"
    pmset -c displaysleep 30 sleep 0 disksleep 0 womp 1 autorestart 1

    else
        echo "Settings are correct"
    fi

Backing Up Minecraft on Mac OS X

My son is supper big into Minecraft, and it always comes up whenever there is a new update … How do I backup my Minecraft folder?

I finally got tired of navigating to the Minecraft folder in the User/Library/Application Support folder. So I made a simpe script that can be run just by double clicking an executable shell script.

Using the Command Line to make the Backup

1. First on the desktop select “Go”, “Go to Folder” from the top menu bar

2. type in “~/Library”, click on “Go”. Navigate to the Application Support/minecraft folder

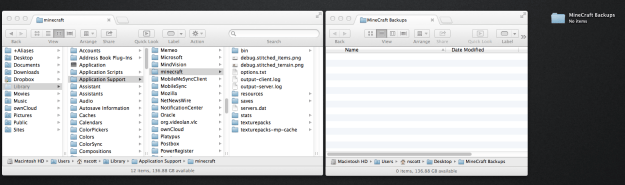
3. Now create a folder to place your Minecraft backups in. I created one called “MineCraft Backups” on my desktop, just to be easy. Then open the folder. You should have the two folders open like below.
minecraft-02

4. Open the Terminal and run this command. Make sure you substitute your user account name in place of “USER1” in the below command.

ditto -c /Users/USER1/Library/Application\ Support/minecraft /Users/USER1/Desktop/MineCraft\ Backups/minecraft_backup.$(date +%Y%m%d-%H%M%S).zip

If successful you should see a zip file added to your backup folder. Let’s break the command down.

The command is a simple ditto -c “source” “destination” “options”

Example:

ditto -c /Users/USER1/Library/Application\ Support/minecraft /Users/USER1/Desktop/MineCraft\ Backups/minecraft_backup.$(date +%Y%m%d-%H%M%S).zip

Command = ditto
a command that copies directory hierarchies, create and extract archives

options = -c
tells ditto to make an archive

Source = Users/USER1/Library/Application\ Support/minecraft
path of the file or folder that we want to back up

destination = /Users/USER1/Desktop/MineCraft\ Backups/minecraft_backup
path to where we want to put the backup

options: .$(date +%Y%m%d-%H%M%S)
this command is totally optional. It simply appends the year, month, day, hour, minutes, and seconds onto the end of the file name. I like to be detailed and this way no matter how many times I run my script they will always have a different file name and I won’t have to worry about them overwriting each other.

file format to save as: .zip
tells ditto to save the archive as a zip file
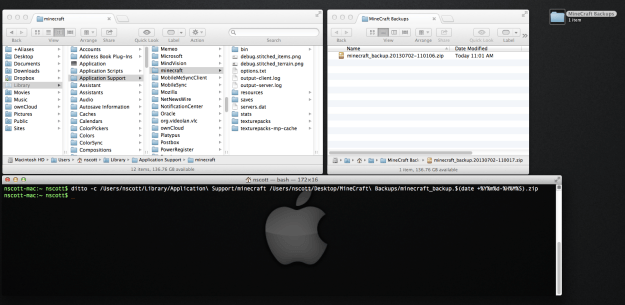
minecraft-03


Creating A script to run the backup

That’s was pretty easy but we don’t want to have to remember that command everytime we want to make a backup. So let’s make that command a shell script.

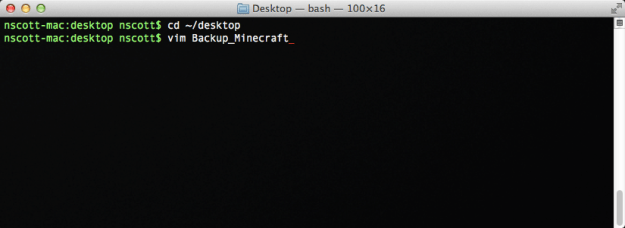
1. In Terminal type:

cd ~/desktop
vim Backup_Minecraft
minecraft-04

This is going to create a file on your desktop call “Backup_Minecraft” that we are going to save our command into.

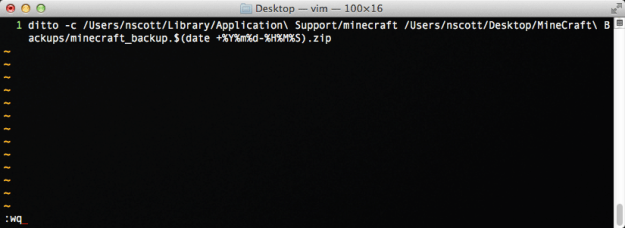
2. It should open a blank window. press “i” to enter insert mode, and paste your command from above into the window.
minecraft-05

3. Then press the ‘esc’ key to exit insert mode.

4. Press :wq to save and close the vim editor.

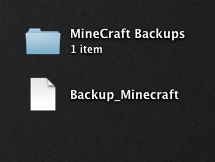
5. you should now have a new file on your desktop named “Backup_Minecraft”
minecraft-07

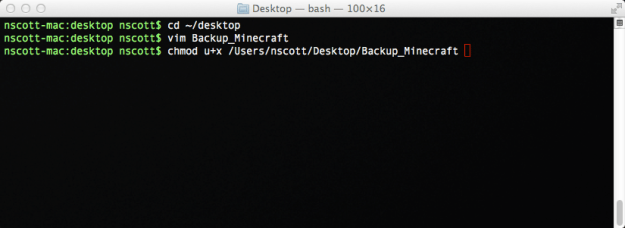
6. Now we need to make it executable so we can run the command. Back in terminal type the below command, again make sure to substitute your user account name in place of “USER1”.

chmod u+x /Users/USER1/Desktop/Backup_Minecraft
minecraft-06

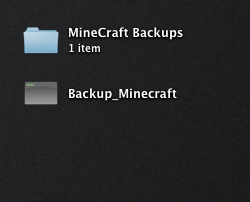
7. If it was successful you’ll notice the “Backup_Minecraft” file has changed in appearance.
minecraft-08

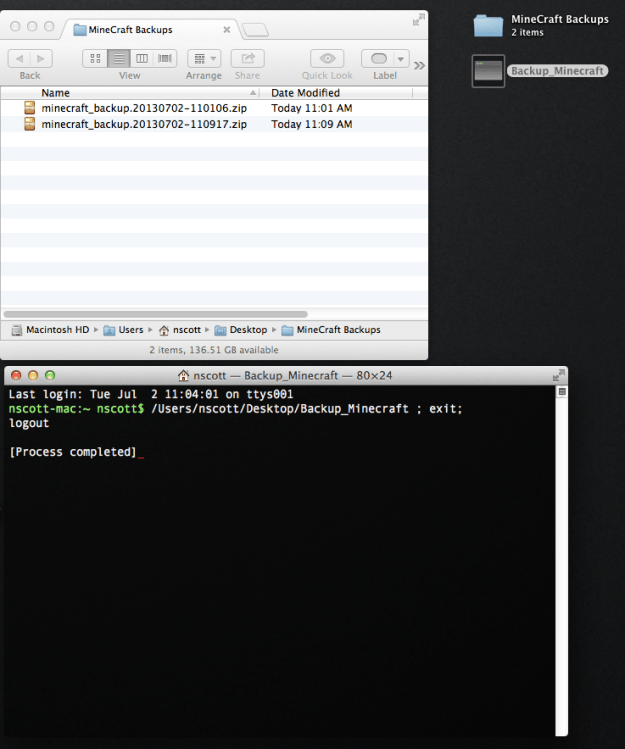
8. Now let’s verify that the script works. Double click the “Backup_Minecraft” file. You should get a Terminal window that pops up and a new .zip file added to your backup folder. If everything went well the Terminal window should say “Process Completed”
minecraft-09

Now anytime you want to make a backup of your entire minecraft folder you can simply double click your script.


How to automate your backup script

I stopped there, but if you wanted too, you could take this a step forward by creating a launch daemon or crontab. I’ll show you the crontab here.

1. Open Terminal and type the below:

cd ~/desktop
vim backups.sh

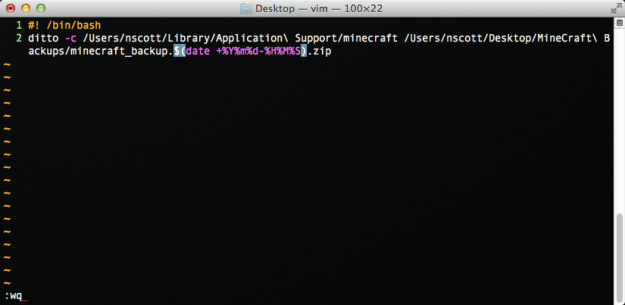
2. When the blank terminal windows opens, press “i” to enter insert mode, and paste your command from below into the window. Make sure you substitute your user account name in place of “USER1”.

#! /bin/bash
ditto -c /Users/USER1/Library/Application\ Support/minecraft /Users/USER1/Desktop/MineCraft\ Backups/minecraft_backup.$(date +%Y%m%d-%H%M%S).zip
minecraft-10

3. Then press the ‘esc’ key to exit insert mode.

4. Press :wq to save and close the vim editor.

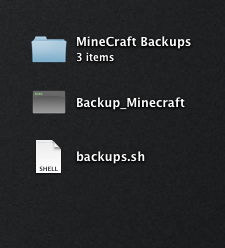
5. you should now have a new file on your desktop named “backups.sh
minecraft-11

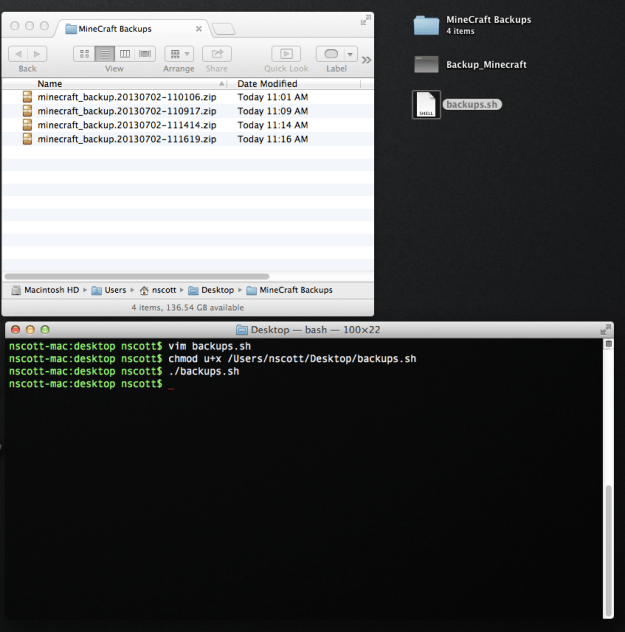
6. Let’s verify the script is working. Open Terminal and type:

cd ~/desktop
./backups.sh

It should create a new backup in your backup folder.
minecraft-12

7. Time to create a crontab which is just a scheduled task. I’m going to set this example up to backup every 2minutes. So we can quickly see if it’s working. Open Terminal and type:

crontabe -e

This will open a blank window so we can create our task.

8. Press “i” to enter insert mode, and paste the command from below into the window. Make sure you substitute your user account name in place of “USER1”

*/2 * * * * /Users/USER1/Desktop/backups.sh

With out going to deep into crontabs, this command tells your computer to run the script backups.sh every two minutes. For more info on crobtabs go here.

9. Then press the ‘esc’ key to exit insert mode.

10. Press :wq to save and close.

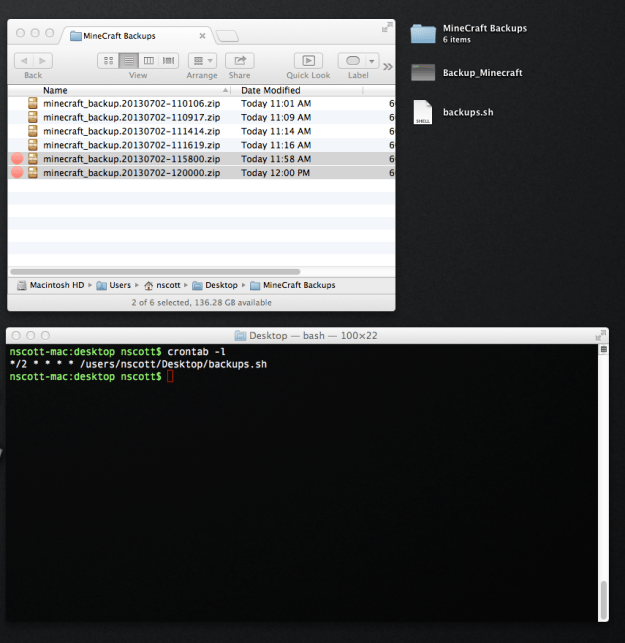
11. To check to see if your crontab was saved run this command or wait 2 minutes to see if a new backup is added.

crontab -l
minecraft-16

12. To remove the crontab run this command. Then you can create a new one and adjust the schedule to run every 24 hours, or what every you prefer.

crontab -r