This has caused me a lot of pain, I hope it saves someone else.
One of the things I do after creating a new VM in Azure is add rules to the NSG. This can be mundane and error prone, especially if you have a lot of rules. It’s much easier to deploy your VM with the basic RDP rule and then add your custom rules later. It’s even easier if you can script it. I prefer to use Powershell and the the AZ module on macOS, that way I don’t have to switch computers.
One of the issues I had was adding a NSG rule where “-SourceAddressPrefix” had multiple values. I can easily do this in the GUI by adding the rule manually.
(The IP addresses are just an example to show an IP address and a CIDR notation)
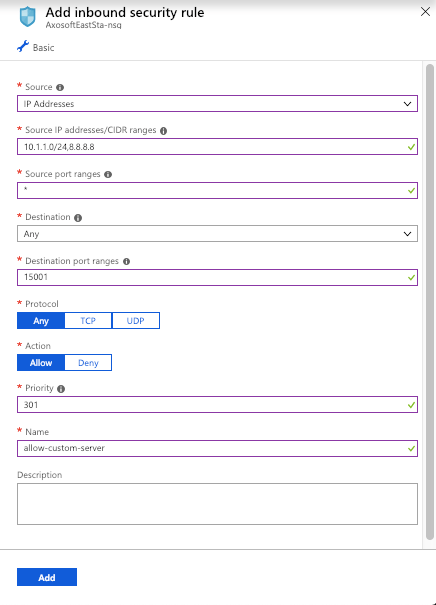
If I click add here, I create a new rule. But I want to do this with Powershell. But every time I run my script, I get a 400 error on “SourceAddressPrefix”, telling me it’s a bad request. To make it worse, Microsoft doesn’t even offer an example in the official documentation of how to add more than 1 IP or CIDR value.
It took a lot of just trial and error, but I finally got it. If you’re passing more than 1 value to “-SourceAddressPrefix”, it expects that the “,” is NOT in quotations.
So where it feels natural to create a variable like this:
$officeWhiteList = "8.8.8.8,10.1.1.0/24"
It’s wrong. Your “,” is inside the quotes. If you change it to this:
$officeWhiteList = "8.8.8.8","10.1.1.0/24"
It works! Some simple documentation or better error messages would have saved me a ton of time. Here’s my full example to add a network security rule to an existing NSG:
#---------------------------------------------------------------------------
# Summary:
# Add an Azure Network Security Group Rule to an existing NSG

#---------------------------------------------------------------------------
$subscriptionToUse = "12345678-1234-1234-1234-123456789012" #just an example
$officeWhiteList = "8.8.8.8","10.1.1.0/25" #just an example
$rgName = "Resource-Group"
$nsgName = "Resource-Group-nsg"
$customServerRule = "allow-custom-server"
$customServerPort = 15001

# Select subscription ------------------------------------------------------
Set-AzureRmContext -SubscriptionId $subscriptionToUse

# Get the NSG resource -----------------------------------------------------
$resource = Get-AzureRmResource | Where-Object `
{$_.ResourceGroupName `
–eq $rgName `
-and $_.ResourceType `
-eq "Microsoft.Network/networkSecurityGroups"}

$nsg = Get-AzureRmNetworkSecurityGroup `
-Name $nsgName `
-ResourceGroupName $rgName

# Add customServerPort --------------------------------------------------------
$nsg | Add-AzureRmNetworkSecurityRuleConfig `
-Name $customServerRule `
-Description $customServerRule `
-Access Allow `
-Protocol * `
-Direction Inbound `
-Priority 301 `
-SourceAddressPrefix $officeWhiteList `
-SourcePortRange * `
-DestinationAddressPrefix * `
-DestinationPortRange $customServerPort

# Save changes to NSG ------------------------------------------------------
$nsg | Set-AzureRmNetworkSecurityGroup
If you want to add more than 1 rule, just add another “$nsg | Add-AzureRmNetworkSecurityRuleConfig” statement. When you’re done, make sure the last statement is “$nsg | Set-AzureRmNetworkSecurityGroup“, this saves your changes to the NSG


