These are my “cleaned up” & “streamlined” instructions for how to get munki installed on a Mountain Lion Server, for the definitive instructions you should go to the wiki page here or check out the project home page. These guys are doing awesome things with munki.
You don’t have to install munki on a Mac server, I just happen to have it installed on my Deploy Studio server as an extra tool to help me manage and image clients. Ideally you can push out a thin image to new clients with Deploy Studio, boot into that image that is already configured with munki. Run the Managed Software Updates and download the remaining apps to finish the build out.
Step1: Building a server repository
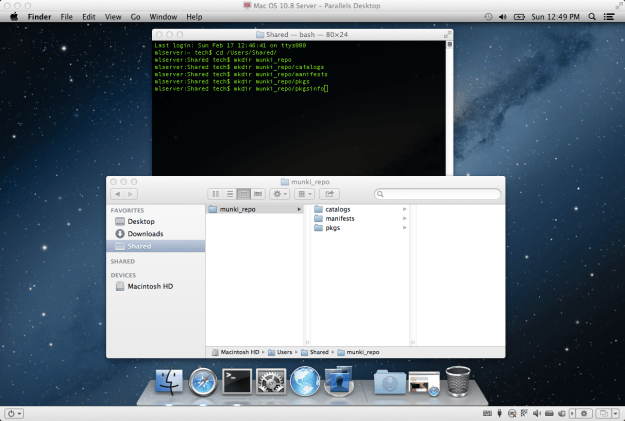
We need to setup some folders to keep our config files and actually software for munki. Copy and paste these commands into terminal.
 cd /Users/Shared/
 mkdir munki_repo
 mkdir munki_repo/catalogs
 mkdir munki_repo/manifests
 mkdir munki_repo/pkgs
 mkdir munki_repo/pkgsinfo
Step1: Building a server repository
_ _ _ _ _
Step 2: Changing Permissions on Directory
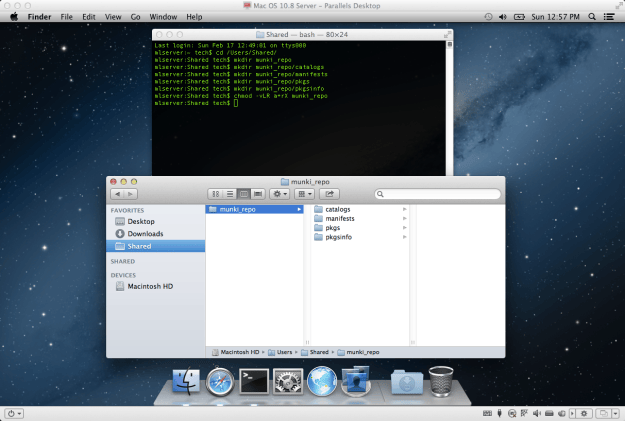
Run this command at the command line, For the specifics of what it does you can run “man chmod”. Basically you want to make sure Apache has the right permissions for this folder.
chmod -vLR a+rX munki_repo
Step 2: Changing Permissions on Directory
_ _ _ _ _
Step 3: Redirect Apache2 to serve the munki_repo directory via HTTP
Direct Apache to the right folder in order to display your repo over http.
sudo ln -s /Users/Shared/munki_repo /Library/Server/Web/Data/Sites/Default
_ _ _ _ _
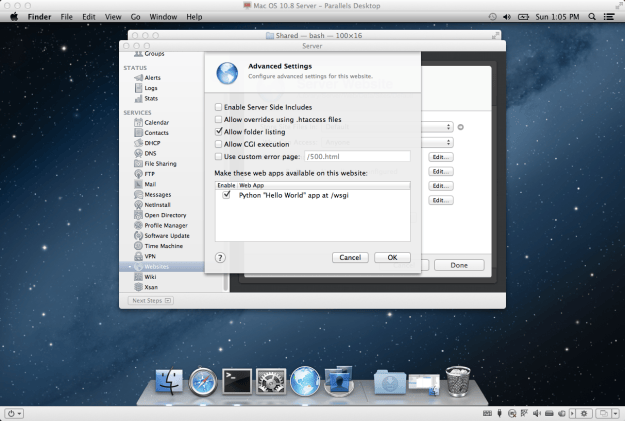
Step 4: Turn on Web Sharing in the Sharing preferences pane
– open server.app
– turn websites on
– select server websites, click edit button (pencil tool)
– elect edit advanced settings, click ‘allow folder listings’
Step 4: Turn on Web Sharing in the Sharing preferences pane
_ _ _ _ _
Step 5: Install munki tools
Download and install the munki tools … YOU WILL HAVE TO RESTART IMMEDIATELY.
http://code.google.com/p/munki/downloads/list
Optional: Adding /usr/local/munki to bash search path
– this step simply adds the path to the bash search path so you don’t have to add the path with every terminal command. For example if you do this step you only need to run: munkiimport –configure instead of /usr/local/munki/ munkiimport –configure
PATH=$PATH\:/usr/local/munki ; export PATH
_ _ _ _ _
Step 6: Configure munki import
Here’s where it starts to get good. We need to set up munki first with some basic information like where we want the folders to be where we are going to put software.
Type this at the command line:
usr/local/munki/munkiimport --configure
or just
munkiimport - -configure
if you add it to the search path in step 5. From here I”ll only list the actually command and not the usr/local/munki
You should see this:
Path to munki repo [None]: /Users/Shared/munki_repo
Repo fileshare URL [None]: <just hit return>
pkginfo extension [None]: <just hit return>
pkginfo editor [None]: TextEdit.app <substitute your favorite text editor>
_ _ _ _ _
Step 7: Import first app into munki
Time to import something. I downloaded Firefox. Run the munkiimport command and then just drag the Firefox dmg on to the terminal window. It will automatically add the path.
munkiimport ~/Downloads/Firefox\ 18.0.1.dmg
You should then see a list of information after just a few seconds. Just follow the prompts. Don’t worry if you get it wrong, this is just a test, you should do this several times to feel comfortable. My responses are in red.
Item name [Firefox]: FIrefox
Display name []: FIrefox
Description []: web browser
Version [18.0.2]: <just hit return>
Catalogs [testing]:test (you can put in whatever you want to name your catalog)
Item name: Firefox
Display name: Mozilla Firefox
Description: Web browser from Mozilla
Version: 18.0.1
Catalogs: test
Import this item? [y/n] y
Upload item to subdirectory path []: <just hit return> (you could say apps/web_browsers if you wanted to create folders and organize your software)
Copying Firefox 18.0.2.dmg to /Users/Shared/munki_repo/pkgs/Firefox 18.0.2.dmg…
Saving pkginfo to /Users/Shared/munki_repo/pkgsinfo/Firefox-18.0.2…
Rebuild catalogs?[y/n]y
Rebuilding catalogs at /Users/Shared/munki_repo ….
After wards you can go to the munki_repo/pkgs folder and see that munki did actually copy the Firefox installer to the right folder.
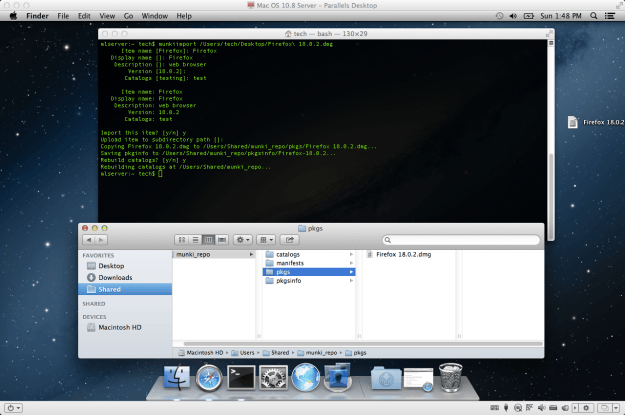
Step 7: Import first app into munki
_ _ _ _ _
Step 8: Creating a client manifest
The manifest is just the file that tells munki what software to offer. So now that we have Firefox in our repo we need to tell munki to offer it to our clients. First I need to create a manifest
run this command:
manifestutil
(again, my responses are in red, for a list of commands with manifestutil type help)
Entering interactive mode… (type “help” for commands)
> new-manifest test_munki
> add-catalog test –manifest test_munki
Added test to catalogs of manifest test_munki
add-pkg Firefox –manifest test_munki
Added Firefox to section managed_installs of manifest test_munki
> exit
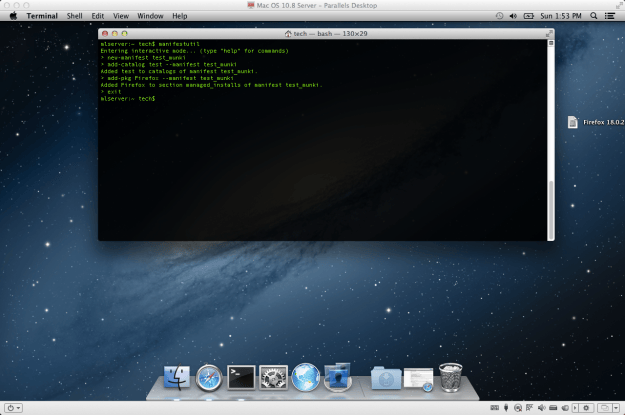
_ _ _ _ _
Step 9: Munki Client Configuration
In order for clients to see the munki server you need to install the munki tools on each client. Go here and download the munki tools and install them. This will install the Managed Software Updates app in the clients utility folder.
Now we need to tell ManagedInstalls where to find munki. Type this command.
sudo defaults write /Library/Preferences/ManagedInstalls SoftwareRepoURL "http://localhost/munki_repo"
This is just a test so I am using “http://localhost/munki_repo” , but if I really installed this on a different client I would have to change localhost to the IP of the Munki Server
sudo defaults write /Library/Preferences/ManagedInstalls ClientIdentifier "test"
“test” would be the name of your catalog you created.
To check your settings run this:
defaults read /Library/Preferences/ManagedInstalls
_ _ _ _ _
Step 10: Managed Software update
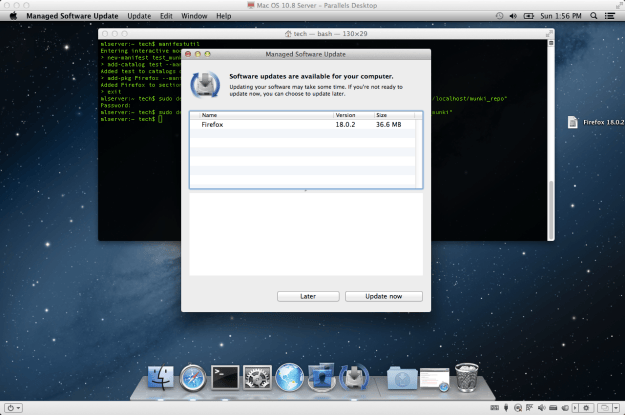
Now the moment of truth. Go to the Utility folder and double click Managed Software Updates. If everything was successful You should see the below.