

Using Raspberry Pi as a PC: Your Essential Guide
So you just got your first Raspberry Pi, or have been using one for a while, wondering if this tiny computer can replace your PC? Well, this is the perfect article for you because that’s what I’ll talk about today.
In short, a Raspberry Pi can be used as a PC. However, several factors need to be considered. For example, the choice of the Raspberry Pi model, resources such as RAM, and a good understanding of what the Raspberry Pi can and can’t do.
After reading this, you’ll know everything you need to know to decide if a Raspberry Pi is right for your desktop use, as well as tips for getting the most out of your setup. Feel free to use the table of contents below to jump directly to the part you’re most interested in.
If you’re feeling lost in all the Raspberry Pi jargon, I’ve got something to help you out. I’ve created a free glossary that explains all the essential terms and abbreviations in a way that’s easy to understand. It’s a great resource to have by your side. Get your free copy here.
Which Raspberry Pi Models Work Best as a PC?
While it’s entirely possible to use the Raspberry Pi as a cheap, entry-level desktop PC, it’s important to remember that the Raspberry Pi was not designed for that purpose – it wasn’t built to replace the traditional computer.
Therefore, if you want to use a Raspberry Pi as a PC alternative, you need a Raspberry Pi model that fits that purpose.

Many Raspberry Pi models available today come with different features and resources. Let’s get a good understanding of some of the models that would give the best performance when used as a PC:
You might also like: Yes, you can access your Pi from anywhere. Here's how.
- Raspberry Pi 5: This is the latest release of the Raspberry Pi models – released on November 2023. It boasts significant upgrades from its predecessor, the Raspberry Pi 4, especially in CPU and GPU. So far, it is the best model to use as a PC.
Below are some of our posts which you can use to learn more about the Raspberry Pi 5. - Raspberry Pi Model 4B: The Raspberry Pi 4 is another powerful model and was considered the most powerful before Raspberry Pi 5 was released. The most interesting feature about the Pi 4 is the ability to choose the amount of RAM you want. You can get a 2GB version, a 4GB version and an 8GB version.
Check out the posts below to learn more about the Raspberry Pi 4B. - Raspberry Pi 500: The Raspberry Pi 500 and Pi 400 are is similar to their mainline models with a few key differences. One notable difference is that these boards are integrated into a keyboard, which you can see in the image below. The other one is that the Pi 500 and Pi 400 come with fixed RAM amounts, unlike the Pi 4B which offers 2GB, 4GB and 8GB variants.
The Raspberry Pi 500+ is also available now with upgraded features meant for PC use.
Below are some posts which will give you in-depth information about these models - Raspberry Pi 3B+: As the name suggests, the Raspberry Pi 3B+ is the predecessor of the Raspberry Pi 4B. Unlike the other models I have listed above, the Raspberry Pi 3B+ only came with 1GB RAM, offering a basic performance level suitable for lightweight tasks.
If you don’t have access to the other Raspberry PI models above, you can also set up the Raspberry Pi 3B+ as a PC but the performance might be limited.
Below are some posts you can use to learn more about the Raspberry PI 3B+:- Raspberry Pi 3B+ vs 4: Which one to choose? (With benchmarks)
- How to install heat sinks on a Raspberry Pi 3 B+ ?: This is also crucial, since setting up your Raspberry Pi as a PC means more CPU tasks, leading to more heat generated.
In summary, the Raspberry Pi 5 and 500 are currently the best options for using a Raspberry Pi as a desktop computer if you can afford them. The other options listed here are decent alternatives for a cheaper budget but don’t expect the same results.
Related: Raspberry Pi 6 Release Date, Specs, and Rumors
Setting Up Your Raspberry Pi
I assume that by now, you’ve decided on the Raspberry Pi model. The next step is installing the OS and getting started with your Raspberry Pi PC.
You can get answers from real experts in minutes.
Get help with your setup
Which Operating Systems Can You Install on Raspberry Pi?
If you have a Windows or MacOS background and haven’t used a Raspberry Pi before, you may need to change your habits, as neither system is suited to it.
In short, Raspberry Pi is designed to run Linux distributions, specifically Raspberry Pi OS, the official distribution based on Debian and developed by the manufacturer. While you can install another OS such as Windows 11, the performance will be disappointing, no matter which Raspberry Pi model you use.
That doesn’t mean you don’t have a choice. There are many Linux distributions available, all with different flavors to suit your preferences. You might even get lost wondering which one to choose, so let me guide you.
Bonus tip: When I started, the hardest part wasn’t the setup, it was figuring out what to build next. I ended up creating a list of 75+ project ideas with links and difficulty, so it’s easier to just pick something and try it. Grab the list here.

If you want a clearer path than jumping from tutorial to tutorial, my book gives you a step-by-step roadmap to really understand your Raspberry Pi.
Check the book here
For a PC set up, I recommend the official Raspberry Pi OS. Raspberry Pi OS is the Linux distribution created by the Raspberry Pi manufacturer. It’s built to be compatible with all Raspberry Pi models and includes the essential applications to get started with this tiny computer.
If you’re starting out, we have plenty of posts on this website covering Raspberry Pi OS, from what it is to detailed installation guides. Here are a few you might find useful:
- How to Install (or Reinstall) Raspberry Pi OS on Your Pi
- Install Raspberry Pi OS Bookworm on Raspberry Pi (Illustrated Guide)
- What Is Raspberry Pi OS? (Goal, Installation & Benefits)
And if you’re already familiar with Linux systems or feel like exploring beyond Raspberry Pi OS, there are several other distributions you can try, such as Ubuntu, Manjaro, and Fedora. For a deeper dive into these options, check out the Best Operating Systems for Raspberry Pi.
Note: I have a video available for community members where I introduce the best distros for desktop usage (so you don’t have to test them yourself). Join here to watch, and get access to 30+ other lessons for Raspberry Pi!
Installing an Operating System on Raspberry Pi
Installing an operating system on the Raspberry Pi is different than on your normal PC.
In most cases, traditional computers have Windows preinstalled, so you don’t need to worry about the installation. And if you do, you usually create a bootable USB drive and use it to install the operating system to the internal storage.
With a Raspberry Pi, the internal storage is a microSD card. To install the OS, you simply make the microSD card bootable using tools like Raspberry Pi Imager. These tools allow you to flash the operating system image onto the card, making it ready for the Raspberry Pi to boot directly into the new OS.

You can follow our comprehensive guide on how to install or re-install the Raspberry Pi OS on the Pi for a step-by-step guide.
Here are some other posts on the same topic that you might find helpful:
- Beginner’s Guide: How To Install a New OS on Raspberry Pi
- Install Raspberry Pi OS Bookworm on Raspberry Pi (Illustrated Guide)

The minimum hardware requirements you will need to set up your Raspberry Pi PC include:
- A Raspberry Pi board. For this project, I recommend using the models that I listed above. Typically, a Raspberry Pi 5 would be perfect.
- A microSD card (at least 16GB) for the operating system. Please don’t just pick up any SD Card. Some are not of good quality and the Raspberry Pi might not boot. You can check our post on the best Micro SD Card for the Raspberry Pi for an in-depth guide.
If you want more storage, you can also boot the Raspberry Pi from an SSD instead of using an SD Card. - The official power supply from Raspberry Pi. Our article on how to power a Raspberry Pi will give you tips on the advantages of using the right power supply. In case of any issues with the power supply, we also have a troubleshooting post like how to avoid “Under-voltage Detected” errors on Raspberry Pi.
- A keyboard, mouse, and monitor for input and display. Here are my favorite keyboards for the Raspberry Pi, but any USB model you already have can be used.
Customizing Your Raspberry Pi System
After installation, you might want to personalize the system to your liking.
The first thing you can start with is changing the default desktop appearance. That’s not because the default appearance isn’t appealing, but as you might understand, the Raspberry Pi OS is built for beginners. With that in mind, developers try to keep things clean and simple which might be less exciting to many.

Then you can start by installing additional applications on the Raspberry Pi. Like any other operating system, Raspberry Pi OS comes with many default applications. However, you can install more using Snap or the APT package manager.
It’s also possible to adjust the system settings and configurations to tailor your Raspberry Pi to your needs. If you have a desktop environment installed, you’ll probably use the GUI, or you can also use the Raspi-Config command-line utility. It is a powerful utility that provides a text menu, so you can modify both hardware and software settings for your Pi all in one place.
What Can You Do with the Raspberry Pi PC?
Now that the hardware and software parts are taken care of, you can do a lot with the Raspberry Pi PC that you would still be able to do on your regular PC. Here are some examples:
- Programming.
The Raspberry Pi is a fantastic tool for learning and practicing programming. It supports multiple languages, including Python, Java, and C++, and comes preloaded with tools like Thonny IDE. You can also install other popular IDEs like Visual Studio Code.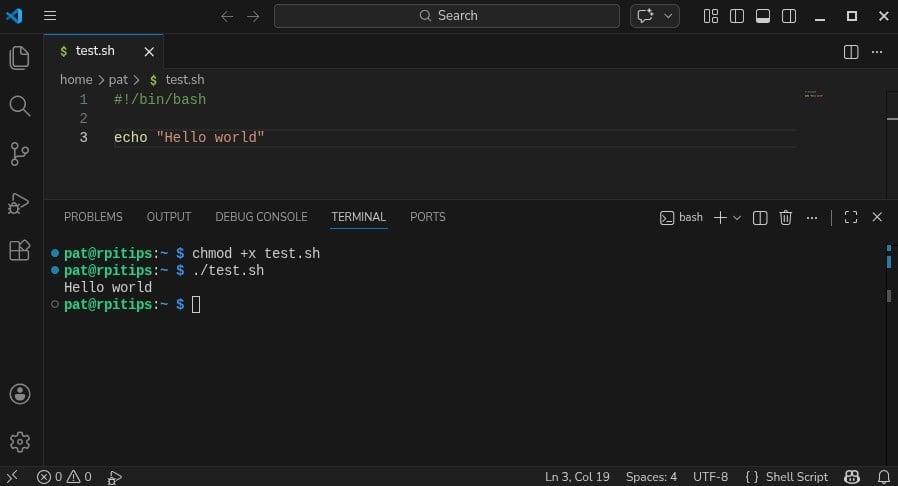
If you want to become a pro Python developer with the Raspberry Pi you can get our Master Python on Raspberry Pi e-book. This book is for any Raspberry Pi user who wants to spend the least time possible on theory and go straight to the real-life usage of Python. - Web browsing and social media.
The official Raspberry Pi OS has a lightweight web browser known as Chromium, which you can use for basic web browsing and staying connected on social media. However, that doesn’t mean you cannot install any other browsers.
Our article on the Best Web Browsers to Use on Raspberry Pi lists the 5 best browsers we tested, providing detailed insights on their performance, features, and usability.
While most of these browsers can handle multiple tabs, it’s best to avoid loading too many resource-heavy websites at once for a smoother experience.
If you installed an operating system like Ubuntu, you can check our post on the top 5 browsers you can install on your Ubuntu system. These browsers have been tested for speed, features and more.
Here are some other articles that might come in handy for installing different browsers on your Raspberry Pi: - Watching videos and listening to music.
The Raspberry Pi can stream videos on YouTube, Netflix, or other platforms and handle music playback seamlessly. It supports up to 4K resolution (on compatible models like the Pi 4), making it a budget-friendly option for casual media consumption.
- Basic productivity.
You can use office software like LibreOffice to create and edit documents, spreadsheets, and presentations. It’s sufficient for light productivity tasks but may struggle with large or complex files.
Warning: While the Raspberry Pi can do many things, it has its limitations. Due to its limited processing power and GPU, it isn’t ideal for heavy video editing, 3D rendering, or playing resource-intensive games due.
Many applications are also not available on Linux systems. For these tasks, a traditional PC or dedicated hardware would be more appropriate.
Common Challenges and How to Solve Them
Deciding to use the Raspberry Pi as your PC comes with a few challenges, unlike when you are using it for other tasks like testing out some IoT projects. Let’s look at some of the most common.
Portecting the Raspberry Pi from Damage
Bonus tip: When I started, the hardest part wasn’t the setup, it was figuring out what to build next. I ended up creating a list of 75+ project ideas with links and difficulty, so it’s easier to just pick something and try it. Grab the list here.
The first thing you’ll need is a Raspberry Pi case—you can’t just leave the bare board lying on your desk, exposed to dust or the risk of accidental contact with liquids. A good case not only protects your Raspberry Pi but also helps with cooling and stability.

That’s why we created a detailed guide on finding the best case for your Raspberry Pi. This article covers important factors to consider when choosing a case, helping you pick the right one to keep your board safe and functional.
Below are other posts related to Raspberry Pi cases that you might find helpful:
- The Best Raspberry Pi 5 Cases You Can Buy Today
- Flirc Case Review: Is it Really the Best? (6 Months Usage)
- GPi Case 2W Intro & Review – Is it Really Worth it?
- Pironman 5 Review: The Ultimate Case for Your Raspberry Pi 5
- Argon NEO: Honest Review After 1 Month Usage
Managing Heat to Prevent Performance Issues
When using the Raspberry Pi as a PC, you’ll likely run more tasks than usual, which will cause the board to generate more heat. If this heat isn’t managed properly, it can lead to thermal throttling, where the system slows down to prevent overheating.

Fortunately, there are several cooling solutions you can implement to maintain optimal performance:
- Installing Heat Sinks: Heat sinks are small metal plates that attach to key components like the CPU and GPU. They help dissipate heat more effectively by increasing the surface area, allowing for better cooling. This is a simple and affordable way to reduce heat buildup.
- Using a Heat Sink Case: Another option is to use a case designed to act as a large heat sink. These cases are typically made of aluminum or other heat-conductive materials and provide passive cooling by transferring heat from the board to the case’s exterior.
- Adding a Cooling Fan: For even better heat management, use a case with a built-in cooling fan or add one separately.
Lastly, ensure you have a good backup process in place if you spend time setting everything up. You don’t want to lose your data or have to start over a few weeks later because of a wrong move.
Something not working? Don't waste hours going in circles. Ask in the RaspberryTips Community and get help from people who've already figured it out. Get unstuck now.
Going Beyond: Expanding Your Raspberry Pi Experience
Once your Raspberry Pi PC is up and running, there’s plenty more you can do to enhance its functionality and performance. Here are a few ways to take your Raspberry Pi experience to the next level:
Adding Optional Accessories
While the Raspberry Pi can function well with basic hardware, adding optional accessories can greatly improve your experience.

- External SSD: Upgrading from a microSD card to an external SSD significantly improves read/write speeds, resulting in faster boot times and better overall performance.
- Peripherals: Accessories like wireless keyboards, mice, and game controllers can add convenience, especially if you’re using the Raspberry Pi for multimedia or retro gaming.
You can find my current gear recommendations on this page for a complete overview.
Overclocking for Better Performance
If you want to push your Raspberry Pi to its limits, overclocking is an option. Overclocking increases the CPU and GPU clock speeds, resulting in faster performance for tasks like web browsing, media playback, and emulation gaming performance.
You can overclock by editing the config.txt file on your Raspberry Pi and increasing the clock speed values. If you have never overclocked your Raspberry Pi before, you can check out our post on tips & tricks to increase your Raspberry Pi’s speed.
Tip: Overclocking generates more heat and may reduce the lifespan of your device, so it’s essential to have proper cooling in place, like heat sinks and a fan, to prevent overheating.
Not getting the same result?
Even when you follow every step, small differences in OS version, hardware or config can change the outcome. Instead of wasting time guessing, get help from people who have already fixed the same kind of issue.
- Get help on your exact issue
- Access step-by-step videos for tricky setups
- Browse the website without ads


