
How to Install MoOde on Raspberry Pi (Beginner’s Guide)
MoOde audio player is a software developed for Raspberry Pi that provides an audio streaming interface for one’s local music collection. It stands out from its competitors because it provides audiophile-grade functionalities that are completely free and open source. Let’s learn how to use it.
The latest version of moOde can be installed and flashed onto an SD card straight from the Raspberry Pi Imager under the “Media player OS” section. Once installed, the moOde audio player can be configured from its web interface.
Let’s start with the actual installation tutorial to get moOde running on our Raspberry Pi. We will take a look at the hardware and software requirements for this tutorial before starting the actual tutorial.
If you’re new to Raspberry Pi or Linux, I’ve got something that can help you right away!
Download my free Linux commands cheat sheet – it’s a quick reference guide with all the essential commands you’ll need to get things done on your Raspberry Pi. Click here to get it for free!
Hardware and Software Requirements
Are you new to what it means to host your own media server? If so, check out: Raspberry Pi as a Media Center: Complete Guide for Beginners!
Once you get acquainted, below is what you’ll need to install MoOde on Raspberry Pi:
- Raspberry Pi: I would recommend using a Raspberry Pi 4, as a media server requires a considerably powerful CPU and more memory.
- SD Card: To flash the latest version of the Raspberry Pi OS for our Pi. You’ll need at least 8 GB. You can find my SD card benchmark here (or get the best one on Amazon).
- Headphones/AUX Speakers (optional): These are not required but would be useful to test our audio player as the Pi’s AUX can be set as an output port.
Apart from this, a local network (Wi-Fi or Ethernet-based) would be required to access moOde as it can be operated through a user-friendly web interface from your favorite browser!
You might also like: I tried to replace my main PC with a Pi 5, here's what happened.
In terms of software requirements, you will need the latest version of Raspberry Pi Imager or any other alternative installed on your system. I would recommend using the former as we can install the latest version of the moOde through a single click.
That is all for the requirements. Now that we are squared away with that, let’s get started with the tutorial.
Bonus tip: If the terminal still feels confusing, I made a simple cheat sheet with 74 commands explained in plain English. You can grab it here for free..

If you want a clearer path than jumping from tutorial to tutorial, my book gives you a step-by-step roadmap to really understand your Raspberry Pi.
Check the book hereMoOde Installation and Setup
This section covers all of the steps required to install and set up the moOde Audio Player on our Raspberry Pi. The steps are as follows:
You can get answers from real experts in minutes.
Get help with your setup
- Flash the MoOde installation image onto an SD Card.
- MoOde first run and initial setup.
Let’s dive into each step in detail.
Flash MoOde onto an SD Card
We will use the Raspberry Pi Imager to set up our SD Card and install the latest version of moOde audio player on it.
- First, pick a fresh SD card or format an existing one. One advantage of using Imager software is that it will format the SD card before installing the new image onto the card.
- Launch Raspberry Pi Imager.
- Press CHOOSE OS to load the list of available operating systems.

- Navigate to Media Player OS > moOde audio player.

- Click on the highlighted option and select the latest version (64-bit option is always recommended). For instance, at the time of writing this article, the latest available version for me was 9.3.7.
- Press CHOOSE OS to load the list of available operating systems.
- Once you have selected the OS, insert your SD card.
Click CHOOSE STORAGE and select your SD card from the list of available choices.
- After this, we will set up some additional configurations so that we can access the OS through headless access. For that, all we need to do is enable SSH and set up the Wi-Fi credentials, which can be done through the Pi Imager’s advanced options.
Click NEXT. When asked to ‘apply OS customisation settings,’ choose Edit Settings.
- Configure the following:
- Hostname: Select the first option and set a hostname of your choice. You can directly access your Pi within your local network through this hostname.
- SSH and Username/Password: Select the Enable SSH option and click the password authentication option. Then set the username and password credentials of your choice. These will be the credentials to log into your Pi.
- Wi-Fi credentials: You will enter your Wi-Fi credentials in the Set up wireless LAN section. Select that option and enter the credentials.
- Once the above configurations are done, press the SAVE button at the bottom.
- To begin writing, choose Yes and Yes again to confirm.
It will take a few minutes to complete so be patient. Once the process is complete, you can eject the SD card from your system.
With this, we have successfully set up our SD card for the Raspberry Pi. Next, we will get moOde up and running.
MoOde First Run and Initial Setup
Now that moOde has been successfully flashed onto the SD card, we can start using it on the Raspberry Pi.
Inserting the SD card into the Pi and First Boot
- Insert your newly set up SD card into your Raspberry Pi and then power on the Pi. Wait a few seconds for the Raspberry Pi to boot up.
- Next, let’s verify that the Pi is connected to our local network. For that, you can use any network monitoring software of your choice. I use the Fing app on my phone for this. You should see your device listed in the available devices section.

- Once you have verified that it has indeed connected to the network, we are ready to access the moOde audio player’s web interface!
Accessing the Web Interface for the First Time
Accessing the web interface for moOde is quite simple.
- Open your favorite browser and then type in the hostname that you set up for your Pi into the address bar (in my case, it’s raspberrypi.local).
Alternatively, you can enter its local IP address (e.g., 192.168.1.69).
- Once you hit enter, voilà! You should see the moOde’s interactive and user-friendly web interface open in your browser.
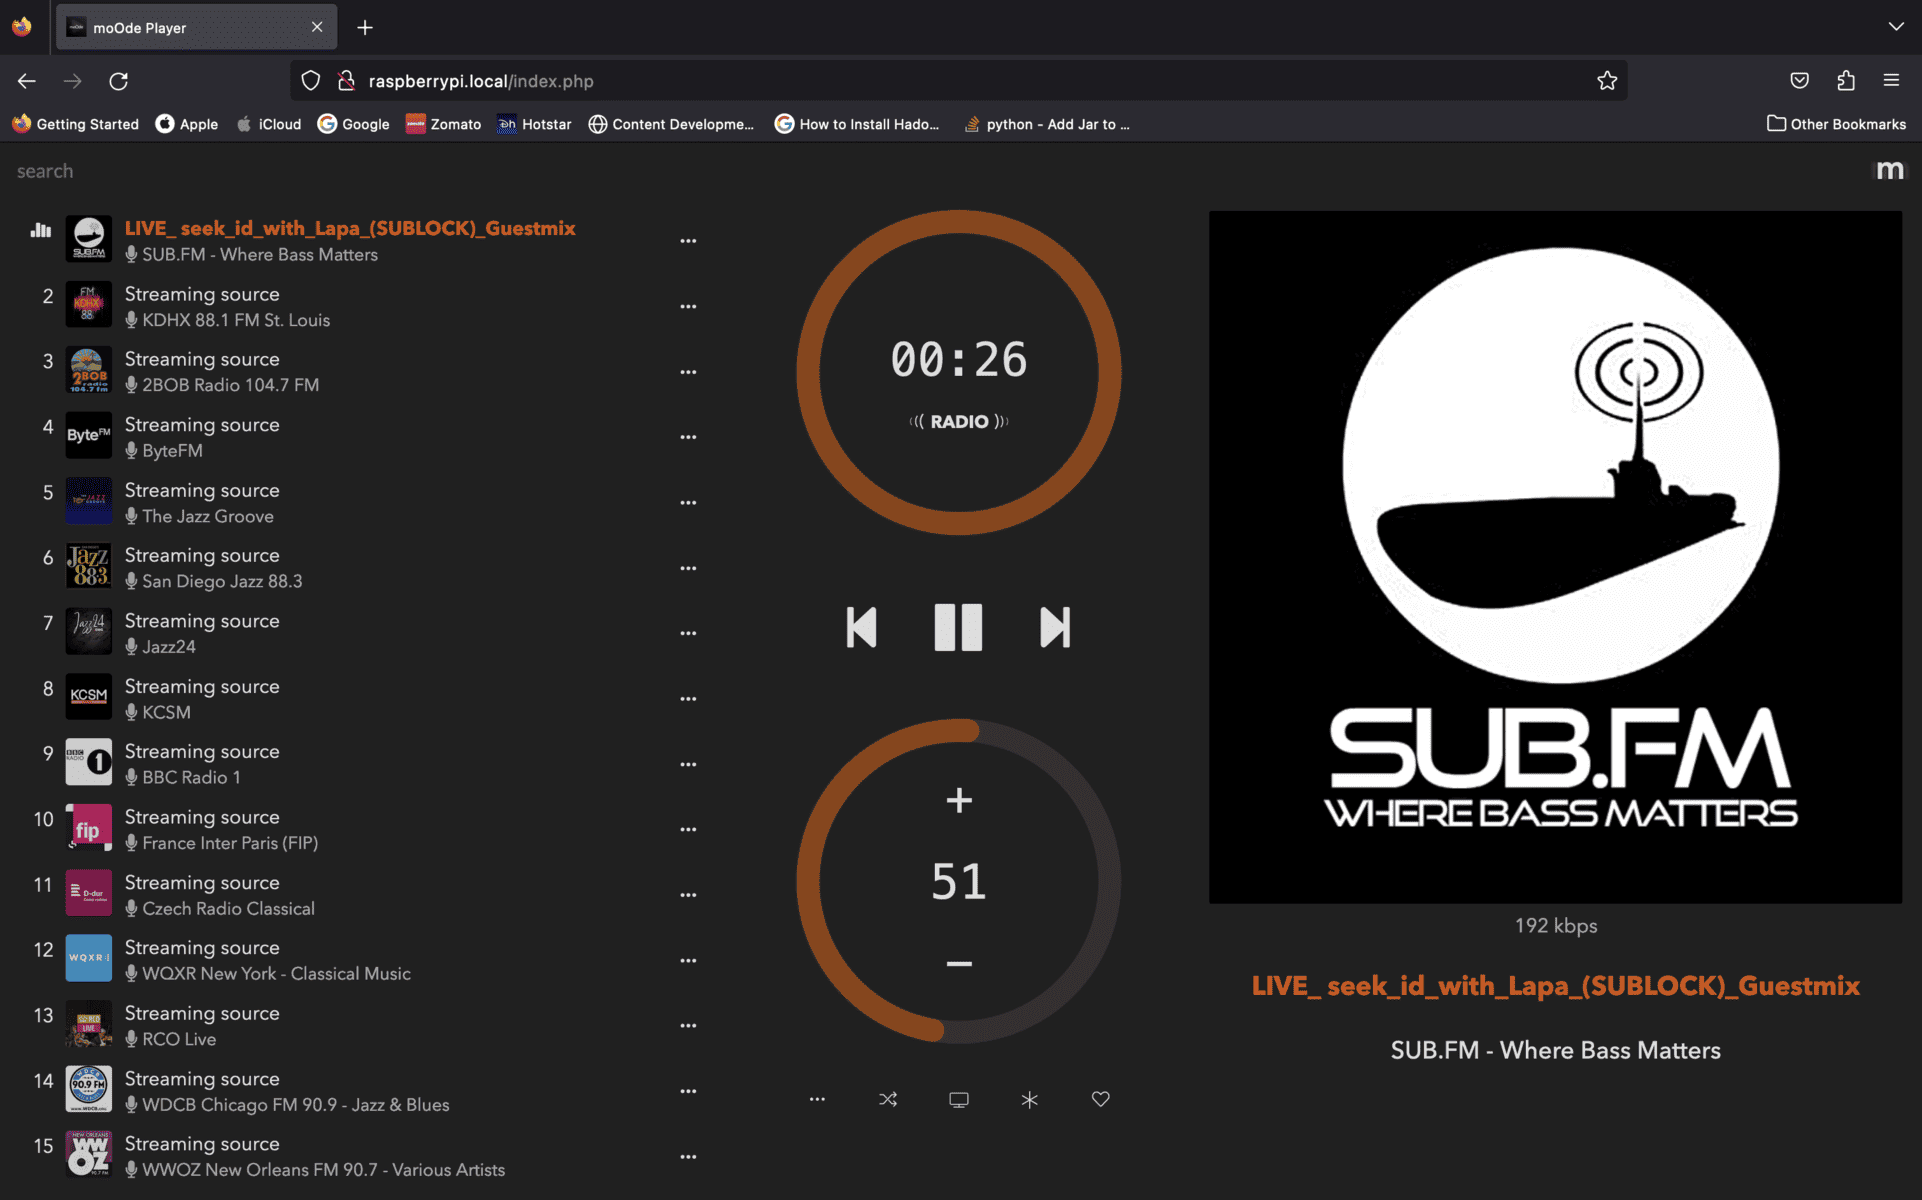
- We can test your player straight away. Some tracks are already a part of the moOde’s default playlist. If you have a Pi that is connected to an HDMI source with speakers, you can press on any track and it will start playing through your display’s speakers.
If you are using a headless set-up, don’t worry. We will see how to test this setup in the next section, where we will learn how to change the audio output port and much more.
Something not working? Don't waste hours going in circles. Ask in the RaspberryTips Community and get help from people who've already figured it out. Get unstuck now.
Exploring Additional Configurations
In this section, we will be exploring some of the available configuration options for moOde. Specifically, I am planning to explore these:
- Audio Output Setup
- Spotify, Bluetooth, and Airplay Integration
- Adding a New Remotely Hosted Library
So, let’s dive into each of these configuration options.
Audio Output Setup
By default, the default output port is set to Pi’s HDMI interface. However, we can configure them to work for different output sources. This section helps you learn how to do just that.
- For this, go to the Audio section in the menu at the top right (m >> Configure >> Audio).
Here you’ll find the Audio Output section, which defaults to the Pi’s HDMI port.
- You can set the final output device using the Output device dropdown. Let’s set it to the Pi’s Headphone jack so that we can test our headless interface as well.

- Note: if you need to use the headphone jack, but it isn’t appearing, you’ll have to add it.
- Go to m > Configure > System.
- Set Integrated audio to Firmware mode (Legacy).
- Restart: m > Power > Restart.
- Go back to m > Configure > Audio and hit Scan.
- Now you can set Output device to Pi Headphone jack and Volume type to Hardware.
- In addition to these basic configurations, you can even connect USB DACs and other I2S devices (like a HiFiBerry DAC) which are custom connectors for audio-specific applications on the Raspberry Pi. You can use the I2S section for these configurations.

Bonus tip: If the terminal still feels confusing, I made a simple cheat sheet with 74 commands explained in plain English. You can grab it here for free..
That is all for this section. Next, we will see how to integrate moOde with different services.
Spotify Connect, Bluetooth, and Airplay Integration
To integrate the above services, moOde has something called Renderers.
Here is how they describe them:
Read next: Should you wait for Raspberry Pi 6?
"Audio renderers are playback applications separate from MPD. When a client connects to one of the renderers MPD will stop and the renderer will begin playback".
What this essentially means is that we use one of these services as the primary music source instead of the default music player daemon (what moOde uses by default). Now, setting up these renderers is quite easy. Just follow the steps given below:
- From the Configuration Settings, go to the Renderers section.

- In the new window, you will be able to see all three services as a separate section. You can only enable one of them at a given time. All you need to do is toggle the switch in the start for the service you would like to enable.

- For this tutorial, let’s test the Bluetooth integration. Just toggle the Controller switch and then wait for a few seconds. A new window with just the RECONNECT button will open and then in a few seconds, you will see a white notification box saying “Settings updated”.

- That is all, you have configured moOde to run through the Bluetooth service. It will now be discoverable to other devices.

You can do the same for both Spotify (covered in our guide here) and Airplay (for Apple devices) services. You can confirm your renderers are working correctly by connecting (via Spotify/AirPlay/Bluetooth) and playing audio.
Adding a New Remotely Hosted Library
Separate from streaming from these other sources, you also have the option of adding your own music library on moOde. Here’s how to do it:
- Navigate to m > Configure > Library.

- In the Library section, you will be able to add a new Library in the Music Sources section.
It now lets you include not only includes remotely hosted libraries (SMB and NFS), but also music on local storage disks.
- All you need to do now is add the details for your remotely hosted location and then press the SAVE button.

That marks the end of this section and tutorial. These are just some of the configuration options available in moOde. That is what makes it a popular choice for audiophiles.
That is all for this tutorial. We learnt how to set up our very own audio streaming service on the Raspberry Pi using the moOde audio player. In addition to this, we explored some of the configuration options available to get the best out of our audio streaming service.
The question now is, what next? You can explore other alternative media players available for the Raspberry Pi. One such alternative is Volumio. To more about it, you can explore this article Getting Started With Volumio On Raspberry Pi (Media Player).
Additionally, you can even focus on a specific use case. For instance, if you want a Spotify client for your Pi, you can take a look at this article The 3 Best Ways to Use Spotify on Your Raspberry Pi.
Not getting the same result?
Even when you follow every step, small differences in OS version, hardware or config can change the outcome. Instead of wasting time guessing, get help from people who have already fixed the same kind of issue.
- Get help on your exact issue
- Access step-by-step videos for tricky setups
- Browse the website without ads


