

Immich on Raspberry Pi: Host Your Own Google Photos Alternative
I’m always looking for new projects to add to my self-hosted Pi cluster, and I’ve recently been wondering how to organize my personal photos and videos. They’re spread across different devices, and I don’t want to upload my private data to a cloud service. That’s why today I’ll show you how to run a photo server on your Raspberry Pi.
Immich is a free and open source photo and video manager that can be self-hosted on a Raspberry Pi. It can sync backups from mobile devices and also includes smart features like facial recognition and contextual search (all stored locally and privately).
If you’re tired of trusting Big Tech with all your personal info, and want to save on subscription costs, Immich might be the solution you’ve been looking for. Let’s get started.
If you’re new to Raspberry Pi or Linux, I’ve got something that can help you right away!
Download my free Linux commands cheat sheet – it’s a quick reference guide with all the essential commands you’ll need to get things done on your Raspberry Pi. Click here to get it for free!
Overview of Immich
Before I jump into the installation, let me give you a quick rundown of what Immich is, why you’d want to self-host it, and how it measures up to commercial cloud photo services.
What is Immich?

Immich is a free and open-source photo and video management solution.
In plain language, Immich is a server that stores all of your photos and videos locally and privately on your own network, with advanced features to back up, organize, and share them.
Reasons to Self-Host Immich for Photos & Videos
But why would you want to run Immich when there are easy-to-use cloud services, like Google Photos or iCloud Photos, available? I can think of a lot of reasons.
Free – A Google Photos account is free up to 15 GB of storage. But once you need more space, you’re looking at recurring subscriptions that you’ll pay until the day you die (or cancel, whichever comes first). If you also have family members who need it, then the costs can add up quickly.

But unlike subscription services, Immich is free for unlimited users with unlimited storage.
You can get answers from real experts in minutes.
Get help with your setup
Privacy – This is my personal reason for using Immich. The hidden metadata stored within photos reveals tons of personal information, and I don’t trust any company with facial recognition, location tracking, or pictures of loved ones in bikinis.
Maintain Control – If you ever get banned from your Google account, you could lose access to all of your photos and custom albums. With Immich, that can’t happen when you’re in control.
Automatic Syncing – The Immich app can sync from mobile devices, so it provides an easy and automatic way to back up your photos and videos.
Smart Search – Immich uses machine learning to search your photos by objects, faces, and even abstract context. It’s much more useful than scrolling through a giant mess of a collection, and I’m comfortable using it when it’s all done locally.

Customization – For techies who like to tinker, there are lots of settings you can change to customize the presentation or workflow to the way you want it.
Advantages Over Alternatives – Many users report that Immich returns better search results than Google Photos, requires less bloat than Nextcloud Photos, and performs faster than other self-hosted apps like Photoprism or Synology Photos.
Limitations of Immich on Raspberry Pi
Of course, our humble little Raspberry Pi is not going to beat cloud services in every way, so there are some downsides to Immich you should be aware of.
First, if you have a gigantic collection, maybe 100,000 photos or more, it’s probably going to get slow with Raspberry Pi hardware. In addition, if you have lots of videos, it’s best to store them as H.264, because the Pi will struggle to transcode them in any other format.
Second, sharing albums over the internet with Immich isn’t plug-and-play like I thought it’d be (whereas sharing is quite easy with Google Photos). It’s still possible with Immich, but there are technical hurdles to overcome to do it securely. More on that later.
How to Install Immich on Raspberry Pi
In this section, I’ll walk you through installing the Immich server on your Raspberry Pi. It sounds complicated at first, but you’ll be downloading pre-made files with everything ready to go, which makes things a lot easier.
The big picture steps to install Immich are:
Bonus tip: If the terminal still feels confusing, I made a simple cheat sheet with 74 commands explained in plain English. You can grab it here for free..

If you want a clearer path than jumping from tutorial to tutorial, my book gives you a step-by-step roadmap to really understand your Raspberry Pi.
Check the book hereCheck this: Need a clear GPIO pinout diagram? Here's mine.
- Install Docker on your Raspberry Pi.
- Create the Docker container files for Immich.
- Launch the Immich service.
Let’s cover each one in detail.
What’s Needed to Run Immich on Raspberry Pi?
Real quick, let’s cover the hardware and software needed to run Immich on a Raspberry Pi:
- Raspberry Pi – I recommend the Raspberry Pi 5 or Pi 4 here.
Less powerful boards probably won’t have enough memory. - Memory – 4GB minimum, but 8GB RAM recommended.
- Storage – I recommend using an NVMe drive or USB SSD for speed and reliability. A high-quality SD card might be good enough for a smaller collection.
- Operating System – A 64-bit Linux distro. I’m using Raspberry Pi OS for this guide.
- Docker – Container software used to load Immich. You’ll want the latest version (not the one in the default repo), which includes the Docker Compose plugin. Don’t worry, I’ll show you how to install it in the next part.
Installing Docker
It’s recommended to run the Immich server as a Docker container. If you’re not familiar with this, check out our guide to Docker here.
Here’s a quick shortcut guide on how to install the latest version of Docker:
- From a terminal, run the official installation script:
curl -sSL https://get.docker.com | sh - Add your user to the Docker group:
sudo usermod -aG docker $USER - Log out and log back in:
logout
When you’re all done, the service should automatically be up and running:
Tip: Command lines can be a pain to memorize. I put the essential Linux commands on a printable cheat sheet so you don't have to keep googling them. You can grab the PDF here if you want to save some time.
Creating a Docker Container for Immich
Once you have Docker, let’s create the configuration files for Immich:
- Make a folder for Immich and navigate inside:
mkdir immich
cd immich - Download a Docker configuration for Immich:
wget https://github.com/immich-app/immich/releases/latest/download/docker-compose.yml - Download an environment file for Immich:
wget -O .env https://github.com/immich-app/immich/releases/latest/download/example.env
So your folder starts pretty simple, with just these two files.

The YAML file contains the Docker configuration for the Immich container, whereas the .env file holds custom settings we can modify easily if needed.

For first-timers, I think both of these files are pretty good as is, so we’re not going to change anything. If you wanted, you could set a different DB_PASSWORD for more safety.
Starting the Immich Service
Now that you have a configuration for Immich, you’re ready for launch.
From inside your project folder, run this command:docker compose up -d

This will download the files for Immich and run the container in the background.
That’s it, everything is installed!
Getting Started with Immich
With Immich running on your Raspberry Pi, it’s time to get your photos into the system and take it for a spin.
In this section, you’ll learn how to:
- Access the Immich web panel.
- Import your photo/video collection into Immich.
- Use its smart features to organize your photos.
Logging in to the Immich Web Panel
Immich runs as a service on your Raspberry Pi. And like many other servers, it has a web admin panel where you can access everything. So hop on a PC or smartphone, and open a web browser for the next steps.
- Visit your Raspberry Pi’s IP address on port 2283.
For example:http://192.168.1.100:2283
(Here’s how to find your Raspberry Pi’s IP address.) - When the welcome screen appears, click Getting Started.

- Create an account and click Sign up.
This is a local account, so you can provide whatever details you’d like here.
- Use your new account to log in.

- The first time you log in, you’ll be presented with a setup wizard to configure things like theme, language, privacy settings, storage templates, and backups.
I think this is an overload for new users, so you’re safe just hitting ‘Next’ to accept all the defaults. Hit ‘Done’ at the end to complete the wizard. - Once setup is finished, you’ll be taken to the Immich dashboard.

Congrats, you have a working Immich server on your Raspberry Pi!
Next, let’s learn how to import your photos into Immich.
Client Apps for Immich
If you have most of your photos on a smartphone or tablet, I think it’s easier to work with Immich from the mobile app.

Here’s where to install free client apps for different platforms:
- Mobile – free apps are available on the Google Play Store and iOS App Store.
- Mac – there’s no desktop client, but you can run the iOS app from the App Store.
- Linux – there’s no desktop client, so use the web portal to upload photos.
- Windows – there’s no desktop client, so use the web portal to upload photos.
Importing Your Photos to Immich
The first thing you’ll want to do is to get your existing photo collections into Immich. Feel free to skip down to the section that fits your situation best.
Transfer from Your Smartphone to Immich
Here’s how to import photos from your smartphone onto Immich:
You might also like: Turn your Raspberry Pi into a money-making machine
- Install the Immich mobile app and launch it.
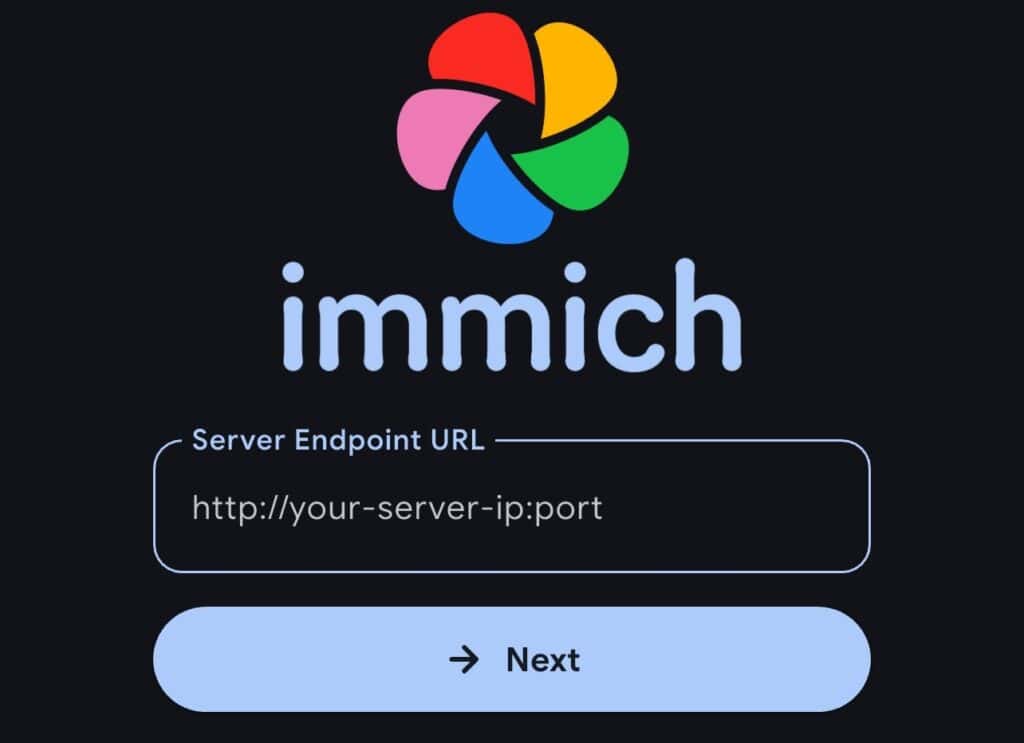
The first time you open it, you’ll want to permit it to access your photo library. - To connect to Immich, enter your Raspberry Pi’s IP address into the URL box (e.g., http://192.168.1.100:2283), and click Next.
- Log in with your user credentials.
Your dashboard might be empty the first time you log in. - To begin importing your photos to Immich, tap the cloud icon (☁︎⋅) in the top right.
Under “Albums to be backed up,” click the ‘Select’ button.
Choose “Select all” to grab all photos (or manually choose categories).
- Save your selections by hitting the back arrow.
- The ‘Backup’ screen now summarizes what photos & videos will be imported.

- Tap “Enable Backup” to start importing the photos onto your Immich server.
The user interface was a little awkward, and calling the main action ‘backup’ instead of ‘import’ caused me some confusion at the start. Anyhow, the steps above actually sync photos and videos from your phone to Immich.
And even when you take new photos on your phone, they’ll also be automatically uploaded to Immich on your Raspberry Pi. This all happens in the background periodically.
Transfer from Google Photos to Immich
If you have existing photos on Google Photos, you can migrate them to Immich. You’ll need to download all of your pics first, but surprisingly, there’s no simple way to do this from Google Photos itself. Instead, the solution is to use Google Takeout to do a bulk download.
Here’s how to import Google Photos to Immich:
- Visit Google Takeout.
- Click Deselect all.
(The default setting grabs everything related to your Google account, which we don’t want.)
- Scroll down and mark the box for Google Photos.
Then scroll to the bottom, and click Next Step.
- When asked to “Choose file type, frequency & destination,” the defaults are fine, so click Create Export.

- The export will start, and it could take hours or days, depending on how many photos you have. When it’s done, you’ll get an email that it’s ready.

- When you finally get the email, click the link to download the zip file(s).
Then extract them onto your PC. They’ll appear as a ‘Takeout’ folder. - Go to the Immich web portal, and click ‘Upload.’
Select all photos (CTRL+A) from the ‘Takeout’ folder to import them.
After giving it time to process, your Google Photos should now appear on Immich.
Tip: Advanced users who want to keep existing albums and photos from Google Photos can try immich-go, which lets you upload the .zip file directly.
Transfer from Other Platforms to Immich
Bonus tip: If the terminal still feels confusing, I made a simple cheat sheet with 74 commands explained in plain English. You can grab it here for free..
Getting your photos from other platforms like iCloud or OneDrive may involve different steps. The most straightforward way is to download all the files to a PC before uploading them manually via the Immich web portal.
Tip: Advanced users who want to automate importing from other platforms can try writing a custom script using the Immich CLI tool.
Example Tasks with Immich
After importing your photos, you’ll see them show up in the Immich web portal.
Let’s do a quick tour of some of Immich’s best features.
(Note: some features below are only found on the web portal and not the mobile app.)
Map view – From this view, you can zoom in and out of a globe of Earth to see where you’ve taken different photos. Clicking on a location lets you browse photos from that location.

Facial Recognition – Immich automatically finds all the unique faces in your photos. Once you label who is who, you can search for photos by person. This data is only stored locally.

Duplicate Remover – This feature identifies photos that might be duplicates, so you can delete similar photos to tidy things up.

Smart Search – Immich uses machine learning to automatically determine the context of photos. For example, when I search for ‘meme,’ it does a pretty good job of returning images that match what I was looking for. And it’s impressively fast at this.
You might also like: The Raspberry Pi projects that pay for themselves

Sharing – You can share with your family from Immich by sending them a link or QR code. There are custom settings for comments, passwords, and expiration timers. However, this feature only works on your local network unless you open up access. (See tips at the end about this.)

Stuck on this project? Ask me or other Pi users in the RaspberryTips Community. We help each other out and you'll get answers quick. Join and fix it together.
Going Further: Immich Tips & Tricks
Now that you know the basics of Immich, let me give you a few extra tips for things you might want to try out once you’ve got the hang of it.
Adding Users to Immich
Let’s say you have other family members who also want to use your Immich server. You can create separate user accounts for them so that they can keep their own photos private.
- Click your Profile icon (top right), and click Administration.
- Under the Users tab, click Create user.
- Enter the login credentials for your new user, and click Create to finish.

Your new user can now load the Immich app on her phone and log in using her new account. Her photo collection will start as a blank slate until she imports her own photos.
Accessing Immich Remotely
One major hitch to using Immich is that you can’t use its share feature for someone outside of your home network, unless you make Immich accessible over the internet.
You could create a port forwarding rule on your router to port 2283, but it’s not recommended for security reasons.
Here are a few hints (and links to our tutorials) to send you in the right direction:
You might also like: I tried to replace my main PC with a Pi 5, here's what happened.
- Create a Cloudflare tunnel to your Immich server.
- Host a reverse proxy (using Nginx Proxy Manager / Caddy / or Traefik).
- Connect to your WireGuard VPN server to access your home network.
Creating a Backup of Immich
Eventually, you should create a backup of your Immich server itself, so you won’t lose all your photos, custom albums, favorites, and other settings. I find the official documentation for backup/restore rather convoluted, so let me give you my shortcut steps for this.
Here’s how to create a backup of Immich:
- Save your current Immich database.
From the web panel, go to Administration > Job Queues > Create Job > Create Database Dump. When it’s done, the file will be saved in immich/library/backups. - Stop the Immich container:
docker compose down - Zip up your Immich folder, which includes all of your photos.
For example:tar -czvf immichbackup.tar.gz /home/pat/containers/immich - Copy these backups—of the database and container folder—from your Raspberry Pi to somewhere else for safekeeping. I like to use SFTP to transfer the files to my PC.
Here’s how to restore Immich from a backup:
- Restore your Immich folder:
tar -xvzf immichbackup.tar.gz - Start the Immich container:
docker compose up -d - Restore your Immich database.
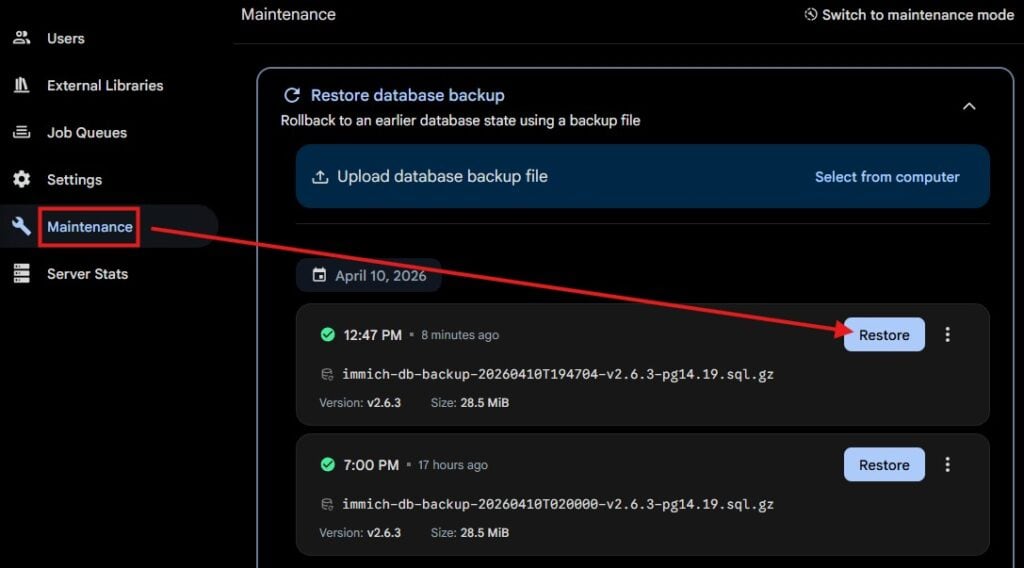
On the web panel, go to Administration > Maintenance > Restore Database Backup.
Click Restore on the database you want (probably the most recent file).
That’s all for today’s tutorial! Another fun project you might want to try is building a digital picture frame that scrolls through one of your photo albums. You can do this with an inexpensive Raspberry Pi Zero 2W that connects to your Immich server (tutorial here).
By storing your own photos with Immich on your Raspberry Pi, you’ve taken another step in taking back control of your digital life. For more projects like this, don’t forget to check out: Top 15 “Privacy-First” Projects You Can Host on Raspberry Pi.
Not getting the same result?
Even when you follow every step, small differences in OS version, hardware or config can change the outcome. Instead of wasting time guessing, get help from people who have already fixed the same kind of issue.
- Get help on your exact issue
- Access step-by-step videos for tricky setups
- Browse the website without ads


