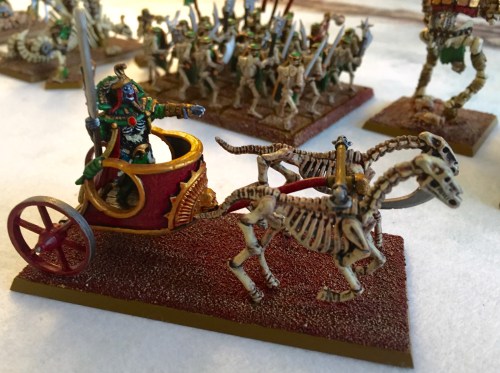
Pharaoh
I was struggling with what to put on my Christmas list, so when I was in Dark Sphere in Lambeth in November and saw the 2nd edition of these rules I picked up a copy on the understanding that my wife would buy me them for Christmas (which she did) – about six weeks later, I’ve gotten around to actually reading them. I had been bemoaning this Age of Sigmar nonsense which killed off the large army form of Warhammer Fantasy Battles without realising that I hadn’t played WFB in the 6 year lifetime of this blog – well maybe I had, but wasn’t actually excited enough to blog about it. Anyway, Mantic were really smart in releasing crossover lists for WFB armies – sure they had Dwarfs in 1st edition but not an Egyptian version of the Undead (my other main army after Dwarfs) so no chariots. With the release of the “Uncharted Empires” army book they have the Kingdom of Dust with Chariots and animated constructs, so it was easy enough to draw up 2 armies to give the rules a go.

Ranks of the Undead
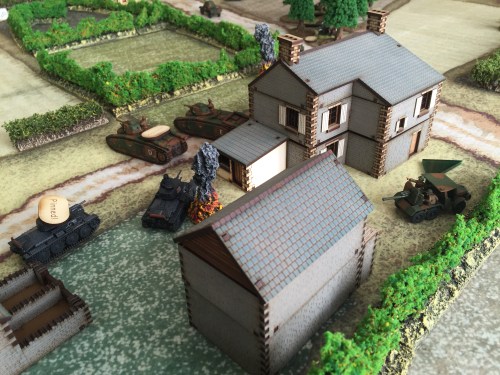
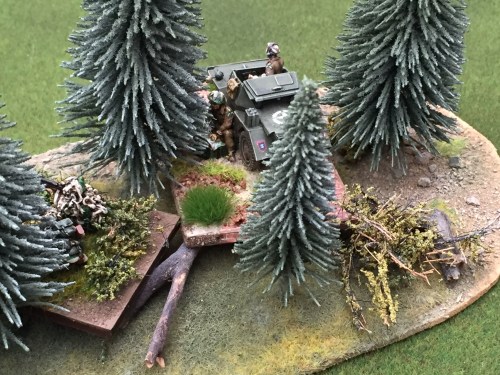
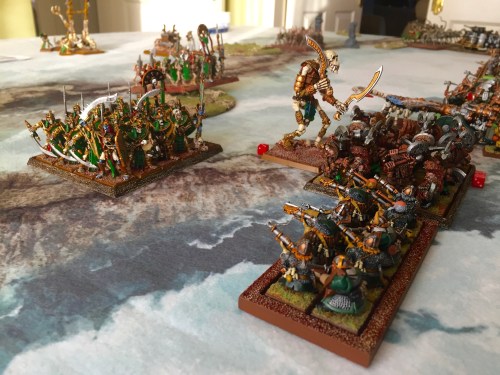
After choosing the simplest of scenarios (see-who-can-kill-the-most) and a fairly standard set-up (the Dwarfs playing on the defensive), the Undead got to go first. Their first turn saw their left flank units attempting to outflank the Dwarfs with cavalry & one unit of chariots, supported by the Priest and a unit of Skeleton archers.

Flank attack develops
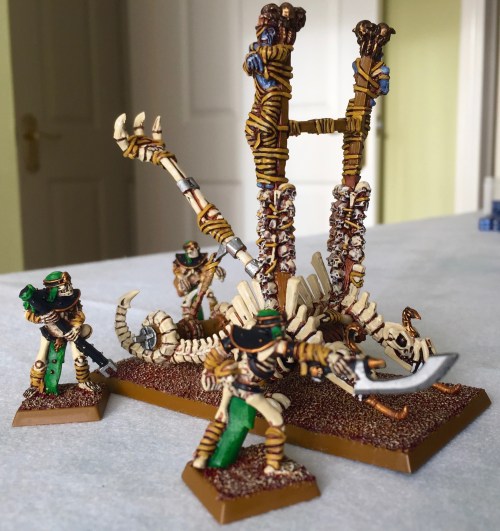
An attempt at double-envelopment saw the right flank chariots and Enslaved Guardians moved past the Shrine of the Skull – meanwhile the Bone Giant and Scorpion took it upon themselves to distract the Dwarf cannon & centre troops.
The Undead shooting was pretty pathetic, but magic (which happens in the shooting phase) saw the Pharaoh cast surge to propel the Bone Giant 5″ forward. Most Undead are shambling which means that they can’t double move – however they can be moved again in the shooting phase by the Surge magic spell.
Predictably, the Dwarf’s only move in response was to bring the Steam Tank into charge range of the Undead cavalry. The Dwarf crossbows shot and missed the Undead cavalry though the steam tank caused 3 hits on them – the softening up had begun. There is no figure removal in the game, but at the end of the shooting phase all units taking a wound roll for nerve (morale). There are 2 levels for each unit – waver or rout, but the Undead never waver only rout so adding the number of hits on the unit and adding 2D6 score was unlikely to succeed against rout values of 14 or more. Waver basically makes you miss a turn, while rout removes the unit from the game – subtle it is not, but happily the nightmare of legislating for fleeing units is removed. This would also encourage reserves, as holes are going to appear in the battle line, and having something to fill these holes would be a good idea.

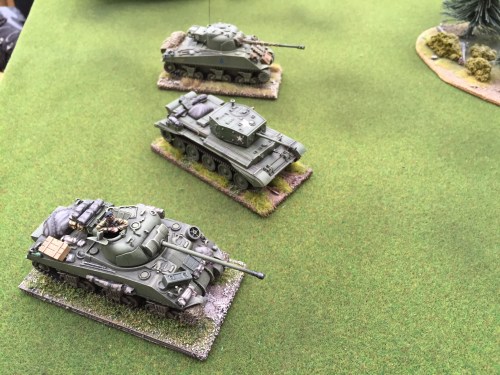
Steam Tank
The Undead were into combat in turn 2, with the Scorpion & Bone Giant charging the Berserkers and the Cavalry charging the Steam Tank. Everything else shambled forward apart from the catapult and alter.

Giant and Scorpion charge Berserkers

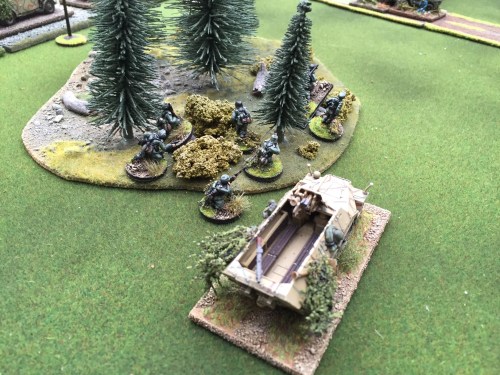
Flank attack is stopped dead
In the shooting phase the catapult missed, but the Alter hit the Dwarf Rifles 3 times, with the skeleton archers putting another 4 hits on them. The Rifles were a troop sized unit (10 figures) so they have a low nerve value of 10 to waver or 12 to rout. The nerve roll is 2D6 added to the current hits on the unit – with 7 hits on them and 8 rolled on 2D6 they exceeded their rout value and left the table – first blood to the Undead.
In melee, the Bone Giant and the Scorpion put 8 hits onto the Berserkers, who shrugged them off with their nerve of 22! The Undead also regain hits (usually 1) for inflicting wounds, so the Scorpion regained a hit for inflicting a wound while the Cavalry caused 2 hits on the Steam Tank and also regained a wound. Melees do not carry on over turns in this game – if an attacking unit fails to rout it’s opponents, it falls back 1″ and can be counter-charged in the opponent’s turn. This removes some complexity around pushback and long-running melees.
So, the Berserkers counter-charged the Bone Giant, leading to an interesting situation because the Scorpion has to be out of the ensuing melee (1 unit cannot charge 2 units) – as per the rules, it was shuffled into the arc of the Flame Cannon. On the Dwarf left flank, the Shieldbreakers advanced to box the chariots in, while the Ironguard shuffled sideways to close the gap left by the routed Rifles. The Steam tank was disordered by being in melee so it couldn’t shoot at the cavalry. but it decided to charge anyway as D6+20 attacks seemed more effective than any gun.
Revenants charge the gunline
During the shooting phase the Dwarfs chipped away at the advancing Undead along the line, but the big event was the Flame Cannon at point-blank range against the Scorpion. The Flame cannon gots 18 dice hitting on 4+, re-rolling 1s because of Warsmith’s (think Engineer) proximity against the Scorpion, and though it had a high defence it still took 5 wounds. The Chariots on the Dwarf right, which had been targeted by the Rangers over 2 turns, crumbled to dust, just exceeding their nerve rout roll.
In melee the Berserkers rolled 25 dice against the Bone Giant but only inflicted 3 hits, however the Steam Tank did much better and inflicted 10 hits on the cavalry – they failed the subsequent nerve test and crumbled into dust.
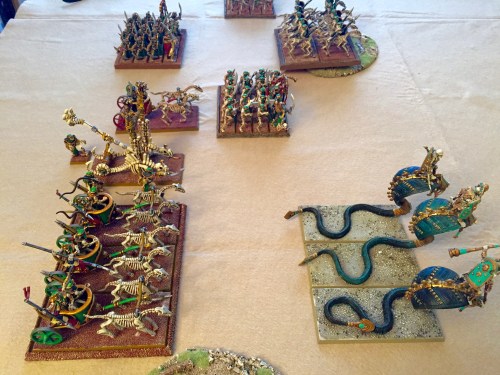
On to the Undead turn 3. The left flank Chariots couldn’t back off so they had to charge the Steam Tank or wait to be charged. In KoW, only the attacking side can cause hits in a melee, so you really have nothing to lose by charging if you are going to be charged next turn. The Enslaved Guardians charged the Shieldbreakers, the Scorpion charged the Flame Cannon and the Pharaoh propelled the Revenants forward 5″, while the Priest healed 2 wounds on the Skeleton Archers. In the shooting phase, the catapult hit for a change and did 7 points of damage on the Ironclads – amazingly the Ironclad regiment stood.
Catapult hits at last!
The Skeleton Archers put 3 damage on the crossbow troop though the crossbows rolled poorly for their nerve test and routed from the field. In melee, the Enslaved Guardians hit the Shieldbreakers 5 times but failed to break them while the Bone Giant only put 3 hits on the Berserkers which they shrugged off. The Scorpion got triple attacks on the war engine (reflecting how bad artillery are in melee) and put 7 hits on them, however a low roll of 3 in the nerve test meant that the crew only wavered instead of routing. Finally, the chariots failed miserably against the Steam Tank, only inflicting 1 wound on it so there was no point in it taking a nerve test.
The Shieldbreakers and Rangers charged the Enslaved Guardians, the Rangers flanking them.

Enslaved Guardians go the way of the chariots
The steam tank charged the chariots. Though the flame cannon shook off its wavering status because of Headstrong, they were still disordered so couldn’t toast the scorpion directly in front of it. The rifles fired at the Revenant infantry and put another 3 hits on them. The cannon targeted the skeleton infantry and hit for a change – a massive 9 hits and a nerve roll of 6 returned the skeletons to dust.
The Rangers in the flank of the Enslaved Guardians should have has a -1 to hit because of charging through difficult terrain, but because of the Pathfinder attribute they could ignore this – they doubled their attacks for attacking the flank giving them 24 attacks of which 5 translated into hits. The Shieldbreakers added another 4, and even with a nerve re-roll for the Inspiring ability of the nearby Pharoh, the Enslaved Guardians crumbled. The Shieldbreakers reformed to face the flank of the advancing Revenants. The Steam Tank also got 24 attacks against the cavalry, scoring 10 wounds – only a re-roll from the nearby Priest stopped them from crumbling.
The Chariots backed off from the Steam Tank, allowing the priest to heal 3 of their wounds. The Giant and the Revenants charged the Berserkers while the Scorpion returned to its unfinished business with the flame cannon. The catapult fired at the Dwarf warriors and missed, but the Alter put 4 hits on them – this forced a nerve test on the Warriors which they failed and without a leader in range they didn’t get a re-roll, so routed off the table. The Berserkers were living a charmed life – the Giant failed to put a single wound on them and the Revenants only scraped 1, so they didn’t even flinch. There was some success however, as the Scorpion finished off the flame cannon.
In the Dwarf turn 4, the King and Warsmith got into the action by charging the Scorpion but failed to do much damage to it. The Steam Tank ground the chariots into dust, while the Shieldbearers and Rangers moved to flank the Revenants.
The Giant and Revenants charged the Berserkers’ front again while the Scorpion charged their flank. The Pharaoh in his chariot charged the Shieldbreakers in an attempt to distract them from the Revenants’ flank while the combined fire of the Skeleton Archers, the Alter and the Catapult put 5 wounds on the Ironguard but they stood their ground.

Berserkers are finished off
The Berserkers had 15 hits put on them from the combined assault, meaning they needed double 1 to stand. The first roll was a 1 and a 2, but the re-roll was worse so they were wiped out. The Pharaoh meanwhile put 3 hits on the Shieldbreakers – they failed their first nerve test and they were out of the 6″ radius of the leader re-roll for the King so they headed for the hills – suddenly the game looked over for the Dwarfs. With the Steam Tank too far away to help, the only chance was for the Rangers to take out the Pharaoh, so they charged him while the rifle troop gamely charged the flank of the Revenants. The cannon missed – again!!! The Rangers failed to put 1 wound on the Pharaoh while the rifles only put 2 on the Revenants so the Dwarfs conceded.
Dwarf losses were 720 against 710 for the Undead, so the result was a blood soaked draw with neither side likely to get the 10% winning margin in the time remaining. However, if the game was played out to the end, the Dwarfs were too short of viable units to stop them losing more units to routs, so may well have lost.
What did I think of the rules? I do like the fact that there is no casualty removal, but the rout test makes the game very bloody with gaps suddenly appearing in your battle line. This is not necessarily a bad thing as you do need to keep a reserve to preserve your flanks. I like the fact that it is quick, playing out a game of this size in 2 hours even with the inevitable rules look-ups for a first time play. There are subtle changes from 1st edition – no modifier for firing at over half range for example – illustrating that Mantic have really stripped the rules to the bone. This is evident in the army lists as well, where unit differences are added using just a few attributes – not a bad thing as I always forget these sorts of things if there is a long list! The Steam Tank felt a bit overpowered for the game, reducing chariots to matchsticks and cavalry to dust – I’ll probably draft in some dwarf cavalry on giant badgers to replace it when I get them painted.
In a postscript to this solo effort, my son was home at the weekend so we played another game of Kings of War with much the same forces, the only difference being that the Empire of Dust took Revenants on Worms instead of the Alter. The Dwarf shooting with him rolling the dice suddenly became very effective, with a couple of Undead units being routed through shooting alone. The low-point for the Undead was when the Scorpion charged the Flame Cannon in the flank but failed to break it rolling 16 attacks – it was then charged in the flank by the Berserkers (50 attack dice rolled – ouch) and killed.
I conceded on turn 4 of 6 with not enough units left on the board to stand any chance of winning – here are a few photos from this game.
Undead flank attack

Heroic Rangers

Enslaved Guardians under heavy fire

Clash of the Titans
Rangers clash with snakes

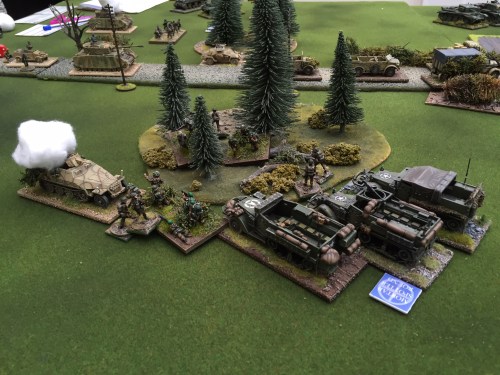
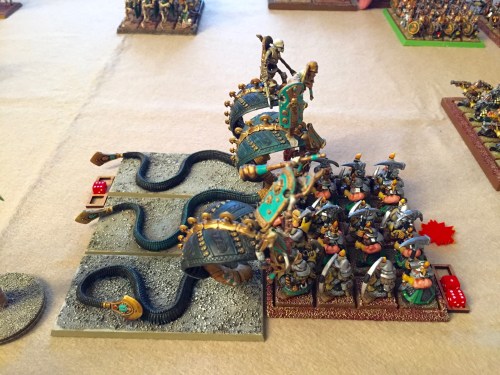
The fight in the centre

Scorpion flanked by Berserkers

End of the road – the Priest is crushed by the Steam Tank