The spectrograph could probably have been designed so it would be easier to assemble, but at least this way most of it is done in one printing session.
I find that the following order is the easiest:
- Fit the wire of the linear ccd module through the hole (which is really only big enough to fit 7 out of 10 wires of an IDC-cable) between the spectrograph and the nucleo enclosure.
- Install the linear CCD using three 20mm M3 hex-screws and 3 ball-point pen springs:
There will be a picture here. - Insert two 12mm M3 screws in the lower two holes of the port of the spectrograph.
Yet another picture, which is not ready.. - Assemble the slit:
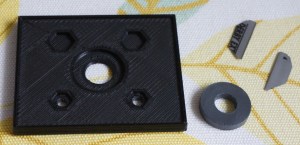
and mount it in the spectrograph using two 16mm M3 screws and two ball-point pen springs: - Insert the lenses (which should already be in their holders) and secure each of them with two 5mm M3 screws.
- Insert a small mirror after the collimating lens, and shine a flashlight (or any kind of light) through the slit. Tilt the mirror slightly so the image of the slit is projected back just next to slit. Now adjust the distance between the slit and lens by turning the screws holding the slit, until the image of the slit is in focus. (If you find this description cryptic, google autocollimation).

- Insert the grating slide. It’s probably slightly too big, so cut the cardboard sides to make it fit.
- Focus the CCD – for this you will need at least two lasers of different colour (preferably violet and red) and the CCD must be connected to a computer.
-Shine the red laser onto the slit and adjust the distance of the CDD using the screw to the right until the laser gives the sharpest possible line (set the integration time close to the minimum, or the CCD will likely saturate):
pictures
-Now shine the violet laser onto the slit and adjust, but this time use the top left screw of the CCD:
moar pictures
-Adjust the bottom screw until the CCD is orthogonal to the optical axis.
It will probably take a few iterations to get everything juust right.


That’s it. Now close everything up.
