
Nelio A/B Testing with URL testing allows you to test and compare different contents (pages, products, posts, custom content, etc.), selecting only their URLs and thus analyze which of them improves your goals. Install, activate and configure Nelio A/B Testing and get the most out of your website.
Instructions for URL Testing
Once you have installed, activated, and configured Nelio A/B Testing, follow these instructions to create URL tests of WordPress content.
Table of Contents
Create a New Split Test of WordPress URLs
- Under the Nelio A/B Testing menu, click on Tests to view and manage your tests.
- Click the Add Test button at the top of the screen.
- A pop-up window will open with all the types of tests you can create. Each of them has a name and an icon.
- Click on URL.

Name and Define Your Test
First of all, give a descriptive Name to the test you want to create to help you identify it in the future. Also, on the right sidebar, you’ll find three additional tabs:
- Status & Management, where you see the status your test is currently in (Draft, Ready, Scheduled or Paused) and options on when it should start and end,
- Description of the test, where you can indicate what you are testing and what you intend to achieve with it,

How to Add Variants to Your Test
An URL A/B test of WordPress content consists of testing different variants of a content and measuring which one works best to achieve your goals. For example, you can compare different promotional pages, products, etc, and see which generate more interest or provide more sales.
Enter The Two (or more) URLs to Test
First, enter the two URLs (called the first one, “Control Version” or commonly “Version A”, and the second one, “Version B”, respectively) that you want to test. Note that if you hover the mouse over any of the variants, you will be given the option to preview the content of that variant.

If you want to compare more than two URLs, for each new variant, just click on the New Variant button and enter the new URL.
How to Define Your Conversion Goals and Actions
A/B tests are usually performed with one or more goals in mind, such as “show interest in your products” or “increase visits to posts.” The goals are met when the visitor performs certain actions. For example, a visitor may be “increase visits to posts” when he visits any of your blog posts. Moreover, a visitor may “show interest in your products” when they visit your pricing page or when they complete a certain form of requesting information.
Let’s see how to define conversion goals and actions in Nelio A/B Testing in order to track the activity of your visitors.
Define Your Conversion Goals
You can add as many goals as you want by clicking on the + New link. If you create more than one goal, Nelio A/B Testing will show you information on how effective each variant is for each of the defined goals.
Optionally, you can give your goal a name to help you remember what you were interested in improving in your test. For example, your goals could be “Show interest in my products” or “Increase visits to posts.”
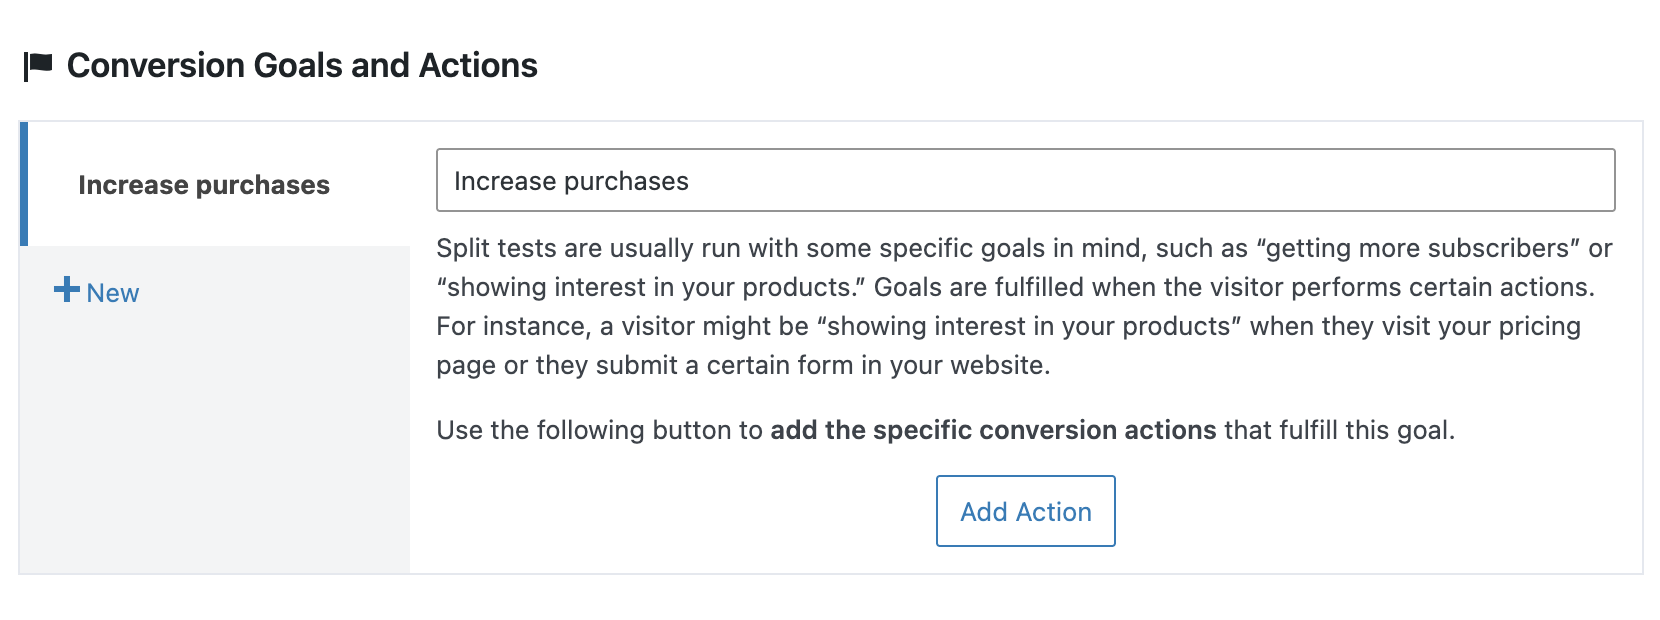
Add Conversion Actions to Your Goals
Different types of conversion actions are available to track your visitors. For example, you can control when they access a certain page, when they click on a certain element of your website, or when they submit a contact form.
- Click on the Action Button that interests you. For example, if you want them to visit a product’s pricing page or a post, click Page View icon.
- Each type of conversion action has its own settings. In the case of a Page View, for example, you must specify what type of content the user has to visit (a page, a post, etc.) and what is the specific content to visit for a conversion to be counted.
- Repeat the process for all the actions you want to add.

Remember that you can delete any action by clicking on the Delete link below the action.
Segment Test Traffic (Optional)
Visitors to your website are not all the same. They come from different countries, speak different languages, use different browsers, access the site from different websites, use different devices, and a host of other subtle and big differences.
If you want all the traffic coming to your website to be part of the created test, ignore this point and go directly to the next one. But depending on the type of website and traffic you have, you may want to refine the audience you want to reach.
Nelio A/B testing allows you to create segments, that is, define by means of rules the set of visitors with a series of common characteristics that you want to participate in your test. Here you will find more detailed information on how to create segments in a test.
How to Start the Test
Once you have fully defined your test, you will see that the status of the test will have passed from Draft to Ready. At that point, you can Start it so that your website visitors can see the different variants that you have created and Nelio A/B Testing will start tracking their actions.

Start your test
To start a test, check that it is Ready and, if it is, click on the Start… button in the upper right corner. If it was not ready, you can hover the mouse over the information icon that appears next to the Status to see why your test is still a Draft.
If you do not want to start the test directly, but want to leave it scheduled for a specific date, specify it using the Start field in the Status & Management section.
Once the test has started, the plugin will show you its results page and you will see that the status changes to Running.
Important: tests cannot be edited once they are active, but you can pause, modify them and restart them so they continue to run. Of course, depending on the modifications you make, your partial results may be invalid after restarting the test. If that is the case, it is best to start a new test, duplicating the previous one.

When do you want to end your test
You can also define when you want the execution to end, indicating the End Mode of the test:
- Manual: the test will stop when you click the Stop button, in the list of tests or on its results page.
- Duration: the test will stop automatically after the indicated time.
- Page views: the test will stop automatically after reaching the total number of visits you have specified.
- Confidence: The test will stop automatically when a winner is found in the first goal with the specified confidence level.
After starting the test, when a visitor lands on either URL, she’ll be assigned a random variant and the plugin will redirect her to the URL she’s supposed to see, always.
How to See the Progress of a Test and Its Results
In the menu option Tests you can see the list of the tests created, the status they are in and the date of their last update. At any time you can see the results of a test that is started or that has already ended by clicking on the View Results link below its name.

Summary of the results
In the right sidebar of the results page you will find the Summary of your test with the following information:
- Status icon. This icon helps you quickly identify the progress of your tests. It is initially in yellow, indicating that there are not enough visits to determine a winner. If the icon changes showing a clock with a heart, there is a possible winner, but statistical confidence is low, so things can still change. Finally if a green icon is shown (with a medal), we have a clear winner. If the icon is red, no alternative is better than the original.
- Some metadata about your test. Specifically, you can see the status of the test, how long it has been running, when it started and how it ends.
- The description and scope of the test are also included, if applicable.
Test Progress
The results page shows, in turn, the following information on the progress of a test:
- Test Name
- Evolution with the conversion rate of the control version and all variants, as well as the total number of conversions and visits to the tested pages.
- Two additional graphs showing the conversion rates of each alternative and its degree of improvement over the original, respectively.
- For each of the variants of the test we will see a thumbnail image, if available, of the page under test, the number of visits it has received, its number of conversions, the resulting conversion rate and, for all variants other than the original, the degree of improvement that they have with respect to the control version.
- We also found a button to display the heatmap of that variant.
- Finally, a summary of the conversion goals and actions of the test is shown.

Improve Your Web Conversion
You can end a test manually at any time by clicking on the Stop button found in the top right corner of the results page. Remember that a test can also end automatically if the condition indicated in its end mode is met.
After completing a test you already know which variant is the winner and you should leave it as the only one accessed by all your users to optimize the conversion of your website.

Take Your Business to the Next Level
The Best A/B Testing Plugin for WordPress


