Photographs taken on 12JUL25 at the Fort Wayne Air Show, Hosted by the 122nd Fighter Wing “Blacksnakes” of the Indiana Air National Guard


Photographs taken on 12JUL25 at the Fort Wayne Air Show, Hosted by the 122nd Fighter Wing “Blacksnakes” of the Indiana Air National Guard


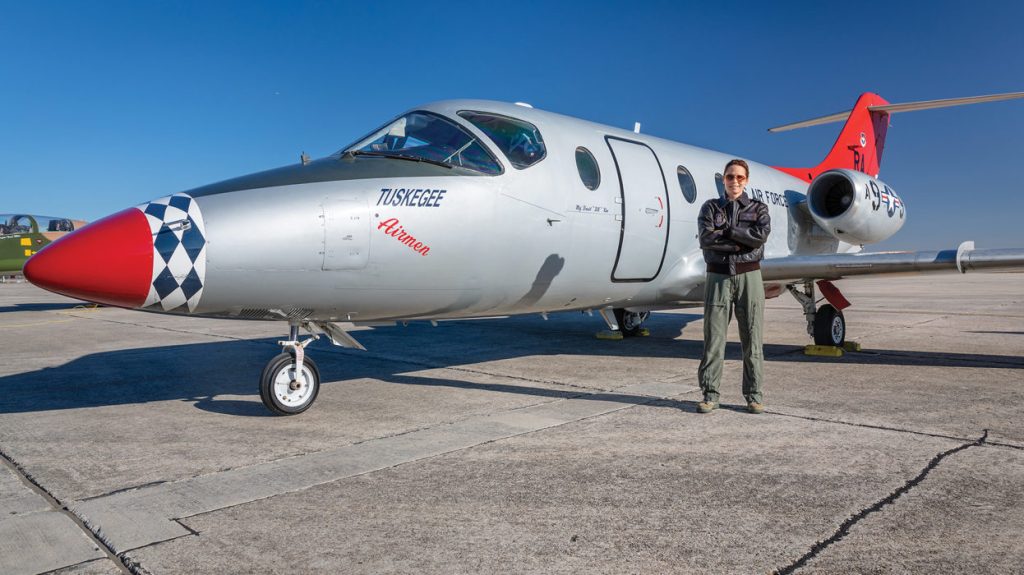


To see more Women Warriors, click on the tags below:
This is a construction thread which originally appeared on the 72nd Scale Aircraft forum as a series of posts. I still get questions about these builds to this day, particularly regarding the “stretchy” Ju 88s. The original posting was marred by the problems wrought by Photobucket and is difficult to find in any case. Fortunately, I backed up the original photos and text, so I am able to update the original material and present it here, augmented with some additional information to answer the most common questions.
My original intention was to use old AMT kits for the Ju 88 components, but the more I looked at them the more I realized just how much there was to be corrected. The AMT kits are too small in the fuselage and engine nacelles, getting a good Ju 88 out of them looked like a lot of work, especially when compared with the quality of the new Hasegawa and Revell of Germany kits. Fortunately, I was able to find a good deal on some Revell kits which were on sale at Squadron. The Fw 190s which served as the upper components for the Mistel combinations are modified Hasegawa kits.
So, starting with five Revell Ju 88A-4s and six Hasegawa Fw 190A-8s and various spare & aftermarket components, my intention is to build a Mistel 2, a Mistel 3, a Ju 88H-4 Führungsmaschine long-range recon combination, a stretched Ju 88H-1, a Ju 88S-3, and three standard Fw 190A-7 / 8s.


Anton Yakimenko was credited with 3 personal and 4 shared victories against the Japanese in 1939 in Khalkin Gol. His total eventually reached 15 victories and he was awarded the Hero of the Soviet Union. The model represents the Yakovlev Yak-3 of Lieutenant Colonel Anton Dmitrievich Yakimenko HSU, 151st GIAP in May 1945. The inscription on the banner reads, “To the Homeland with Victory”.


Construction here: https://inchhighguy.wordpress.com/2026/02/13/hobby-boss-yakolev-yak-3-build-in-1-72-scale/

Dragon Wagon: A Visual History of the U.S. Army’s Heavy Tank Transporter 1941-1945
By David Doyle and Pat Stansell
Softcover, 120 pages
Published by The Ampersand Group Inc., 2013
Language: English
ISBN: 978-0-9895547-0-1
Dimensions: 11.0 x 8.5 x 0.3 inches
“Dragon Wagon” was the unofficial but widely used nickname for the U.S. Army’s M25 Tank Transporter. Produced by Pacific Car and Foundry the Dragon Wagon was developed during the Second World War and served until 1955. The M25 designation applies to the M26 armored tractor and M15 40-ton trailer combination, as well as the later unarmored M26A1 tractor and improved M15A1 trailer.
This book is aimed squarely at the scale modeler. Authors David Doyle and Pat Stansell draw on U.S. Army technical manuals as well as period photos to show every detail of these interesting vehicles throughout every stage of their development and service lives. Included are descriptions of a bewildering array of tools and equipment issued to these vehicles to assist in their recovery operations, as well as how all this equipment was to be used and stowed. Photos from the technical manuals are reproduced several to a page, while portraits of the vehicles in service are generally given full page spreads. All are annotated and captions provide additional information.
This book presents numerous insights into how the Dragon Wagon was used in service and the wide variety of tasks which it could perform in the field. There is ample information here for the modeler to depict any version on the M25 engaged in specific recovery or transport operations. Details of the tools and equipment as well as the standard stowage are particularly useful. This is a valuable reference for the military vehicle modeler, highly recommended.


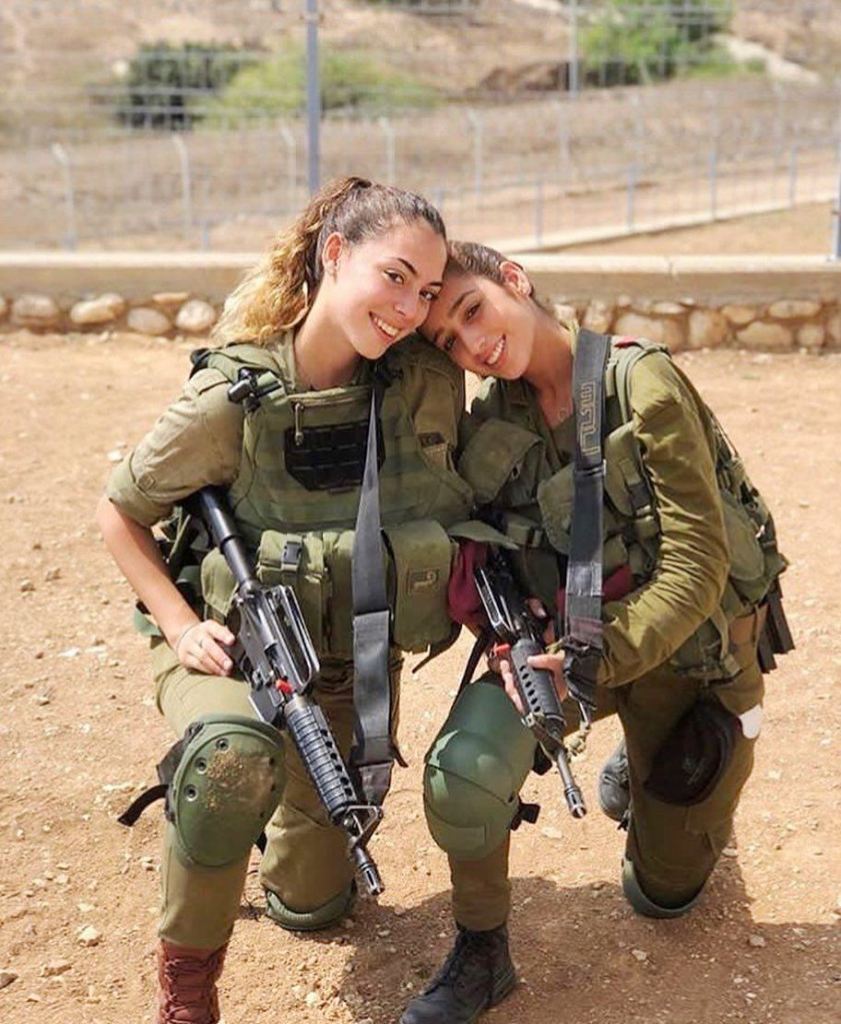
Photographs taken on 12JUL25 at the Fort Wayne Air Show, Hosted by the 122nd Fighter Wing “Blacksnakes” of the Indiana Air National Guard


To see more Women Warriors, click on the tags below:


SUMMARY

The SMER kit represents an early single-seat Stormovic, it has finely engraved surface details and the option for ski or wheeled undercarriage. It comes with a small PE fret but I didn’t use much from this as the flat PE parts wouldn’t look right in many applications anyway. Cockpit detail is sparse so plan on some extra work there if you want to open the canopy. The kit fit together much better than I was anticipating and it looks good when complete. Overall, I was pleasantly surprised with this kit!

The Academy single-seat IL-2 is an excellent kit and just falls together. The cockpit looks great right out of the box and the canopy can be posed open to show it all off. It includes an excellent Cartograph decal sheet, just be careful using this as the camo color call-outs are erroneous. The one “gotcha” is the panels on the horizontal tail surfaces are represented as lap joints but this is easy to correct. Academy also boxes an IL-2M two seat version of this kit which I have no doubt is equally good. If you want a straight-wing Stormovic this is the kit to look for.

The Dakoplast kits have some good reviews online, they feature fine surface detail on the metal panels and different kits contain parts to build any major version of the Stormovic. However, I do not like this kit. The wing to fuselage joint is a dumpster fire and is located such that it makes it difficult to finish both the cockpit AND the exterior. Repeated filling and sanding sessions kill the enjoyment of the build and eliminate the surface engraving, the best feature of the kit. The cockpit needs work but the thickness and poor fit of the clear parts will hide most of this anyway. There are better kits out there for all three Stormovic versions so save yourself a headache and give the Dakoplast kits a pass.

I was expecting more from the Zvezda Stormovic given it is a VVS subject from a Russian manufacturer, but then again Zvezda still has some older kits in their catalog. This one has some simplifications of the contours under the fuselage as well as inaccuracies and gaps inside the ventral cooler, plus the cockpit is very crude and most modelers will want to put in some extra work to improve things there. Fit is not the greatest and filler is needed on the major seams. On the plus side Zvezda has done a good job molding the exhausts and the clear part is actually clear and fits well. This kit really shows its age, go with the Academy kit instead if you can find it.

The Eduard kit is now almost thirty years old and is an earlier example of their Profipack line. This one has a PE fret and several resin parts to enhance the appearance plus the plastic parts are excellent as well. I skipped most of the PE fret as I preferred to scratch the details from plastic. The kit has engraved metal wings and a wooden fuselage, but if you wanted to model a wooden-wing Arrow you could fill the panel lines on the wing. This is a good place to start for an IL-2M3 Arrow.

The Hobby Boss kit is from their easy assembly line and it is certainly easy to assemble. Surface detail is excellent as is the fit but cockpit detail is sacrificed. Clear parts are also excellent. The Hobby Boss research team is very confused though, they have included parts for the 37mm gondolas under the wings which are wrong for the IL-2M3, plus one of the marking options is for a well-known IL-2M instead of an Arrow. The internal wing guns are missing and the 12.7mm defensive gun in the rear position will need to be replaced. Still, I like this kit. If you are willing to correct the issues with the guns and put some extra work into the cockpit the HB kit can be made into an excellent Stormovic.

Tamiya kits have a reputation for outstanding fit and excellent detail. Their Shturmovik lives up to that reputation. I enhanced this build with the Kelik cockpit set and some PE parts as well as various surface details. I don’t think sales matched expectations as this kit was only issued once and is now hard to find. If you have any interest in the IL-2, the Tamiya kit is the best one to get if you can find it.
Construction Part I here: Part I here: https://inchhighguy.wordpress.com/2026/02/20/ilyushin-il-2-stormovic-comparison-build-in-1-72-scale-part-i/
Models built by a North American
My ongoing wargames projects!
Scale models, where they come from, and people who make them
Scale diorama tips and ideas
Let's build, and build again even if you won't build everything you have bought
A futile fight against entropy or 'Every man should have a hobby'? Either way it is a blog on tabletop wargames, board games and megagames
World War II with Scale Models
Illustrating Stories, Painting Miniatures, Reviewing Realms.
This is my ad free non-profit blog of my research notes on military history since April 2018.
Moving with the tides of history
Building and improving scale models
WHENEVER ANY FORM OF GOVERNMENT BECOMES DESTRUCTIVE OF THESE ENDS (LIFE,LIBERTY,AND THE PURSUIT OF HAPPINESS) IT IS THE RIGHT OF THE PEOPLE TO ALTER OR ABOLISH IT, AND TO INSTITUTE A NEW GOVERNMENT― Thomas Jefferson
Let's build and build again
This WordPress.com site is Pacific War era information
Scale Modeling and Military History
The best in WWII aviation history
Scale Modeling and Military History
Scale models from the sunny side of the Alps.
Scale Modeling and Military History
Scale Modeling and Military History
Scale Modeling and Military History
Scale Modeling and Military History
Scale Modeling and Military History
Scale Modeling and Military History
Scale Modeling and Military History
A blog about Modeling and life in general
