Setting Up Rackspace Hosted Email on iPhone

  1. Home
  2. Email
  3. Setting Up Rackspace Hosted Email on iPhone

This tutorial details how to connect your Rackspace hosted email with your iPhone mail app.

Start by opening the settings app, then follow along using the images below.
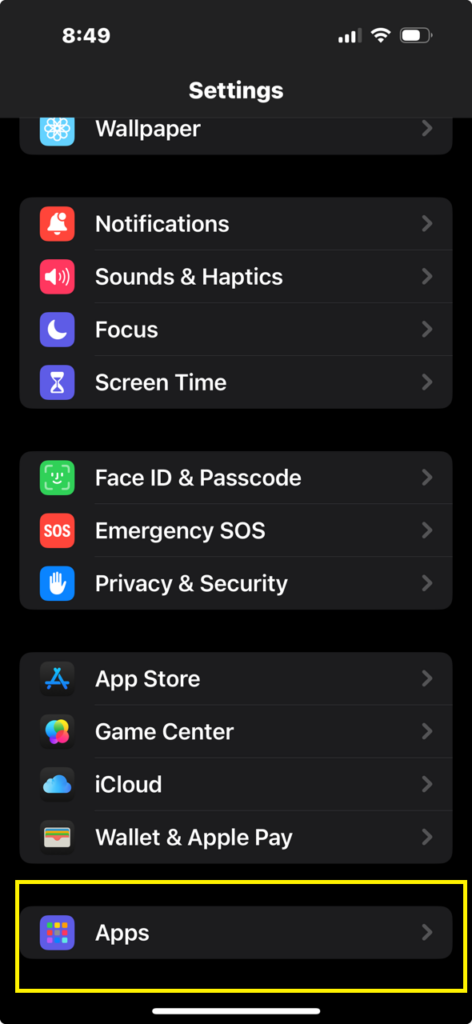
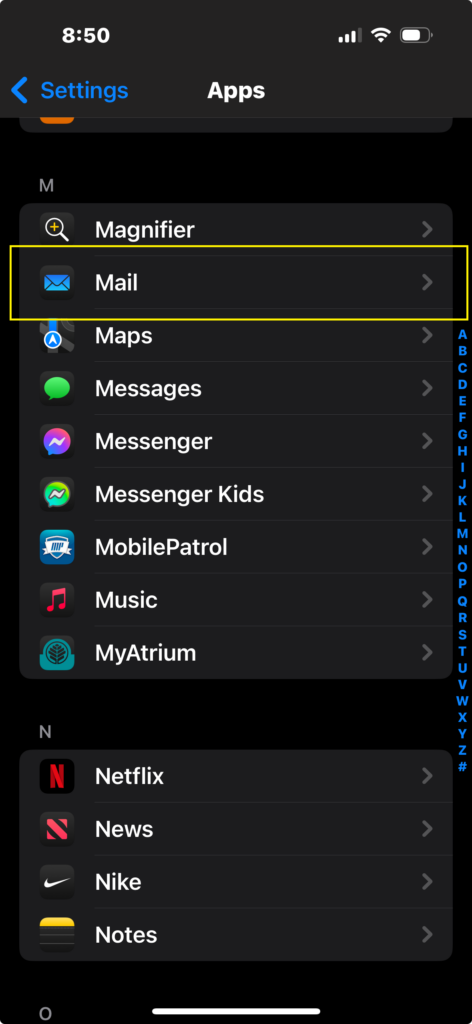
1 choose apps

First, select “Apps”

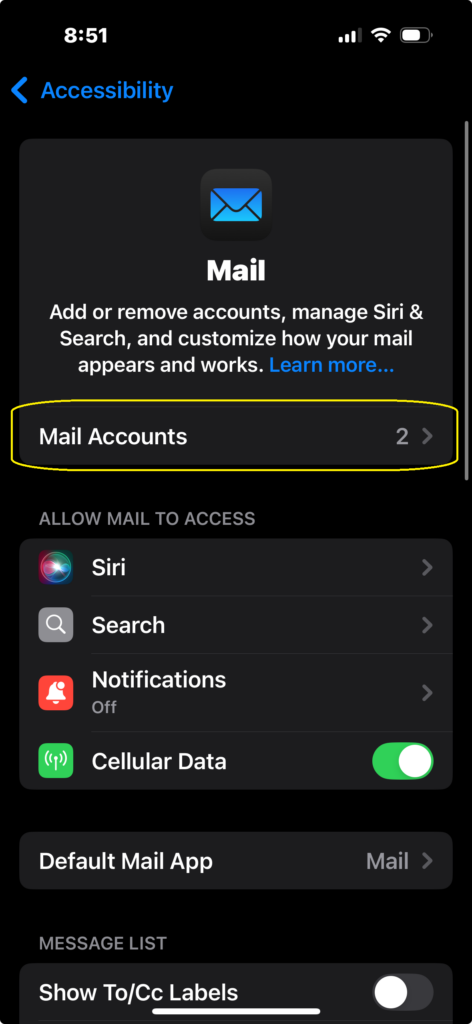
2 choose mail

Then choose “Mail”

3 click mail accounts

Click “Mail Accounts”

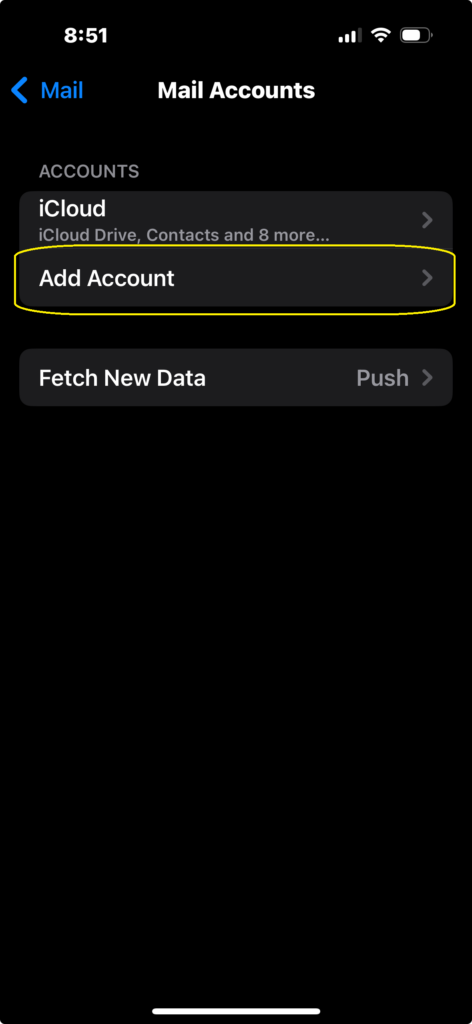
4 click add account

Click “Add Account”

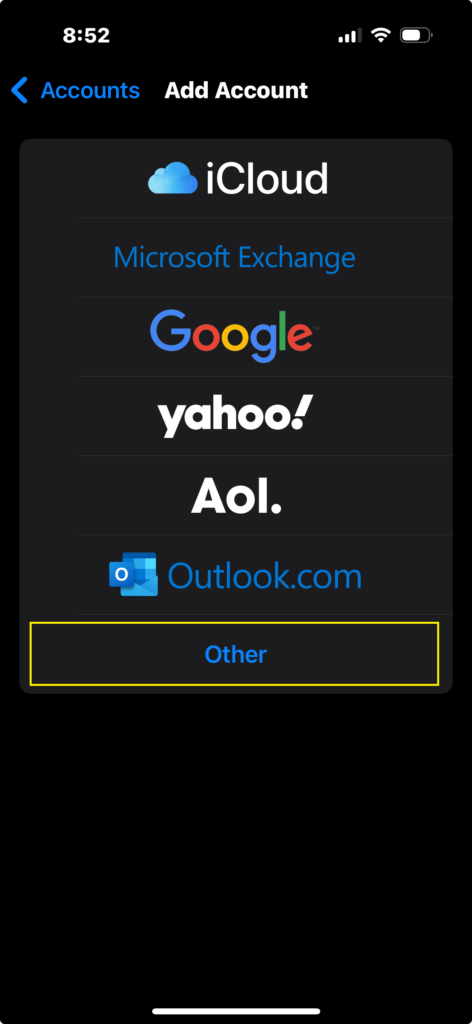
5 click other

Click “Other”

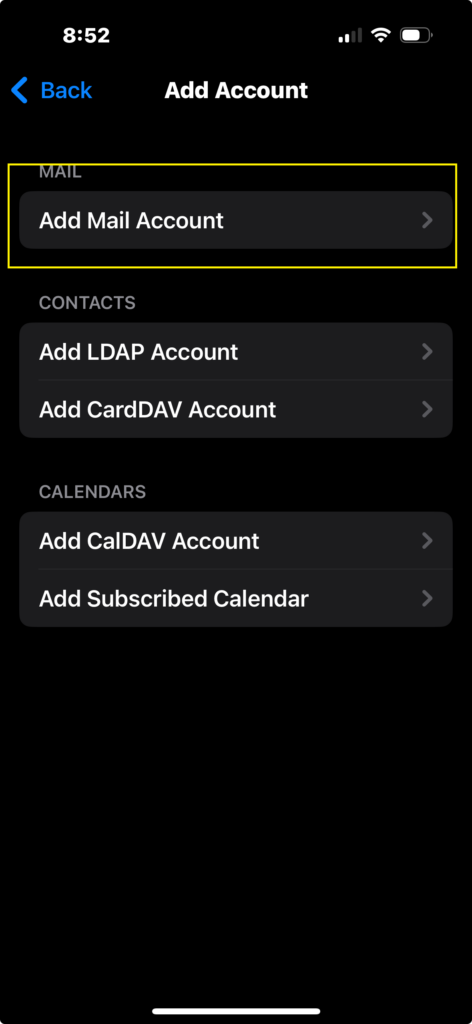
6 click add mail account

Click “Add Mail Account”

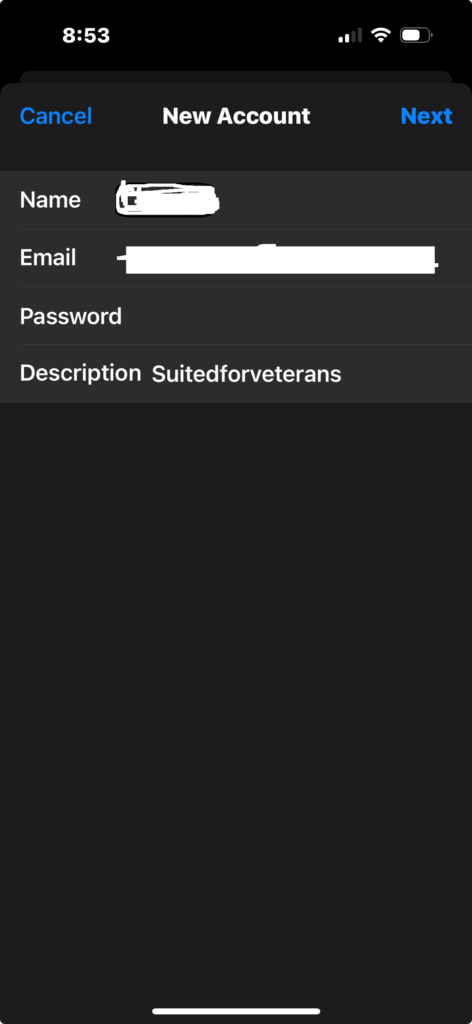
7 enter the first settings

Enter the first settings

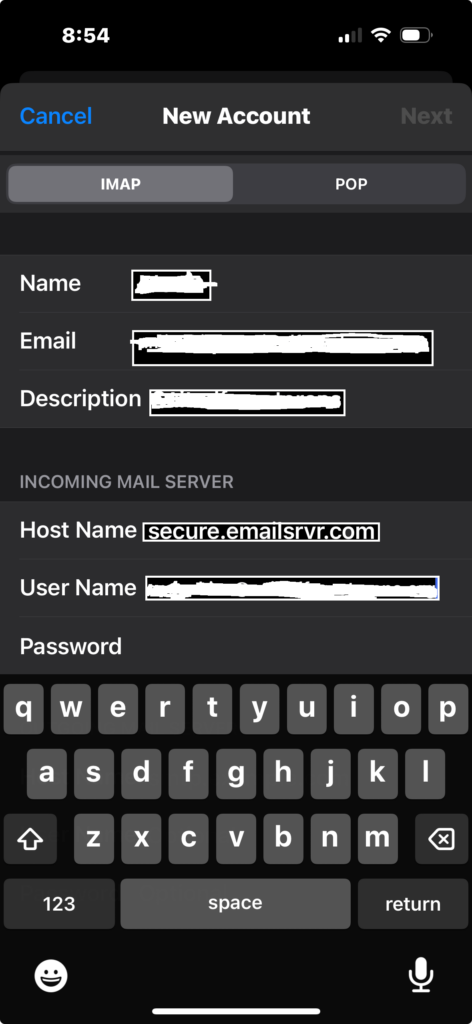
8 enter the imap incoming settings

Enter the IMAP_incoming settings
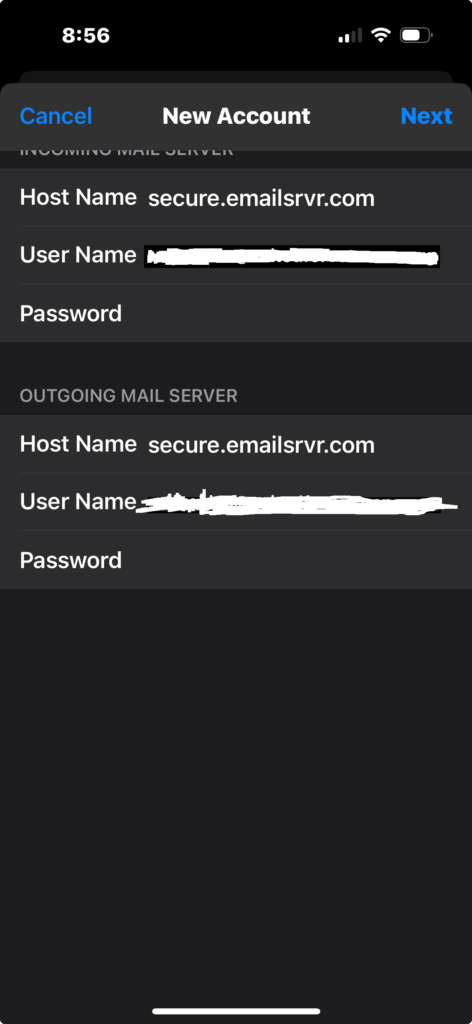
9 beneath the previous settings, enter the outgoing settings

Beneath the previous settings, enter the outgoing settings

10 it will display the verifying message next and it will take up to a minute at times
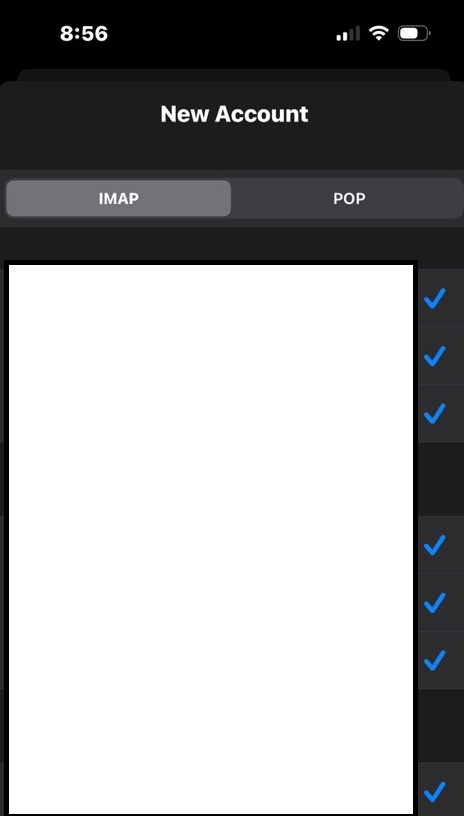
It will display the verifying message next and it will take up to a minute at times

11 if you entered the settings correctly it will verify and look like this

If you entered the settings correctly it will verify and look like this

12 step 12 you will see this screen after the checkmarks and you have to click save in the upper right hand corner

You will see this screen after the checkmarks and you have to click Save in the upper right hand corner

13 at the end of the setup, you'll now see your mail account listed when you view the mail accounts

At the end of the setup, you’ll now see your mail account listed when you view the mail accounts

You May Be Interested In…

How to Set Up Email in Outlook

Your username and password credentials will be sent from an Appnet Support member. Make sure to check your current email!Step…

How to Safelist

Occasionally legitimate emails can be blocked or rejected by spam filtering rules. If you are expecting messages from a specific…

Search by Topic

Share This

Previous Post
How to Safelist