
Important terms to know before starting:
Frontend: The customer facing portion of your website that everyone sees when they go to your URL.
Backend: The administrator panel/dashboard where you can make changes to your website. Accessed via login (details below).
Element: A reusable content component—like a text block, button, or image gallery—added to a webpage via the WPBakery editor.
Rows vs Columns: An important distinction to understand, Rows span from side to side in the editor and can be broken up into multiple Columns.
Shown below is an outer row boxed in red and an inner row boxed in blue:

Take note of the pencil on both of these that allows you to edit the settings for either row.
Shown below are the various columns in this example:

For columns, the edit pencil appears at the top when hovering over that column, as can be seen in the blue section.
Editing rows/columns settings will be covered in another article, but the definitions are important for clarity. If you need help specifically with rows and columns, that information is here, but we recommend being fully comfortable with the topics in this article first.
If you ever need to edit anything on your site the first step will always be to login to your websites admin dashboard. You can go this by going to your sites homepage and adding /wp-admin/ to the end of the address in the address bar. As an example, if your domain was websiteX.com, you would login at the address: https://websiteX.com/wp-admin/
Be sure to check remember me!
If you are lacking credentials to login with please reach out via our support portal at support.appnet.com. If you have never used our support portal, information pertaining to its use can be found here.
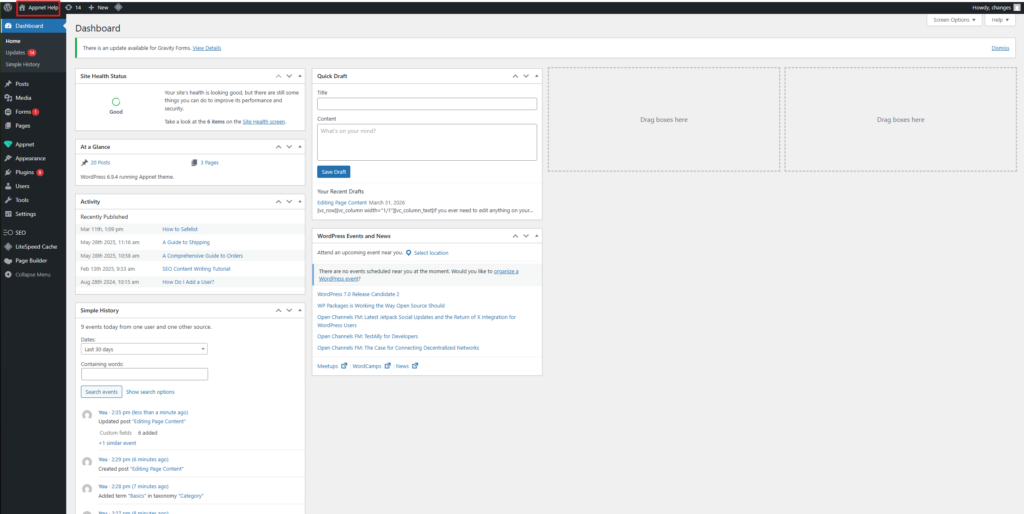
After you have completed the login you will land on the dashboard page which details various information about your site. Along the left side of the screen is the admin navigation.
Below is a common admin dashboard screen.
The first thing we will cover is clearing the cache.
A cache is a saved version of your site’s files or pages that helps the website load faster. Instead of rebuilding everything from scratch every time someone visits the site, the cache allows the site to serve a stored version more quickly.
If you make changes to your site and something is not updating the way you expect, clearing the cache is usually the first thing to try.
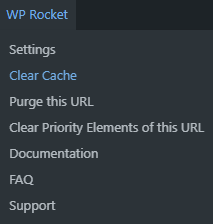
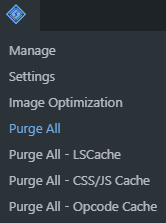
Depending on which cache plugin your site uses, the option may look slightly different. The most common plugins are WP Rocket and LiteSpeed Cache. In either case, the cache option is usually located in the same general place: the black admin bar at the top of the page.
For WP Rocket, look for WP Rocket in the top admin bar. Hover over it, then click Clear Cache.
For LiteSpeed Cache, look for the small diamond-shaped icon in the top admin bar. Hover over it, then click Purge All.
See the images below for examples.
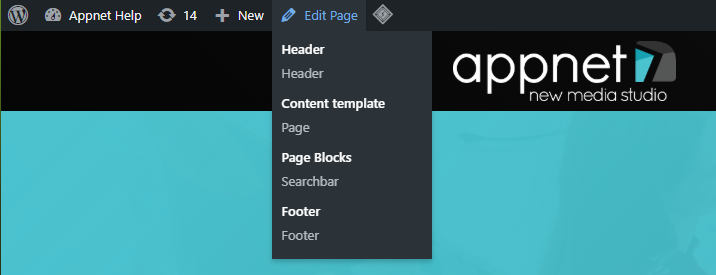
If you click where it says edit page (not selecting one of the dropdowns) this opens up the page editor for whatever page you have open at the time. Right now this is probably your homepage so long as you did not navigate anywhere else after clicking home from the dashboard. If you go to a blog page the button changes to say ‘edit post’ but it still has the same function, it opens the edit page for whatever page you are on.
Most things you need to edit will be editable from the generic edit page, especially if it is content that is unique to that page, unique meaning that the exact same section is not repeated elsewhere.
You probably noticed other options when you hover over the edit page button, also depicted in the photo above. These allows you to easily reach other components that are being used to build the page. This includes the header and footer, page templates, reusable blocks, and more. If you do not see an option for a given page then the page you’re does not have one.
Header:
The top section of your website that displays before any other page content. This includes your navigation, logo, and anything else you wanted to display at the top of each page. Usually contact info and contact buttons are included here.
A warning about editing the header: Pages, posts, templates, and reusable blocks all have a thing called version control making it easy to revert changes made to an earlier version, the header lacks this feature. Be careful making edits to the header, small changes are recommended so you can manually revert easily. (click here to jump to note on using version control, found in the publish section)
Before attempting to edit the header, we suggest you read this article in full first: Editing the Header and Navigation Menu (Impreza/WPBakery)
Footer:
The footer is the section at the very bottom of every page. It most often includes any content that you see repeating on every single page at the very bottom.
Page Template:
Used less commonly to create repeating content, specifically it is used when content in the middle of the page needs to be on multiple different pages or every page. All pages will use a page template, but not all page templates will really have any content on them. The most simple templates only use a title bar and an element called “Page content”. If that is all you see when you edit the page template then the edit you need to make is not in there.
Reusable blocks:
The most common use for these is the title bar, though less commonly this will be used to display repeating page content on multiple different pages without having to setup a whole page template. When there are very few pages that a repeating content needs to show on this is likely how it was done.
The Editor
Below is a view of what the edit page looks like for this post.
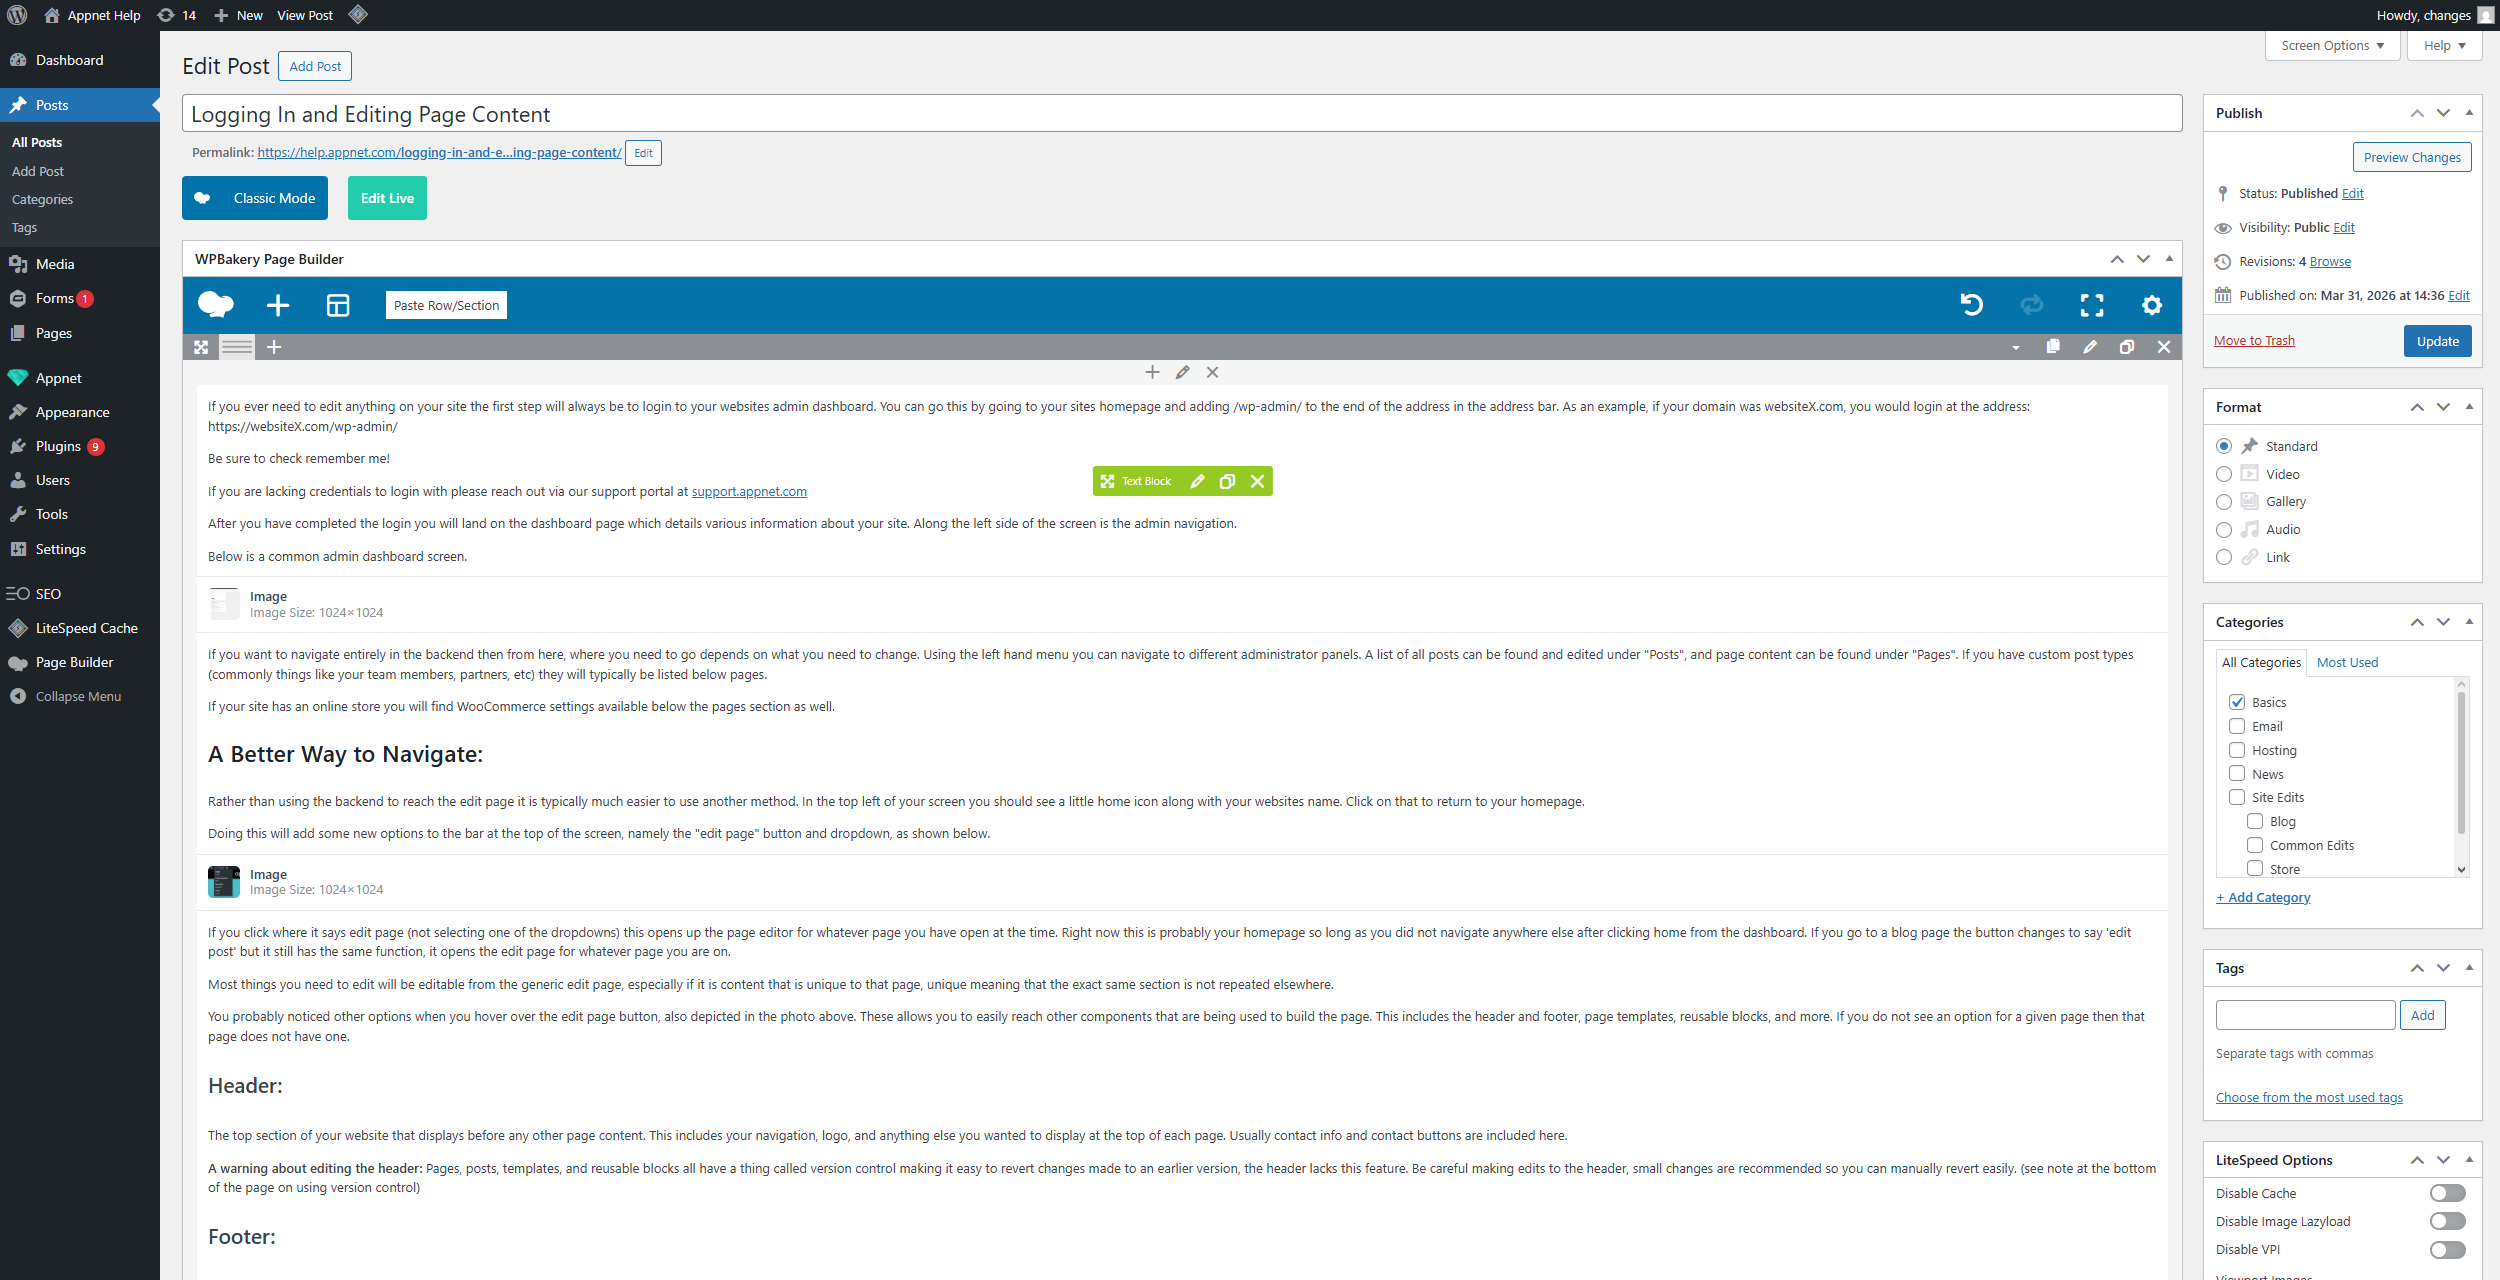
First, you need to ensure you are in the correct builder mode. Near the top left of the image is a large blue button that says “Classic mode”. You need to ensure that your box says the same thing otherwise your builder will look very different. If yours does not say classic mode, simply click it in order to toggle it.
Also, take note of the green box that is visible in my image, this is the element options panel and each button does something different. When you hover over any element in the editor you will see this green menu appear.
- Clicking and dragging on the 4 direction arrow allows you to move the element.
- The pencil allows you to edit the element and its settings.
- The two rounded squares will duplicate the element.
- The X deletes the element.
Clicking the pencil opens the menu, if the element in question is a text element, the menu that opens will look very similar to one of the two options below. Some discrepancies may exist due to differences in site theme/plugin versions from this example.
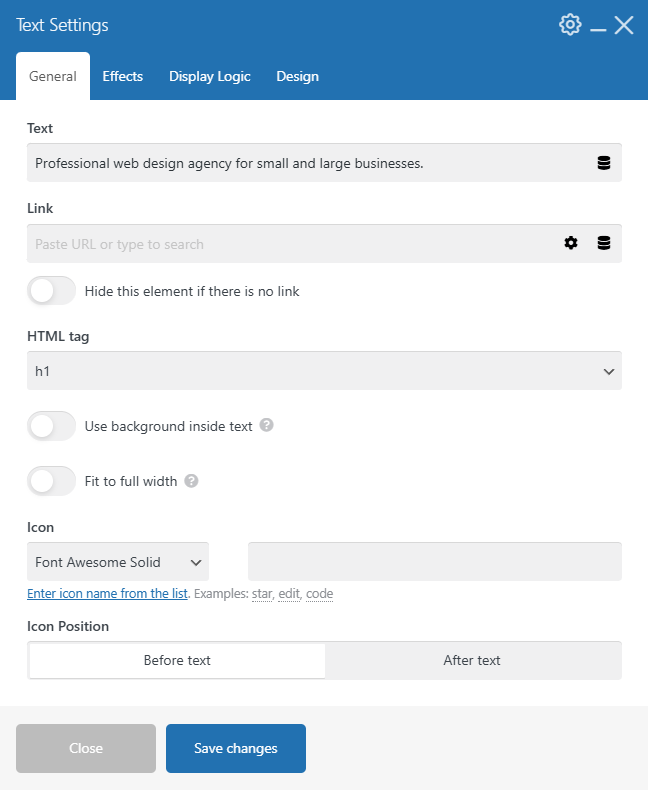
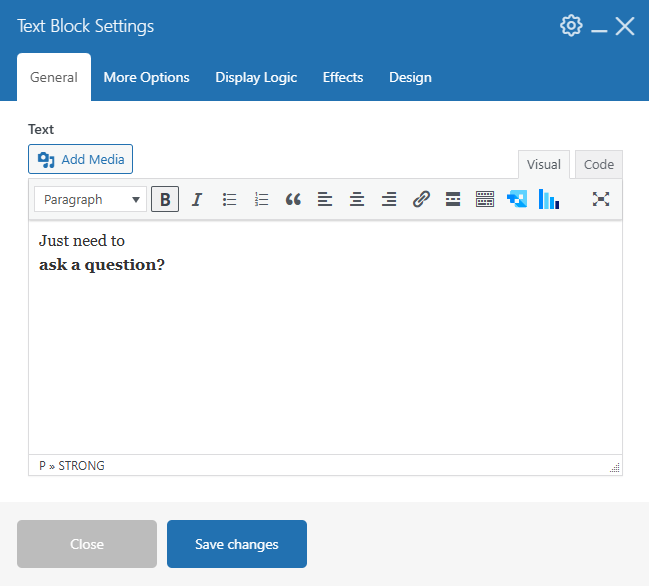
From here editing text is quite simple. Take note of the other tabs at the top, you may have more or less tabs depending on what kind of element it is, as is shown here with a difference even between the two different kinds of text elements. For things like carousels and grids, you will find options to change display options like row count, appearance, and more in those tabs.
All elements have the design tab. This is where you can go to easily apply CSS/visual properties using a friendly user interface.
When you are done editing an element you must click the blue “Save Changes” button for the changes to take effect on the element.
Adding New Elements
If you find yourself needing to add a new element there are a couple ways you can do so, depending on where you need to add it.
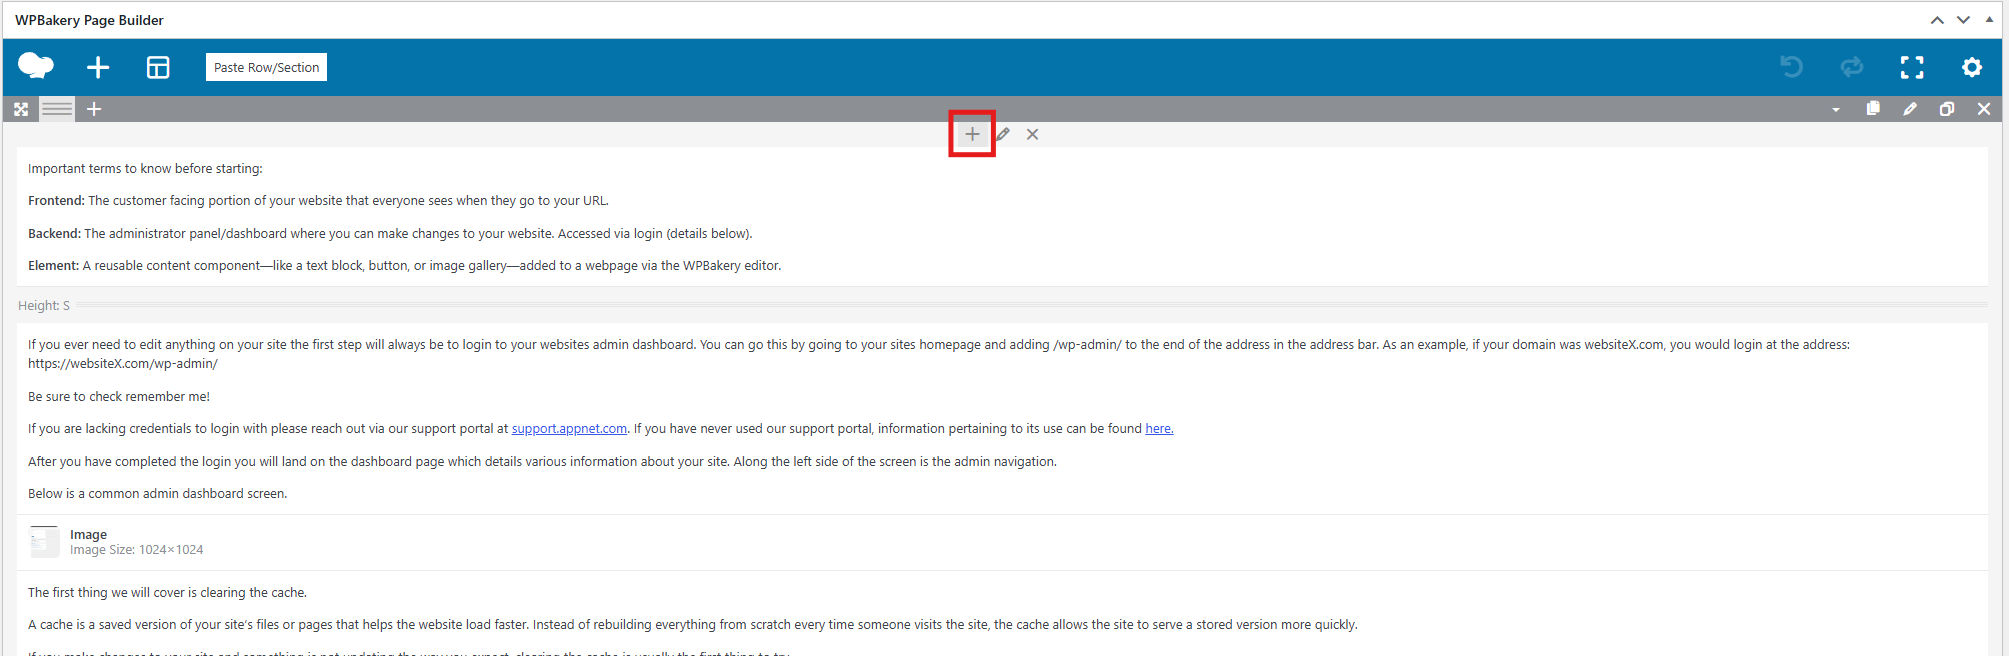
The primary way to add something new is to go to the bottom of the current row and press the grey + button that’s in the center, shown below:

The plus button boxed in red will be found at the bottom of every column and is only shown when hovering over the column.
The larger plus button that’s displayed is found exclusively at the very bottom of the entire content, it allows you to add new rows, and anything added with this button will be placed inside a new row of its own. Use this when you want to add a totally new section to the bottom, or you need a new row to drag up and sandwich between two already existing rows.
You can also add elements to the top of columns by hovering over the column at the very top and using the plus button that appears.
Remember that you can drag to re-order elements as you please.
Click one of the plus buttons to open the menu below which allows you to select a new element to add:
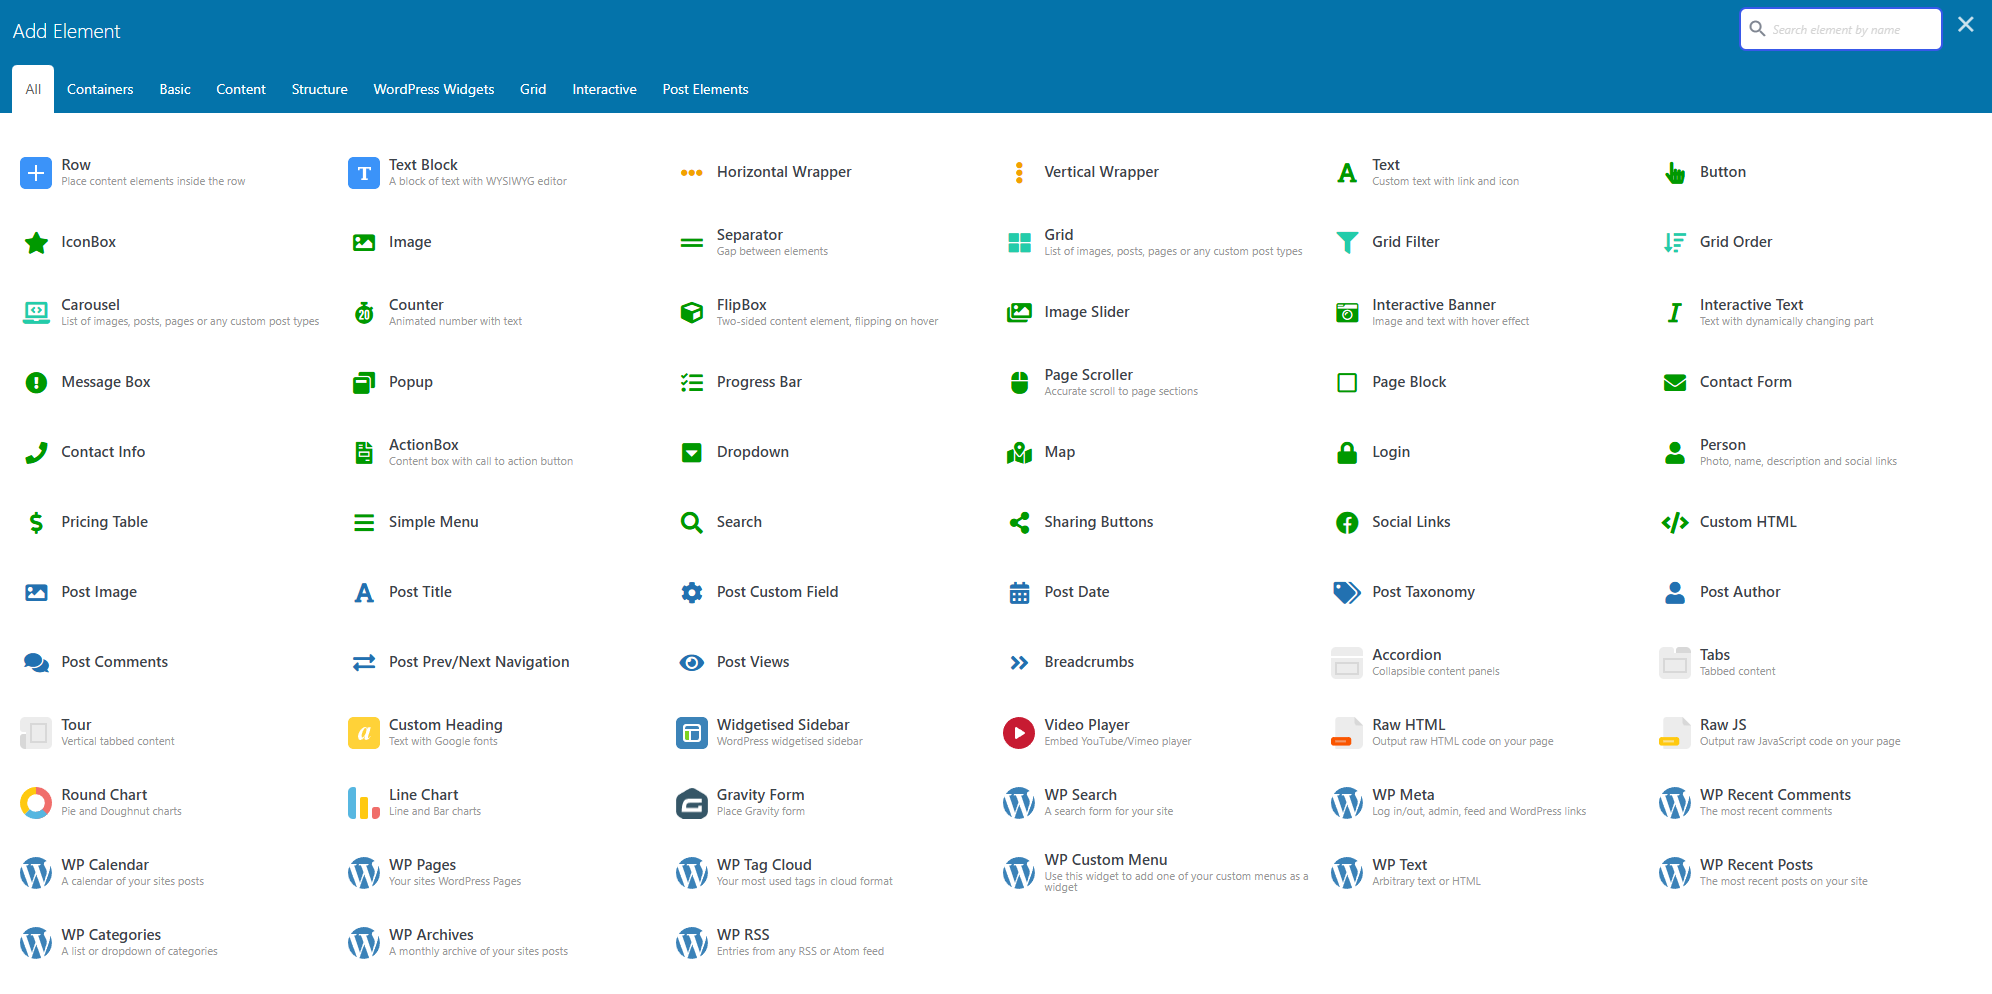
From here you can choose from a vast array of elements to add to your site. There are simple things, like text and image elements, and more advanced items like grids, carousels, social links, wrappers, and more depending on your sites plugins.
Just like text elements, you can edit the contents and settings for any of these by adding them, then hovering over them and clicking the pencil.
These more advanced items, along with images, will be covered in more detail in other articles.
Other Sections of the Edit Page
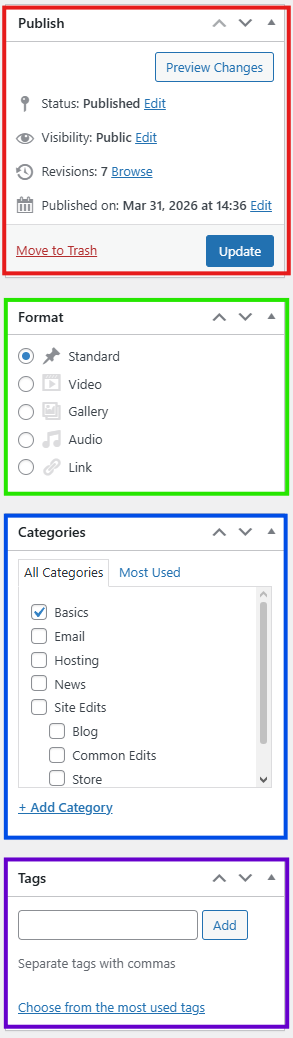
Publish
Update button: Click this when you are done making changes to the entire page and you are ready for them to go live. This is basically the “Save Changes” button for the editor.
Preview changes: Allows you to open a page that shows you what it looks like if you hit update and refreshed the live page.
Status: Lets you change the page to a draft state, draft makes the page visible for administrators but not reachable for regular users. Pending review is exactly like draft functionally but just has more meaning internally for administrators of the site.
Visibility: Lets you password protect a page, useful for if you only want clients to be able to view a page after they have gotten an access code from you.
Revisions: Allows you to revert to a previous version of the page, it holds on to approximately the last 20 versions of the page that were “updated”. So each time you hit update that is a new version and it is saved there. Hit browse to start choosing a revision to go back to. It provides you with a DOM view of additions/subtractions from your current DOM.
Format
Very uncommonly used. Your setting should almost always be set to “Standard” but if it is set to something else do not change it.
Categories
Used in blogs, custom post types, and WooCommerce stores. Adding a new category is easy, just hit add category, name it, and select if it has a parent or not. WordPress automatically generates category pages, for some sites we have created custom page templates for these categories. If a category is a child of another category, then it will be displayed on its category page. A good example of when this is useful is if you have a store with many different types of fruits, you would want to create a fruit category then create another category named something like apples, then you would assign all of your apple products to that category.
Tags
Used much less commonly as a simpler alternative to categories. Type in a term and hit add to add it to the list. Select already used terms by clicking ‘choose form the most used tags’. Unless you have a site with some considerable age it is likely using categories over tags.
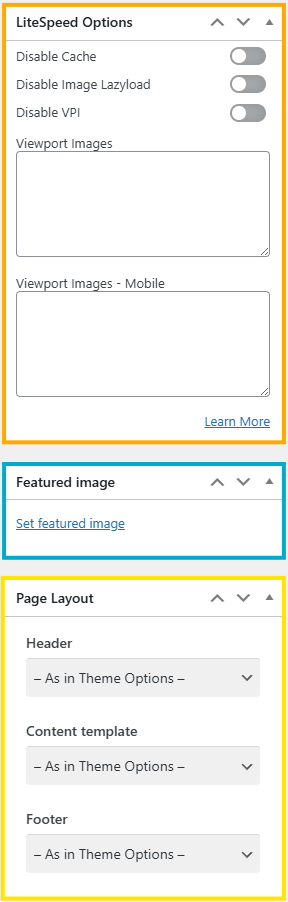
LiteSpeed Options (or WPRocket Settings)
Some sites will have LightSpeed Cache, other will have WPRocket, it just depends on what kind of server your site is running on. This menu has options to allow you to change how the caching on this specific page works. We advise against changing settings in this box unless you feel confident.
Featured Image
This is where you set the primary image for the page at. Most commonly, for regular pages or blog posts this will change the photo that is displayed in the background of the title bar section.
For products, this will set the image that is displayed in the shop grid or any other grids the product is displayed in, as well as the primary image on that products page. Similarly, for custom post types the featured image typically changes the image displayed on the grid and the primary image on the post page.
Page Layout
Used to change the template in use for a given page manually, making it behave differently than the global settings. If you have made a brand new template for a page and wish to apply it, first consider if the template needs to become active for many pages or just the one. If its in fact only this one, you would change that setting here.
Otherwise, for when it needs to be the template for many pages, such as for a custom post type, product, or otherwise, you would need to change the template setting in the global Impreza settings. Be careful editing Impreza settings and only do so if you are confident in what you are doing, the only way to undo changes made to those settings is by requesting us to load a backup of your site.
If you get stuck or need assistance we are always happy to help! Please get in touch with us via our support portal at: support.appnet.com
If you have not used our portal before, you will need to make a new account. There is also a forgot password button down below the login fields if you have forgotten your password.
You can also use the portal to request a zoom meeting where we go over how to make specific edits if it isn’t covered on our help pages; or if you just need a bit of extra guidance.
Thank you, and happy editing!