
This article covers the most common methods you will need to use to edit images on your site of varying types and locations.
If you have not done so yet, please review the following article, its contents include basic information that this article assumes you are already comfortable with: Logging In/Editing Page Content.
Any given image on your site might be configured in slightly different ways, depending on where it is and what it is doing.
Featured Images
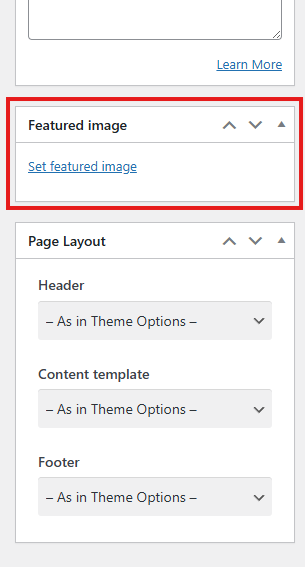
If you need to change the background image for a pages title bar, a products primary image, or the image displayed with a blog post or custom post (like an our team section); then the featured image is what you are looking for. Start by navigating to the page with the image you wish to change and clicking the edit page button at the top.
Regardless of where you are editing the featured image will generally always be found in the same location, along the right side of the edit page, somewhere below the blue publish button.
If you do not have a featured image set currently, you can click “Set Featured Image” to add one. If you do currently have one set just click on the displayed image to select a different one.
If you wish to remove it entirely and display whatever the default image is, click “Remove featured image” it will be below the current image.
If your image is not fitting well, you will have to manually crop it to better fit the area and reupload. For title bars the section is typically very thin and requires a “banner” style photo, so you will likely need to vertically trim photos you try to use there, especially if you want it to show a specific portion of the content.
Editing in-Page Images
To edit images within pages you will need to first ascertain if the image you wish to edit is set as a background or as a regular image element. Again, start by navigating to the edit page for the page in question. Next, use the text or other elements to guide you in finding where in the editor the photo might be, look for an “Image” element that has its image set to the one you need to change.
If you do not see an image element anywhere nearby the text elements the image displays near, or the elements you are finding are not set to the image you need changed, then you likely have an image that is set as a background. This will be covered in the next section.
Editing Image Elements
Once you find your image element and click the pencil, you will be greeted with this menu:
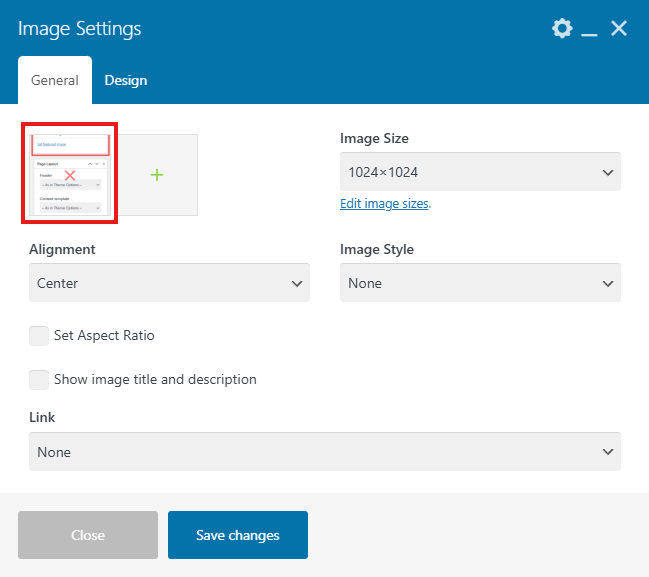
The first thing of note is what I highlighted with a red box. This is the image that is currently set. Notice the red X in the middle of the preview, clicking that will remove the image. You will then be able to click the plus box (visible to the right of the current image preview) to add a new image after the previous is removed.
You also have access to various other options to help get your image into the shape you wanted, such as image size, alignment, image style, and the ability to add a link to the image that fires on click. You also have checkboxes you can enable to allow you to use aspect ratio and to enable displaying title and description.
Most of these are pretty self explanatory, but if you find that an image is not taking up all the available space, you might need to set the image size to “Full Size”, this is especially true for very large images.
The design tab at the top also has some very useful settings for images, particularly things like spacing, sizes, and borders. The design tab is covered in far more detail in this article if you need assistance: Advanced Element Configuration (Impreza/WPBakery)
Editing Images Set as a Background
If you were not able to locate a dedicated image element then the next place you will need to look is at the background settings in the columns and rows around where it appears. Again, its useful to look at the text or other elements in the editor and on the page to try to find out where a background image is being set. Background images are set in the design tab, usually they are set inside either the column or the row options. See below on how to locate them:
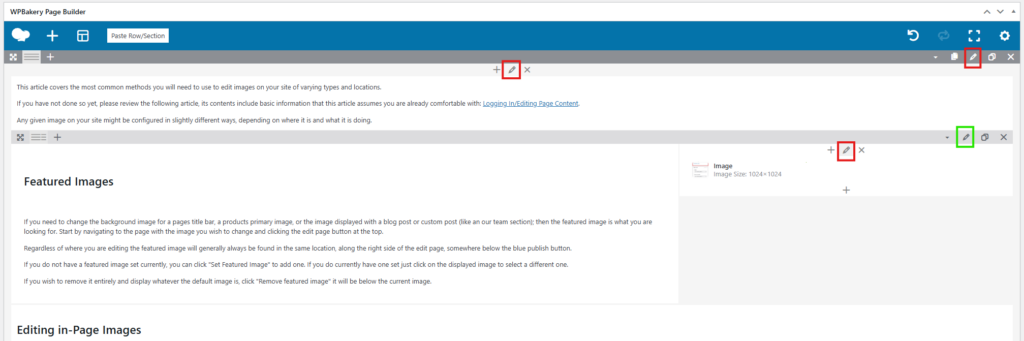
Boxed in red are the edit buttons for columns. If you are not seeing the pencil, hover over the column in question.
Boxed in blue are the edit buttons for rows.
Rows stretch from one side of the screen to the other, columns can be broken up. You can use this as another hint to help you figure out which one the image might be set on. If the background image shows across the entire area, its likely on the row. If it only shows across part of the section, its probably in the column.
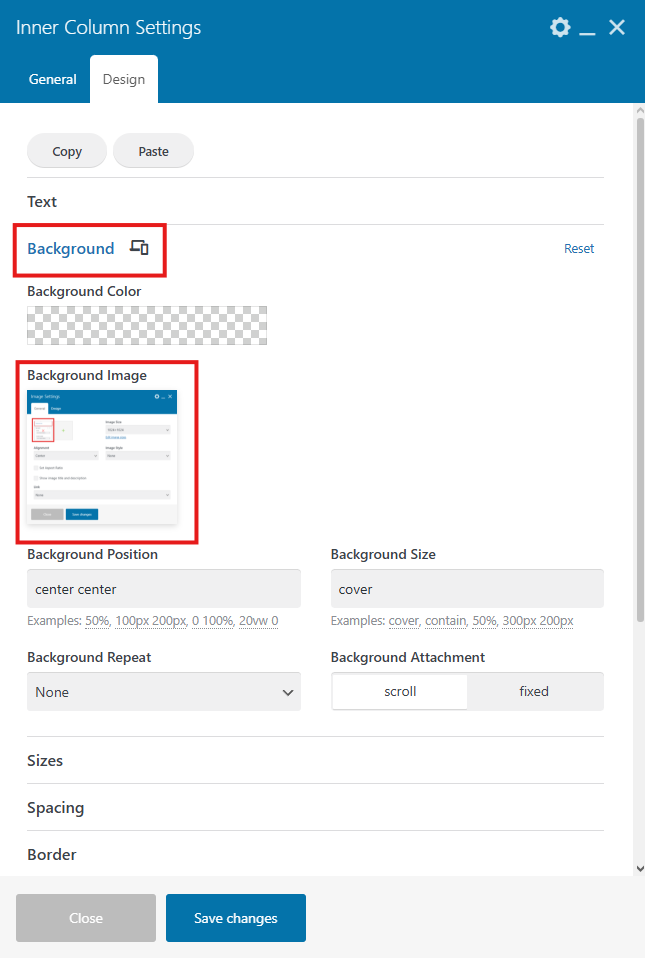
To the right is an image showing the design tab with the background tab open for a column with a background image.
You should easily be able to tell if you are in the right place by looking at the preview image (red box) and ensuring it matches the one you wish to change.
To change the image, simply click the preview image and select a new one.
Also shown are some common settings for background images, this makes most images display properly; though, if different things are set you should not change them unless the new photo isn’t fitting correctly.
If your image is not fitting well, you may consider manually cropping it to better fit the area, then reuploading.
If the background image stretches from side to side on the page, you may have a background image set inside the darker outer row under the general tab, as shown below:
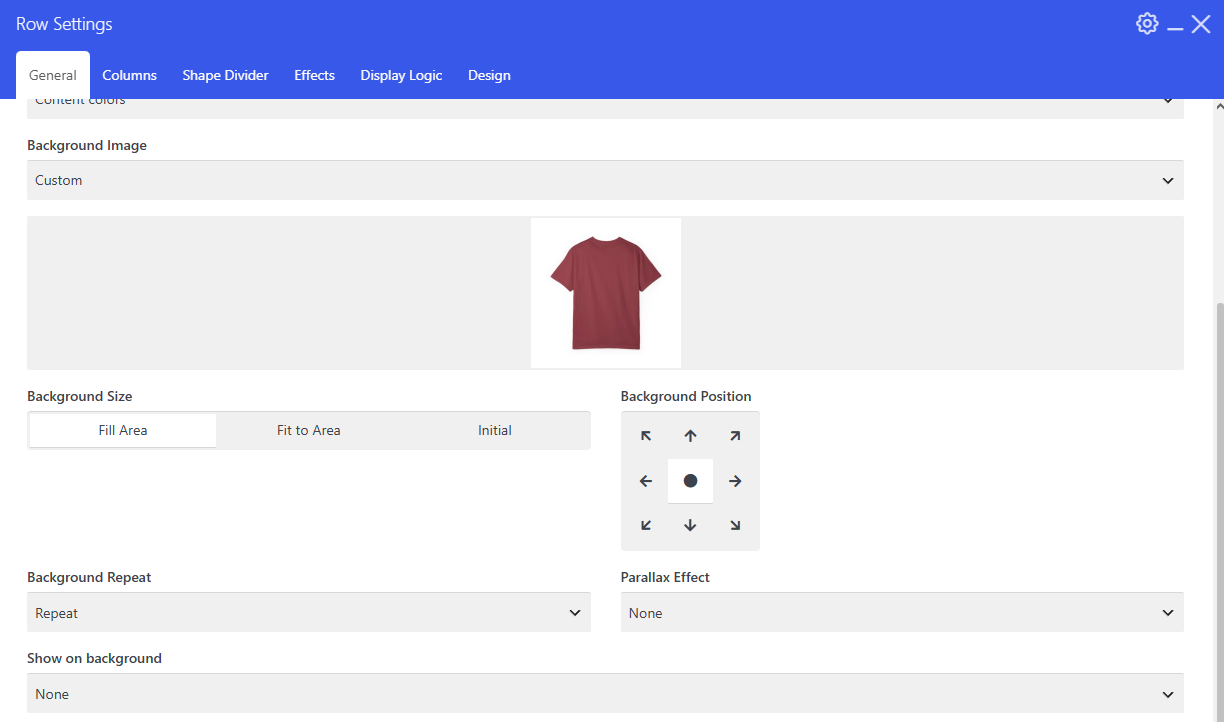
Same as before, clicking on the image allows you to change it, and you can edit the various settings to tweak the images look.
As always, if you have any trouble or require assistance with anything, we’re here to help! You can submit a support ticket at support.appnet.com to request help.
Additional information on the portal and its use can also be found here: Requesting Changes For Your Website