
The PayPal Sandbox is a self-contained test environment that mirrors live PayPal. You create orders and approve payments using fake accounts and test money. You can build and debug a full payment flow without touching a real account or moving a single real dollar. It has the same API feature set as the live environment, so a flow that works in the PayPal Sandbox behaves the same way when you go live.
Best for: building and testing a complete payment flow before you switch on a single live credential. This covers orders, approvals, and simulating declines.
A real payment has two sides, so the PayPal sandbox gives you two account types. You need one of each to test a complete checkout.
| Account type | Plays the role of |
|---|---|
| Personal | The buyer (customer) |
| Business | The seller (merchant) |
Payments are the one part of your app you can't safely test in the live environment. The PayPal sandbox gives you a safe space to get the flow right first.
- Test the full buyer and seller journey with no real money at risk.
- Reproduce edge cases similar to declines on demand.
- Keep your real PayPal account and its transaction history clean.
- Use separate PayPal sandbox keys so a mistake while testing never reaches live environment.
This guide moves between two PayPal sites that look similar but aren't interchangeable. Each has its own login, so knowing which is which up front saves a lot of "why won't my password work?" confusion.
| Site | What you do there | Sign in with |
|---|---|---|
developer.paypal.com |
Manage Sandbox accounts, apps, and API credentials. | Your real PayPal login. |
www.sandbox.paypal.com |
Approve and review test payments. | A generated Sandbox test account. |
Your code calls a third URL, the Sandbox API base https://api-m.sandbox.paypal.com, using an access token you generate from your Client ID and Secret.
Here's how the three URLs and your accounts connect:
The PayPal sandbox site and API each have a live counterpart, paypal.com and api-m.paypal.com, that you swap in when you go live. The Developer Dashboard stays the same for both and uses a sandbox/Live toggle.
You need a PayPal account and access to the PayPal Developer Dashboard. Signing in to the Developer Dashboard is what generates your default PayPal sandbox accounts, so there is nothing else to install.
Tip
A PayPal account is free to create, and the same login works for both www.paypal.com and the Developer Dashboard. You don't need a separate developer sign-up.
When you sign up as a developer, PayPal automatically creates one default Business account (with test API credentials) and one default Personal account. You can create more whenever you need extra roles or balances.
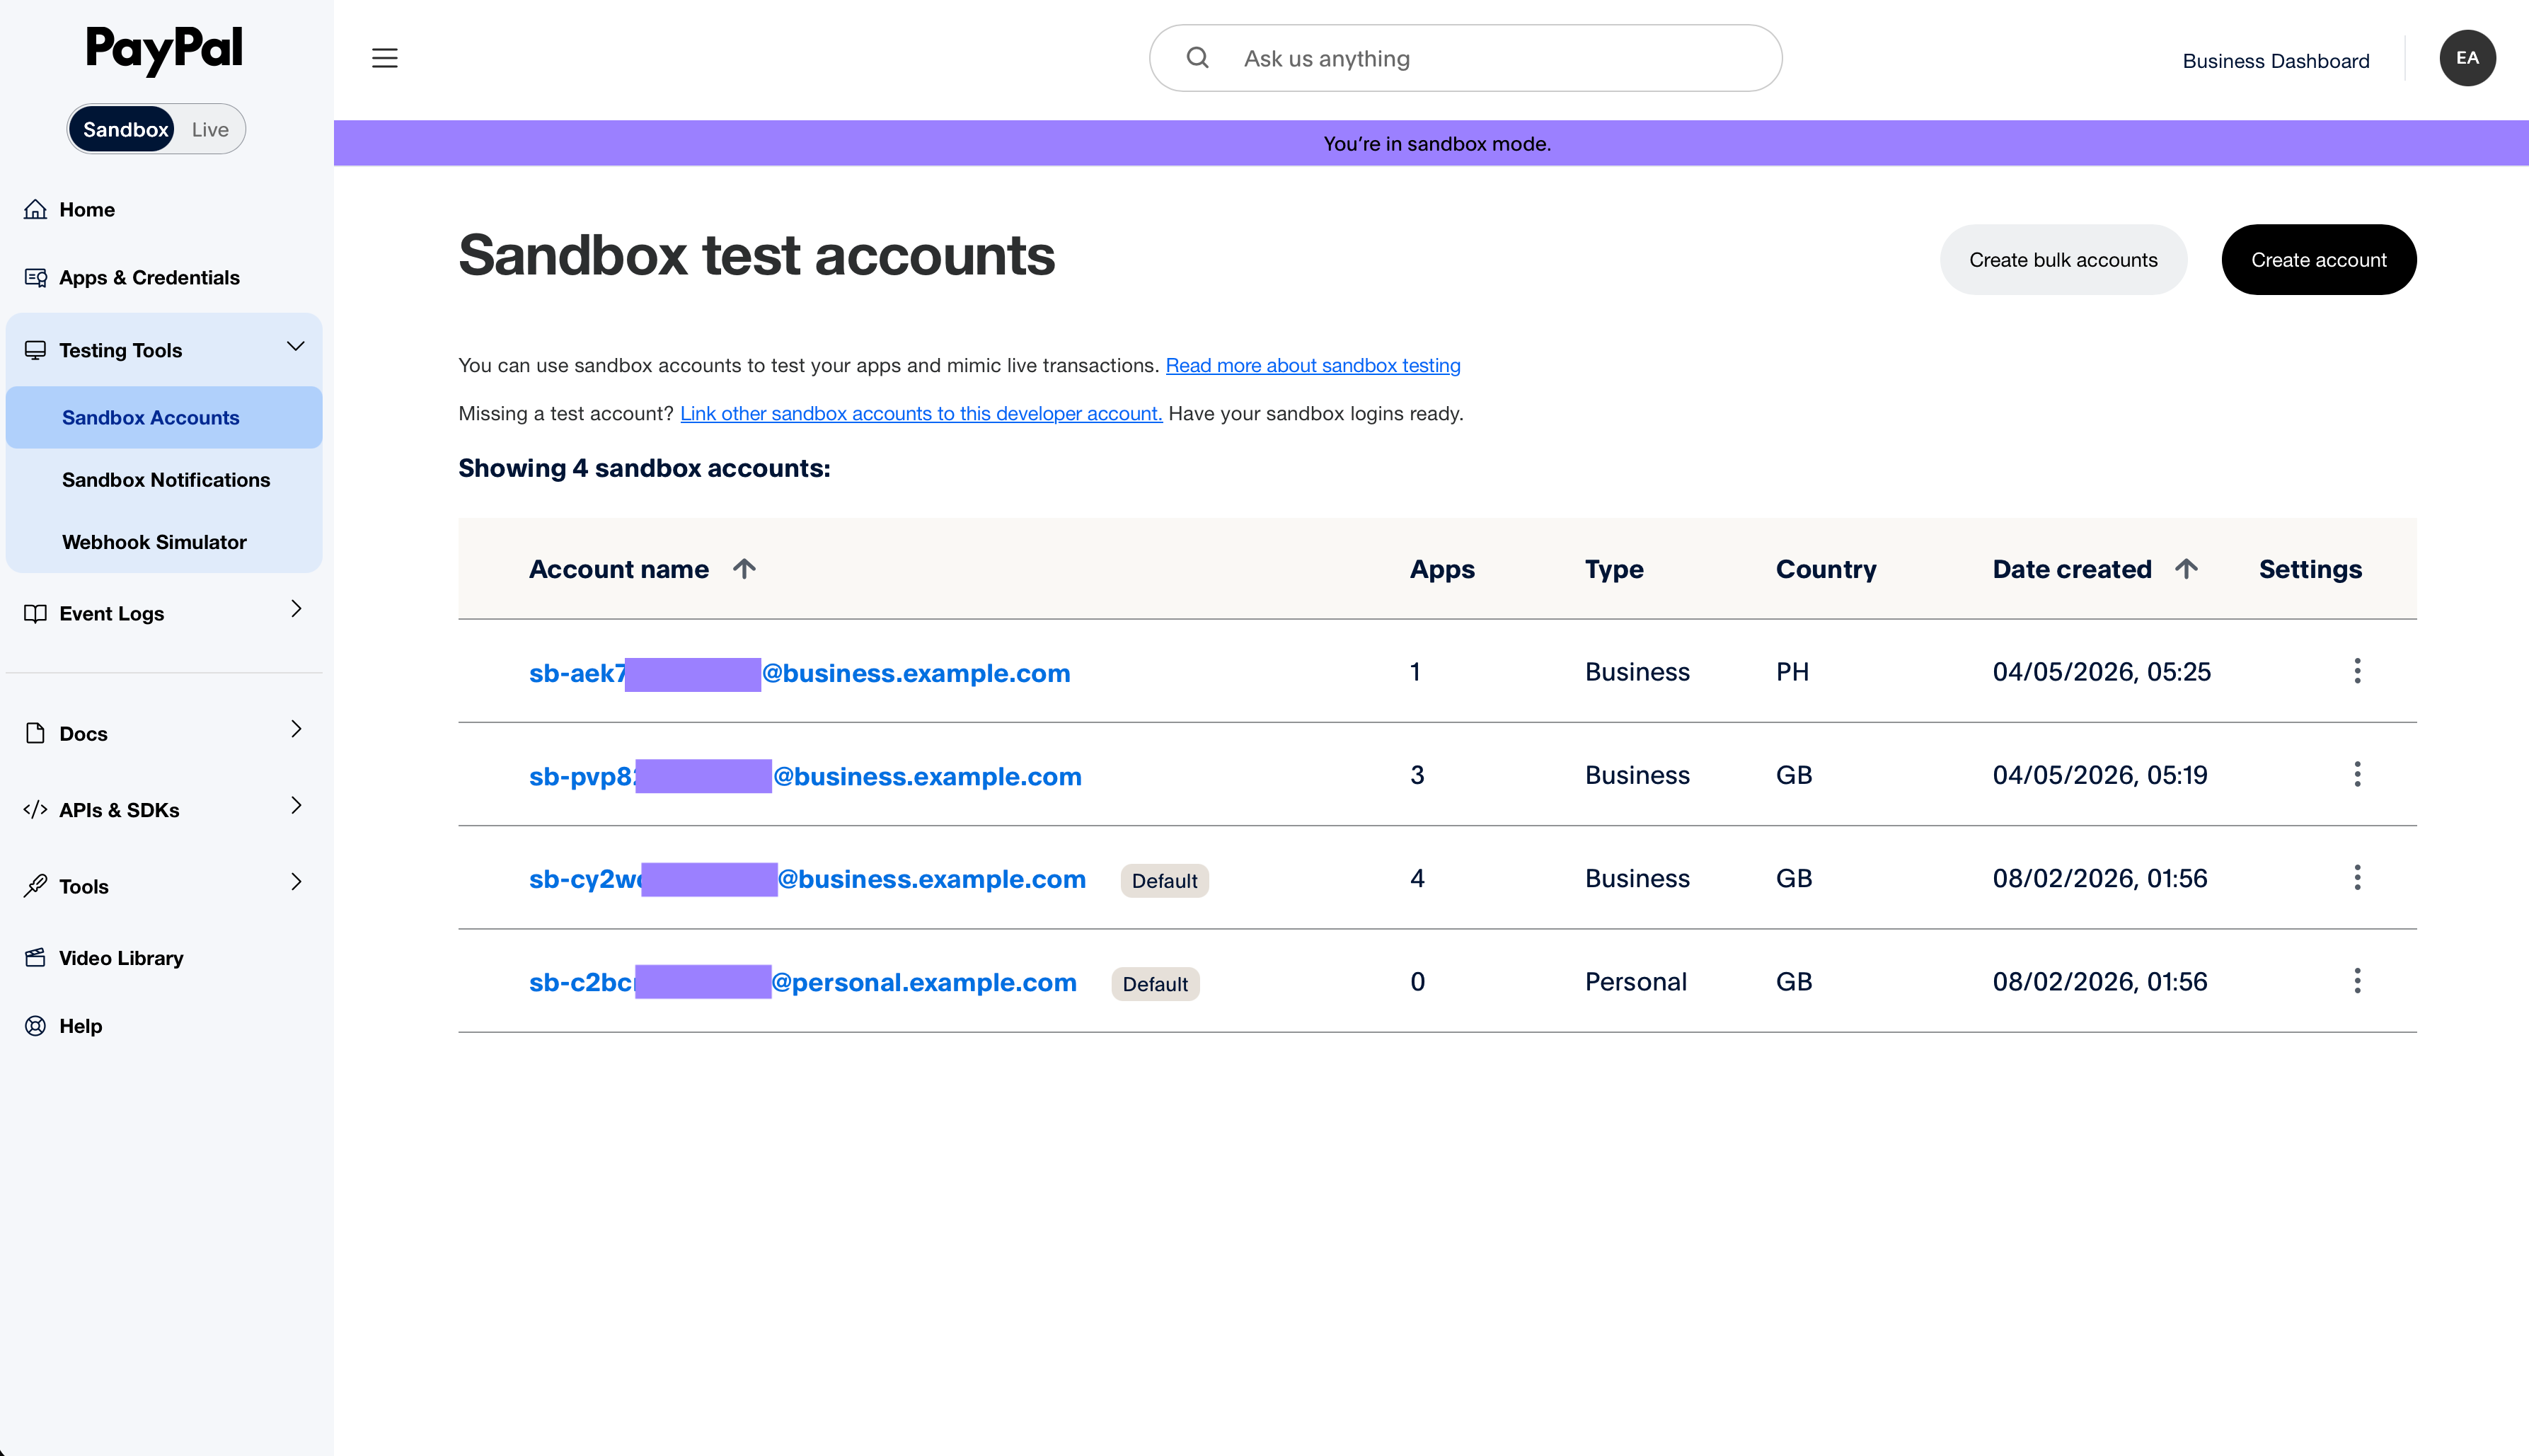
You will find both accounts on the Sandbox Accounts page. Here's how to open it:
Sign in to the PayPal Developer Dashboard.
Select the PayPal sandbox environment so you work with test data, not live data.
Expand Testing Tools in the left sidebar.
Select Sandbox Accounts to list your test buyer and seller accounts.
Note
Default Sandbox accounts use addresses like [email protected] and [email protected]. These are fake addresses for testing only, and the two default accounts can't be deleted.
Need more than the two defaults? Create extra test accounts for additional roles, balances, or currencies from your Developer Dashboard page.
Click Create Account, set the Account Type to Personal or Business, choose a Country, and click Create Account.
PayPal fills in default balances and details. For custom balances or card data, choose Create Custom Account instead.

Each account gets a generated email and password. You use the email and password to log in to the Sandbox for reach account. Change the password anytime from the (...) menu under View/Edit Account.
Every Sandbox account comes preloaded with fake money, and each one keeps its own balance and transaction history, just like a real account. You manage all of it from Testing Tools, then Sandbox Accounts in the Developer Dashboard.
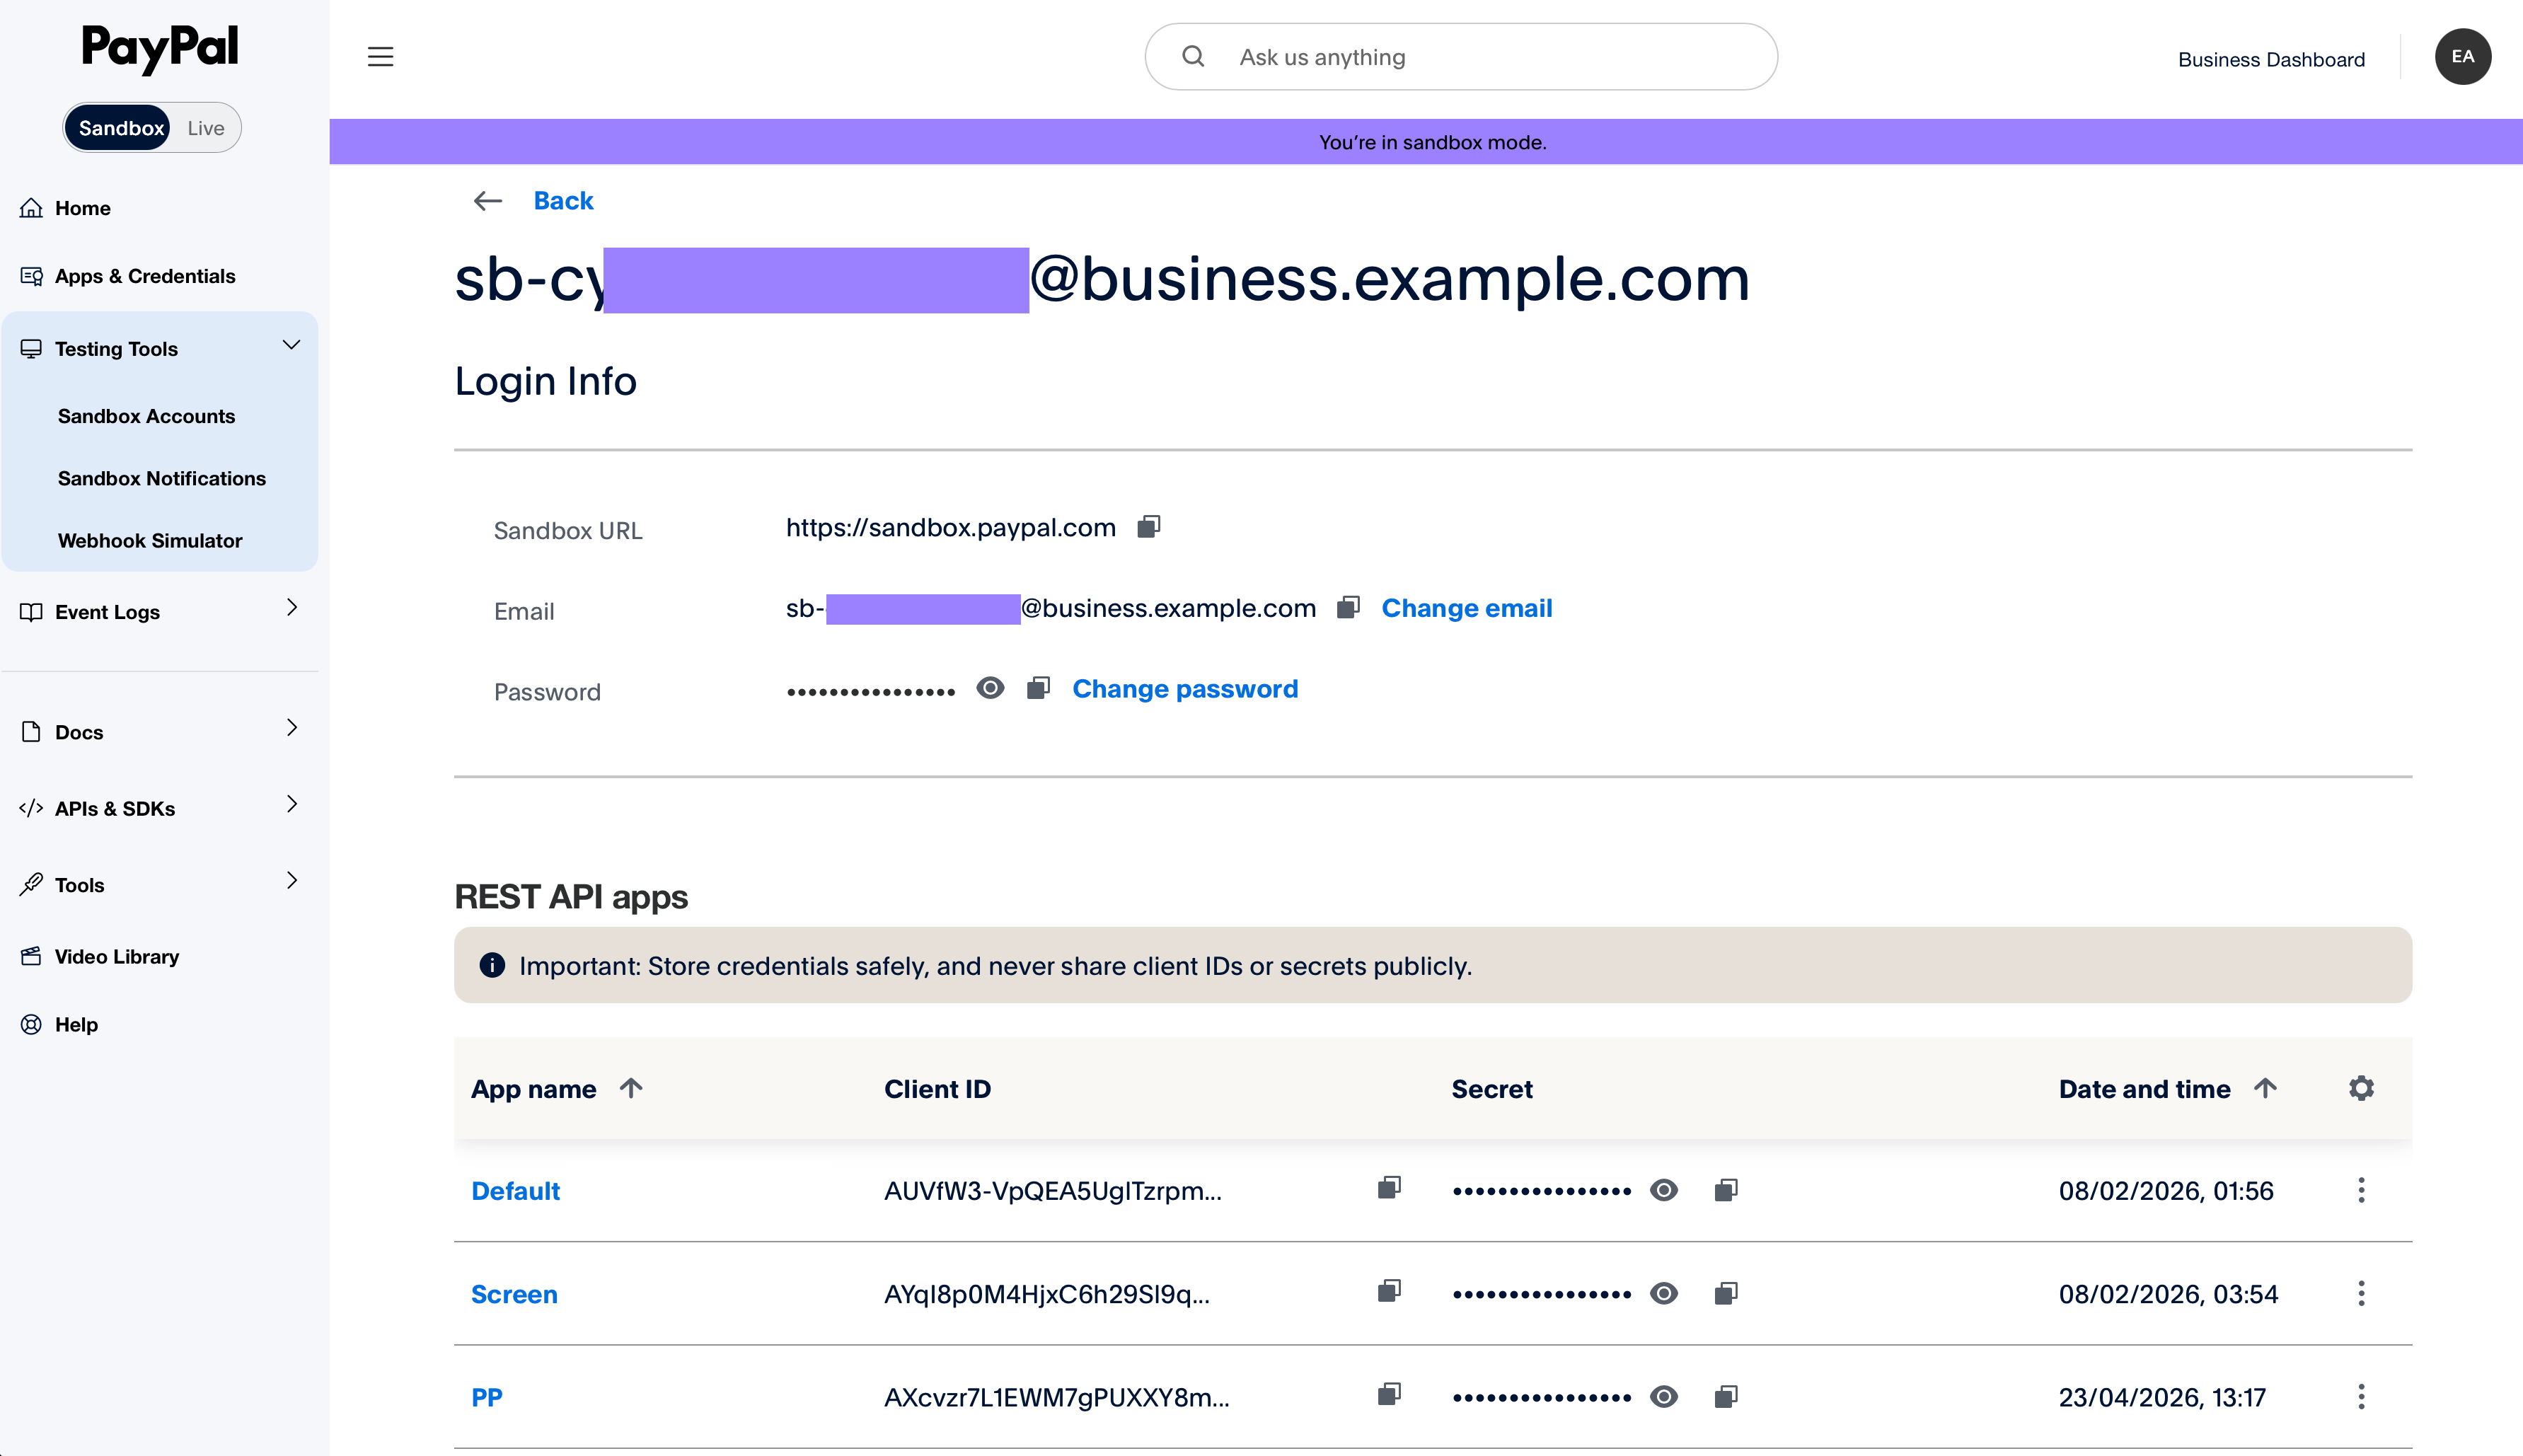
Open the (...) menu next to an account and choose View/Edit Account to:
- Check or top up the account's balance.
- Change the currency, or hold balances in more than one currency.
- Review the account profile: the generated email, password, and address you use to log in and to make test API calls.
Tip
A Personal (buyer) account needs a balance to complete a PayPal-funded payment. A Business (seller) account collects the payments you capture, so its balance is a quick way to confirm test money actually moved.
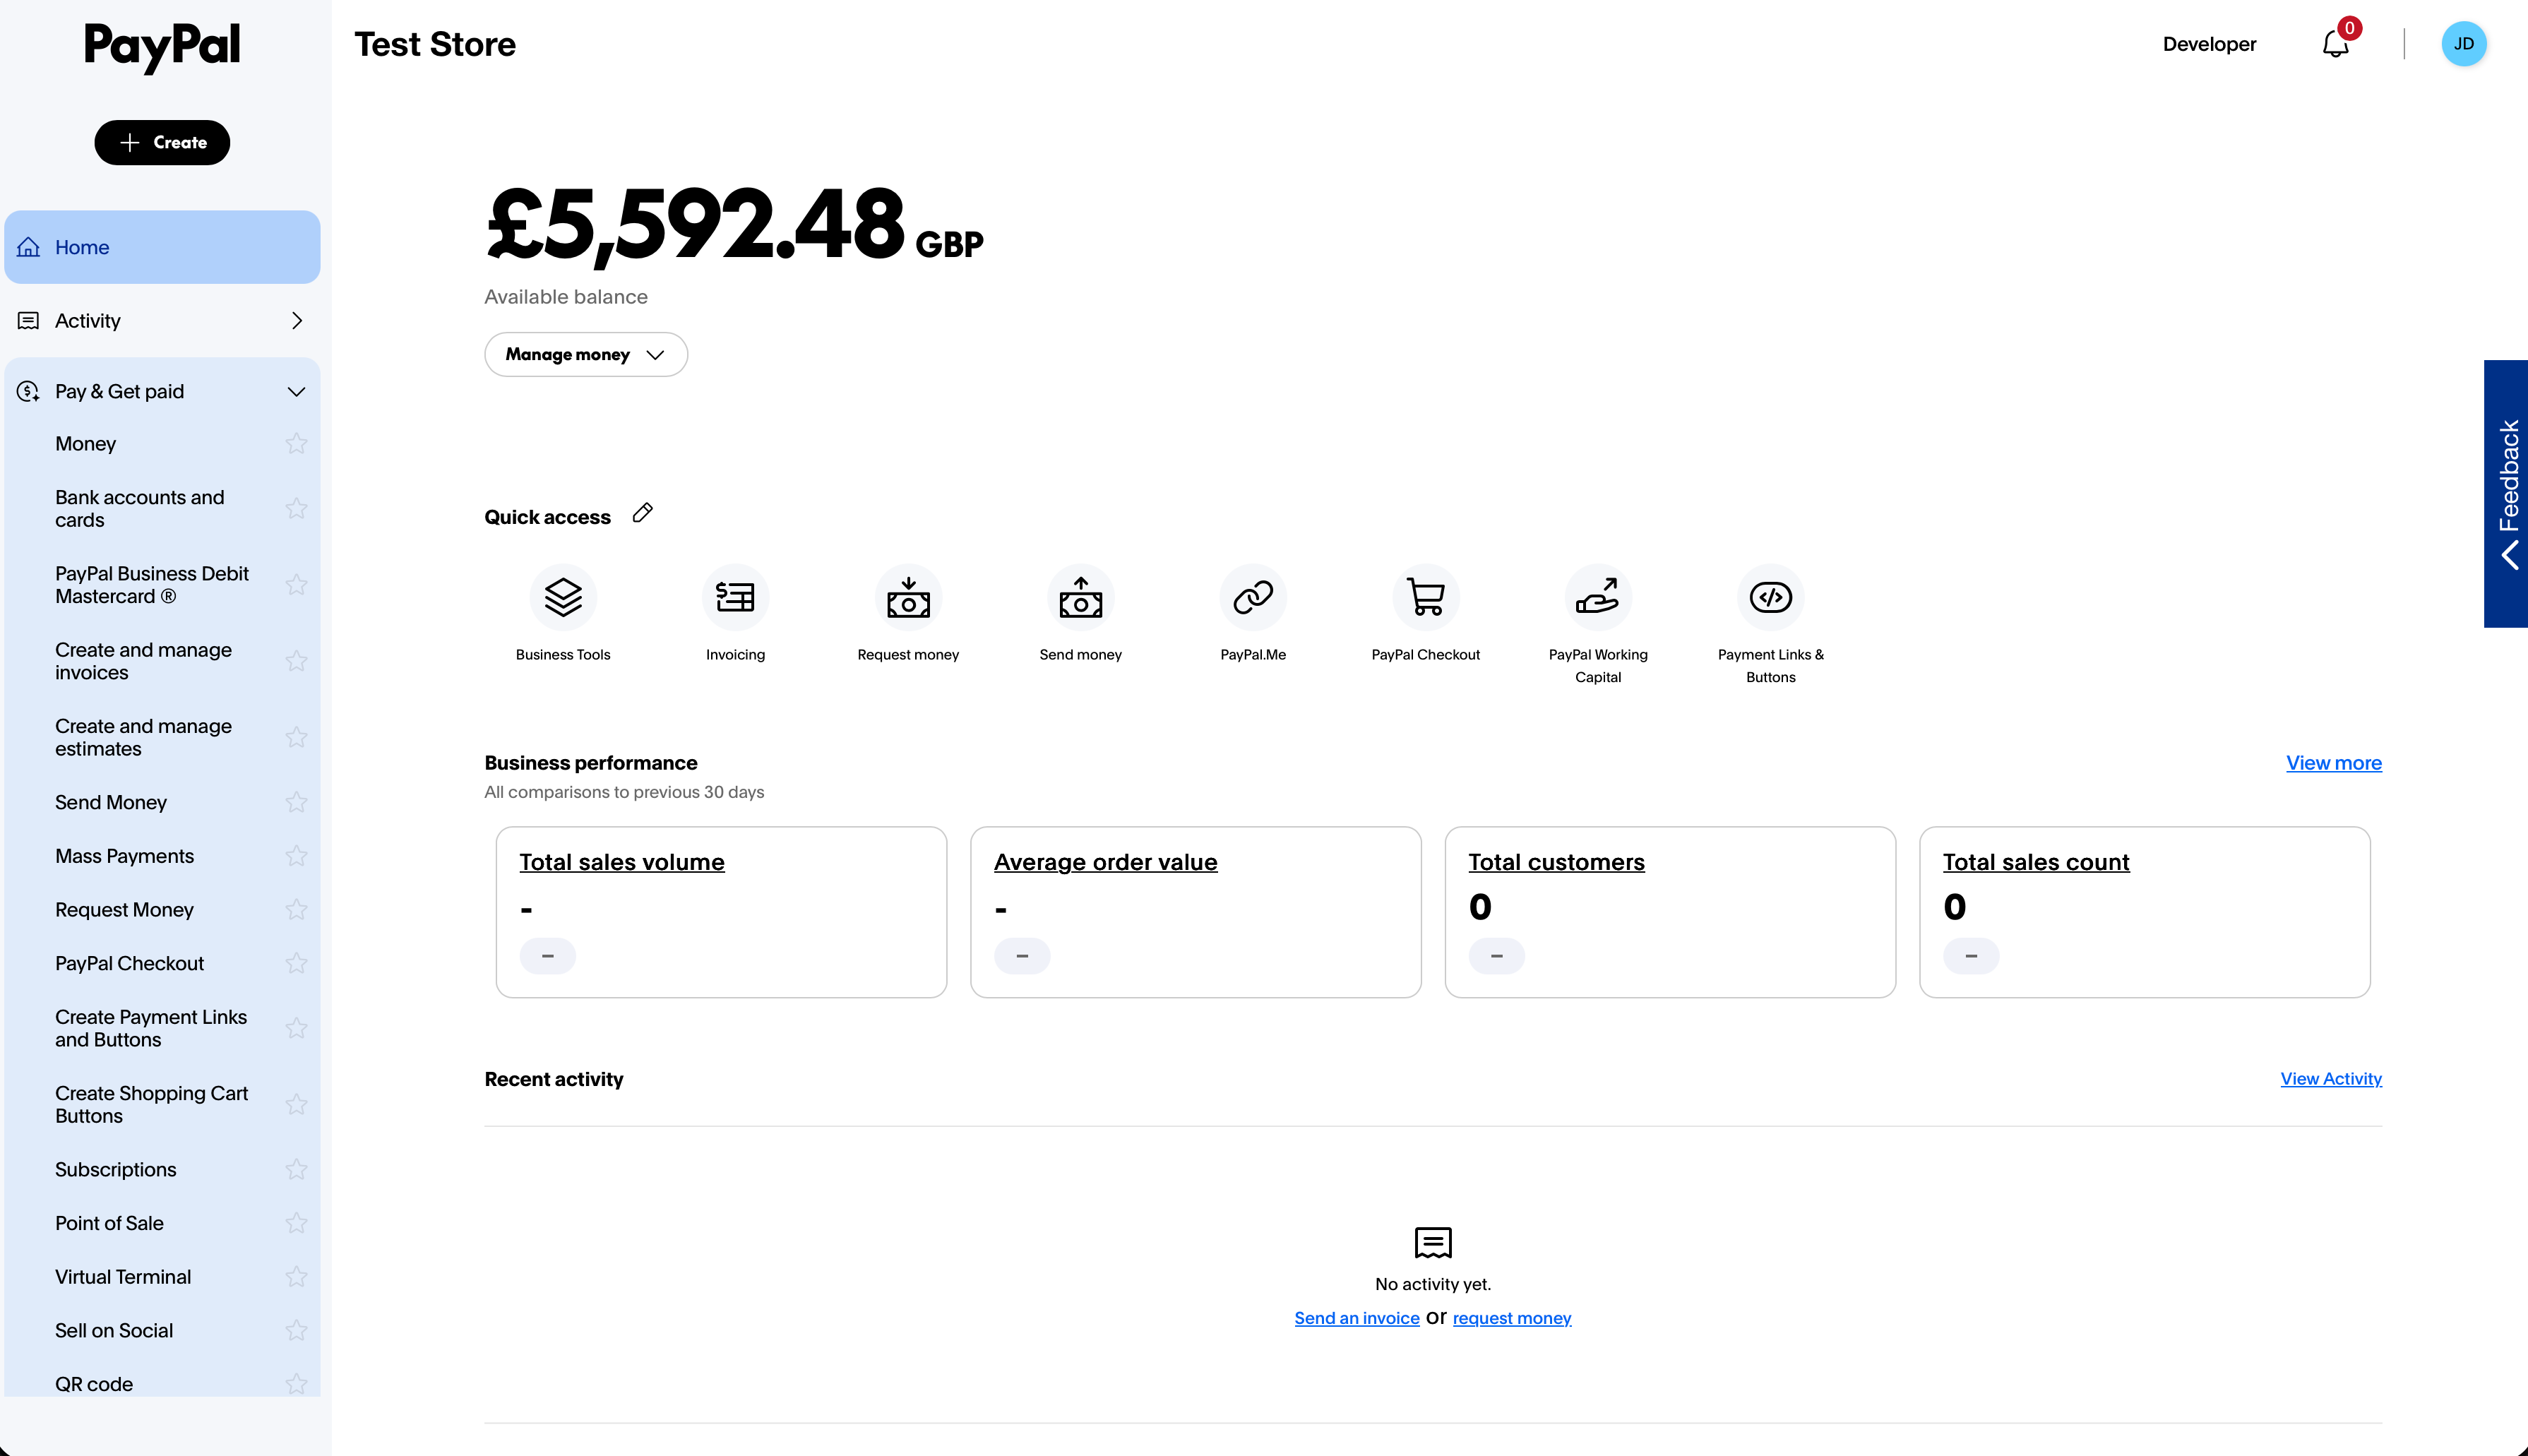
PayPal sandbox accounts only work on the PayPal sandbox site. Go to the PayPal sandbox site at www.sandbox.paypal.com and sign in.
- Log in as your Personal (buyer) account to approve a test payment during checkout.
- Log in as your Business (seller) account to watch the payment land and review the transaction.
Note
The Sandbox is a separate site. Your Sandbox login won't work on paypal.com, and your real PayPal login won't work on sandbox.paypal.com.
To call the PayPal APIs from your own code, you need a Sandbox Client ID and Secret.
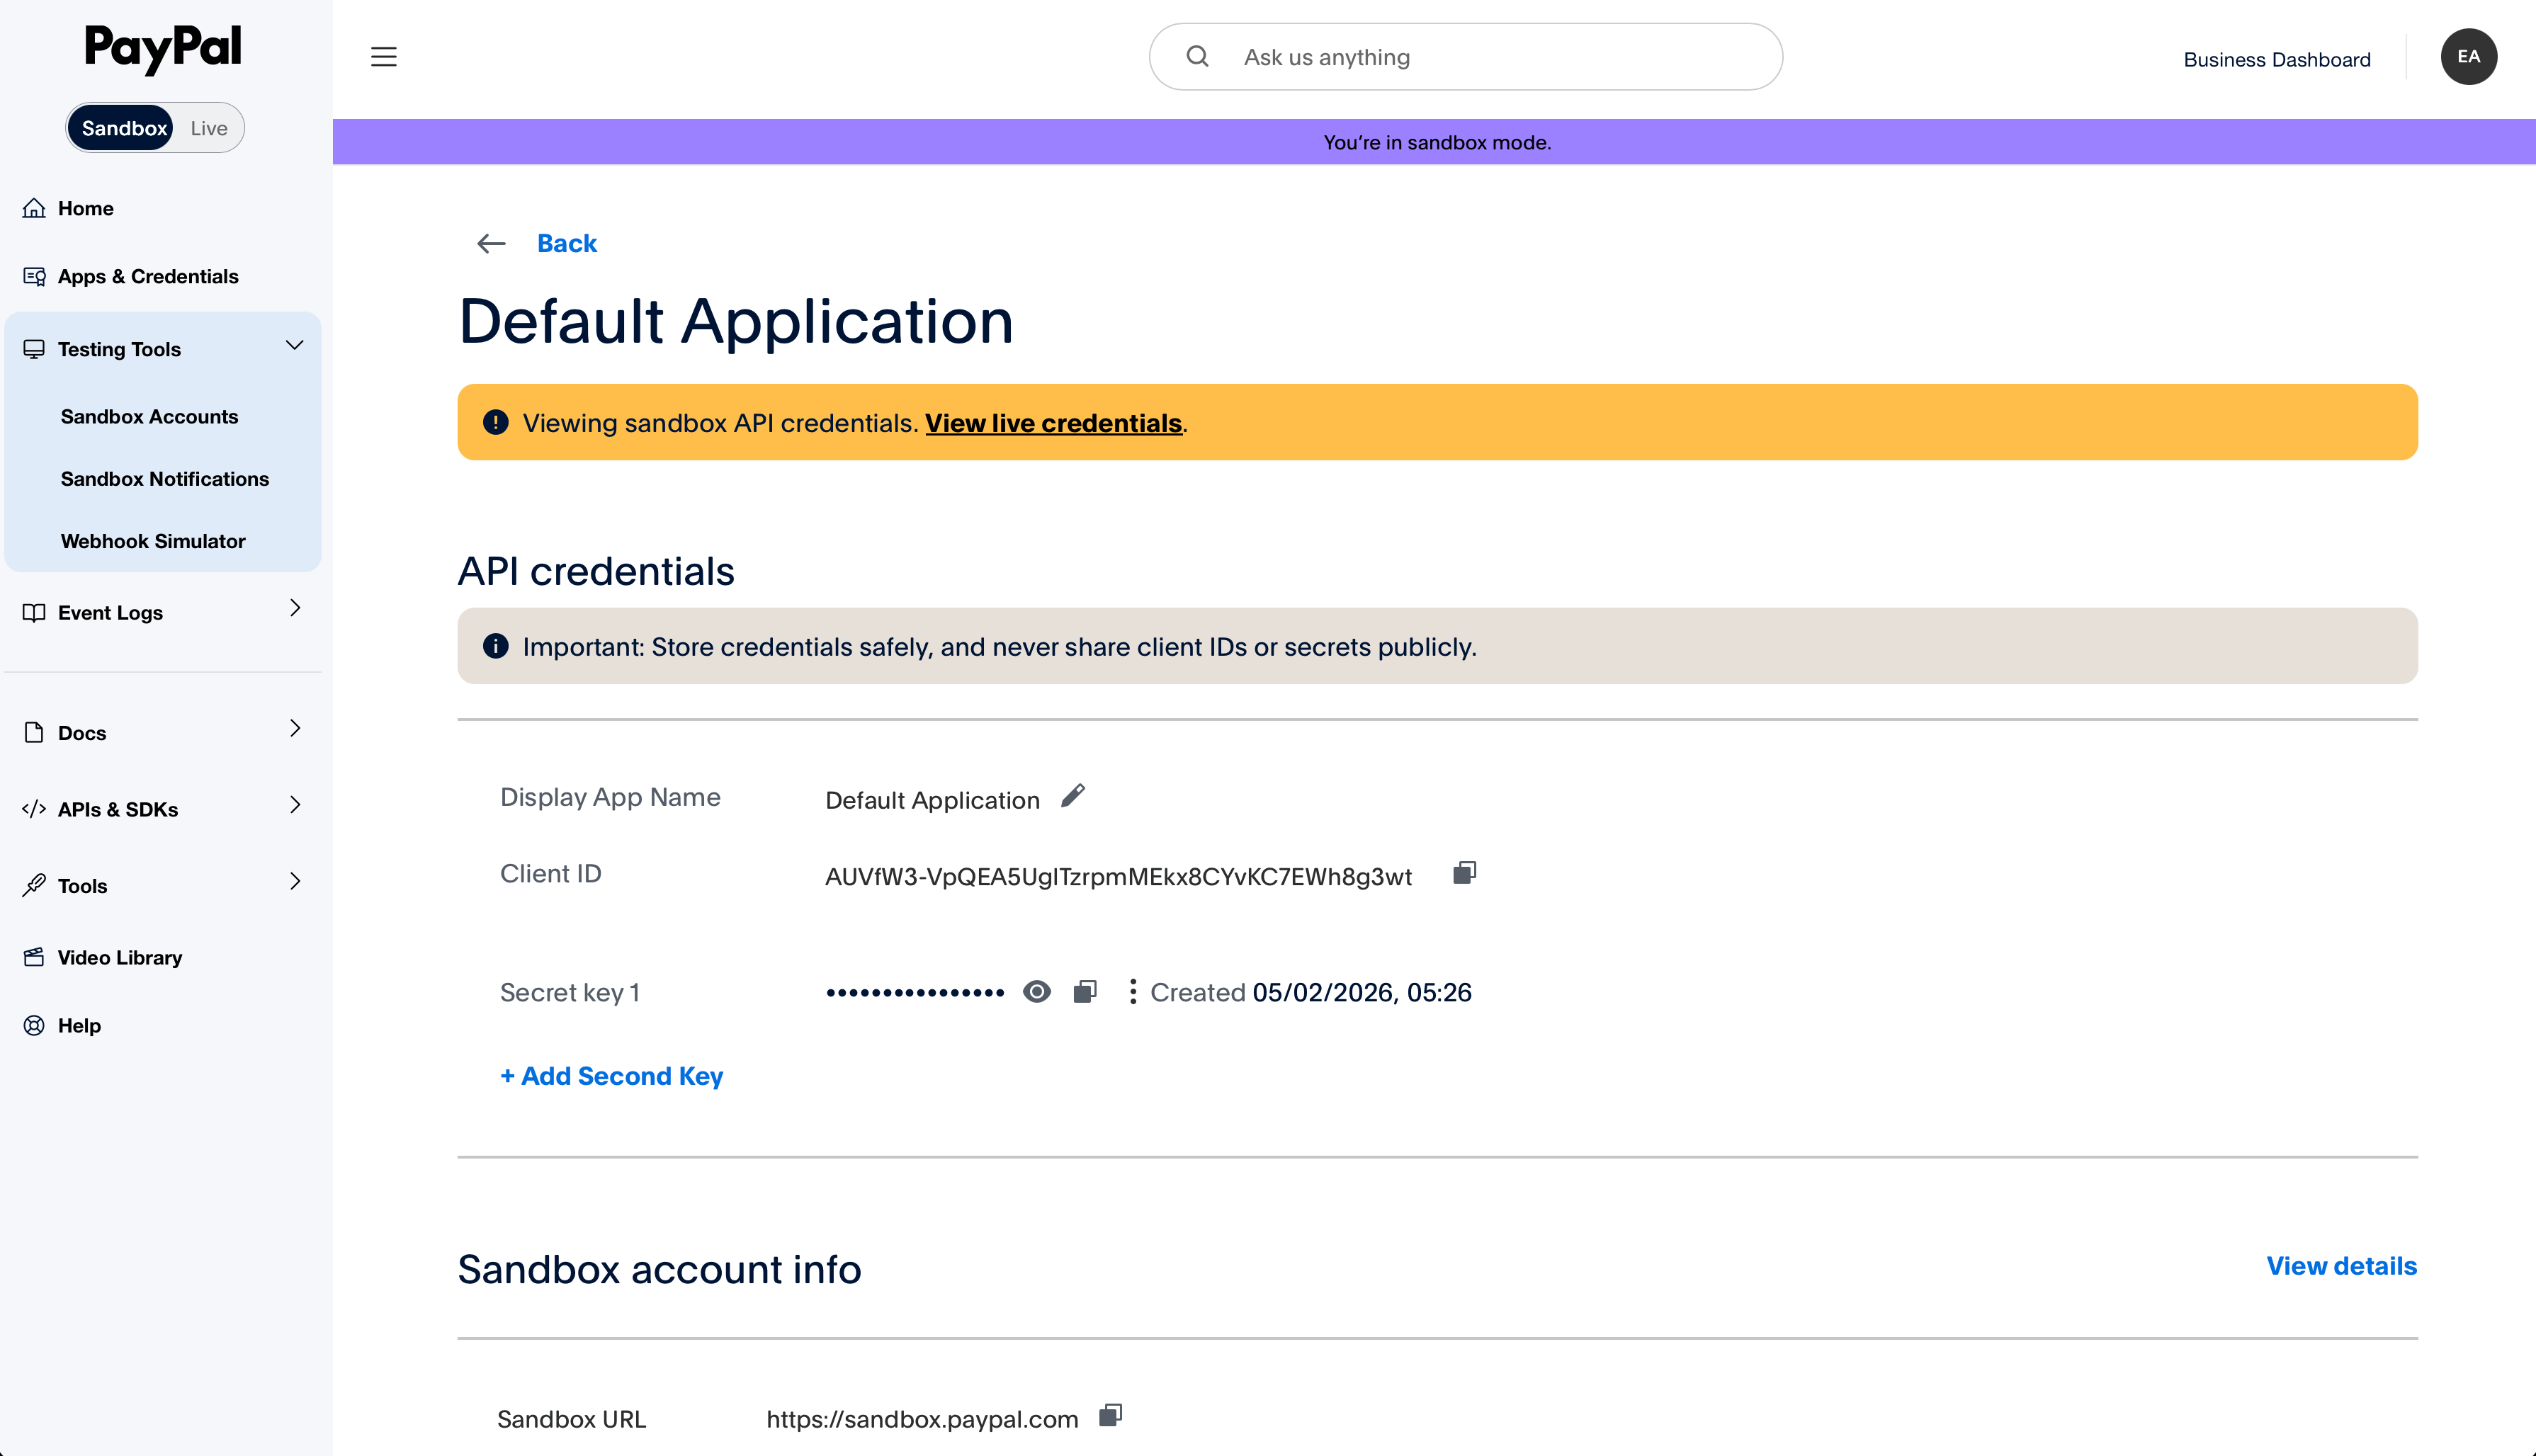
In the Developer Dashboard, open Apps & Credentials and select the Sandbox tab.
Use the Default Application, or click Create App to make your own.
Copy the Client ID and Secret.
You only need this step if you call the PayPal REST API directly. The PayPal Server SDK handles OAuth2 and token refresh for you, so if you are using it (see PayPal Checkout with Next.js), skip ahead and let the SDK manage tokens.
To call the API by hand, point your requests at the Sandbox base URL, https://api-m.sandbox.paypal.com (live is https://api-m.paypal.com), then exchange your keys for an access token:
curl -X POST https://api-m.sandbox.paypal.com/v1/oauth2/token \
  -u "CLIENT_ID:CLIENT_SECRET" \
  -d "grant_type=client_credentials"
Caution
Keep your Client Secret server-side. Never commit it or expose it in client-side code. Sandbox and live each have their own keys, so store them in separate environment files.
Time to put it together. This is the loop you'll repeat throughout development: create an order, approve it as the buyer, and confirm it as the seller, all with test money.
Kick off a payment from your integration. If you don't have one yet, the Low Code Buy Button and PayPal Checkout with Next.js guides both create a real Sandbox order in minutes.
When the PayPal window opens, sign in with your Personal (buyer) account and approve the payment. Nothing is charged. The payment draws from the account's test balance.
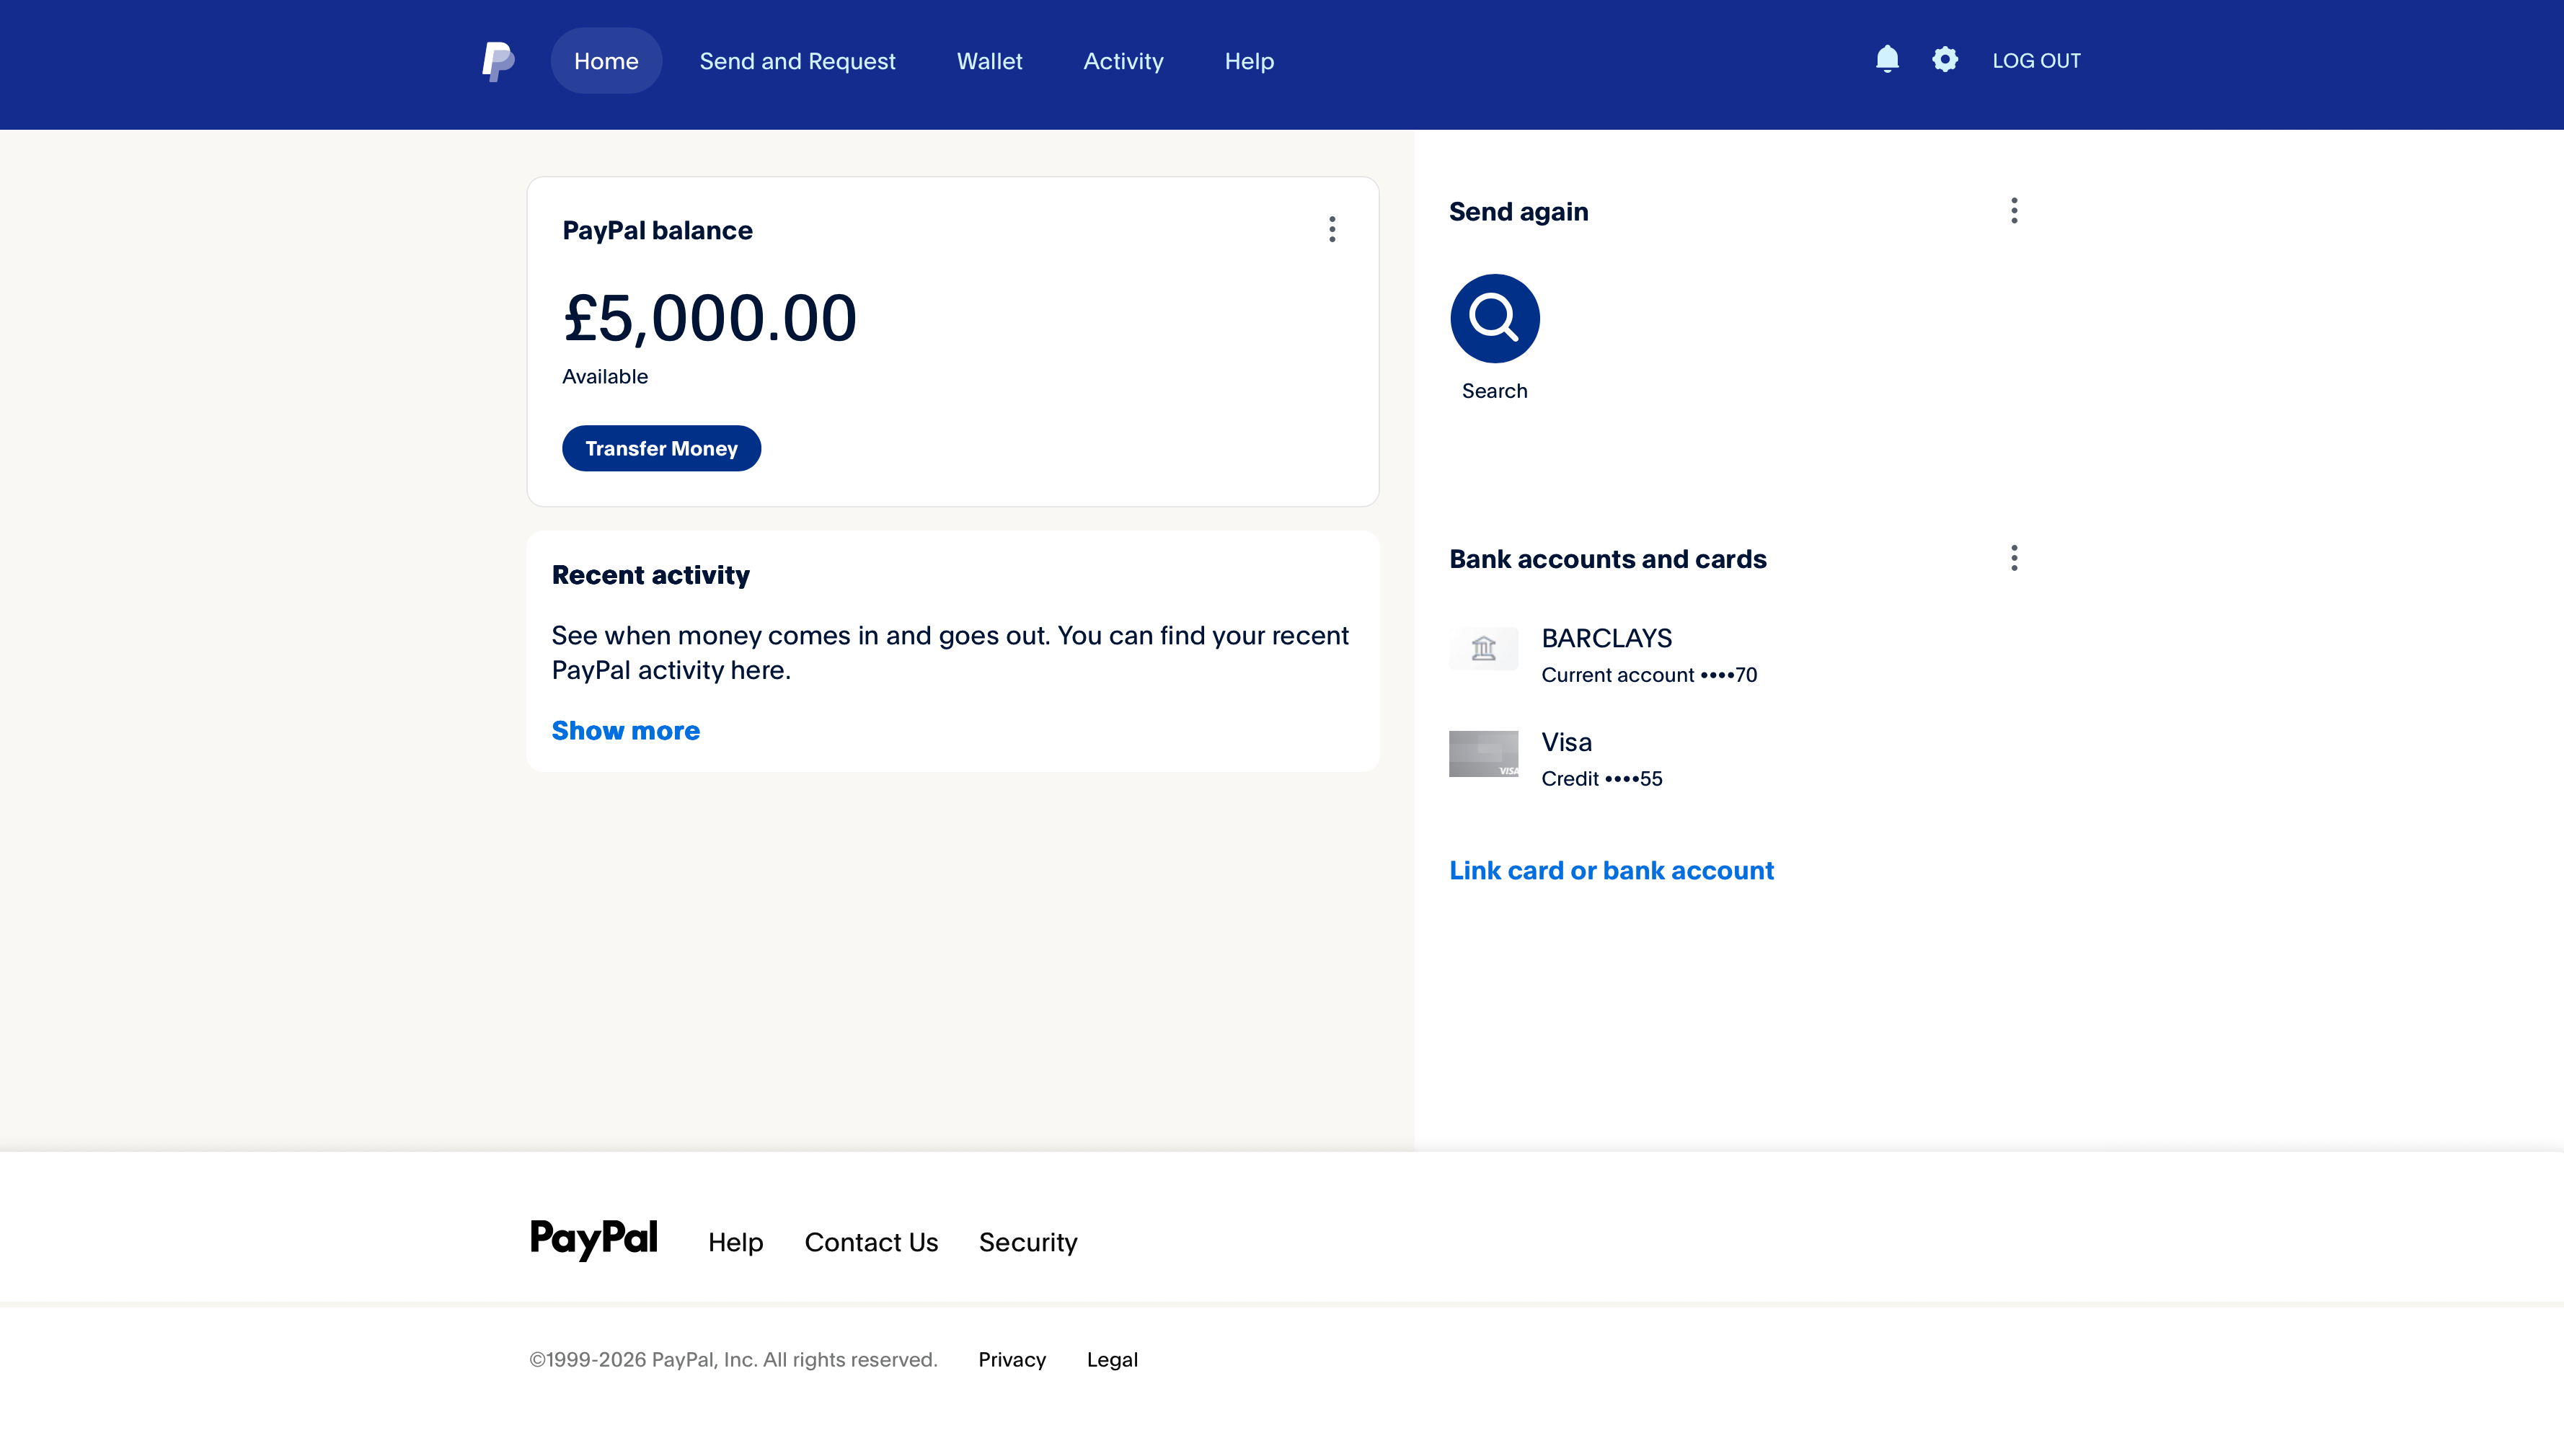
Sign in to www.sandbox.paypal.com as your Business (seller) account, or open that account in the Developer Dashboard, and check the activity. The captured payment should appear in the seller's transaction history.

Note
Seeing the payment land in the seller account is your end-to-end proof the flow works. Once it works in the Sandbox, the same code runs in production. You only swap in your live credentials.
A real integration has to handle more than the happy path. The Sandbox lets you force a specific result: an approval, a decline, or an error. Build and verify each branch before a real customer hits it.
For card payments, use one of PayPal's Sandbox test cards. Any future expiry date works, along with a CVV of the right length: 4 digits for American Express, 3 for every other brand.
To exercise your failure paths, use negative testing: make the Sandbox return a specific error on demand, so you can confirm your handling before going live. There are two ways to trigger one.
Add the PayPal-Mock-Response header to any Sandbox request and name the error you want in mock_application_codes. PayPal returns that error instead of processing the call. This works only against api-m.sandbox.paypal.com.
curl -X POST https://api-m.sandbox.paypal.com/v2/checkout/orders/ORDER_ID/capture \
  -H "Authorization: Bearer ACCESS_TOKEN" \
  -H "Content-Type: application/json" \
  -H 'PayPal-Mock-Response: {"mock_application_codes": "INSTRUMENT_DECLINED"}'
Swap the code for the scenario you need to cover:
mock_application_codes |
Simulates |
|---|---|
INSTRUMENT_DECLINED |
The buyer's card is declined; your UI should prompt for another method |
DUPLICATE_INVOICE_ID |
A repeated invoice_id, so you can test your idempotency handling |
Each PayPal API accepts its own set of codes. The full list lives in the Orders v2 and Payments v2 error references, linked in the negative testing note below.
Whichever code you send, PayPal replies with the same error envelope and a matching HTTP status, so your handler always parses one shape. For example, DUPLICATE_INVOICE_ID returns 422 Unprocessable Entity:
{
  "name": "UNPROCESSABLE_ENTITY",
  "details": [
    {
      "issue": "DUPLICATE_INVOICE_ID",
      "description": "Duplicate Invoice ID detected. To avoid a potential duplicate transaction your account setting requires that Invoice Id be unique for each transaction."
    }
  ],
  "message": "The requested action could not be completed, was semantically incorrect, or failed business validation.",
  "debug_id": "70c28ae654da",
  "links": [
    {
      "href": "https://developer.paypal.com/docs/api/orders/v2/#error-DUPLICATE_INVOICE_ID",
      "rel": "information_link",
      "method": "GET"
    }
  ]
}
Branch your error handling on details[0].issue, log the debug_id (PayPal asks for it in support tickets), and show the buyer your own copy rather than the raw message.
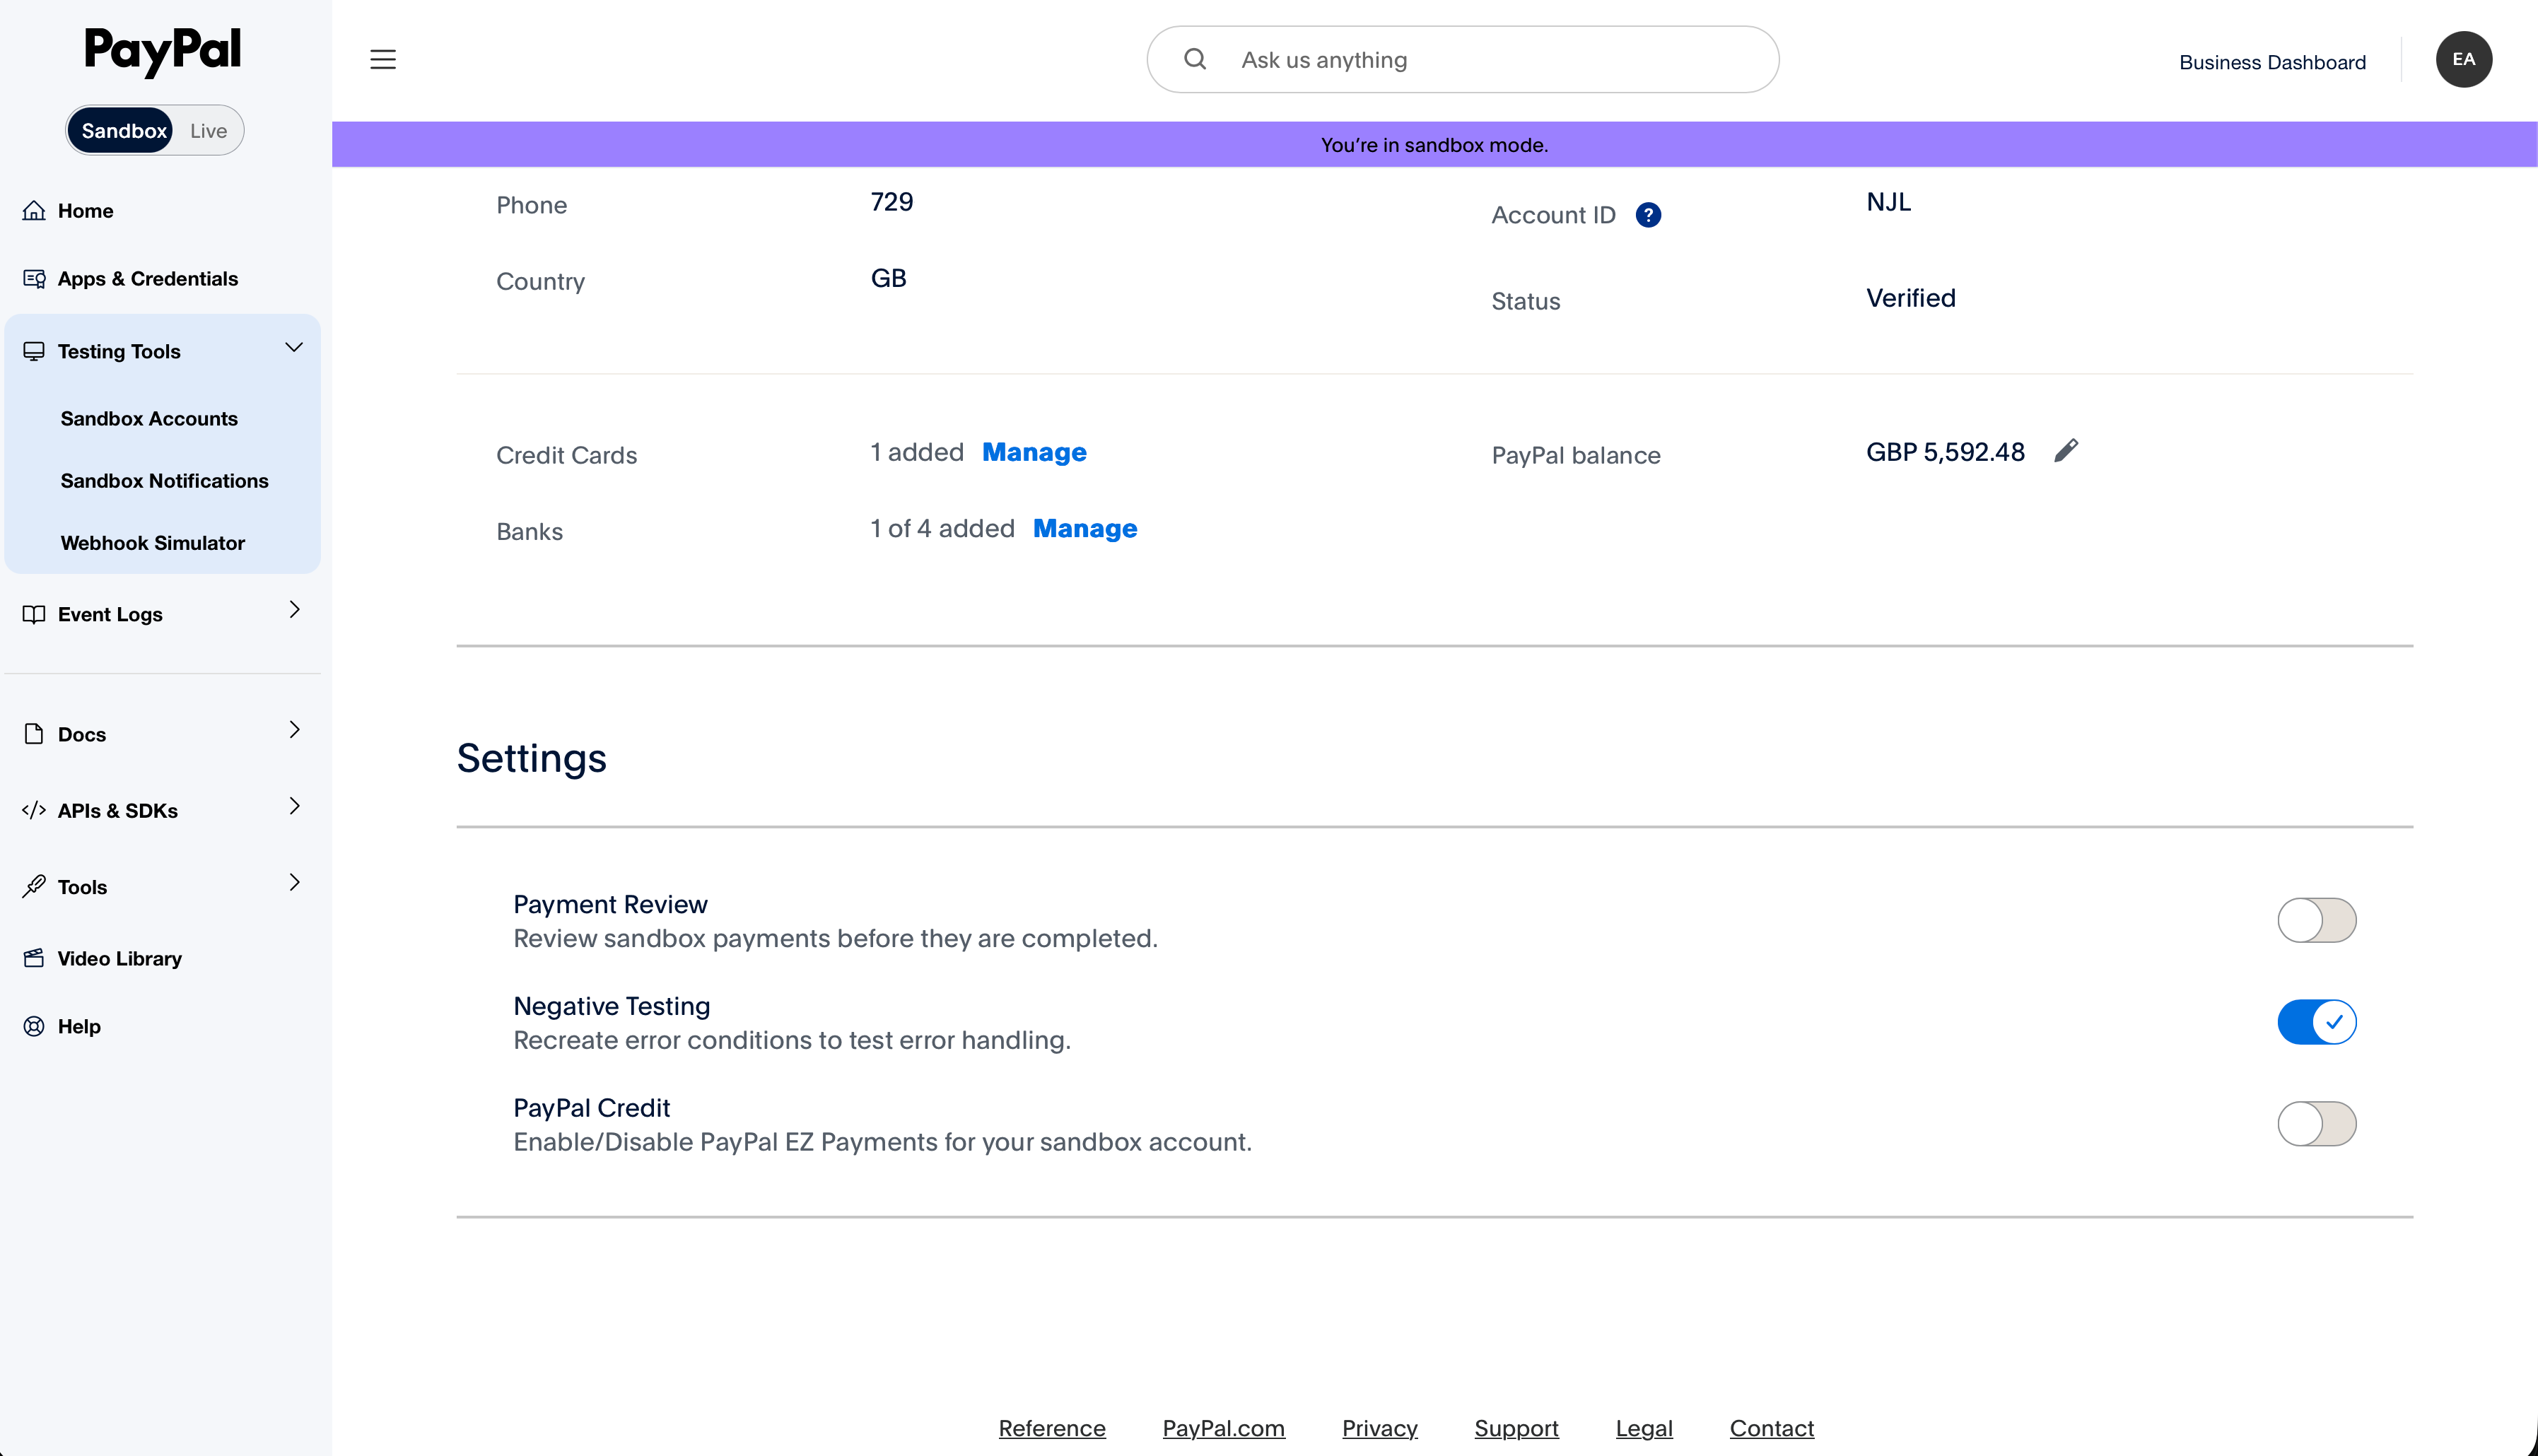
To make a whole account fail without changing your code, turn on account-level negative testing. This is handy when you test through the Buy Button or hosted checkout instead of direct API calls.
- Go to Testing Tools, then Sandbox Accounts in the Developer Dashboard.
- Find a Business account and choose View/Edit Account from its (...) menu.
- Open the Settings tab.
- Set Negative Testing to On. The account now returns errors instead of approvals until you switch it back.
Warning
Turn Negative Testing back off when you finish. While it's on that account fails every transaction, which is easy to forget and later looks like a broken integration.
Tip
For the full mechanics and value lists, see PayPal's negative testing and card testing guides.