Nos dias 24, 25 e 26 de setembro de 2024, a Divisão de Satélites e Sensores Meteorológicos do INPE organizou a primeira edição do Workshop Virtual de Análise e Previsão Meteorológica no Brasil no âmbito do Laboratório Virtual (VLab) da Organização Meteorológica Mundial.
Veja as gravações dos três dias do workshop nos seguintes links:
Nos dias 22, 24 e 26 de abril de 2024 o INPE em parceria com a UNIFEI realizou o curso: Radar Meteorológico – Fundamentos e Processamento de Dados com Python. Contanto com 180 participantes, foram abordados diversos aspectos téoricos e práticos do processamento de dados de radar. Abaixo, as gravações dos três dias de curso.
In November 6th – 11th we had a face-to-face training course on “Meteorological Satellite Products and Applications for Mid-Latitudes” in Montevideo, Uruguay, organized by @AEMET_Esp / @AECID_es and @eumetsat, with participants from Argentina, Brazil, Chile, Mexico, Paraguay and Uruguay.
A great experience! The instructors covered different products and application areas: nowcasting, fog, ocean, fires, aerosol, vegetation, data access and processing, the new generation of satellites and more. And we also visited INUMET, the Uruguayan Institute of Meteorology.
The instructors were from Spain (AEMET), Portugal (EUMETSAT), Brazil (INPE) and Uruguay (FAU).
Many hands-on activities included! Participants presented their case studies / exercises using satellite data from @eumetsat / @LSA_SAF and @NOAASatellites, including Metop, Meteosat, GOES-East, GOES-West and NWP data from @ECMWF, using Python to create their images! @PyTrollOrg
In October 18th and 19th, the Brazilian VLab CoE organized the first short course on TATHU, a python package for tracking and analyzing the life cycle of Convective Systems (CS), developed at INPE/Brazil.
Please find more information on the TATHU packge at the following repository:
It was very nice to see many Brazilian students participating in the event, including members of the team that won Challenge #1 (Visualize the View)! Of the 29 final confirmed participants, 20 of them are international!
In August this year we had the opportunity to collaborate on a 10-hour short course during the Space Week Nordeste 2023 in Brazil, including @eumetsat #MTGI1, @LSA_SAF and @HydroSAF products covering the Brazilian region (including hands-on)! 25 participants from NMHSs and universities, a great experience!
Atividade Complementar: Utilizando o Visual Studio Code
Vimos na primeira atividade complementar como executar scripts Python localmente, instalando a ferramenta Miniconda e utilizando o Notepad++ para criar os scripts. Como comentado, o Notepad++ foi utilizado devido a simplicidade e evitar possíveis problemas de configuração.
O procedimento a seguir mostra como usar ambientes virtuais conda (como o ambiente “spaceweek” que criamos) com o Visual Studio Code, um ambiente de desenvolvimento integrado (IDE), além de algumas configurações adicionais para facilitar a criação dos scripts e facilitar o fluxo do trabalho.
A seguir, os passos necessários:
PASSO 1: BAIXAR E INSTALAR O MINICONDA
Este passo já fizemos no procedimento anterior. Como vimos na primeira atividade, o Miniconda pode ser baixado através do seguinte link.
PASSO 2: CRIAR O AMBIENTE VIRTUAL CONDA E INSTALAR AS BIBLIOTECAS DESEJADAS
Também já fizemos este passo. Nesta demonstração, vamos utilizar o ambiente “spaceweek” criado no procedimento anterior, utilizando o arquivo environment.yml disponível no GitHub do Minicurso e o seguinte comando.
conda env create -f environment.yml
PASSO 3: BAIXAR E INSTALAR O VISUAL STUDIO CODE
O VSCode pode ser baixado através do seguinte link:
Inserindo o diretório conda e o interpretador padrão
Agora estamos protos para executar nossos scripts Python utilizando o ambiente virtual “spaceweek” automaticamente! Vamos ver algumas configurações adicionais.
PASSO 6: SELECIONANDO O DIRETÓRIO DE TRABALHO
Na barra de ferramentas à esquerda, selecione “Explorer” (primeiro ícone, mais acima), clique em “Open Folder” e selecione o diretório onde você tem, ou deseja criar seus scripts e arquivos. No exemplo a seguir, foi selecionado o diretório “saf”, dentro no nosso diretório de trabalho do minicurso:
Selecionar o diretório de trabalho para que ele apareça no explorador do Visual Studio Code
Os arquivos em sua pasta de trabalho aparecerão no explorador. Selecione um script python e ele aparecerá em uma nova aba ao lado direito da interface.
Abrindo um script Python no Visual Studio Code
PASSO 7: MUDANDO O TERMINAL PADRÃO
Para executar comandos conda (para listar as bibliotecas instaladas, por exemplo) diretamente no terminal disponível no Visual Studio Code, é necessário alterar o terminal padrão para o Prompt de Comando (referência):
1. Abra a paleta de comandos: (Ctrl+Shift+P)
2. Procure por “Terminal: Select Default Profile”
3. Selecione o terminal padrão (“Command Prompt” neste exemplo).
Selecionando o terminal padrão
PASSO 8: EXECUTANDO O SCRIPT PYTHON USANDO O AMBIENTE CONDA
Após todas essas etapas, se você clicar em “Run Python File” (Executar arquivo Python) no canto superior direito, o script python selecionado será executado com o ambiente conda padrão selecionado no Passo 5.
Executando un script Python no Visual Studio Code
Você verá o ambiente padrão do conda sendo ativado automaticamente e o script python sendo executado no terminal do Visual Studio:
Ambiente conda sendo ativado automaticamente e script python sendo executado
PASSO 9: USANDO UM ATALHO NO TECLADO PARA EXECUTAR SCRIPTS
Por padrão, é necessário clicar em “Run Python File” (botão “Play”) no canto superior direito da interface, como visto no passo anterior. Para usar um atalho no teclado, clique no ícone de engrenagem no canto inferior esquerdo e selecione “Keyboard shortcuts” (Atalhos do teclado) (referência).
Procure por “run python in terminal”, selecione “Python: Run Python File in Terminal” (Executar arquivo Python no terminal) e atribua o atalho desejado (“Ctrl+R”, neste exemplo – você pode selecionar o atalho que desejar).
Atribuição de um atalho de teclado personalizado para executar scripts Python
PASSO 10: LENDO ARQUIVOS LOCALIZADOS NO MESMO DIRETÓRIO, SEM ESPECIFICAR O CAMINHO COMPLETO
Por padrão, você precisa especificar o caminho completo onde está um determinado arquivo. Se quiser colocar o arquivo na mesma pasta e apenas inserir o nome do arquivo no código, acesse as configurações do usuário, procure por “python terminal execute in file dir” e marque essa opção (referência).
Ativação da possibilidade de execução de arquivos no mesmo diretório
PASSO 11: SELECIONANDO O ESQUEMA DE CORES DO EDITOR
Pessoalmente, não gosto do esquema de cores padrão do editor, chamado “Dark+ (default dark)”.
Se você quiser alterar o esquema de cores, vá para File > Preferences > Theme > Color Theme e selecione o tema de sua preferência.
Selecionando o esquema de cores do editor
E isso é tudo! Nesta atividade complementar vimos como utilizar o Visual Code, um ambiente de desenvolvimento integrado, e uma opção muito mais robusta e configurável para o desenvolvimento dos nossos scripts.
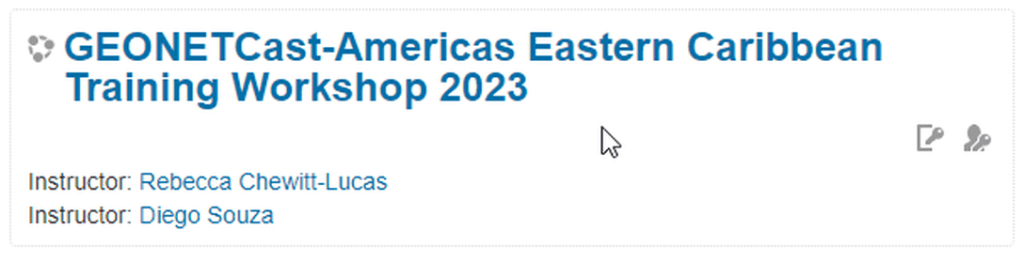
Our colleagues from CIMH (Caribbean Institute for Meteorology & Hydrology) kindly opened the Moodle access for guests. Now you can check all the presentations and recordings from the GEONETCast-Americas Training for Eastern Caribbean States, held virtually on May 3, 5, 8, 10, 12 and 15 (4 hours each day, 24 hour total).
Seven GEONETCast-Americas (GNC-A) are being installed through the “Strengthening Disaster and Climate Resilience in the Eastern and Southern Caribbean” (SDCR) Project and the purpose of this workshop was to train participants on the skills required for the effective exploitation of the imagery and products available in the GNC-A broadcast.
Training included various topics such as a detailed analysis of each equipment of the GNC-A ground stations, maintenance aspects, data access mechanisms, disaster capabilities and an introduction to Python.
Here’s how you may access the Moodle page:
STEP 1: ACCESS CIMH’s MOODLE AND CREATE AN ACCOUNT
This Blog series shows the products developed by the community in the Americas. Most of them refers to data received from GNC-A, however, we also post the development with data received from other means. Please find below the other posts from this series:
Creating RGBs – FCI True Color: Using SSEC SIFT, the Satellite Information Familiarization Tool
In this event, EUMETSAT is demonstrating a multi-mission data visualisation tool SIFT which is suited for viewing and analysing data from MTG-I1 missions. SIFT is an open-source software released by EUMETSAT and University of Wisconsin, which utilizes the popular Satpy python-package for data reading. We also show an upgraded version of the web-based EUMETView tool. For the demonstration, we are using FCI data and proxy datasets, and encourage active participation by the audience.