
Fantastic - could not be better! The support has been amazing and I now have three different Stripe payment forms that I can keep on duplicating and changing the name of the product.

Last updated on May 23, 2025 by Kyle Cash
How To Embed Google Maps in WordPress [2 Methods!]
Discover how to embed Google Maps in WordPress in a simple way. Follow this guide to add custom maps to your site without coding!

Approximate read time: 9 minutes
Ever wanted to show visitors exactly where to find you but don't know how to code?
Adding a map can make your website more engaging and user-friendly, whether you're a small business owner, event organizer, or travel blogger. And the good news? You don't need to be a tech expert to make it happen.
This guide will show you the simplest way to embed Google Maps in WordPress step by step.
So, before we start, there are two ways to embed a Google Map in WordPress:
- Use the HTML code from Google Maps
- Use a form plugin
We'll show you how to do both so you can choose the best option. For the form plugin, we'll use Formidable Forms, the most advanced WordPress form builder on the market.
But first, let's show the simplest way to use WordPress to embed a Google Map: using a piece of HTML.
Upgrade your WordPress site with powerful, flexible forms.
Embed a Google Map with HTML
There's a good chance you've seen this method and never realized it was so easy to use.
First, go to Google Maps and find the location you want to show on your WordPress site.

Next, click the Share button, and a popup will appear.
Then, click the Embed a map tab and click Copy HTML to get the embed code.

Next, head to your WordPress site and go to the post or page where you want to show the map. Then, add a new WordPress block in the Block Editor and find the Custom HTML block.

Paste the HTML from Google Maps into the block, and click the Save/Update button to show the changes on your site.
This is an excellent way to show a basic map on your website. But if you'd like a more customizable method that allows you to add custom information, multiple pins, and even improve your SEO, check out the following method.
From Idea to Reality in Minutes. Build Powerful Forms, Dashboards, Apps and More.
Formidable Forms makes advanced site building simple. Launch forms, directories, dashboards, and custom WordPress apps faster than ever before.
Embed a Google Map using a form plugin
As mentioned above, the best way to do this is using Formidable Forms.
With its Geolocation add-on and Formidable Views, you can take your form entries and show them on a map in a few simple steps. Whether you need to display a business location or the best unknown restaurant in a city — Formidable Forms can help you.

So, to get started, grab the Formidable Pro version (Business plan or above) to get the tools you need. Then, it's six steps:
Step 1: Install and activate Formidable Forms
First, we must install and activate Formidable Forms and the add-ons.
So, assuming you already grabbed a plan, go to your WordPress dashboard, click Plugins → Add New, and search for Formidable Forms.
Click Install, then Activate. Next, go to Formidable → Global Settings and click the Connect an Account button to connect your Formidable Forms Pro account.
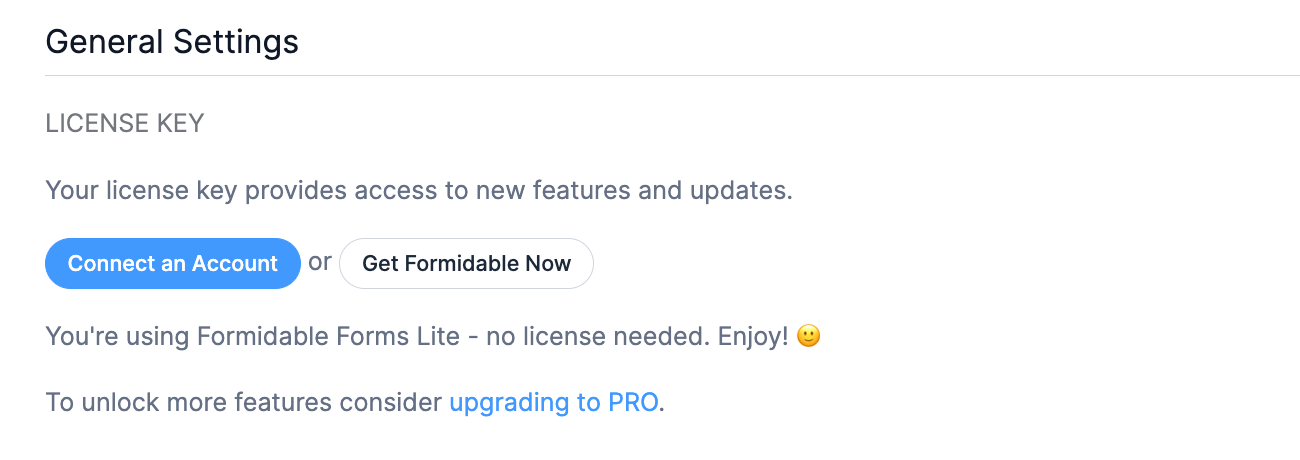
Follow the setup wizard to finish linking your account (or click the Get Formidable Now button to get one).
Once that's finished, we need add-ons to do the dirty work. So, go to Formidable → Add-ons and click the toggle button for the Geolocation add-on.

Do the same for the Visual Views add-on. This will create the map and show your locations on the map. Once those are ready, it's time to get your Google Maps API key.
Step 2: Get and enter your Google Maps API key
The Google Maps API key communicates with Formidable and Google Maps.
If you already have this, you can skip ahead in the tutorial. If not, here's how to get one for free.
First, go to the Google Cloud Platform Console (Google Developers Console) and choose an existing project or create a new one. Once ready, go to the API & Services dashboard using the menu icon in the top-left corner.
Note: This process requires a credit card, though it's free as long as you stay under the limit.

Then, click on the + Enable APIS and Services button and find the following APIs in the library:
- Geocoding API
- Maps JavaScript API
- Google Places API
Enable all three, then go to APIs & Services → Credentials. Here, click the + CREATE CREDENTIALS button and select API Key. Your new API key will appear in the popup. Then, you can click the Edit API key to set restrictions.

To use the key with Formidable, choose Application Restrictions → HTTP referrers (web sites). You can also restrict domains by using the key if you want.
To do this, click Website Restrictions → Add an Item, and enter your website's domain.

Once finished here, go to your WordPress dashboard, go to Formidable → Global Settings, and find the Geolocation tab. Then, enter your Google Maps API key in the box:

Step 3: Create a form with an autofill address field
Now, we can create your form to enter the addresses you want to show on the map.
So, go to Formidable → Forms and click the Add New button.

Here, you have three options to create your form:
- Create a form from scratch
- Use a pre-built form template
- Use the AI form builder
We'll create a form from scratch by clicking Create a blank form and the drag and drop form builder will open. This is where you can start customizing the form to match what you need.

Most importantly, you need an address field, which can be a Text or Address field. Text is great for single-line addresses, and Address is great for showing multi-line addresses.
For either field, click on it and select both Add address autocomplete and Show map in the Field Options. You can turn on Use visitor location if you'd like, but it's not necessary.

With these two features, the field will show a generated list of options as the user fills in the address. They can also use the map to move the pin around or view where it is before entry.
Feel free to add any other fields you may need. When you're done, you can click the Preview button to get an idea of what it looks like. Last, click the Save button and give the form a name once it's finished.
Step 4: Enter a sample form entry
With no form entry, nothing will show on the map we'll create in the next step. So, let's create a test entry to preview what it looks like for easy customization.
First, go to the Entries tab for your form and click Add New.

Then, fill out the form with a sample address and click Submit. If there are multiple locations, repeat the process until you have entered them all.
You can display all of these on one map.
Step 5: Create a Map View
Now, we'll create the view showing the map with the pins for the locations.
So, go to Formidable → Views and click the Add New button in the top right. Then, click Map.

Next, give the View a name (you're the only one who can see this), choose a data source from the Use Entries from Form (the form you created), and click Create a view.
This is where you can start customizing the map's appearance. The plugin will open the Listing Page for the view, and you'll see the pins for your form entry from the previous step.

To customize it, click the map to open and edit the Listing Page content. This allows you to add extra information manually or import it from other fields on your form. It has a Visual/Text editor, so you can customize it using HTML or simple text.
For example, if you're showing a set of business locations, you could include the Business Name and Address field information. These shortcodes match the Field ID (which you can see in the panel on the right under Customization).

On the map, it will look like this:

So this gives you a lot of power and customization options to design how you want your pins and information to look on your site.
So play around here and familiarize yourself with what you can do. You can even create a Details page to add more information about a location.

Be sure to check out our Map View documentation for help.
Also, save your view when you're done customizing it. Then, we'll move on to the next step.
Step 6: Publish the view
The last thing to do is publish the map view on a page or post it on your website (aka embed the map on your site).
So, go to the page where you want to show it and add a new WordPress block. Then, find the Formidable Views block and add it to the page. Next, choose the map view you created from the dropdown list.

The map will load, and you'll just have to publish/update the page — you're ready to go!
Allow users to update their map pin
We hope this tutorial on how to add a Google Maps to your site has helped you. Whether using the basic HTML map from Google or Formidable Forms helps you do bigger things, we hope this step-by-step tutorial helps you do exactly what you need.
If you want more, we have something we think you'll like. After all, contact details and business hours change, and local businesses occasionally move locations. So, it is essential to include a way for users to update their own data. Data management is also an essential component of GDPR compliance.
Front-end editing makes it easy for users to manage their own data and map multiple locations. So, you can take the work off your back and let people update their details—all without access to the backend.
So, if you're ready to get started, grab Formidable Forms using the button below.
And follow us on Facebook, Twitter, LinkedIn, and YouTube and join 50,000+ others in hearing the latest updates from Formidable Forms each month! 👇
Get the Formidable Forms Newsletter
Read more about Google Maps
 How To Add a Google Map to a WordPress Contact Form [Free!]
 How To Add Google Address Autocomplete Fields in WordPress
 8 Best WordPress Geolocation Plugins [Free & Paid!]
This article may contain affiliate links. Once in a while, we earn commissions from those links. But we only recommend products we like, with or without commissions.
