This article will discuss how you can create a Pipedrive WordPress integration form for your website.
You’ll need a form that captures the necessary details from your customers and a tool that can automatically map this data to Pipedrive.
From installing the plugin to mapping form fields, we’ve got you covered step by step.
Want to see this process in action? Here’s a step-by-step video tutorial to complement this guide!
While the video walks you through the process, I recommend reading the full article below for a detailed explanation.
Let’s dive in!
Step-by-step Tutorial on Creating a Pipedrive WordPress Form
Follow the step-by-step guide below and quickly create a form with Pipedrive WordPress integration.
1. Install Everest Forms Pro
First, you’ll need a plugin to help you easily create a Pipedrive WordPress form; the Everest Forms form builder plugin.
The premium version of Everest Forms enables you to integrate forms directly with your Pipedrive CRM account.
So, follow this documentation on how to install Everest Forms Pro and proceed to the next step.
2. Activate Pipedrive Add-on
Everest Forms offers the Pipedrive add-on, eliminating the reliance on other tools. Using this add-on, you can quickly connect your forms with Pipedrive.
To activate it, simply go to Everest Forms >> Add-ons. Search for the add-on and toggle the activate button when you find it.

3. Enable Pipedrive WordPress Integration
Now, let’s create a form that collects data you want to send to Pipedrive.
First, you need a Pipedrive API key for a Pipedrive and Everest Forms integration.
To get the key, open your Pipedrive account. In your account dashboard, go to Account on the top right and choose Company Settings.

Then, go to Personal Preferences >> API. Here, copy the API key to a clipboard.

Open Everest Forms >> Settings >> Integration >> Pipedrive in your WordPress dashboard.

Paste the API key, enter a Pipedrive nickname, and press Connect to Pipedrive.

With that, the Pipedrive WordPress integration with Everest Forms is successful.

4. Create a New Pipedrive WordPress Form
Now, it’s time to create a custom Pipedrive WordPress form.
To do that, open Everest Forms >> Add New. Here, you can select a pre-built form template for a quick start or make one from scratch.

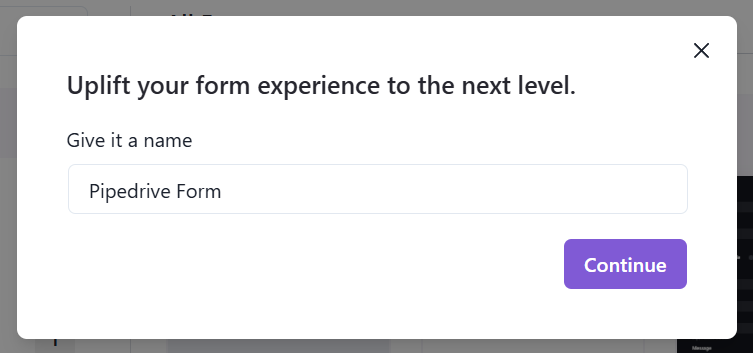
For this tutorial, let’s choose the Simple Contact Form template. We’ll be using the contact form to collect leads.
So, click Get Started and give the form a name. Then, press Continue.
The form has all the primary fields needed for a contact form. You can add extra fields with simple drag-and-drop if required.

You can also customize each field using their Field Options.
Refer to this article for a more detailed guide on creating and customizing forms.
After the form is ready, click Embed at the top of the builder.

Select an existing page or create a new page where you want to display the form.

Let’s create a new page for now. Name the page and proceed ahead.

As you can see, the form is automatically embedded on the page.

All you have to do now is Publish the page, and your Pipedrive form will be ready to collect leads.
5. Connect the WordPress Form with Pipedrive
We previously connected your Pipedrive account with Everest Forms.
Now, we must connect the individual WordPress form we just created to your Pipedrive.
So, go to the Integrations tab in the form editor and click Add New Connection under Pipedrive.

Give the connection a name and press OK.

Next, it’s time to configure the connection.

- Select Account: Choose the Pipedrive account you previously connected with Everest Forms.
- Select Services: Select one of the two services: Person or Leads.
- Owner: Select the owner of the Pipedrive account.
- Select Organization: Select the organization you want to connect with this form. The new contacts will be collected under this organization.
- Select Label: Label the contact as either Customer, Hot lead, Warm lead, or Cold lead.
- Visible to: You can show the form entries submitted to only specific people. Choose between 4 options: Item owner, Item owner’s visibility group, Item owner’s visibility group and sub-groups, and All users.
- List Fields: Map the list fields in Pipedrive to the form fields using the dropdown.

- Custom Field: You can create custom data fields in Pipedrive and map them with the respective form fields.
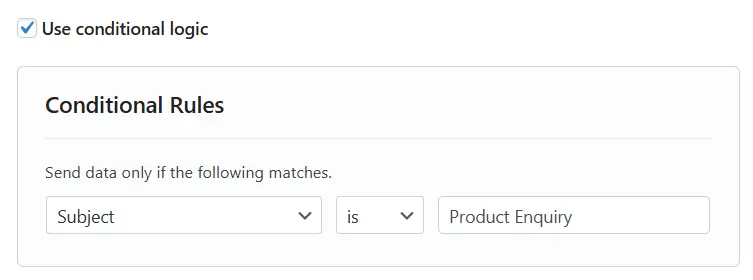
- Conditional Logic: You can enable conditional logic for the connection. This means the form data will be sent to Pipedrive only when specified conditions are met.
And you’re done. The leads collected through the contact form will be sent automatically to Pipedrive for further sales campaigns.

6. Embed the Form on a Page
Go to Pages → Add New and name your page (e.g., “Contact”).
Use the Everest Forms block to insert your form.

Select the form you just created and then, click Publish.
You now have a live form on your website ready to send submissions to Pipedrive.
Step 7: Test the Integration
Open the form in an incognito window, fill it using test data (or a tool like Fake Filler), and submit it.
- In WordPress, check form Entries under Everest Forms to confirm submission.
- In Pipedrive, go to Contacts → People and look for the new entry.
- Click on the contact to confirm all mapped data, including custom fields like date of birth.
It’s Your Turn Now!
With Everest Forms Pro, connecting your WordPress site to Pipedrive becomes a breeze.
You can easily map custom fields, collect detailed contact information, and keep your CRM up to date — all without touching a line of code.
If you’re confused about any of the steps detailed above, please comment below with your questions. We’re here to help!
While you’re here, you can check out similar articles on uploading form files to Google Drive and sending form data to Google Sheets.