Flow Launcher and Flow Launcher_SObject both allow you to launch any auto-launched or screen flow from an existing screen flow. They can show up in-line or as pop-up modals. The flows can be launched with a button, or you can hide the button and let the flows launch reactively when one of the input attributes changes. This post will review how to configure this component, when to use which version and provide some example use cases.
Configuring Inputs for the Launched Flow
You can pass values into the launched flow a few different ways. One is to specify the name of the input resource (variable) in the launched flow and identify the value to be passed to it.
NOTE: The Flow Input Variable Name should be a text entry of the name of the attribute in the launched flow. Be sure not to select an existing resource from your own flow in the drop-down with the same name.

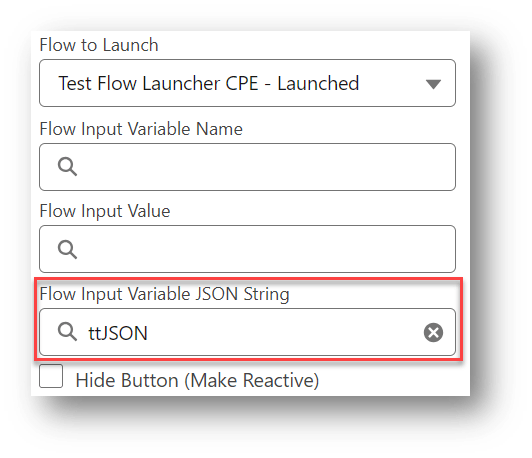
If you want to pass in multiple values, they can be specified as a JSON formatted list of variable names, types and values. The JSON can be created as a plain text Text Template.
Each attribute is composed of three parts.
- The name of the input flow attribute in the launched flow
- The data type of the attribute (String, Integer, Boolean, etc.)
- The value to be passed to the attribute
Note: A future version of Flow Launcher will help with picking the input variables and automating the process of creating the JSON.

Handling Outputs from the Launched Flow
You can also pass values back to the calling flow from the launched flow. This does require you to give these output attributes in your launched flow special names. This is why the two versions of Flow Launcher came about.
The regular Flow Launcher recognizes up to two different outputs from the launched flow. One is the Launched Flow Output Result – Integer and the other is the Launched Flow Output Result – String.

To be able to access these values in the calling flow, the launched flow has to have a Text and/or Number variable marked as “Available for output” with the exact names of OUTPUT_Integer and/or OUTPUT_String respectively.


Flow Launcher and Flow Launcher_SObject
This is where the second version of Flow Launcher comes in. Flow Launcher_SObject adds two additional supported inputs and outputs, a Record or Record Collection can be passed to the launched flow with this version. You need to specify the object you want to reference when you first configure Flow Launcher_SObject on your screen. This was put in a separate version to keep you from having to always pick an Object even when you don’t plan on using the Record or Record Collection attributes.

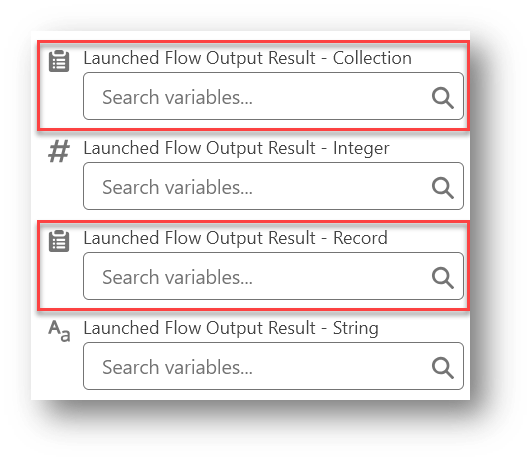
This version of the component will also recognize Launched Flow Output Result – Collection (OUTPUT_Collection) and/or Launched Flow Output Result – Record (OUTPUT_Record). These allow you to pass a collection of records or a single record of the specified Object back to the calling flow.
Sample Flows with Flow Launcher and Datatable
Let’s take a look at a few demo flows that use the SObject version of the Flow Launcher. The first two show different ways to use a Datatable row action to edit a record in a separate reactive pop-up screen flow. The third shows how to use a Flow Launcher button to run a flow to add a new record to an existing Datatable.
Sample Flow #1 – Datatable Row Action Edit Record
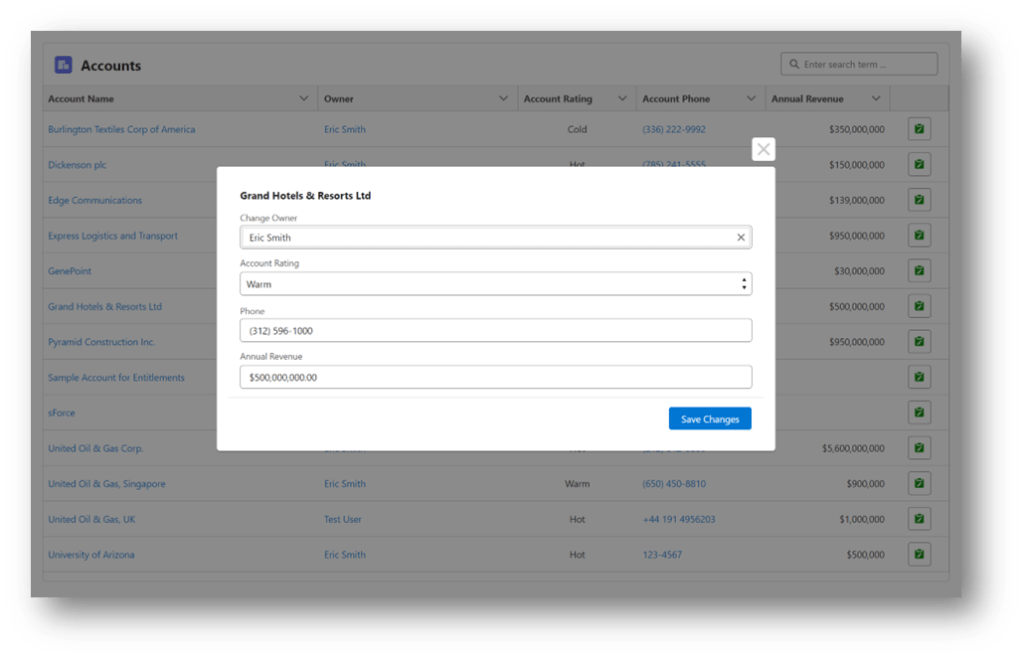
This first demo is a screen flow with a datatable where the user selects a record to update via a row action. The actioned row causes the Flow Launcher to run a pop-up screen flow where the record values are edited and the changed record is passed back to the calling flow to be updated. By adding the Auto Navigate component to the calling flow, you can force the flow to complete the update by reacting to the returned value from the launched flow instead of making the user click an extra button.

Here’s a breakdown of the two flows used in this demo.
Primary Flow
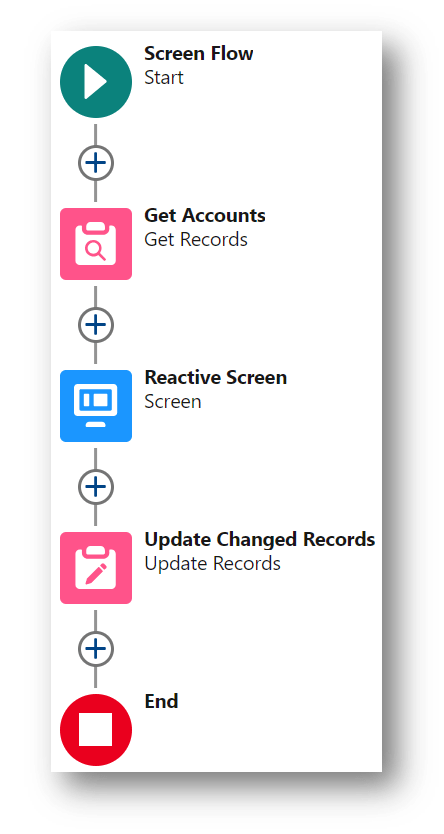
The primary flow gets some Account records and displays them in a Datatable. When the user clicks on a Row Action, the Flow Launcher reacts and calls a Screen Flow and passes the actioned record to it. When the called flow passes back the changed record, the Auto Navigate component’s conditional visibility causes it to navigate to the next element in the flow. The next element in the flow updates the changed Account record and the flow restarts which gets the newly updated Account records and starts the process over again.
This method is good for when you want to put this type of screen flow on a Lightning Home or Record page.


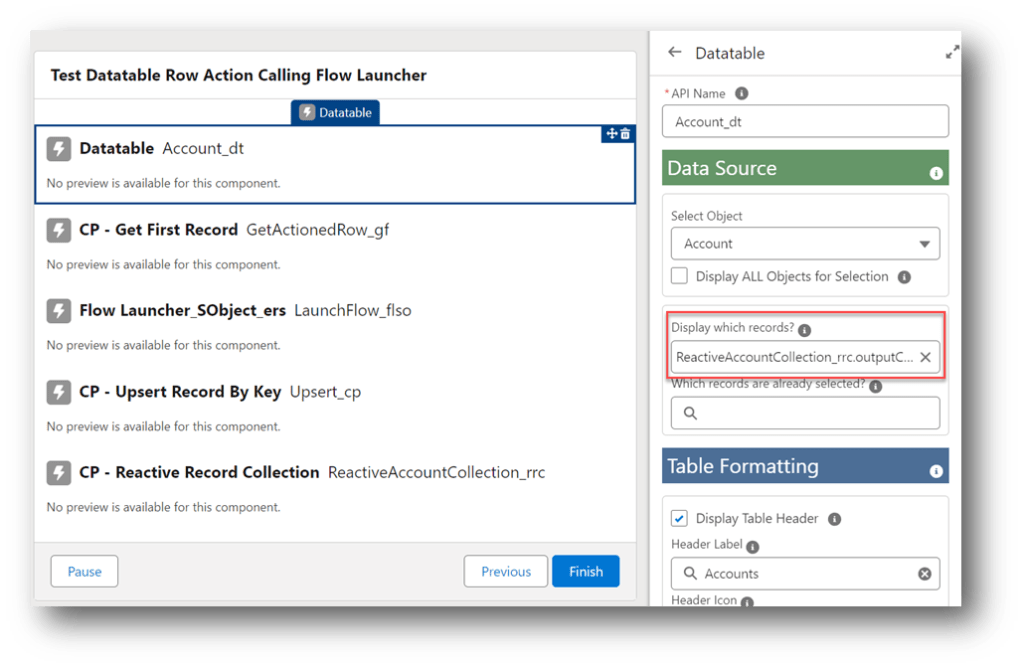
On the screen, the Datatable displays the records from the Get Accounts element.
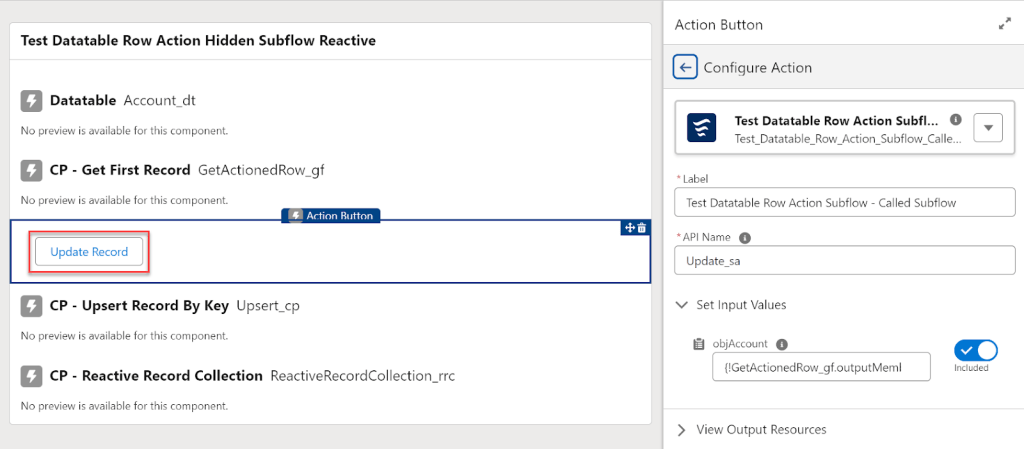
A standard Row Action is added to the Datatable so the user can pick which record they want to make changes to.

The SObject version of the Flow Launcher is configured to:
- Work with the Account Object
- Show the launched flow in a modal
- Disable the user’s ability to close or escape out of the modal before completing the flow
- Set the size of the pop-up modal
- Pick the flow to launch
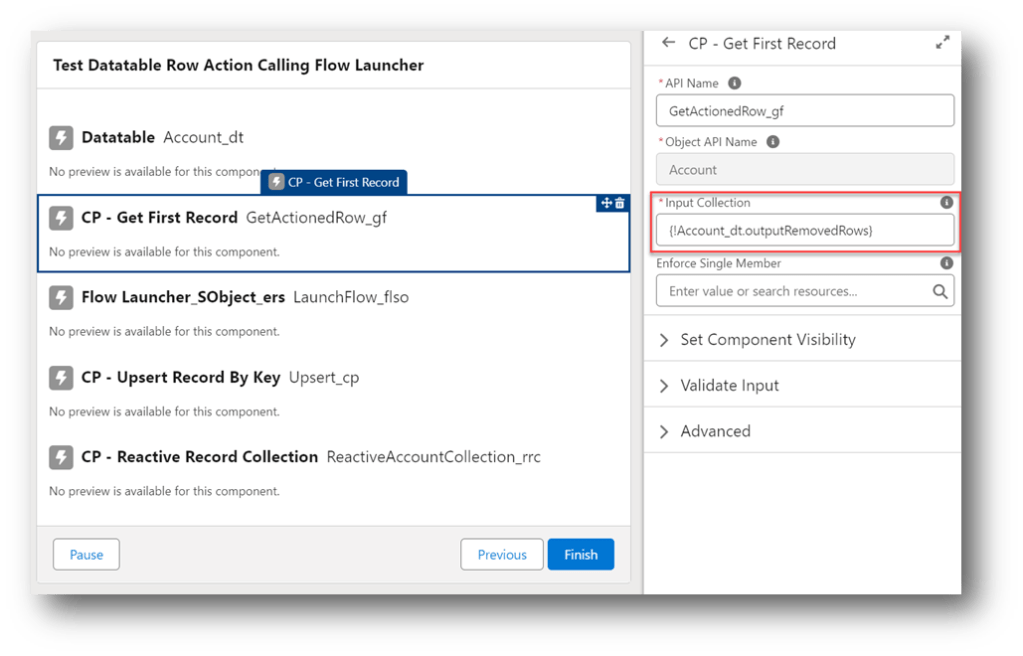
- Specify the name of the Input variable in the launched flow to pass information into
- Pass the Actioned Row output from the Datatable to the launched flow
- Make the flow reactive to changes in the Input Record by hiding the Button

The Auto Navigate component is configured with Conditional Visibility to only show (react) when it sees a value come back from the launched flow.

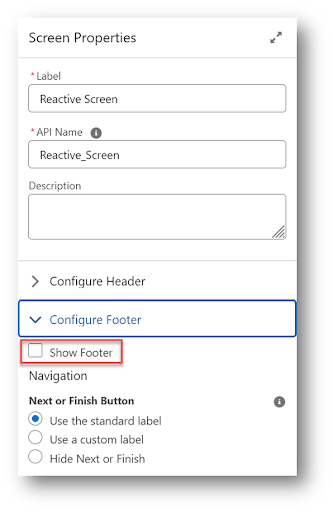
Because the Auto Navigate component is being used to advance to the next element, hide the Screen’s footer so the Next button is not visible.
Finally, the Update Records element is configured to update the Account with the changed record that was passed back as an output attribute from the launched flow.

Launched Flow
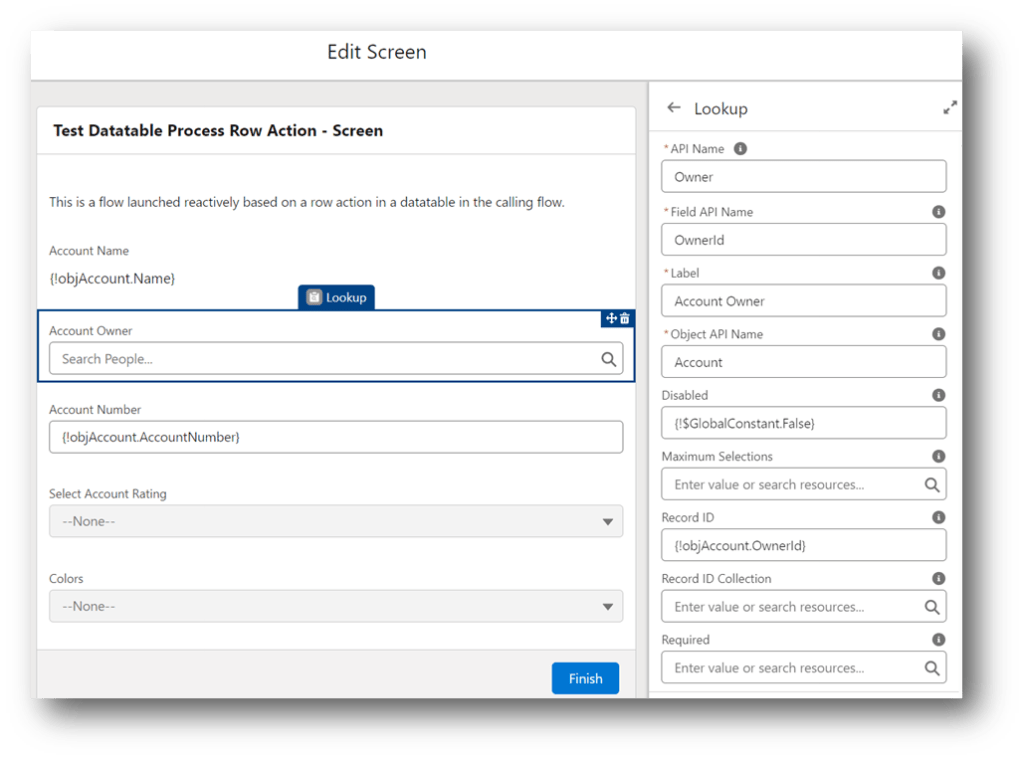
The launched flow is a screen flow that takes the Account record passed into it from the primary flow, displays some of the fields for the user to make changes to and assigns the changes to a special output attribute called OUTPUT_Record which gets passed back to the primary flow.

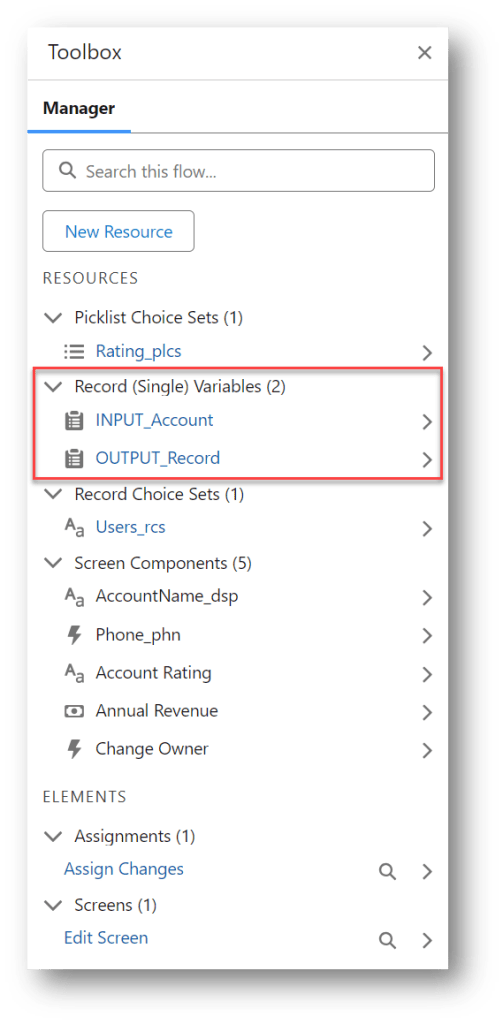
This flow has 2 special resource variables to communicate with the primary flow. One is an Account record variable (INPUT_Account) that is set as “Available for input” and the other is an Account record variable (OUTPUT_Record) that is set as “Available for output”.
NOTE: The output variable has to have this exact name in order to be recognized by the Flow Launcher component in the primary flow. The input variable can have any name as long as the primary flow references the same name in the Flow Launcher configuration.
The flow Screen uses the values from the input record for display and as defaults for the inputs for the field changes.

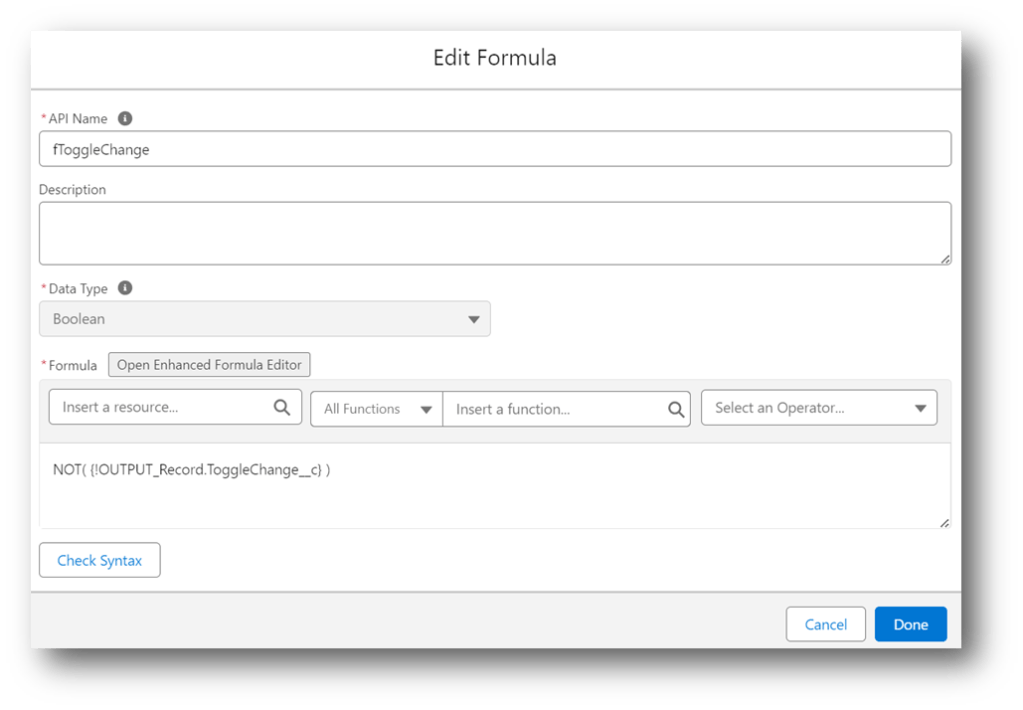
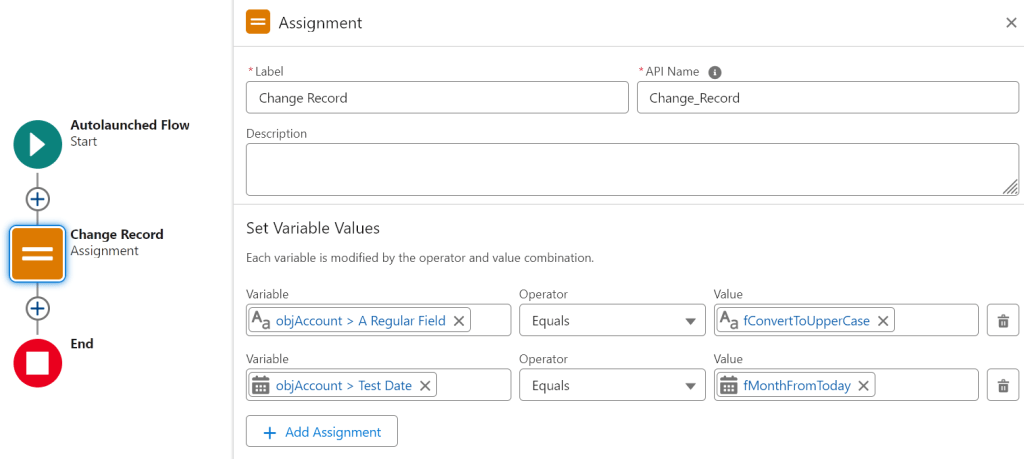
The Assignment copies the original input record to the output record and then updates the field values changed on the screen.
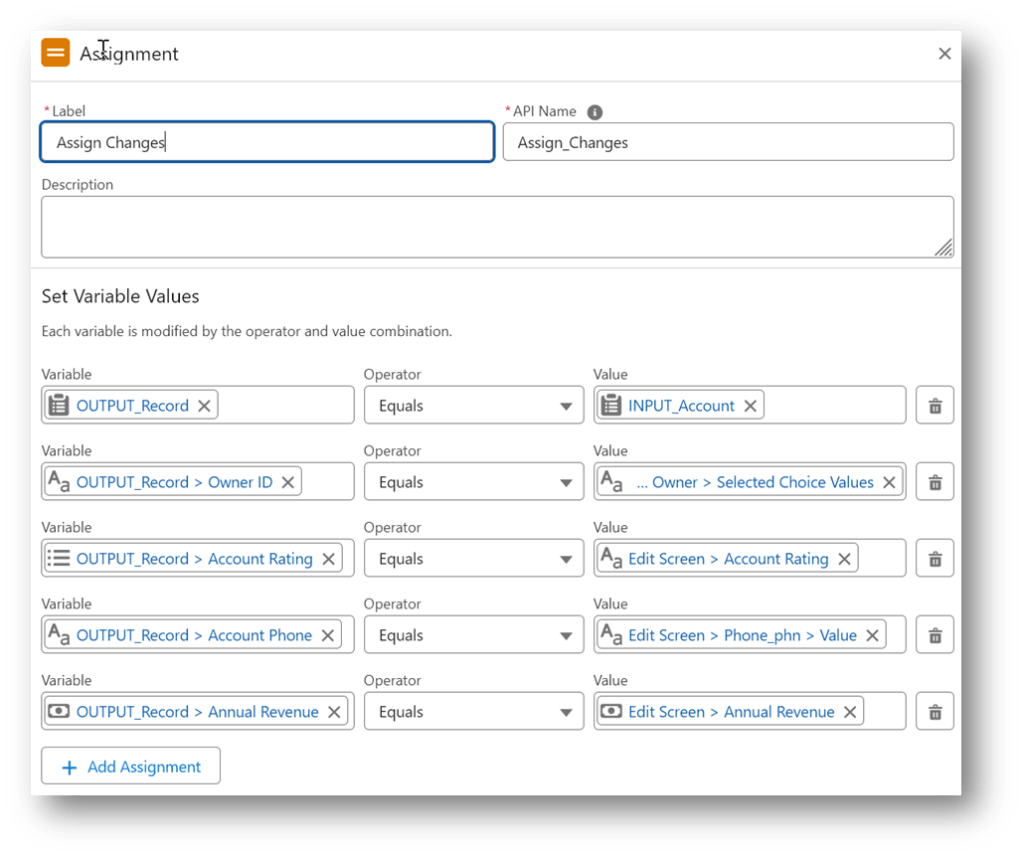
The changed record is what gets passed back to the primary flow where the actual update is processed.
So combining the two flows, the user selects a record to act on in the primary flow, it gets passed to the launched flow for the user to change field values and the changed record is then referenced back in the primary flow where it reacts to the changes and navigates past the screen and writes the changes back to the database and starts the process all over again.
Sample Flow #2 – Datatable Row Action Edit Records
The previous flow processed one record at a time then restarted the flow to display the updated record in the datatable. This slightly different version of the primary flow uses a couple of reactive collection actions to allow multiple updates on the same screen with the records displayed in the datatable refreshing each time a change is saved. This type of flow is useful when you want to handle record updates as part of a larger flow or process.
The CP – Reactive Record Collection acts like the BLANKVALUE function for record collections. Initially, the component is seeded with the record collection from the Get Accounts element but once there is a value being returned by the CP – Upsert Record By Key component, that collection is used instead.

The output from the Reactive Record Collection is what gets used as the record collection to display in the Datatable.

The Flow Launcher component is configured exactly the same as it is in the previous example and it calls the same pop-up screen flow.

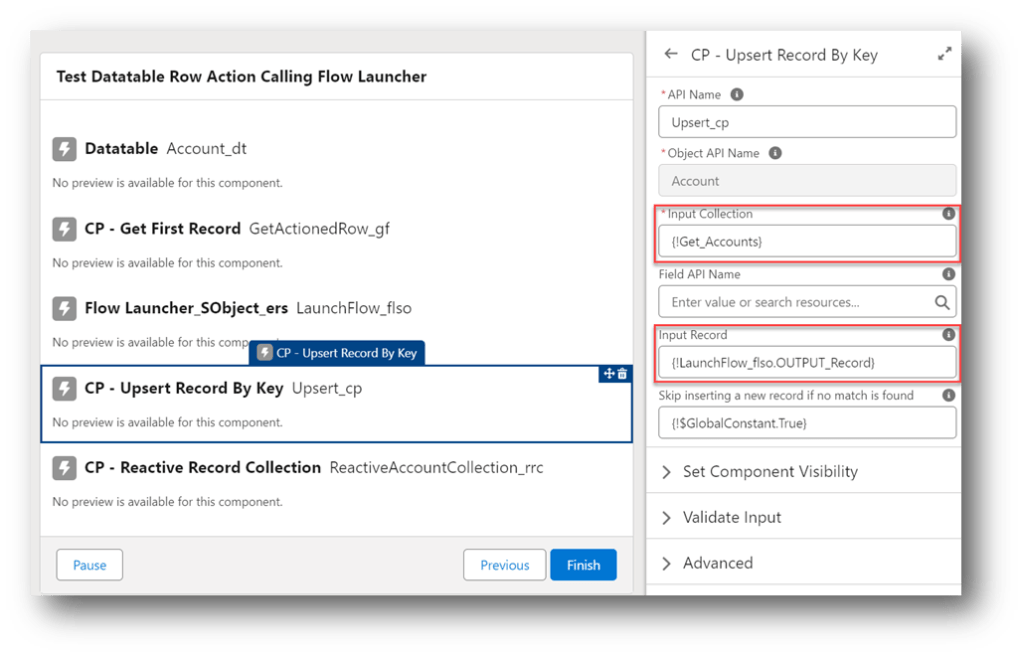
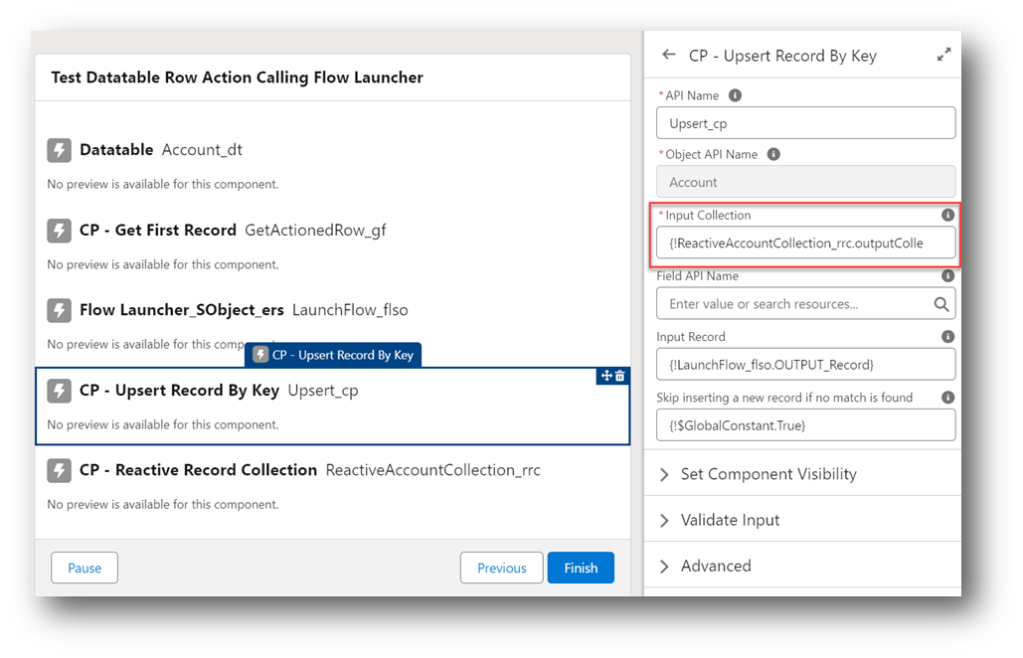
The CP – Upsert Record By Key component replaces the record in the original collection with the changed record returned by the launched flow.
- The input collection is the Output Remaining Rows collection from the datatable. Note: This output includes all records passed into the datatable while also including any additional inline edits made by the user in the datatable.
- The API name of the field used to match the record in the collection can be left blank as it defaults to Id.
- The record to upsert is the changed record that was returned by the launched flow.
The four components on the screen work together reactively to keep all of the changes to the records up to date in the datatable.
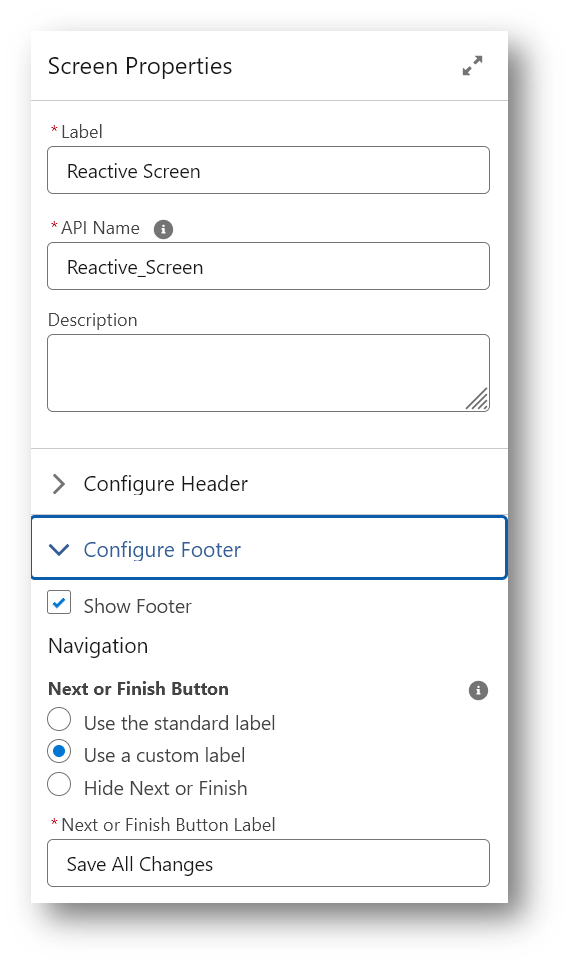
The Screen footer is shown with the label of the Next button changed to read Save All Changes. The user will click this when they are done changing records in the datatable and are ready to have those changes saved to the database.
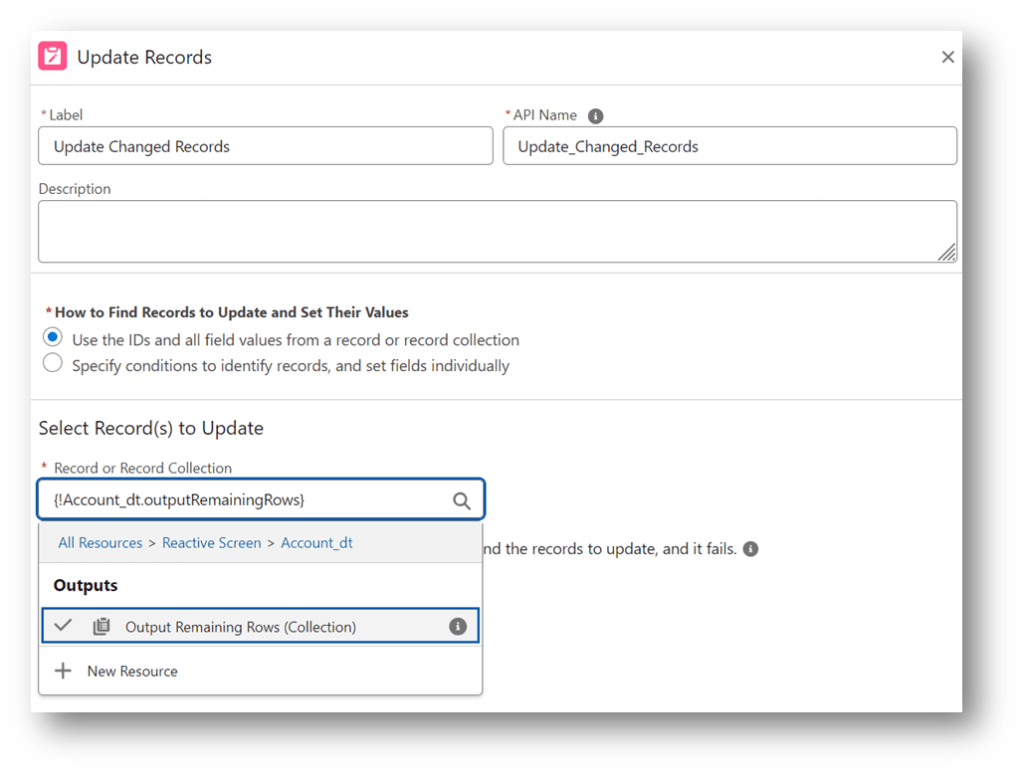
Once the user is done making changes and continues on from the screen, the Update Records component commits the output from the datatable with all of the changes back to the database.
Sample Flow #3 – Datatable with Add New Record Button
The third example demonstrates how to use a Flow Launcher button to add a new record to a Datatable.

Primary Flow
This primary flow is very similar to the flow used in the last example. It has the same Get Accounts and Update Changed Records elements as well as the same custom components on the Screen. The difference is how the Datatable and Flow Launcher are configured.

There are no Row Actions in the Datatable and the columns were set up as being editable for inline editing.
The Flow Launcher is configured with these attributes:
- Leaving Disable Close unchecked allows the user to cancel out of the Add Record screen
- The Add Record flow is selected
- Since a record is being added, no inputs are needed for the launched flow
- Hide Button stays unchecked so a button will be used to launch the flow instead of reacting to a changed input
- The button label, variant and icon are defined
- Stretch Button is checked to display the button as a long bar beneath the Datatable

NOTE: To help your future self when going back later to review a flow with a lot of custom screen actions, you can use Display Text components (7) on the screen to add descriptive notes.

These only appear when editing the flow in the flow builder and are not visible to a user running the flow because conditional visibility is used to hide them when running the flow.
cHideMe is a Constant resource with an assigned value of True.
This time the Upsert Record By Key will insert the returned record because it does not already exist in the Datatable record collection.
Launched Flow
In this example, the launched flow is designed to collect field values and create a new Account record.

The screen has inputs to collect data needed for the Account record. It also relabels the Next button in the footer as “Add New Account”.

The Assignment sets the field values in an Account record variable.

The Create Record uses the Account record variable to create a new Account.

Since there could be other automation in the org that acts on a newly created record, a Get Records is used to read the newly committed record back into the flow. The id of the new record can be accessed here in the Get Records because it was automatically inserted into the Account record variable by the Create Records element.

Finally, the OUTPUT_Record variable is populated with the new Account record values so it can be referenced in the Flow Launcher component in the calling flow.

Hopefully these three examples will give you some templates you can use in your own orgs to take advantage the the Flow Launcher component.
The custom components used in the demonstrations can be found here:
Reactive Collection Processors