The Genesis Block Theme is a block-editor-first theme that leans in on the power of modern WordPress®.1 It’s a simplified theme that steps out of the way and lets you design your site using the block editor.

In this article, we’ll cover the settings and options available in this theme.
Table of Contents:
Getting Started
Before you begin, you’ll need to download and install the Genesis Block Theme. Installing the Genesis Blocks plugin is optional, but highly recommended.
Note: If your site is hosted at WP Engine and you create a new site within your User Portal, the Genesis Block Theme and the Genesis Blocks plugin will be automatically installed for you.
Requirements
The Genesis Block theme requires the following:
- WordPress version 5.4+
- PHP version 7.1+ (Check with your web host for your server’s current version of PHP. Though this theme will work with PHP 7.1 and greater, we recommend using the latest version to prevent security issues on your site. See WordPress Requirements for more details.)
Note: The Genesis Block theme is not a child theme and does not require the Genesis Framework.
Download and install Genesis Block Theme
The Genesis Block Theme is free and can be downloaded here.
There are two ways to install this theme which are described below.
1. Install the theme through the WP-Admin Dashboard
- From your WP-Admin dashboard, go to Appearance > Themes and click the Add New button.
- Click the Upload Theme button at the top of the next screen and then upload the .zip file you downloaded previously.
- Click the Activate link on the final screen.
2. Install the theme using an FTP client
- Download the theme .zip file to your computer, and unzip it. You will see a theme folder with the name of the theme you are installing.
- Log in to your server through an FTP client, and navigate to the wp-content/themes directory. You will transfer the entire theme folder to that directory.
- Go to Appearance > Themes and hover over the Genesis Block theme screenshot to reveal and click the Activate button.
Install the Genesis Blocks plugin
This theme can be used without installing the Genesis Blocks plugin, but we encourage you to install it to get the most out of this theme.
There are two ways to install this plugin which are described below.
1. Install the plugin through the WP-Admin Dashboard
- From your WP-Admin dashboard, go to Plugins > Add New.
- Use the search box to search for Genesis Blocks.
- Click the Install Now button.
- When installation is complete, click the Activate button.
2. Install the plugin using an FTP client
- Download the Genesis Blocks plugin .zip file to your computer, and unzip it. You will see a folder named genesis-blocks.
- Log in to your server through an FTP client, and navigate to the wp-content/plugins directory. You will transfer the entire genesis-blocks folder to that directory.
- Go to Plugins > Installed Plugins and and click the Activate link.
Theme Settings
The Genesis Block theme includes several settings that you can use when customizing your site.
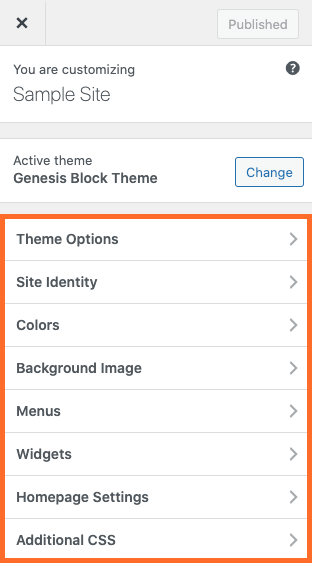
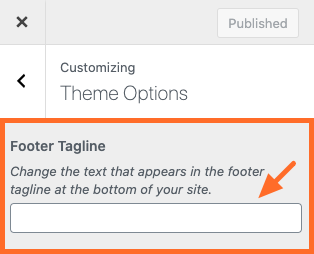
Theme Options
Go to Appearance > Customize > Theme Options > Footer Tagline to customize the text that appears at the very bottom of all posts and pages. This section is typically used to display copyright information.
Site Identity
Go to Appearance > Customize > Site Identity to edit the site title and tagline, as well as upload a custom logo and site icon.
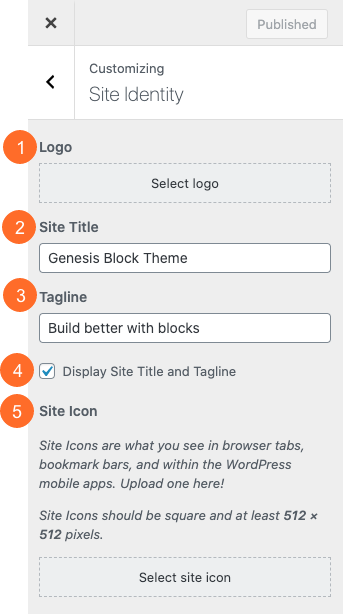
- Logo: The recommended size is 150 x 150 pixels. To keep your site running smoothly and quickly, we recommend uploading an image with a file size of 120kb or smaller.
- Site Title: The site title is displayed by default in the site header.
- Tagline: The tagline is displayed by default in the site header.
- Display Site Title and Tagline: Check the box if you’d like to display both your logo image and the site title and tagline at the same time.
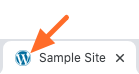
- Site Icon: The site icon (or favicon) will be displayed in the browser tab when viewing your site (as shown in the image below).
Colors
Go to Appearance > Customize > Colors to change the default accent and background colors.
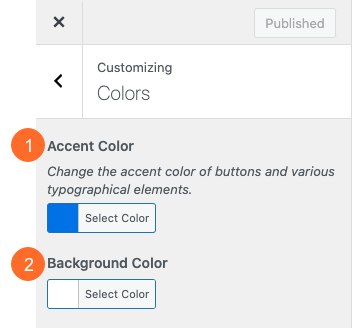
- Accent Color: This color is applied to buttons and various typographical elements (like links).
- Background Color: This color is applied to the background of the content area. It appears behind the body of the post or page (not the site header or site footer).
Background Image
If desired, you can apply a background image to the content area. The image will appear behind the body of the post or page (not the site header or site footer).
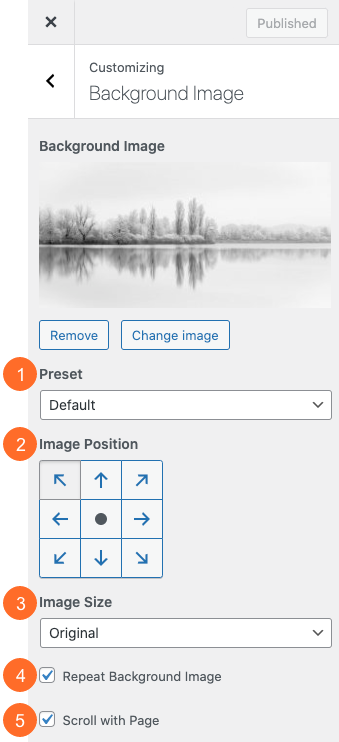
- Preset: If you’d like to control all the available settings individually, choose Custom. If you’d like to use a preset, you can choose from the following options : Fill Screen, Fit to Screen, or Repeat. When you choose a preset, some of the settings described below are pre-configured and will become unavailable.
- Image Position: Choose where the background image should be displayed on the screen. For example, you can choose the top left corner, top middle, top right corner, etc.
- Image Size: Choose whether the image should stay the original size that you uploaded or if it should be dynamically resized to fit or fill the screen. If you choose Fit to Screen, the image will be resized as needed so it will cover the screen from left to right. If you choose Fill Screen, the image will be “stretched” so it covers the entire screen from top to bottom and left to right. Note that if the original size of your image is smaller than the screen, the image may become distorted if you choose to fit or fill the screen.
- Repeat Background Image: Check the box to allow your background image to tile, or to be repeated, across the screen.
- Scroll with Page: Check the box to allow your background image to move with the page as you scroll up and down. When this box is unchecked, the image will stay in one place (fixed position) as you scroll up and down the page.
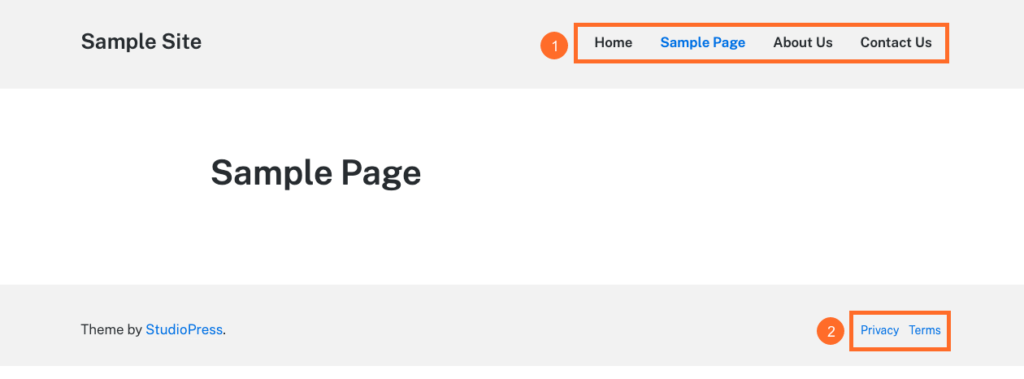
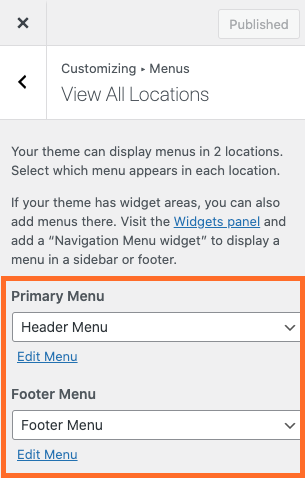
Menus
This theme includes two (2) default menu locations:
- The Primary Menu displays in the site header next to the logo image and/or the site title and tagline.
- The Footer Menu displays in the site footer and one level deep.
Go to Appearance > Customize > Menus > View All Locations to assign your previously created menus to these locations.
Widgets
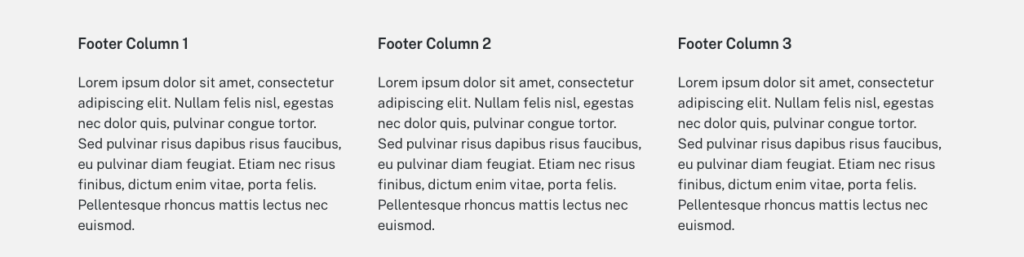
This theme includes a Footer widget area that can display up to three (3) columns at the bottom of all posts and pages, as demonstrated in the image below.
The footer widget columns have a dynamic width which means if you choose to use only two (2) columns, their widths will adjust so they are displayed evenly across the page.
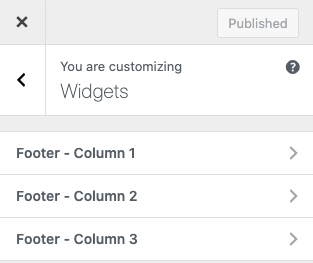
Go to Appearance > Customize > Widgets to add widgets to these areas.
Homepage Settings
Your homepage can be set to display a list of your latest blog posts or a static page.
By default, WordPress sets the homepage to display the latest posts, but if you’d like to select a static page instead, you may do so in Appearance > Customize > Homepage Settings.
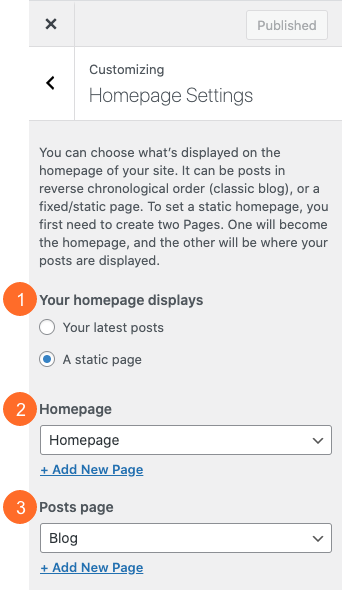
- Your homepage displays: Choose whether the homepage should display the latest posts or a static page.
- Homepage: If you choose to display a static page as the homepage, select the page you’d like to display as the homepage.
- Posts page: If you choose to display a static page as the homepage, the homepage will no longer display a list of your latest posts. Select the page where you’d like to display them instead.
Additional CSS
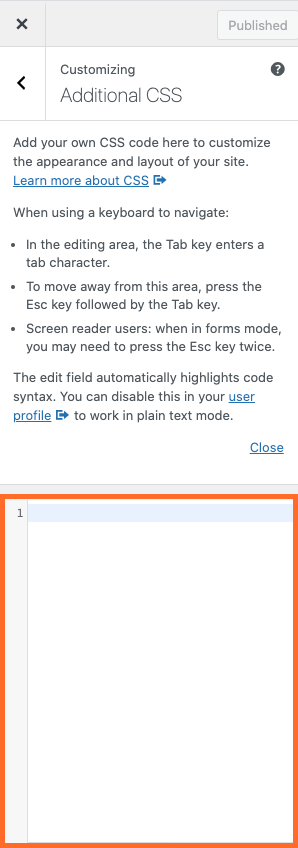
You can safely customize your theme’s appearance by adding custom CSS in the WP-Admin customizer. The CSS you add here will not be overwritten when WordPress is updated.
Go to Appearance > Customize > Additional CSS to add your CSS.
Build your pages
Now that you’ve configured all the theme options, you’re ready to begin building your block-based pages.
Full Width page template
To help you create wide or full-width layouts, this theme includes a Full Width page template which will stretch the content area to the full width of the content container. Your content will remain centered and have padding on the left and right side.
To apply this template to a post or page, open the editor, go to Page Attributes > Templates, andselect the Full Width page template, as shown below.

Hide page title
If you’d like to hide the page title from view on the front end of the site, check the Hide Page Title box, as shown below. This option is available for pages only (not posts).
Note: If you hide the page title, we highly recommend adding an H1 headingnear the top of the page to keep the page accessible and SEO-friendly.

Using the Genesis Blocks “Layouts” block
If you’ve installed the Genesis Blocks plugin, you can use the Layouts block to quickly build all the pages of the site.
This block includes a library of pre-designed sections, layouts, and collections which are made up of groups of blocks where all the settings like backgrounds, margins, padding, colors, etc. have been pre-configured for you. After adding them to your page, all you need to do is replace the sample text and images with your own.
- Sections are small groups of pre-configured blocks that can be added to a post or page as part of a full-page layout.
- Layouts are groups of pre-designed sections that work together to create a full-page design.
- Collections are groups of pre-designed sections and layouts that share the same theme or design aesthetic. Genesis Blocks (free) currently includes one collection and Genesis Blocks Pro currently includes five collections. Click the links below to view a demo of each collection:
- Slate Collection (Free and Pro)
- Agency Collection (Pro)
- Altitude Collection (Pro)
- Monochrome Collection (Pro)
- Tangerine Collection (Pro)
User documentation for the Genesis Blocks and Genesis Custom Blocks plugins is available in the following locations: