The Genesis Custom Blocks plugin is free and can be used with any WordPress® theme (the Genesis Framework is not required) and on any web host.1
Table of Contents
- Install via the dashboard
- Upload the .zip file via the dashboard
- Upload the plugin files via sFTP
- Activate the plugin
Install the plugin via the dashboard
To automatically install the plugin through the WP-Admin dashboard, simply go to Plugins > Add New and search for Genesis Custom Blocks.

Click image to enlarge
Upload the .zip file via the dashboard
To manually upload the plugin’s zip file through the WP-Admin dashboard, first download it from the WordPress plugin directory.
Next, go to Plugins > Add New > Upload Plugin and then click Choose File to upload the zip file.
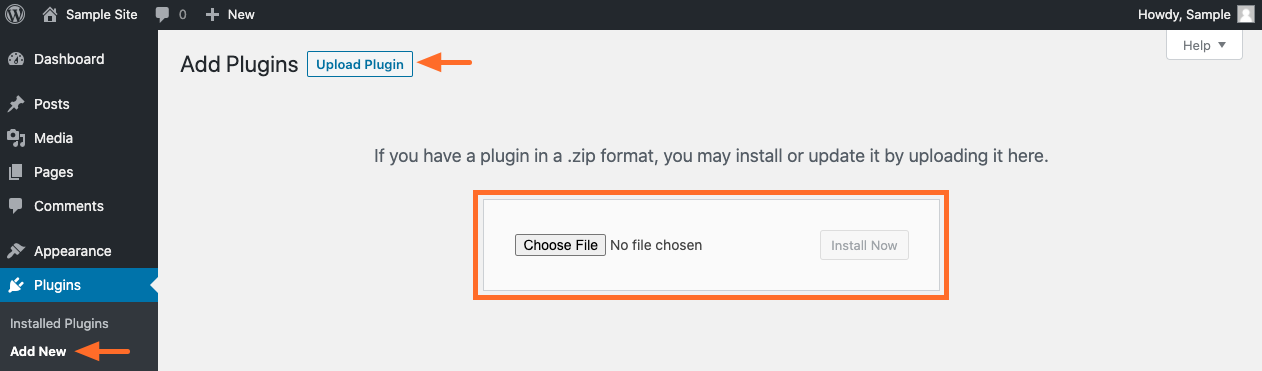
Click image to enlarge
Upload the plugin files via sFTP
If you prefer, you can also install the Genesis Custom Blocks plugin manually.
- Download the latest release of Genesis Custom Blocks from the WordPress plugin directory.
- Unzip the file and move the unzipped
genesis-custom-blocksfolder to your/wp-content/plugins/directory.
Activate the plugin
If you’ve searched for and installed the plugin in the dashboard, follow the on-screen prompts to activate the plugin.
If you’ve uploaded the .zip file through the dashboard or uploaded the files via sFTP, go to Plugins > Installed Plugins to activate Genesis Custom Blocks.
