Skip navigation

Last month I did a article on the IBM Model 55sx, A machine I myself was not to crazy about. It was certainly functional but hampered by so many little things and a few big things as well such as the proprietary MCA expansion ports. This time I’m going to talk about the Model 30 286 also of the IBM PS/2 line. This machine seems to have become one of the more desirable PS/2’s most likely because this machine unlike many others of the line is actually equipped with standard 16 bit ISA slots. will this be enough to redeem the system or will it be dragged down by the little issues that plagued the 55sx? Lets read on and find out.

ps2302861

The case is virtually identical to the previous 55sx and again it’s a nice small desktop case. Again there is not much room for expansion and your basically limited to a standard floppy drive, hard drive combo or two floppy drives.

ps2302863Taking a look at the back.

ps2302862

Not a whole lot to say since the back is very much like the 55sx though arranged a little different. The VGA port is mid case and before the other ports. The port is indeed VGA and not MCGA as on the 8086 based model 30. The port on my machine did not work but I’m unsure of the reason. perhaps a dead video chip. Below and to the right are two ps/2 ports for keyboard and mouse. Following that is a larger serial port and a parallel port.

I won’t go over the two cards I installed but they are a Trident 8900 VGA card and a early 16-bit Sound Blaster 16 sound card. The sound card is a bit “noisy” but its setup by jumpers which is important seeing as this is a 286 based machine and the plug and play setup program requires a 386.

The floppy drive is a 1.44mb drive but like most of the ps/2 line it is proprietary so you need a floppy drive just for the ps/2. also like the 55sx it uses a sled that the drive sits on to install into the bay.

ps2302865

The hard drive is also the same ESDI style drive that was in the 55sx with the same style connector. Mine is what appears to be the original 20mb drive and it still boots up just fine.

ps2302864

The first thing you can tell right off on opening the case is that the model 30 286 is one of the few ps/2 models that use the 16 bit ISA expansion slots as opposed to MCA. This was because at the time this was considered the cheaper budget version but as time saw the MCA format die off this model and its slower 16 ISA has remained far more versatile and useful as a retro computer.

1) Power supply & switch – This machine again uses the common power arrangement found in the IBM PS/2 line of having a mechanical switch connected to the front that via a hooked rod physically powers on the PSU on power up. A little strange overall but from researching and comments this actually turns out to be a safer method then directly connecting the power to a front switch as is the common practice.

2) CPU – The Model 30 286 as the name would imply uses a 10mhz 286 CPU. The 10mhz 286 is one of the earlier and slower 286 CPUs and in my opinion for this machine is in a rather awkward place. I say that because it feels a little to fast for some CGA games that require a 4.77 8088 or V20 to play at correct speeds. At the same time the 286/10 is a bit to under powered for the bulk of the later VGA games and lacks the “coolness” factor of a NEC v30 machine that’s for the most part running at the same speed. It should run many slower paced games from the late 80’s and maybe even early 90’s in EGA fine though.

ps2302868I’m not sure the reason for that yellow wiring above the CPU chip or if that’s factory done.

This CPU crystal oscillator is soldered onto the board.  You could in theory desolder everything and resolder on a faster oscillator and add a faster chip but it’s unknown if this will work or be stable. There are A few official CPU upgrade “snap” on upgrades though such as the HyperACE SX (M30) as well as a few others do exist. I’m not sure though if these upgrade chips will work with other machines or if they are specific to the model 30 286.

486slc2486SLC2 50mhz 486 cpu upgrade (image courtesy of user Nestor at at the vintage-computer.com forums)

IMG_20140407_114755_540 HyperACE SX (M30) 386-25mhz CPU upgrade w/ math copro / 64k SRAM cache (image courtesy of user lowen at the vintage-computer.com forums)

3) co-pro socket – This is a socket for a 287 math coprocessor to assist with complex mathematical computation. Mine as you can see lies empty. Not terribly useful unless your doing CAD applications or running one of the few games like SimCity that take advantage.

4) CMOS Battery – Again we have the infamous Dallas RTC battery. Mine seems to be the later revision but unfortunately it still appears to be either incompatible or dead. I’ll repeat here what I wrote in my model 55sx article “The Dallas RTC is basically a lithium battery coated in a hard plastic shell and then socketed into the board. The problem is these chips and even their updated and more recently manufactured replacements are out of production. Throw in the fact that many of these are now dead, the newer replacements aren’t guaranteed to work the same and that the system will act erratically, throw errors (error 161) on boot or not work at all without a working battery and you have a major issue. The best fix for this issue is hacking the battery to use a modern coin form lithium battery externally. Instructions on this process can be found here as I have not attempted it yet. Ive read and seen some videos where the newer replacement battery the Dallas DS12887 works fine but other sources indicate issues such as a clearing of the CMOS after restarting.”

It is worth saying that my machine seems to be able to boot up to its hard drive regardless of the CMOS battery being dead and without the need for a reference disk. After the error codes if you wait a few seconds an image will appear and if you hold down the F1 key the machine will continue to boot up.

5) Speaker – The speaker on the 30/286 is a cheaper Piezo beeper speaker which makes sense seeing as this was considered a budget machine.

6) RAM – My machine has 1MB of RAM installed but the max capable is 4MB. unfortunately the PS/2 30/286 does not take standard 30 pin RAM but instead uses proprietary “PS/2 Type” RAM which can be a little hard to find. Some of the IBM RAM sticks use sort of odd looking metallic box memory chips as you can kind of see in the image below.

ps2302866

So is the PS/2 model 30 286 a good retro machine? Well…not really, at least compared to other OEM or self built setups. Again in my opinion it’s from the hassle involved. The proprietary RAM, the proprietary floppy/hard drive interface and Dallas RTC battery and even still the reference disk even if its not as big of a deal. Is it far better as a retro PC then the “high end” MCA PS/2s? Yes, and if you are a IBM fan and want a PS/2 then I would suggest this machine. Many of the above issues of the other models are mitigated by the use of standard 16 bit ISA slots in this machine. The hard drive can theoretically be replaced with something larger and newer via a cheap and available ISA IDE or SCSI controller. The problem with doing this is that there are NO molex power connectors on the PSU to power a hard drive or floppy drive. I am unsure if a standard power supply will fit in its place but even if it did it was almost assuredly make the front power switch useless. Upgrading the sound and video is also much easier with the huge array of ISA video and sound cards now usable. Earlier sound cards that are jumper configurable are recommended though due to the none plug and play nature of the system. As I mentioned earlier the CPU for me holds kind of an odd place but if you don’t have any other better machines of the era this one should fill some of your needs.

This slideshow requires JavaScript.

msfm1

The Sega Master system. A much maligned console during the 8-bit console wars between Nintendo and Sega in North America. Despite being more powerful then the NES and having a broader color palette the Master System just couldn’t break Nintendo’s strangle hold on the American market and it faded into the background. I remember seeing them off and on growing up, mostly the model II. My cousin ended up having one and I remember playing Shinobi and not wanting to stop. Eventually a bit after the 8-bit consoles prime my mom ended up buying one second hand off a Electronics Boutique (remember that place) employee at the local mall. She paid $50 for the loose console and a handful of loose games including Shinobi and I finally had my Master System although a little late in the game so to speak.

Little did I know at the time that like most times a console from Japan came to North American shores we got screwed. Much like the scenario with the North American NES having less sound channels the North American Master System lacked FM sound that the Japanese equivalent the Mark III had built in. Even the older styling of the Japanese Master System could equip it as an add on peripheral. I would eventually import a Japanese Master System at some cost and effort just to sample these FM tunes in games that which in many cases were superior to the PSG tunes we got outside of Japan. When I moved cross country my Japanese Master System was one of the many items I had to leave behind in storage but as time passed I began to feel the urge to game again on Sega’s 8-bit system and finally I decided to buy a Master System from a local game shop. About this time is when I discovered an awesome site called retromegabit.com and one of the articles detailed how to add an actual FM sound unit to your North American SMS giving it true FM sound just like the Japanese version. I debated even writing this article since the process is already covered so well over at RetroMegabit but I felt that if I could help get a few more people to discover this mod it was worth the effort.

First off you need to order the FM module from etim.net.au. The module is about $75 Australian dollars but it worked out to be about $52 US dollars (exchange rates vary and can change all the time though). This is an Australian site so keep that in mind as far as currency conversion and what not but they do take Paypal and for me shipping only took about one week for the module to arrive. My module is version 2.2 which feature a three position switch to choose between PSG, FM and Japanese/FM.

msfm3

This is the module and you can see the Yamaha FM chip on board. The three prongs are for a switch that allows you to switch the system’s FM module on and off so if there’s any games where you prefer the PSG soundtrack you still have that option. The card plugs into the rear edge connector on your Master Systems motherboard and the wire running off the board ends in three wires that will require soldering to the board so please keep this in mind when buying the module. To be completely honest the soldering job is extremely easy and even a novice should be able to pull it off.

Other then a soldering iron I would recommend one of these.

msfm2

The mod requires desoldering a capacitor and soldering two wires where the capacitor legs previously went and this little iron will help with that as you just apply it to the back of the board at the capacitor solder points and use the bulb pump to suck up the melted solder. My capacitor fell right off the board leaving two clean solder points for my wires.

msfm4

First stop obviously is taking off the top cover of the Master System and then the RF shield under that via a few easy to find screws. I felt the Master System came apart far easier then the NES, especially with no spring cart insertion system to bother with. The area in the red rectangle is the spot on the board we need to work with. The blue rectangle is your edge connector on the motherboard you need to install the FM module on. To make things way easier remove the entire motherboard from the plastic bottom so you can fully remove it and easily desolder the capacitor.

msfm5

First thing you want to do is scrap off a little bit of the green on the motherboard on the area to the left as seen above in the image. This where our ground wire is going to be soldered on. The capacitor we need to remove is at C37 on the right side of the image. The best method is to flip the motherboard around and desolder it from the rear solder points and it should fall right off the board. Keep in mind if you back out now unless you resolder the capacitor onto the board you will have no sound.

msfm6

The white wire goes into the point where the + symbol is and the red wire in the lefter solder point close to the C37 label. Note that on the official installation instructions these wires may be accidentally reversed. This image above is the correct orientation. If soldered opposite of this way you will have no sound.

msfm7

I added a dab of hot glue to each wire end just to help everything stay in place and to put less stress on the solder points. At this point test your Master System with a FM capable game such as Miracle Warriors just to make sure the module is properly installed and your soldering job made a good connection. The sound from both FM and PSG should be clear and strong. A full list of FM sound compatible games can be found here.

At this point before you reassemble the Master system you need to modify your RF shield to accommodate the newly added module.

msfm8

Just snip away and then either cut off or fold up the excess metal. After this the shielding should go right on.

I decided to drill a small hole in the rear of my unit to install the three way switch. I used a small power drill and then carefully widened the hole with an Exacto knife until the switch fit snugly.

msfm9

msfm10

Overall I’m very happy with this mod. The installation took less then an hour and it all looks and works very well. I considered posting some videos with audio examples of the difference between PSG and FM soundtracks but these are easily found on YouTube or better yet make your way over to RetroMegabit and check out his article on the FM mod and sound examples.

As a final note I spied this on the motherboard.

msfm11

I’m pretty sure a switch to choose between PAL and NTSC can be wired up at this point since many Master System games were PAL exclusive. After further research and talking to NTSC owners of PAL games it seems a mod of this type is unnecessary and PAL games play just fine on NTSC systems. If I can find any examples that prove this false though I’ll be sure to post them here.

The IBM PS/2 (or Personnel System 2) line, both greatly reviled and greatly beloved by….oh, well…actually mostly reviled. The IBM PS/2 line was a series of many computers mostly targeted for business use and containing many proprietary components in an effort to reverse the perceived damage and loss of revenue caused by the flooding of the market by “IBM clone” machines. This massive use of proprietary components is both why the PS/2 is hated but also beloved in a way that some of the additions such as the ubiquitous ps/2 ports that would come standard later on PC’s as well as the modular design introduced in many of the PS/2 line made opening up the machine easy. As game machines though most of the PS/2 machines fall flat and this can mainly be attributed to the MCA (MicroChannel Architecture) expansion slot introduced in the line, a faster then ISA but poorly supported bus slot.

ibm55sxfull

The machine I’ll be looking at here is the IBM PS/2 model 55sx, a prime example of the MCA PS/2 line and what IBM created as a low end to mid range model PS/2 for business and professional uses. I want to point out right away I never did get this machine fully working and in the end I had to cannibalize a few parts for a more useful ISA equipped PS/2 I’ll be covering later.

ibm55sx

The model 55sx was released around 1988 though Wikipedia states 1989 and the copyright date on the case is 1987. The build quality overall is very good and typical of IBM. the case is a desktop design and is pretty heavy though not very large. There is very little room for any expansion with two 3 1/2 slots really only suitable for a floppy drive or hard drive which was the typical combo setup as seen on this machine. The drives are on sleds much like in a desktop Macintosh’s of the mid 90’s. The power switch to the far right is an actual heavy duty switch and not a button as was typical on many cases and becoming more common. The floppy drive is a 1.44mb 3 1/2 floppy drive but the drive itself is proprietary to the PS/2 and uses a special connector.

ibm55sxflop

As you can see there is no separate molex connector for power and the power is supplied via the floppy cable connector. This connector is not IDE though it looks like it. PS/2 floppy drives typically feature a large blue eject button on the front sometimes with the disk format on the button.

I believe the hard drive in mine was a standard 30mb drive that came stock. The hard drive is of ESDI format which is different from IDE or SCSI and from what I understand fairly fast for the time and comparable to SCSI though it quickly faded away as the 90’s approached.

ibm55sx9

These drives like the floppy also lacked a separate molex connector as power was supplied via the edge connector.

Now lets take a look at the rear of this machine.

ibm55sx2ibm55sxback

The rear ports consist of two ps/2 ports for keyboard and mouse. The introduction of the ps/2 ports which get their name from the PC line are perhaps one of the best new features introduced with the IBM PS/2 line and one of the most influential on future PC design in the coming decade. Next to that you have standard parallel a DB-25 serial port and finally a standard VGA port that the PS/2 line was helping to standardize and promote at the time. The introduction of the VGA standard is possibly the greatest legacy of the PS/2 line with ps/2 ports right behind. Expansion is fairly weak with only three slots available via a riser though being that this is a MCA based machine the point is largely moot for gaming anyways, which is something I’ll discuss as we delve deeper into the machine.

There are also two punch out holes above the ps/2 ports in case you want to chain the machine to a desk so your untrustworthy employees don’t take it home with them or to thwart looters that forgot their chain cutters at home.

The case opens by removing a few screws on the left and right sides. On lifting the top half of the case away an interesting feature of the power switch becomes obvious.

ibm55sx5

The switch on the front of the case is actually just a switch to flip a another switch operated by a hooked metal rod. Why this approach was taken rather then having it directly wired up I have no idea though I have read some material that suggests this sort of setup it actually safer as the power supply is truly off when the PC is powered down.

ibm55sx4

1) CPU – The model 55sx sports a 386SX CPU at 16mhz. The processor is soldered to the motherboard so except for a possible rare and hard to come across MCA CPU upgrade cards your stuck with the 16mhz 386. The SX designates a 16 bit CPU. There is no math coprocessor built into the chip but luckily there is a socket for a 387 math co-pro next to the CPU. The 16mhz 386 itself actually isn’t a terrible chip even though it’s a lower end to mid range 386 it still has enough power to play a wide range of early 90’s DOS VGA games, applications and even Windows 3.1 and below adequately if you want.

ibm55sx11

2) Speaker – The 55sx does have a full PC speaker as opposed to a beeper speaker which is very nice as you will most likely be stuck with it as upgrading sound on a MCA machine can be expensive and difficult

3) RAM – This machines came with the 4mb maximum via 2x2mb sticks of RAM but can be expanded beyond this to either 8MB or 16mb via a RAM expansion card.  Information on maximum total supported RAM limits seem to be conflicting on researching the internet though it seems that limit is 8mb rather then the 16mb stated by some sources. The RAM is of the 72 pin variety which is something else the PS/2 line introduced to replace the old 30 pin standard but it may be proprietary “PS/2” type RAM rather then standard 72 pin though I cant seem to find any concrete confirmation of this nor did I have the will to swap out modules for testing. The 55sx requires 80ns modules and will not accept faster 70ns without modification

ibm55sx8

4) RTC battery – This is the infamous Dallas DS1287 real time clock and a source of unending frustration with PS/2 users. The Dallas RTC is basically a lithium battery coated in a hard plastic shell and then socketed into the board. The problem is these chips and even their updated and more recently manufactured replacements are out of production. Throw in the fact that many of these are now dead, the newer replacements aren’t guaranteed to work the same and that the system will act erratically, throw errors (error 161) on boot or not work at all without a working battery and you have a major issue. The best fix for this issue is hacking the battery to use a modern coin form lithium battery externally. Instructions on this process can be found here as I have not attempted it yet. Ive read and seen some videos where the newer replacement battery the Dallas DS12887 works fine but other sources indicate issues such as a clearing of the CMOS after restarting.

I also feel I need to point out that the 55sx does not handle hardware changes like most other PC’s via BIOS the same. The 55sx and most if not all of the PS/2 line require a “reference disk” to be inserted on making any changes such as replacing the battery. Thankfully these disks are not very difficult to find via the internet. This site has a link to the model 55sx reference disk.

5) MCA slots – This perhaps even more so then the Dallas battery is the bane of the model 55sx and many PS/2 machines. These are the MicroChannel Architecture slots which were designed to replace ISA.

ibm55sx6So much animal hair inside this system

MCA was faster then ISA (10mhz compared to 8mhz) had an increased data width as well as having limited “plug and play” capabilities but unfortunately the PnP capabilities required constant updates of the reference disk for newer cards. A lesser pointed out positive of MCA cards is they tend to have less interference or “noise” so an MCA sound blaster sound card should technically sound a little clearer then its ISA counterpart as well as video cards looking a little better then A ISA counterpart. In reality though most users didn’t seem to notice or care. MCA was not backwards compatible with ISA and IBM required a hefty royalty for its use in other manufacturers machines. For these reasons it never caught on and PC clone manufacturers ended up coming up with the EISA slot to counter MCA.

This riser has two different forms of MCA slots. The top two are 16 bit and the larger bottom slot is I believe a 16 bit slot with a axillary video connection. I’m guessing this is a special slot of some video cards but there is very little information I could find on it. I originally thought it may be a 32 bit slot but specification sheets for the 55sx claim three 16 bit slots and a German Wiki image reports the slot to be axillary video. The biggest issue with MCA cards are the lack of options as not to many third party manufacturers made MCA cards though SCSI, network cards and memory expansion MCA cards don’t seem to rare or expensive on places like Ebay. Video cards tend to be fairly generic and confusing as to the standard they support and specifications they hold. Sound cards are extremely rare and can be very expensive. This is the biggest issue for gamers with a PS/2 system. Companies like Creative did make MCA versions of the Sound Blaster 16 as well as a few other third party makers but these cards are very hard to find and pricy making any sound option other then PC speaker on a MCA system not very practical. IBM did make a somewhat easier to find and cheaper M-ACPA/A sound card but this card IS NOT SB16 compatible and games tend to sound very “off” and incorrect.

The connector on the top of the riser is actually to the ESDI hard drive as it interfaces via the riser card.

IBM VGA PS/2 monitors of the time are generally of good quality though the one that came with my model 55sx was sadly dead.

ibmmon1

 ibmmon2

ibmmon3

So my overall thoughts on the model 55sx and indeed most of the MCA PS/2 line? Don’t bother with it. If you like to mess around with old PC’s with unusual components go ahead if you can find one cheap and under $25 or so but overall and especially as a game machine the 55sx and all IBM PS/2 MCA machines do not cut it. The modular design and revolutionary changes it brought to the PC world such as VGA and ps/2 ports for keyboards and mouse were great for PC in general but better implemented on generic machines. The proprietary components are a hassle, The Dallas real time clock is a hassle, the MCA slots are a hassle, the lack of accessible sound options is a hassle and the reference disks are a hassle. Your far better off with a generic system with ISA slots even if you lose the ps/2 ports. One thing to look for though is the model M keyboard that came with many ps/2’s as it is a very good quality and many times worth more then the PC so keep an eye out if you can get one of those with a deal.

This slideshow requires JavaScript.

One of the great things I love about retro computing and collecting is that it always seems like there is more to discover. Sure in the realm of video game consoles a rare Prototype will pop up time to time such as the SNES Playstation or some game that was almost translated into English but for the most part you need to be very lucky to come across something like that and by and large it feels like it has been talked about to death. Retro computing though seems to hold many more secrets that have yet to be revealed, rare expansion cards that had very low production runs or games that have fallen through the cracks of time and have been forgotten. Another great thing is that because retro computing is so much less popular than console collecting prices and availability are in general much better. It seems much more likely that you’ll stumble on a rare video card or memory expansion card from that 386 you grabbed off Craigslist for $5 then the odds of finding a Little Samson in that NES you probably overpaid for on Ebay. In this Odds & Ends I’m going to share with you two very unique finds that I acquired in the past few months of which very little information exists of and of which a lot of detective work and the help of some very knowledgeable people was necessary to even figure out exactly what I had.

OPTI LOCAL BUS

 So what is Opti Local Bus? Basically it is a proprietary form of the VESA or VLB bus found commonly on many 486 motherboards. Those really long brown slots that take the equally long cards.

early90

The VLB slot was designed to take advantage of the faster speeds of the 486 and 486 motherboards offering faster performance then the older 16 bit ISA slots. Before this became standardized into what we know as VLB or VESA slots many motherboard and chipset manufacturers attempted to implement their own version each with different and incompatible cards and slots. The most common of these proprietary slots was the Opti Local Bus slot introduced by Opti, manufacturer of the Opti chipset among other things.

Below is a motherboard with an Opti Local Bus slot, two actually. The board itself is actually of interest being a (possibly) early 486 Chaintech 433SCL. This is interesting because first the BIOS string indicates it’s a BIOS from July 7th 1991 placing it pretty early for a 486 and second because there is NO information on the internet about this particular motherboard, Nothing except the posts made on various forums from me as I tried to identify it. It actually took a lot of detective work by some very savvy vintage computer forum members as well as getting the board to post and looking at the BIOS string to get any information on this board. The Chaintech website archives confirms a Opti Local Bus motherboard was produced in ’92 but that’s all the information that could be dug up on this board from the internet.

opti1

The two slots at the bottom that I have circled are the Opti bus connectors in question. If you know a lot about this era of motherboards you may mistake them for EISA slots which is what I thought they were at first. One of the biggest issues with this slot type is that it looks exactly like the somewhat more common EISA slots of the time and will physically accept EISA cards without issue. The problem is installing a EISA card in a Opti bus slot and powering on the board could very well result in a blown out card, motherboard or both. This being the case make completely sure what kind of expansion slot your motherboard is sporting. Fortunately when I found this board in a box of random PC parts at a local monthly electronics fest I also found an accompanying Opti Local Bus video card.

opti2

You can tell what kind of card you have by comparing the pinouts with an EISA card and seeing if they match. Also many times a Opti card will have “Local Bus” printed somewhere on it though in this case, mine did not. By checking the FCC ID I was able to determine this card was also manufactured by Chaintech. The card is a 1MB video card based off the Tseng Labs ET4000 chip making it a pretty nice and speedy DOS card. Performance theoretically should be equal to the VLB version but as I never was able to get this motherboard to boot to an OS easily and never put the time into setting it up I was not able to benchmark. I should also note that in all my research I have only seen video cards using the Opti Local Bus connector and all of these were based off the Tseng ET4000 chip.

opti3

opti4

The Opti bus along with the other even less known proprietary local buses were pretty short lived and came and went before most people even noticed as it was replaced industry wide by the VLB slot standard. As seen on my motherboard the chipset does not have to be Opti based to support the Opti bus. My board for instance is based off of a SIS chipset. Some Leading Edge 486 motherboards and Orchid’s Superboard series also use the Opti local bus and I encourage anyone who comes across a “EISA” motherboard to double check before installing any cards.

Here’s another example of a Opti Local bus board I came across.

olb1x

You’ll notice this unidentified Opti motherboard at least had the decency to label the slot as a local bus slot. You’ll also notice this one looks pretty much like a VLB bus slot.

olb2x

And here is the card itself which as expected is based on the Tseng Labs ET4000 chip. It looks as the traces on the back part of the connector all lead to the VGA BIOS. Unfortunately I could not get this motherboard to POST.

DIAMOND SONIC PRO (ARIA CHIPSET)

 The second item I have to talk about is the extremely rare Diamond Sonic Pro sound card based upon rare Sierra Semiconductor Aria sound chipset. How rare is the Diamond Sonic Pro? well, like the Chaintech 433SCL motherboard above before I randomly stumbled across this card inside a 486 machine I bought off Craigslist and posted images in an attempt to identify it there were no known pictures of the card on the whole of the internet nor any information on this particular card except a brief mention of its existence in Wikipedia and a dead link to possibly its driver package on the archived Diamond website.

dspro1

This slideshow requires JavaScript.

The Aria sound chipset is a surprisingly well supported sound chip supported natively in a number of games from the 90’s including The 7th Guest, Elder Scrolls: Arena and Elder Scrolls: Daggerfall among others and is most commonly found on the also rare Prometheus sound cards that I’m told turn up on Ebay maybe one to three times a year. As far as I know though the Diamond Sonic Pro card has never been on Ebay or at least not that anyone has identified.

The Aria cards MUST be initialized via a software driver to function which for this card presented a problem as the original Diamond drivers are nowhere to be found on the internet except a dead archived link. This forced me to use the drivers for the already mentioned Prometheus line of Aria based cards which fortunately mostly seem to work, at least under MS DOS. When I say mostly its because some utilities seem to work and others do not but at the very least I was able to initialize the card and set the basic I/O address, IRQ and ect… I have no idea what any of the jumpers or switches do as the only information available on this card is pretty much what I’ve supplied here. Interestingly games like Daggerfall gave me issues when setting the I/O address as the only option I have when installing the drivers for I/0 address is 280 and 290 and in the Daggerfall sound setup the highest I/O address selectable is 260. Again this may be an issue with mismatched drivers. another issue with the mismatched drivers is the mixer doesn’t seem to work or it could be my card is actually damaged. In testing games I was only able to get mono sound and some games did not mix audio correctly. I will update this if I can find the correct drivers. Until then I made a short video with some audio samples and comparisons though the Aria mono quality is fairly bad and surly does not do the card justice. As far as I can see at the time of this writing its’ the only example on YouTube of the Aria chipset.

Other then some information on thiese fairly rare and uncommon PC components I hope I got the idea across that the world of retro PC collecting still has some mystery in it and a rare find can still be had by the average guy buying a $5 PC locally. It’s part of the reason I still love retro computer collecting and still discovering new things every day.

adventuretime2

Usually I’m not one for indie games and turn my nose up at anything without a physical copy but lately Ive relaxed my stance a little. This has led me to a 2000’s series of indie point and clicks known collectively as the Blackwell series which focus around the character Rosa who is a burgeoning medium and has to put the dead to peaceful rest along with the help of Joey, a ghost from the 1940’s that is somehow attached to her. As always in these articles SPOILER ALERT!

The first game in the series from 2006 is the Blackwell Legacy which mostly serves as an introduction to the series and its characters.

blkl1

The plot of Legacy is that your “crazy” aunt has recently died and you as her only real family is dealing with the death when you start to get crippling headaches. You soon learn that the “power” your aunt had of talking to ghosts has now transferred to you which included Joey the aforementioned ghost from the 40’s whom is attached to you. The goal is to then unravel a series of mysterious suicides involving three college girls

blkl5

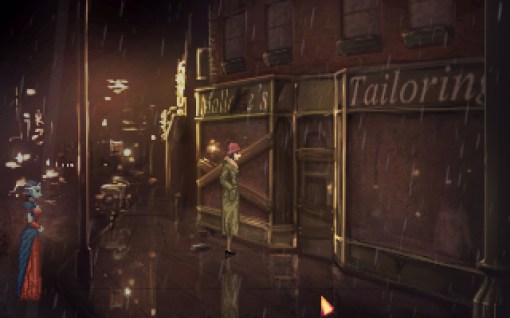
This game actually really excited me upon hearing about it and its collective series. The idea of the whole ghost thing and the artistic esthetic of the game really made me want to try it out. This is a point and click so there is no text parser and runs like many point and clicks from the late 90’s. The game starts out with you as a local news writer are investigating the suicides by going to the college dorm and questioning who you can find. everyone is voice acted and the acting for the most part is pretty well done for a indie title. Some sites have brought up the fact that the Indian character, your neighbor, sound very American and that’s true but it never bothered me. maybe shes just an Indian that grew up in the US and dresses in her ethnic clothing, its possible.

blkl2

The art style is nice but the thing that really bothered me was the character portraits as there is some color limitation. In the game in general you cant tell but you get a distinct “256 color” look with the portraits. The puzzles are pretty simple, were talking Hugo’s House of Horror simple, maybe even simpler as they mostly just require you to talk to everyone and run back and forth multiple times talking to NPC’s. Important names or ideas are placed in a notebook item and you can click on two separate notes to see if there’s a correlation. Its a neat idea but sometimes progression is simply checking all combinations. No puzzle in Legacy held me up for more then a few minutes. As far as items go there’s not very many in the game. Actually when I said the game was in introduction to the series I meant it. I went in for some reason expecting a full blown adventure game but Legacy can be completed in two hours or so much like the Hugo games.

blk6

In the end though I wanted the game to be longer because I was enjoying the experience. Thankfully they are a series of games and as I’m doing here you can think of them as one whole as they also be acquired together cheaply off a service such as Steam. As I quickly progressed though the game I found the girls were being harassed by a character they inadvertently summoned via Ouija board known as “The Deacon”. I was fully expecting some sort of showdown with the villain but in the end things take a different tone and its more about just helping him pass. After that the game just sort of ended and you get a scene on a bridge and then credits which as I said had me just kind of blankly staring at the screen as I felt the game had just started.

This slideshow requires JavaScript.

The second game, a prequel is Blackwell Unbound was released a year later in 2007 and follows your aunt in the early 1970’s.

blku1

Unbound is a better game. overall it was about the same length though maybe a little bit longer as in 2 1/2 to 3 hours long. Like the first game there doesn’t seem to be any way to die only get stuck if you cant figure out where to go or what to do next though like the first game puzzles aren’t hard, maybe a little trickier then the first game but I was never held up for more then a few minutes on any part of the game.

blku2

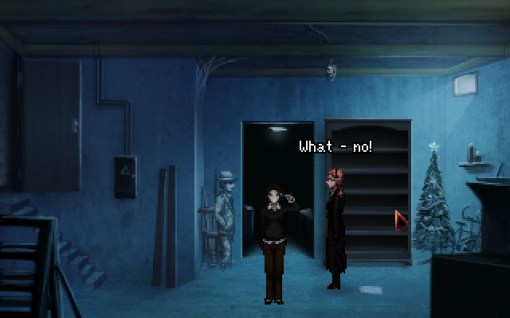
Unbound follows Lauren as a spiritual medium working “cases” to free lost spirits. Overall I think I liked Unbound’s Lauren a little more then Rosa. The game revolves around two “cases” your currently working on which can be done in either order as far as I can tell or at the same time. The first case involves a female ghost at  recent torn down buildings construction site and the second involves a ghostly jazz musician that plays nights at Roosevelt Island. Solving puzzles is the same fair for the most part as in going back and forth locations, talking and re-talking to people of interest and comparing clues in the notebook. There are a few inventory puzzles but they all make sense and aren’t to difficult. Instead of a computer to look up information now you have a phone book where you have to look up numbers of names you discover on clues such as paperwork or hints in photo’s which I found pretty fun.

There sort of a main protagonist this time with a crazy lady known as “The Countess” who you find out is also a medium who has lost her spirit guide. In the end there is a brief showdown but as far as I could tell you cant die even if you sit and let her straggle you.

blku5

Also of important note, this time around you can control Joey the ghost directly and doing this is important to progressing as Joey can see things at different angles, pass through solid walls and physically interact with other ghosts. There’s also no portraits in Unbound but to be honest I didn’t find myself longing for the sometimes color limited images. Overall I liked Unbound. I liked the overall tone and music better then Legacy as well as the plot. The puzzles while by 80’s and 90’s adventure game standards are incredibly easy they were still fun and at least seemingly required a little more thought and detective work then the first game….a little.

This slideshow requires JavaScript.

The third game in the series released in 2009 is Blackwell Convergence.

blkcon1

Right off the bat you can tell the production values of Convergence are above the previous two installments. The art is better looking, the sound and just the overall presentation is superior to the previous games. Despite the improved visuals the length and structure of the game is on par with Unbound. With the game taking about three hours total to complete, maybe slightly more of less depending.

blkcon3

This time your back to more modern times and again playing as the character Rosa Blackwell. You’ve grown to accept your role as a medium and are now regularly working cases with your ghost familiar Joey, whom as in the previous game you can change to and directly control. The story arch from Unbound clearly relates to Convergence as you soon work to unravel a string of mysterious deaths all involving choking or attacks on the neck and as you uncover more clues the deaths seem to lead back a local investment fund company. The plot is still advanced mainly by going back and forth and talking to various people with a simple inventory puzzle thrown in here and there. The idea of story is far more important to the Blackwell series then solving puzzles. Your computer is back as a means to find information complete with email (or Bmail as its called here) and a internet search engine which you need to use several times to find things like information and addresses. Its a pretty neat thing and more interactive then simply clicking on the computer and searching prewritten things from your notepad. There are even a few puzzles that require you to “hack” into others Bmail accounts.

blkcon4

As the plot moves forward you eventually uncover that the protagonist from the previous game, “the Countess” is behind the killings and is now in unstoppable ghost form. Like the first game its uncovered that she is linked to a certain individual and whomever he writes about the ghost must kill, though this time the murders are intentional this time. There’s also a rather metaphorical theme going on with all humans being linked together and the past shifting of the Countesses links.

This slideshow requires JavaScript.

Blackwell Convergence is another easy short and sweet point and click experience in the series but admittedly sweeter then the previous games. I did have a few issues with the improved graphics in consistency as in there were some parts that seemed overly pixelated and at other times it looked like Vaseline was smeared on my screen. On that note though Character portraits are back from the first game and they look good with no color limitations present. So far this was my favorite game and it seems the series keeps progressing and improving itself so I was really looking forward to the fourth installment.


This slideshow requires JavaScript.

The forth game in the series Blackwell Deception was released in 2011

blkdec1

The style of Deception is very similar to the previous game except somehow the character sprites come off worse in my opinion then in the last game. I thought it may have to do with my settings but my resolution and settings were set exactly as they were in Convergence. Rosa’s sprite is especially bad compared to the previous game in my opinion. The backgrounds and environments are as good if not better though.Length wise the game felt to be overall a little longer then the previous games coming in at maybe four or five hours but this may be because of the increased emphasis on puzzles which I’ll talk about shortly.

One thing I like about the Blackwell series is that as its timeline moves forward so does Rosa’s means of clue gathering. Its a small detail but I like it. for example Unbound which took place in the 1970’s had you using the phone book as a means to find things like addresses. In Legacy and Convergence you had to also return to you apartment in order to use the internet on your desktop to look up information. In Deception the process is made far more convenient as you now possess a smart phone which acts as your internet link and notepad.

blkdec3

And speaking of notes the process of looking at and linking clues in your notebook to form new clues is back.

Deception takes place seemingly not to long after convergence. Your still a medium working to free lost souls from their earthly shackles. After a sort of introductory mission involving a ghost on a yacht your pulled into a larger conspiracy involving the death of a reporter friend and subsequently the deaths of several linked people he was investigating.

blkdec5

One thing I liked about Deception is its increased focus on puzzles. Like the other Blackwell games there are no scenarios that result in death and thankfully as far as I can see no “dead man walking” scenarios where you get yourself in an unwinnable situation but the puzzles in Deception are more numerous and a bit harder then the ones found in previous games, at least I found this to be the case. There were actually a few moments in Deception that I really had to think and it took me a little bit of time to solve as opposed. Don’t get me wrong, these aren’t mid 90’s puzzles that are either illogical or hair pulling difficult but they add a nice low level challenge that I felt was lacking in the other games.

blkdec7

As the game unfolds I learned of the mysterious deaths of two young women. On further investigation it is uncovered that they were victims of a man named Gavin and that a strange secretive cult exists that knows much about the spirit world. Gavin acts as the main protagonist in Deception much like the Countess did in the previous installment. In the end its not really made clear what he is but its stated that hes over 200 years old and he has prolonged his life by “feeding” off peoples positive energies. The end of the game results in a battle against Gavin as he attempts to manipulate and drain Rosa of her energies.

blkdec12

In the end I think Deception is a solid game. slowly uncovering the large conspiracy gave a sense of greater purpose that I found very motivating in moving the plot along. Again Deception builds on the previous games and comes out ahead of what preceded it.

This slideshow requires JavaScript.

The fifth and final game in the series is The Blackwell Epiphany released in 2014

blkep1

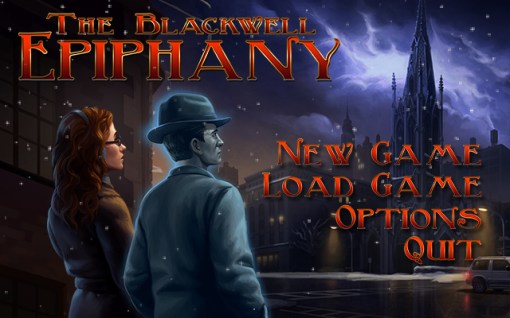
Epiphany is in my opinion the jewel in the Blackwell series crown. This game truly felt to me like a full retail release and could of easily been a retail release from the late or mid 90’s. The graphics are great and the story ties things up rather nicely making this my favorite of the series. One thing to note though the game does not act as a continuation of the events of the previous game, Deception. At the end of that game your given the impression your going to hunt down and expose the “vampires” like Gavin whom you faced previously. Epiphany drops that plot though the events are refrenced many times in the game.

blkep7

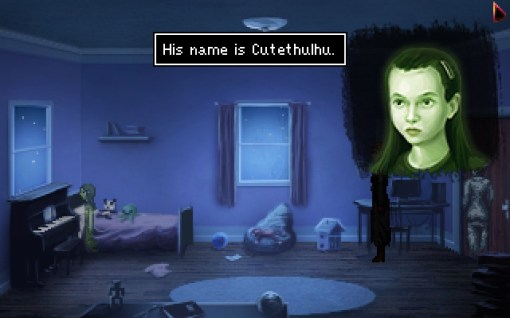
The game starts off as the others with solving cases involving spirits except this time your working off the books with the detective from the previous game. All is going as usual when a man is shot in front of you and then he soul is seen being torn apart. Epiphany is noticeably darker in theme from the previous four games exploring topics such as suicide, child death, drug use, domestic abuse and prostitution. The game also ties a lot of loose ends giving us more background on Joey via flashback segments to the 1920’s.

blkep3

The game controls very much as the previous game did and I really enjoyed the puzzles as well as the mystery of the story and attempting to uncover why these souls were being wiped from existence and how they were related. Again your phone plays a dominate roll in searching for information on the net as well as serving as a notepad. Epiphany also felt a little longer then the previous games. Not by to much but perhaps lasted me a good five to five and a half hours and features many locations from a church to a police station and various homes to a mental ward at the end.

blkep8

As the game progressed I learned of the “Grace Group” a self help group whose former members were all dying and being torn apart in the spirit world. This group was led by a mysterious Benjiro whom nobody can seem to remember. Further investigation led me to a priest who was once a member of the group and who was bonded with Madeline a very old spirit whom formally guided the “Countess” whom was the protagonist in Convergence and Unbound.

After A time its uncovered that Madeline is actually behind the deaths and has gone mad after serving unappreciated and unrewarded as a spirit guide for generations as well as being abandoned to the void for over fifty years by her previous host.After possessing Rosa and then being forced out I ended up in a mental institution seemingly facing the same fate as my aunt and grandmother as the universe fills my head.

blkep14

At this point I discovered the spirit of the elusive Benjiro whom apparently was another spirit vampire experimenting with none fatal ways to feed and thus the grace group was formed. Also I learned that a tear was forming between worlds cause by Madeline who was attempting to find peace by destroying herself but taking the entire City of New York with her.

After an escape from the hospital and a final confrontation with Madeline ending in victory I as was pretty surprised when the main character Rosa dies and as a last act uses her new found and fleeting powers to return Joey to flesh. The the game ends on the bridge with a now mortal Joey dumping Rosa’s ashes into the river mimicking the beginning of the first game.

blkep19Why does he remind me of a down on his luck Leisure Suit Larry here?

As I already stated I really liked Epiphany. The puzzles and scenery were good and it had a great story to go along with it. I enjoyed figuring out the puzzles to unravel more of the plot. Though the game did suffer from the same weakness of the others which was the constant back and forth between locations and talking over and over again to characters. I also enjoyed the darker more adult themes of the finally as well as the grander consequences of failure.

This slideshow requires JavaScript.

Blackwell Series overall

With the exception of the last game the games overall don’t really feel like full fledged games mostly due to length but if played as a whole the Blackwell Series becomes a 15 plus hour game featuring a unique plot and ideas and a overall excellent adventure game experience. The first games are a little rough in terms of polish but its kind of fun to play through and see how they evolve. There was never any way to die, run out of time or end up in “dead man walking” situations which does make the game feel a little easy compared to more hard core offerings of the early 90’s and 1980’s (though I can ALWAYS do without dead man walking situation) but I did appreciate the fact that all of the puzzles made logical sence and I did not have to seek help once while playing the entire series though I will admit two or three puzzles did have me stumped for a good five to ten minutes. and another one of two I had to sleep on before I came up with an answer to progress. The entire series id currently (2015) available via Steam.

For awhile now I’ve considered getting into and doing more video content. Rest assured I will not be going over to an all video format. I have many reasons for this but lets just say I prefer writing and I’m very happy with how this blog has turned out and evolved. That said YouTube video’s seem to be all the rage with the kiddies and I do agree some things are just better conveyed via a video. To that end I will be attempting to include more “Supplemental Video” content to my posts. These will largely be quick and fast unscripted video reviews of whatever machine I covered in the article and probably won’t nearly be as in depth as my written article. I may do some game reviews in video only format but that has yet to be seen. Currently I’m going to be going back and adding these videos to my older posts and hopefully the videos will encourage people to visit the blog and read some of the content as I’m not going to be producing a video for every article but only those I deem worth the effort and that could meaningfully add something.

What do you guys think of this? good idea or a waste of time?

To give you guys an example I’ve made one of these videos for one of my earliest articles “Anatomy of a Pentium based DOS PC ” so this would be an example of what to expect. please keep in mind I threw this together in one go and spent less then $100 on its production. Professional YouTubers have quite a bit of experience with video’s and in some instances spend thousands of dollars on equipment. Good quality HD cameras can run an excess of $800, mine was $50. I had a bit of fun making it even if the production value was lacking but if the idea sticks expect the videos to improve in quality.

colt1

Commodore is best known for thier unique series of home computers such as the VIC-20, Amiga, PET and best selling Commodore 64 but like all PC manufactures in the the earlier years Commodore had its tentacles in the world of PC clones as well. One such PC clone (or more specifically turbo XT clone) from Commodore was the Commodore Colt which is a rebranded Commodore PC10-III. Maybe a group of executives figured a cool name slapped onto a new case would move more units then the boring and business sounding  PC10-III. From what I can find the PC10-III was launched in 1987 and used the exact same motherboard as the Colt and only the case and name were different. The PC20-III also used the exact same motherboard and was merely a PC10-III with a factory installed 20MB hard drive. From the rest of this article on when I refer to the Colt the same things apply to the PC10 and PC20 III’s. Despite being a PC clone machine the Colt has a number of unique quirks and features giving the machine a personality of its own.

colt2

I found my machine as far as I could tell completely factory stock and in great physical and working condition. The front of the PC has a Commodore logo and badge as well as activity lights for a hard drive and power. There is no power button on this machine or reset button so powering on and off is done via a switch on the back which admittedly is a bit of an inconvenience. There are two half height 5.25 drive bays. The Colt came stock with either one or duel 360K drives like mine does. both of my drives thankfully worked perfect.

colt3

The keyboard port is not located on the rear of the machine but on the right side of the case. The mouse port on the Colt is for a 9 pin D-sub bus mouse port and is compatible with the 1352 mouse which happens to be the same mouse used with the Amiga. This appears to the system as a bus mouse and standard MOUSE.COM drivers in DOS should work just fine. Next is the built in Video which uses a composite out jack for a composite monitor and a 9 pin video port for CGA via the onboard Paradise PVC4 chip. There are a few DIP switches next to the video port to set the video along with an extremely handy chart on what the settings are which was good thinking on Commodores part. Next is a 25 pin serial port and finally a printer port. There are a measly four expansion card ports but even worse the motherboard itself only has three ISA slots which we will see in a minute. Powering all this is a proprietary form factor 75 watt power supply.

Here is a quick look at the green screen monochrome monitor that came with my Colt. The picture quality was very good and this monitor was very light.

coltm1

coltm2

The Colt case is fairly easy to remove after a few screws are removed.

colt4

Now that the case is off we can see there is room for an internal drive which is slightly uncommon for an XT class machine as usually the case expects you to be mounting a half height MFM drive in one of the 5.25 inch bays though will get our explanation for this as we open up the case more.  Another thing we can notice is the lack of expansion ports. The Colt sports only three 8-bit ISA slots which is about the smallest I’ve seen for a machine of this form factor. This deficiency is somewhat made up for though with the multitude of good quality built in features like the quality CGA video and built in floppy controller.

colt5

Here is the exposed motherboard. You can see the keyboard port on the bottom of the image. The board itself is overall pretty well made and compact.

1) CPU – The Colt uses an 8088-1 CPU capable of 10mhz speeds. The really cool thing about the Colt is that its Faraday FE2010 chipset allows the CPU speed to be adjustable via a SPEED.EXE utility via DOS or through keyboard commands. The default is the standard 4.77mhz but the speed is adjustable to 7.16mhz and 9.54mhz

  • CTRL+ALT+S switches the CPU to the “Standard” 4.77MHz speed
  • CTRL+ALT+T switches the CPU to the “Turbo” 7.16MHz speed
  • CTRL+ALT+D switches the CPU to the “Double” 9.54MHz speed

This is a really nice feature that helps give a boost to programs that need it and giving the best compatibility. Most machines I’ve encountered have only offer two speed settings, usually 4.77mhz and 7.16mhz. The Colt like almost all 8088 machines can be upgraded via an NEC V20 CPU giving a significant speed boost at the slight cost of game and program compatibility.

colt6

2) NPU – This is the math co-processor slot if one should choose to add an 8087. This obviously gives a boost to programs which use the extra math power of the processor though almost no games of the era use this feature. If adding a math co-pro be sure its the 8087-1 variety that is capable of 10mhz else you may encounter instability if running the machine at 9.54mhz “double” speed.

3) RAM – The Colt comes with a full 640k of memory on-board which is the full amount a XT PC can address and more then enough for the CGA era. More RAM can be added via expansion cards but like the math co-pro nothing this early takes advantage of the extra memory and it’s really a waste of the few ISA slots this machine does have.

4) PSU – This is the proprietary power connector for the power supply which can present a problem if your Colt’s power supply is dead or dies. A standard AT power supply, provided it fits could possibly be modified to work.

5) Video – The onboard video features the Paradise PVC4 which functions pretty much just like an ATI small wonder CGA card. The layout is actually the same as on the small wonder cards and  it could be that Paradise produced the actual chips for the small wonder cards but I haven’t been able to confirm this. The onboard video offers the same modes as the small wonder cards by outputting CGA composite via the RCA jack as well as MDA, CGA Color text and graphics, Hercules monochrome, Plantronics Colorplus and Alpha132 Monochrome via the 9 pin video port. This is one of the few times I didn’t upgrade the video in a PC since the go to card for me on an 8088 would be a ATI small wonder CGA card but in this case it wouldn’t offer any benefit over the onboard video and would eat one of the precious three ISA slots.

colt7

6) XTA interface for hard drive – Now this is a very interesting feature of the Colt and probably why we see a small internal bay for a 3.5 inch hard drive. At first glance the connector next to the floppy drive interface may look like a more modern IDE connector but it’s actually an 8-bit variant known as XT or XTA IDE. The connector looks the same as IDE and should fit the same cables but unlike the 16-bit variety we are used to seeing this short lived 8-bit IDE standard will only work with a very small number of drives. There may only be about twelve or so models built to work with this standard and they are all old, unreliable, small in size (20mb or under), hard to source and probably massively overpriced. As neat as it is having built in IDE on a 8088 machine, due to the factors I’ve already stated it’s best to disable the onboard  interface via jumper JMP208 and seek out a controller card instead.

colt8

7) Floppy drive interface – This is the built in drive interface. The floppy controller on the Colt cannot be disabled to allow for a separate card to be used and this controller does operate differently then a standard controller. It supports 360k drives which is usually what the Colt came stock with but it also supports 720k drives. Adding a 720k drive can be a difficult task and the process is a little more involved then in other XT clone machines. If you’d like to learn about this scroll down to my upgrade section where I will be covering this.

8) Speaker – unfortunately the Colt does not feature an actual cone PC speaker but instead a piezo beeper speaker

I want to go over a few upgrades I did with my machine that I think make it a better all around PC to work with giving me more flexibility and an overall improved experience.

The operating system I have installed on my machine is MS DOS 3.2 which is the original OS distributed with the Colt.

UPGRADES

CPU – The first question I had with the Colt was whether I wanted to replace the 8088 CPU with a NEC V20. As I’ve said in just about every 8088 review I’ve done the NEC V20 upgrade is generally recommended and offers a speed increase (up to 15%) at only the cost of slight compatibility with a few very speed sensitive games and programs. For my Colt though I decided to stick with the 8088-1 for full compatibility speed wise with the CGA games I plan on playing on this machine. I also installed a Intel 8087-1 math co-pro though it will likely see little usage.

Hard Drive – for the hard drive I used the Silicon Valley APD50L  8-bit hard disk controller that I previously had installed in my Epson Equity E1 PC. This card should give slightly better performance than a IDE-XT card. I ended up pairing it with a industrial grade 32MB CF card. I generally do not use CF cards with most of my systems but I felt it really benefited here with its speed and much lower power draw. My Colt fortunately came with its original working floppy disks so I was able to install MS DOS 3.2 with the Commodore SPEED utility. 32mb is also the max size partition limit for DOS 3.2 which I think is far more then enough space seeing as I will be using this machine with early 80’s games and most programs of the time  are very small.

colt9

Sound – Since sound cards didn’t become a thing until the late 80’s a sound card in an early 8088 based XT machine is far from necessary. Pretty much everything you can run is going to be PC speaker only. Seeing as this was going to be my new all around XT PC though I wanted the option in case I wanted to play something like a demo or something like Prince of Persia in CGA mode. To that end I installed a Sound Blaster 1.5. The 1.5 is an 8-bit Sound Blaster card which is identical to the SB 1.0 except that the Creative Music System compatibility was dropped. Thankfully this can be restored giving high CMS compatibility by adding two cheap Phillips SAA-1099s into the two empty sockets. This is much easier to achieve then with the later SB 2.0 which also requires a hard to find GAL chip. I like the sound blaster because it gives me Adlib, CMS and SB support if I so choose.

colt10

Adding a 720k floppy drive

colt12

now I’m going to make this a section of its own since as I stated earlier the process is a little more involved on a Colt then a regular XT clone. Although the onboard controller does indeed support 720k drives how it goes about this is different. First off I wanted to keep my drive A: as a 5.25 drive since this is the primary format of the era and most of the PC booter games I have are this format of which many require the booting drive to be A:\. Before I go any further I also want to thank the good people over at the Vintage Computer Forums and especially Scali and SkydivingGirl for helping the retro community figure this process out as it was not well documented at the time.

You may notice that the floppy drive cable that came with your machine lacks a twist found in most other floppy cables to help the machine differentiate drive A from B. The Colt instead uses jumpers on the floppy drives themselves to make this distinction (DS0 for A: and DS1 for B:). Note that using a standard cable with a twist will NOT solve this issue as the motor on signal to the floppy is also done differently at best only one drive will work.

colt13Original cable with two 5.25 floppy edge connector

First off I have only done this with the original Chinon FZ-502 5.25 drive as drive A: so I’m not sure how it would perform with a 3.5 drive not being B:. make sure your 5.25 drive is jumpered as DS0 and leave everything else as default.

Next your going to need a 5.25 to 3.5 inch bay converter so your 720k drive will fit in the 5.25 inch bay. For simplicity I also acquired a 34 pin to edge connector converter like the one below so I wouldn’t need to mess around with a different cable. I acquired mine at http://www.bgmicro.com/

colt15

 Lastly your going to need a 720k drive with jumpers. I went with a Chinon FZ-357 drive but I can confirm a Chinon FZ-354 also works in 720k mode as well as a Gotek SFRM72-FU-DL 720K floppy emulator. The jumpers on drive B: need to set very specifically for it to work. Make sure you close the DS1, MD, DC, and TTL/C-MOS jumpers as below.

colt14

If done correctly you should now have a fully working 720k floppy drive in your Colt or PC10/20-III PC.


Adding an XTA hard drive

As stated earlier, if you want to use the onboard XTA hard drive interface your going to be very limited on what drives you can use. Possibly the best choice is the Seagate ST-351A/X drive.

colthdd1

First off remember to set the onboard jumper JMP208 to enable the onboard interface. make sure its jumpered to the pins that are in line with the other jumpers beside it. If you have an early BIOS revision of 4.35 like mine your going to be limited to 20mb of space at most.  With the ST-351A/X  you must set the drive to XT mode. My drive is jumpered in the following way.

colthdd2

After the drive is jumpered and attached correctly you should not get a “hard drive not found” message on the boot BIOS screen anymore. There’s a few more steps though from this point.

Boot the PC from a floppy disk and when you get to the A:\ prompt run DEBUG.EXE.  which will take you to a “” at the prompt type G=FA00:5 and press enter. hit enter for the next few questions that come up. When asked about dynamically configuring choose N and lastly hit Y to begin low level formatting.

If everything is set up OK and the drive is in working order the program should low level format your drive. After a reboot you need to run the FDISK program to set a partition. after setting a partition use the FORMAT command. type FORMAT C: /V/S which should be the final step to allow you to boot from and use your hard drive.

colthdd3

colt16

Overall the Colt is a nice looking, reliable and compact XT clone. Its hampered by its lack of expansion slots but this issue is mitigated somewhat by the quality onboard options. The three CPU speeds are probably one of the neatest features I’ve seen in any XT class machine and I love the flexibility it affords me. The hassle with adding 720k floppies does detract from the usefulness of the Colt plus the virtual uselessness of the built in XTA hard drive interface makes the option pointless for the most part. They are neat machines and with a little effort can be made into very competent 8088 XT PC’s but in honesty unless your a die hard Commodore fan like myself, crave the coolness factor or stumble across a working one for super cheap its probably not worth the hassle. A generic XT PC can be had easier without the odd floppy issues and with far more expansion card possibilities.

This slideshow requires JavaScript.

I’ve personally never been a huge fan of portable systems. It was never that I hated the games or felt many of the systems were bad per say I just always preferred to do all my gaming in the comfort of home on a big screen. I always realized the utility and need for gaming on the go it just simply wasn’t for me and if I was on the go that generally meant I was doing something that required my attention. Even in car rides I usually was quite content to look out the window and watch the world zip by rather then bury my face in a mobile game. I remember even on family trips I would take my entire NES to hook up in the hotel room rather then bring a trusty Game Boy. That’s not to say I disliked the Game Boy and ironically I played it very often and have fond memories of many games, the thing is I was usually doing that gaming at home. Then one day came the Super Game Boy. I remember seeing it first at Walmart and I was smitten. All my Game Boy games on the big screen TV? and in color?!?! I had to have it.

sgb4

What the Super Game Boy did basicly is use the Super Nintendo as a pass though A/V device. Inside the cart is basically a fully functioning Game Boy like you would find in the actual handheld stuffed into a SNES cart so as to interface with the console. Use is extremely simple. You put you Game Boy game in the top slot and then insert the SGB into the SNES, turn the power on your SNES just like it was any other game and voila you would get a splash screen and then your Game Boy game would start.

sgb1

Since the SNES only acted (in most cases) as a pass through to feed the video and audio to a TV as well as take care of the additional coloring and as an input device for the controller, compatibility was as far as I can find is 100%. The Super Game Boy allowed you to play your game boy games in black and white or with most games, choose from predefined color palettes. This was accessed by hitting L and R at the same time on the SNES controller which gave you access to a menu. In this menu you could also change the borders to your screen from a selection of nine as well as a tenth border that acted sort of like MS Paint where you could doodle your own border.

sgb1moz

The available borders were the Game Boy border, black, windows with clouds, one that looks like those bulletin boards you stick pins into, a meadow with tree, theater, sleeping cats, a table with pencils to the side and an M. C. Escher looking border. I played a lot of RPG’s on my SGB so I liked the Meadow cause it was sort of foresty and forests make me think of RPG adventures….

The Super Game Boy only works with original monochrome Game Boy games and black cart Game Boy Color games that have a monochrome compatibility mode for the Super Game Boy. Some games took advantage of the extra hardware in the Super Nintendo and had extra effects and sound. Wikipedia lists Contra: The Alien Wars, Donkey Kong, Kirby’s Dream Land 2, A Bug’s Life, Animaniacs and Toy Story as games that took advantage of the SNES. Some other games such as Killer Instinct also allowed the second  SNES controller to be used to allow for two player mode. Some Game Boy games also had special Super Game Boy features such as improved custom color palettes and custom borders such as Mighty Morphin Power Rangers.

sgb2

One major issue that’s seldom discussed with the Super Game Boy is the timing issue. Games played via the Super Game Boy play at 2.4% faster due to the clock in the Super Nintendo. This can be corrected with a mod. I never really noticed the timing issue growing up but it does result in higher pitched sound as shown in this video.

In 2003 the Game Boy Player came out for the Game Cube which played Game Boy, Game Boy Color and Game Boy Advanced games at 480P with the correct cable. Its an awesome little device but I’ll list a few reasons that you may want to hold onto your old Super Game Boy for original Game Boy games

  1. Super Game Boys are way cheaper/simpler if you already have a Super Nintendo. Even at retail game stores I see them for $13 – $15 while the Game boy Player goes easily for $50. The Super Game Boy also does not require a disc unlike the Game Boy Player which on most occasions is missing when found “in the wild”.
  2. Compatibility with SGB enhanced games. This includes games with custom borders and custom effects that relied on the Super Nintendo hardware. When played on the Game Boy Player these games fall back to regular Game Boy mode.
  3. Color Palettes, The Super Game Boy has a selection of 32 color palettes plus the option to make your own where as the Game Boy Player only offers 12 built in color palettes for original Game Boy games.
  4. Getting the best A/V signal is actually easier on the Super Game Boy when paired with a Super Nintendo. both the original Super Nintendo and Game Cube output S-video but if you want the best video quality the original Super Nintendo outputs RGB natively but only the PAL region Game Cubes output RGB. Early NTSC Game Cubes in the US do have a digital output port that allows for component at 480P but Game Cube component cables are crazy rare and expensive and easily go for over $150 where as an RGB capable PVM monitor can be had for $75 – $100 and you can use that with all your retro consoles.


Unknown to many outside of Japan a second version of the Super Game Boy was actually produced that corrected a few issues with the original. This was the Super Game Boy 2 and it was released only in Japan.

sgb6

I picked my SGB2 off Ebay for about $25 but the price fluctuates. As you can see it’s more in the style of a Japanese Super Famicom cart and is in a translucent teal case which personally I don’t care for. It will function just fine in a US Super Nintendo and with US Game Boy carts but you’ll have to remove the tabs to allow the cart to insert just like you would to allow for any Super Famicom cart. The compatibility is just like the original Super Game Boy though there is a common misconception that the Super Game Boy 2 allows for the use of Game Boy Color games. Let me stress to save some of you money and effort. The Super Game Boy 2  DOES NOT work with Game Boy Color games!

sgb3

So now I’ll point out some of the added features and fixes introduced with the SGB2.

  • Timing bug with slightly increased speed has been corrected in the SGB2. This alone makes it the superior player despite its rather unappealing shell.
  • LED power light added. Its not a big deal but I guess it is nice to know its receiving power.
  • Link cable port added to side of cart to allow two player and Pokemon trading

sgb8

There are also games such as Tetris DX that have a special border only when played on the SGB2.

The Super Game Boy 2 has a different set of nine choose-able borders. Supposedly there is a code to unlock the original nine but I could not find it (Edit: thankfully someone in the comment section left a comment with the code to unlock the original boarders ” L L L L R while you have the black background set”).

sgb2moz

The Super Game Boy 2 borders are a Game Boy border, black, circuit board, tropical island, Aztecish looking art, gears, a swamp, under water dolphins, a coliseum. I prefer the original border selection but that’s probably nostalgia talking.

So that’s the two Super Game Boys and although I prefer the look of the original I would definitely recommend the Super Game Boy 2 since it offers some extra features as well as the timing bug fix.

sgb9

Before wrapping things up though I wanted to talk about a nice custom controller that is really highly recommended if you use either Super Game Boys a lot and that’s the Hori Super Game boy commander controller.

sgb10

sgb11

The Super Game Boy Commander was exclusive to Japan but of course works just fine on an American Super Nintendo. Its styling is very similar to the original Game Boy which is pretty neat. The SGB commander has some very interesting features. In the center is a switch that you use to go between SFC (Super Famicom / Super Nintendo) mode where the buttons operate as they would on a regular Super Nintendo controller as labeled. In SGB (Super Game Boy) mode though the L, R , X,and Y buttons take on new functions. On a regular Super Nintendo controller you would need to press the L and R shoulder buttons at the same time to access the menu but in SGB mode you only need to hit the R button also labeled Menu. The color button shifts through the different palettes while the Speed button acts as a de-turbo button slowing the game down. There are three speeds with the first button press slowing the game down and the second adding a little speed while a third press returns the game to normal speed. Some games may have issues with the speed button. Finally the last button is a mute button to well, mute and unmute the audio. Overall its a really nice controller that mimics the look and feel of an original Game Boy while adding some features.

If you have a Super Nintendo by all means pick up a Super Game Boy since they are so cheap and available. I think it may be the very best way to play and enjoy original Game Boy games. If your very serious about the Game Boy shoot for a Super Game Boy 2 and of course the very handy Hori Super Game Commander.

When I first saw this machine my first thought was that it was a later Tandy 1000 PC but on closer inspection I discovered it was an IBM PC clone machine. It seems every company made IBM clones back in the day and I shouldn’t of been surprised Tandy did either but I had never seen a straight clone from them, besides the later Sensation! machines which I think all used the Pentium and had some kind of backwards compatibility with Tandy sound. The price was right so I present the Tandy 425 SX.

t425sx1

The closest PC I have that I can directly compare the 425 SX to would be my Packard Bell Legend 115. I say that because they roughly use the same small desktop form factor and feature somewhat similar motherboards and the same base Intel 486 SX CPU. The 425 SX is a little wider but the expandability you get is worth the extra size. The machine I have here is bare stock and as far as I could tell was not upgraded in any way from the factory configuration. It almost seemed like NOS. There’s a power button on the far right and a reset button on the far left along with a key lock for locking the case shut I think which was kind of a thing back in the day. There is two 5 1/4 bays and two 3 1/2 bays one being fully internal and meant for a hard drive. Mine came with a 170MB IDE hard drive installed as well as the stock 1.44mb floppy in mine that had “1.44” printed on the eject button which I think is kinda cool. I like the two 5 1/4 bays because this gives you the option of a CD-ROM drive and something like a 5 1/4 floppy drive or a HDD caddy unlike my PB Legend 115 which only has one 5 1/4 bay which goes to the CD drive.

t425sx2

Here we have the back of the unit. The PSU that came with this machine has the monitor pass through which is always convenient. As you can tell right away from the expansion slot placement this machine uses a riser card but It has ISA slots on both sides of the card allowing for five cards which is really nice though the two on the left have to be short in length and you need to pull the power supply to get them in but at least you have the option. As far as ports from left to right we have Keyboard and mouse PS/2 ports, two serial ports a printer port and the VGA port for the built in video.

One thing to note about the VGA port is that it uses an older pin configuration and so one of the pin holes is blocked. This was an issue for me with my flat screen Gateway CRT monitor I use as it had this pin on the connector. One option is buying a VGA extension cable and snapping off the pin on the PC connection side or you can do what I did and drill out the hole so newer monitors will connect. this won’t hurt anything.

t425sx3

Opening this PC is very easy and just involved the two screws on the back and lifting the top away. So here we have a look at the internals. jumper sheet here.

t425sx4

1) CPU – The CPU for the 425 SX is, surprise, an Intel 25mhz 486SX. The SX designates that this CPU has either no math copro built in or has the math copro disabled. The CPU on this PC’s motherboard is soldered onto the board so it can’t be removed but luckily the machine had an extra socket to allow for upgrades. The 25mhz 486 SX is a lower end CPU and although does the job fine for older games it’s really suboptimal for later DOS stuff and an upgrade is highly recommended.

t425sx5

2) CPU upgrade slot – This is the CPU upgrade socket. This is a cheaper LIF socket so insertion and especially removal of the CPU is a little more difficult then a ZIF socket with a handle. This is where you would install either a 487 math coprocessor or the better option, a DX CPU. There are jumper setting to set the FSB to 25mhz and 33mhz so upgrading to a 66mhz DX2 or even an AMD 133mhz 5×86 should work fine. Once a CPU is inserted in the socket and the jumpers set the soldered on 25mhz 486 becomes disabled.

3) RAM – The RAM on this PC is a little strange. There are eight slots for 30 pin RAM as well as one 70 pin RAM slot but this machine seems very picky about what RAM it will accept. I couldn’t make it post with any of the 30 pin RAM I had and only one 8mb 70 pin RAM SIMM as well as the 4mb SIMM that it came with would allow it to post without error. All the other 70 pin RAM I installed allowed the machine to POST and was detected but they tripped a parity error. This board will supposedly support up to 40MB of RAM by using all available slots ( 1 x 8mb 70 pin and 8 x 4mb 30 pin ) but I suspect the right kind of 32MB 70 pin SIMM will also work, but as I said the 32MB stick I tried tripped errors on POST.

4) L2 cache – these are the sockets for adding L2 cache ram. This model did not come with any L2 cache installed which isn’t surprising as it was pretty pricy back when this machine came out. The 425 SX supports 64, 128 or 256kb of L2 cache. even though this isn’t as much as the Legend 115 which supports 512kb of L2 (but NOT 256kb) the chips needed for 512kb on that machine are very hard to come by and after 256kb you start getting diminishing results anyways. The downside is the number of chips and the size of the tag RAM chip needed is not the same as the rest. All cache configurations need either a 8k x 8 or for 256kb a 32k x 8 11 pin TAG RAM module which seem to be a little uncommon. All configurations also require an extra ninth 64k x 1 14 pin module. I don’t know why this ninth module is required, possibly for parity checking. It’s a little bit of a hassle considering that in many other boards all the cache modules you need are the same physical size or like the PB 115 where you just installed five modules of the same size for 128kb.

5) Video – On board Video uses a Western Digital WD90c31A-LR chip with 512MB of video RAM. This is a decent chip and unlike the Headland chip in the PB 115 does not suffer any timing errors. I believe this chip is running on the ISA bus rather then a local bus. The chip can be expanded to a full 1MB of video ram by means of sockets next to the chip. The RAM should be easy to find especially if you harvest it from an old  generic or Trident VGA ISA cards.

t425sx6

6) Riser card supporting five ISA expansion cards (three full length).

7) One on board floppy connector and one on board IDE connector.

8) AT power connector.

9) external CMOS battery.

10) PC piezo beeper speaker for PC speaker sounds.

I like the Tandy 425 SX. Its a small machine but not to small so you have room for expandability. The only downside is the picky RAM on this motherboard as well as the need for extra L2 cache chips. I originally had plans for the PB Legend 115 for a special project setup but due to the ability to cache 256kb as well as the added expandability I think I may use this PC instead.

This slideshow requires JavaScript.

In my last article I covered the Pentium Compaq Prolinea 5120e. This time will be taking a look at the other computer I picked up alongside that one, the ICL Ergolite DT486/66. I had never heard of ICL when I picked up this PC. ICL  from what I can tell was a rather large British computer hardware, software and service company that operated until 2002 before being bought out and absorbed into the Fujitsu company. From those I’ve talked to the DT486/66 seems to of been found mostly in office settings in its day and used primarily in business settings rather then the home market.

icl661

You can see right away that the case isn’t a standard design and it somewhat resembles in form and function a 90’s Macintosh machine. It’s quickly evident that the case design does not leave much room for expansion, this problem is actually worse once we look inside. We have two bays, one 3 1/2 inch and the other a 5 1/4. I received this machine with a 3.5 inch 1.44MB floppy drive installed. Below the large round power button we have lights for power and hard drive along with another unlabeled led which I have yet to identify. Possibly for a turbo button enabled by a key combination.

icl662

On the rear of the PC we have the power plug on the far left as well as a pass though plug for a monitor. I really like the port label with the various ports and what they are, especially the little mouse for the mouse ps/2 port. So we have two ps/2 ports for keyboard and mouse which is nice for a 486 machine. This is followed by two serial ports a printer port and finally the built in VGA port.

another interesting thing is

icl663

I do believe this is the first time I’ve ever come across anything manufactured in Finland. we also have the date of manufacture as 1993. The case as you can see is screwless. Whatever holds the case top on must of broken off because mine just slides right off. This is very much like the screwless Macintosh PC’s of the 90’s that would become brittle with age and have the various retention tabs snap off. And now a look inside.

icl66f

Here is the machine on the inside. The SB16 card is something I added. As you can see this machine uses a riser card with four 16 bit ISA slots. Two things stand out. The mounting bracket that holds the drives and the power supply.

icl668

Nothing to special about the PSU except that its rather long.

So on to the mounting bracket.

icl665

So as I said before there are no screws so the whole bracket sits in some grooves and just lifts out. This actually works really well except for one thing. On the rear of the bracket there are two 3 1/2 inch mounting points so one could easily install two hard drives. The front on the other hand only has one 3 1/2 mounting point for the 3 1/2 inch 1.44mb floppy drive. The problem is there is no way to mount any 5 1/4 drives which means no 5 1/4 1.2mb floppy drives or more importantly no CD-ROM drive. Therefore going back to what I said about the outside case and that bezel that pops out for a 5 1/4 drive is very misleading and rather pointless. I suppose you might be able to rig up something with twist ties and maybe gluing something to the bottom of the case for the drive to sit and balance on but honestly its not a practical option. Perhaps they use ice troll magic in Finland or something to mount hovering drives but other then that it’s really a downer that you can’t stick a 5 1/4 drive in even when the case allows it.

While were talking about hard drives the one currently installed in this machine had a amusing message on it.

icl667

Damn turbulent supply situation.

Now will get down to the motherboard itself.

icl669

The motherboard all around is an okay design. There is a complete lack of L2 cache memory which hurts things overall but it looks like there is a space in the corner where cache could be an option. There are a lot of jumpers on this board and unfortunately no way to identify what they are for so I did not change this machine from its default configuration.

1) CPU – The CPU is a classic 66mhz DX2 486. The socket is not a ZIF socket but a cheaper LIF socket so there is no handle or easy removal of the CPU. Regardless of the rest of the machine the 66mhz DX2 is possibly the most iconic 486 and is an excellent all around CPU.

2) Speaker – a cheaper Piezo beeper speaker as opposed to a full speaker though if your relying on PC speaker for sound on a 486 you don’t care about quality anyways.

3) RAM – eight 30 pin slots for FPM RAM. This machine came to me with 8MB of RAM but I have no idea what the maximum amount of RAM that can be installed. I would think a safe bet for maximum RAM would be 32MB and 64mb being a less likely max amount.

4) CMOS – I cant be totally sure on the CMOS battery of this machine. There is a DALLAS chip which in my experience is usually a real time clock battery although this one is soldered directly to the board and does not appear to be a clock battery. Next to it is a lithium battery, which happens to be seated in a vertical position rather then a more common horizontal seating. This is the prime suspect for being the CMOS battery.

5) slot for the riser card

6) Video – The on board video chip is a Cirrus Logic CD-GL5422. Not a terrible chip as CL can be pretty good. I don’t think this is running on a local bus but just the ISA bus as Wikipedia states the CD-GL5422 chip was only used on ISA cards but I could be wrong.  My tests reported 512MB of video RAM on board and I assume the sockets next to the chip are for expanding video RAM to 1MB.

icl6611

7) Finally we have the standard AT power connection along with a built in IDE and floppy controller.

Finally this PC does have a kind of weird non standard BIOS.

icl664

You can access the BIOS by hitting Control + ALT + Escape on POST. It’s rather limited in what you can do but at least it’s there.

So final word on this PC. It does come off as a rather budget 486 for the office and lacks nice expansion options found in better 486 machines like a VLB bus. the lack of any way to mount a 5 1/4 drive (in the absence of Scandinavian ice troll magic) despite the misleading removable bezel is a major downside in an era of emerging CD drives. On the plus side the small, light weight and screwless case allows fast and easy access to the machines innards and  PS/2 ports for both mouse and keyboard are also very convenient. You also really can’t go wrong with a 66mhz 486 DX2 CPU and in a lack of any more capable machine this PC can make a good DOS machine, provided either that all your games are on 1.44MB floppy or you can attach an external SCSI or parallel port CD-ROM drive.

This slideshow requires JavaScript.

Benchmarks (Intel DX2 66mhz 486, No L2 Cache, 8MB FPM RAM, Built in Cirrus Logic CL-GD5422)

3DBENCH – 27

PCPBENCH – 8.0

DOOM -13.93

Quake – N/A

FDISKformat

A place for the pc collector

I ❤ Old Games!

Probabilmente il miglior blog bilingue al mondo*

Waltorious Writes About Games

Game-related ramblings.

NekoJonez's Gaming Blog

My Gaming Timeline

Evelynn Star

Lynn talks about video games, records and books ...

Retro Megabit

Sharing My Retro Video Game Collection.

133MHz's Junk Box

Random electronics and gaming crap

SNES A Day

Chronogaming project featuring reviews, screenshots, and videos of the entire Super Nintendo library in release order.

Retrocosm's Vintage Computing, Tech & Music Blog

Random mutterings on retro computing and music.

The PewPew Diaries.

Work(s) in Progress!

1001Up

1001 video games and beyond

retro computing and gaming plus a little more

sparcie

retro computers and stuff

jispylicious

Stay Jispy!

Design a site like this with WordPress.com
Get started